Stamping gel varnish
The art of modern nail art does not stand still. Thanks to constant updates, you can easily create a beautiful and high-quality manicure without resorting to the services of a specialist. One of these innovations is a technology called "stamping", which has gained a huge share of popularity among lovers of the original and fashionable manicure. It should be noted that the usual manicure is radically transformed through the use of stemping. This method is quite easy to use, because it does not require any special skills, which is why its popularity is increasing every day.
What it is
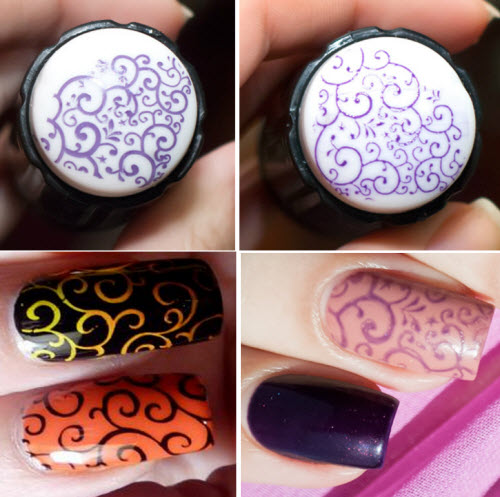
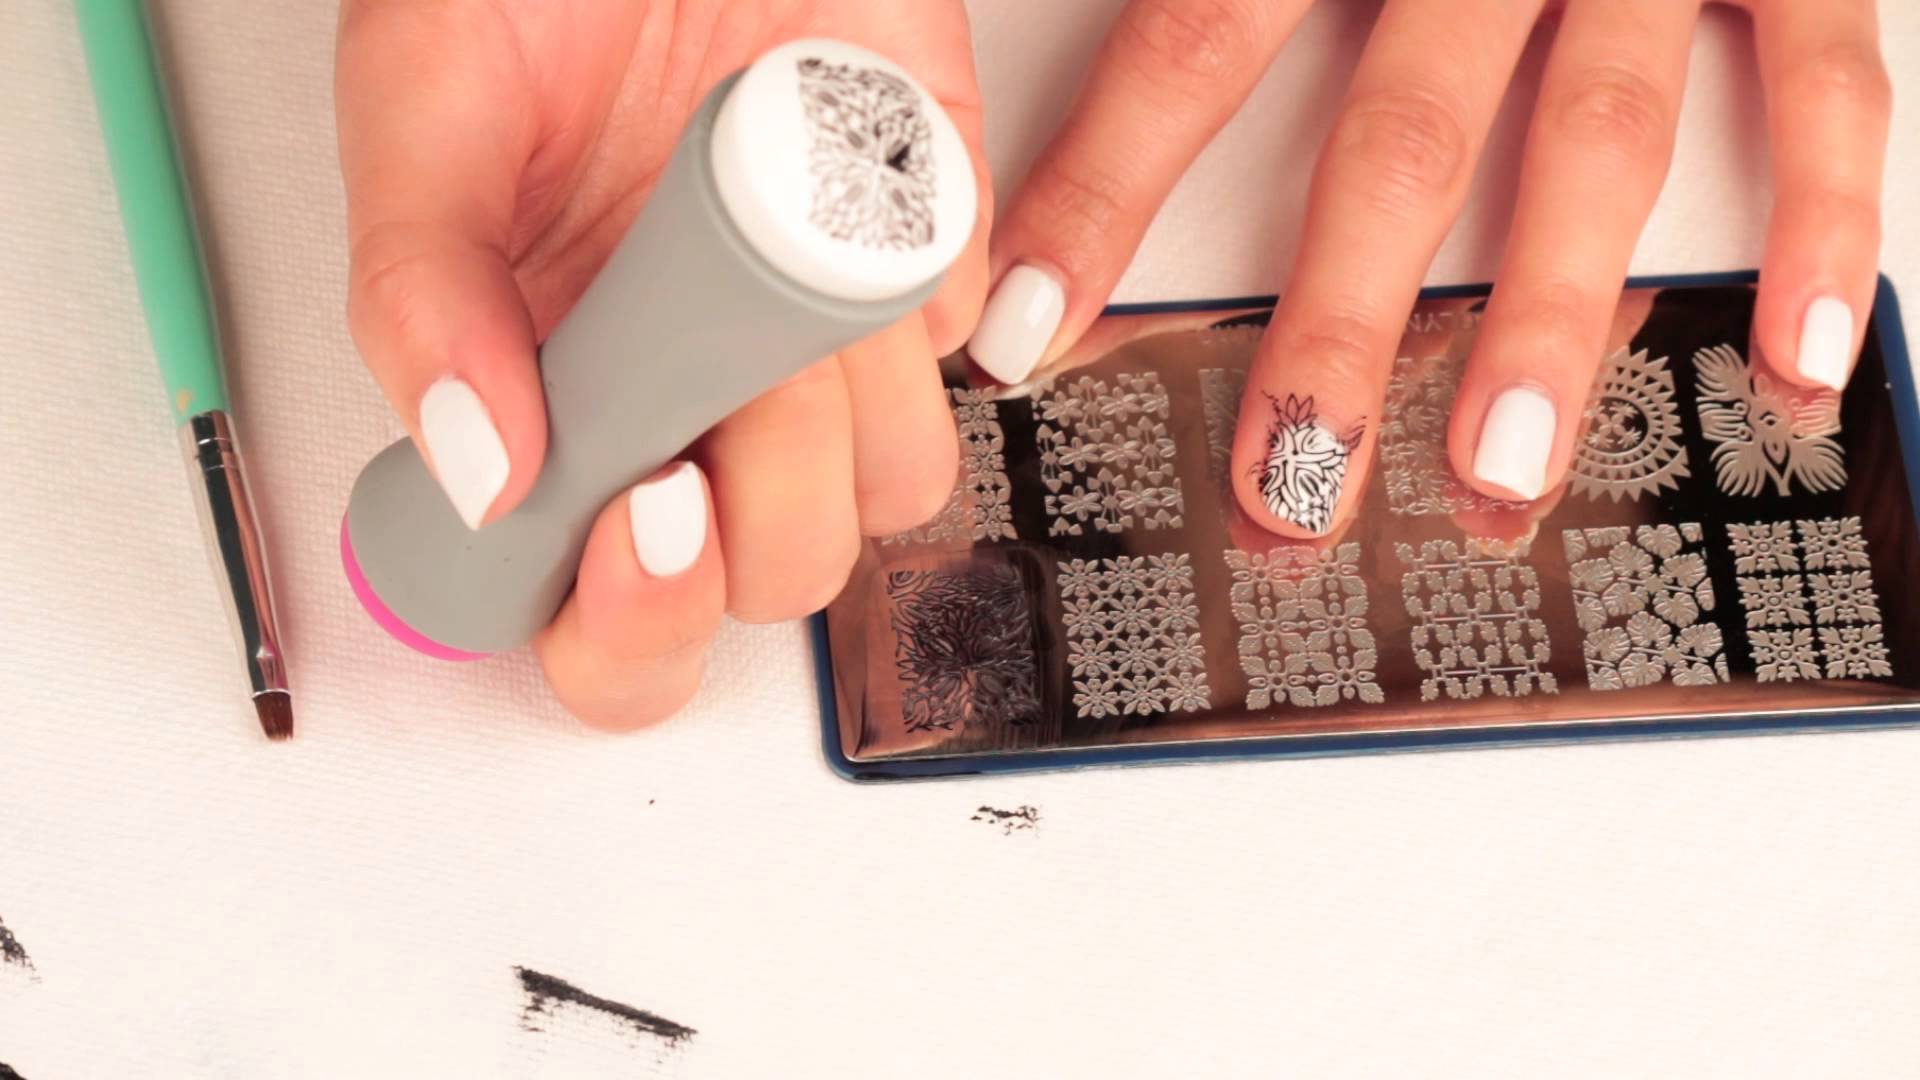
The term “stamping” in English means “stamping”. It is the printing of drawings by copying patterns from a special plate. In general, beautiful and original drawings are created thanks to a set for the stamping design in the form of a plate, scraper, stamp, varnish and fixer. The printing of drawings is carried out as follows: the stamp transfers the pattern from the plate, after which the picture is reproduced on the nail. Technology stamping design using stamping allows you to easily transfer different images with the smallest details.
To learn how to make clear pictures, you need to train, so most girls prefer to make their first creations in the stemping on gel polish, which makes it possible to further remove damaged drawings without fear for the main surface.
Patterns transferred from the plate, you can try to transfer as many times as necessary to achieve the desired result, because the gel can not be erased with simple acetone. But thanks to him, you can remove the image, which is performed using ordinary nail polish. Thus, thanks to the gel coating used as a background, you can gain experience for fast printing of images. With a good mastery of this technology, you can begin to make a manicure using absolutely any varnishes for both drawings and backgrounds.
Gel polish stamping kit includes:
- Stamp;
- Scraper (scraper);
- Plate with engraved images;
- Picture fixer;
- Thick varnish or acrylic paints;
- Gel Polish, applied to the background image.
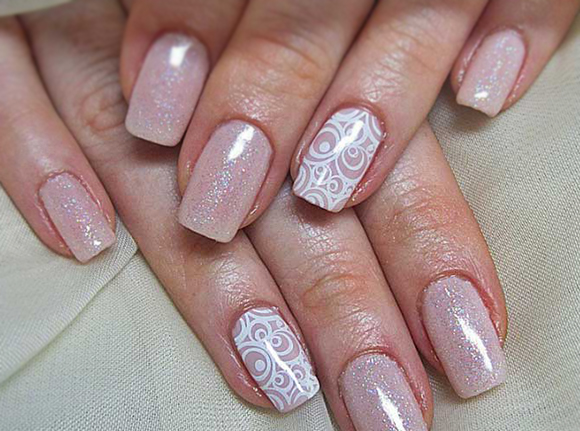
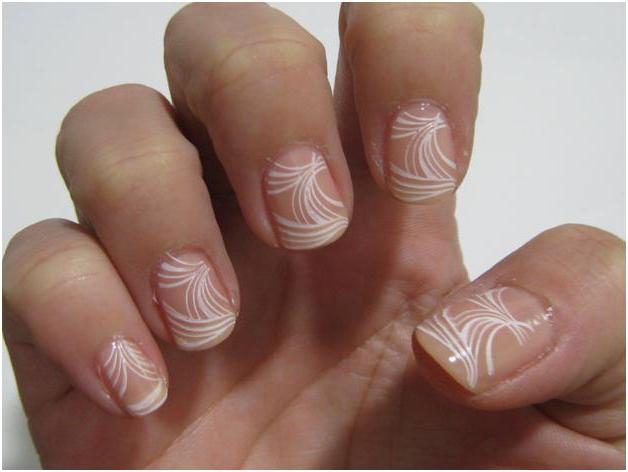
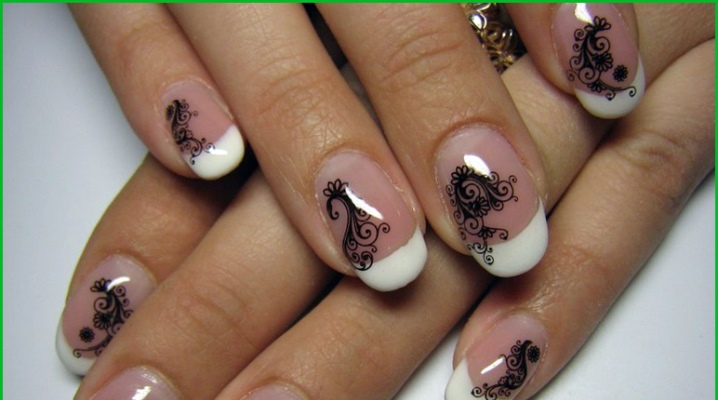
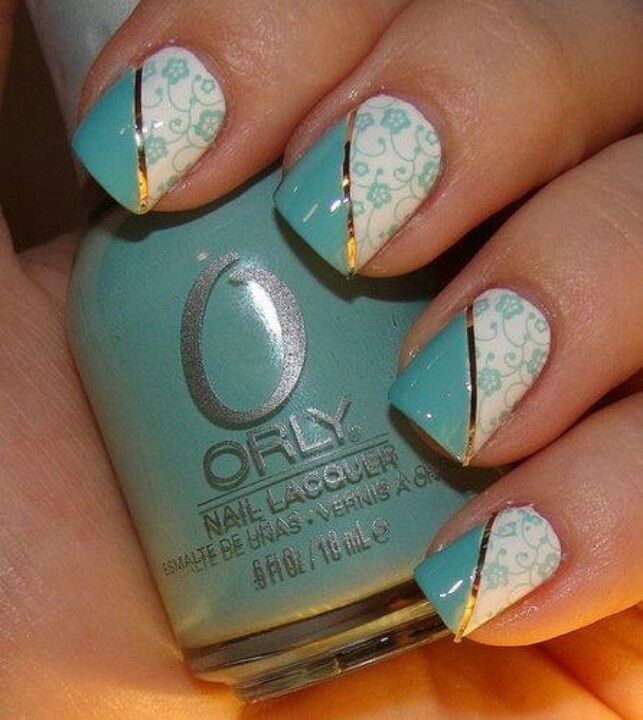
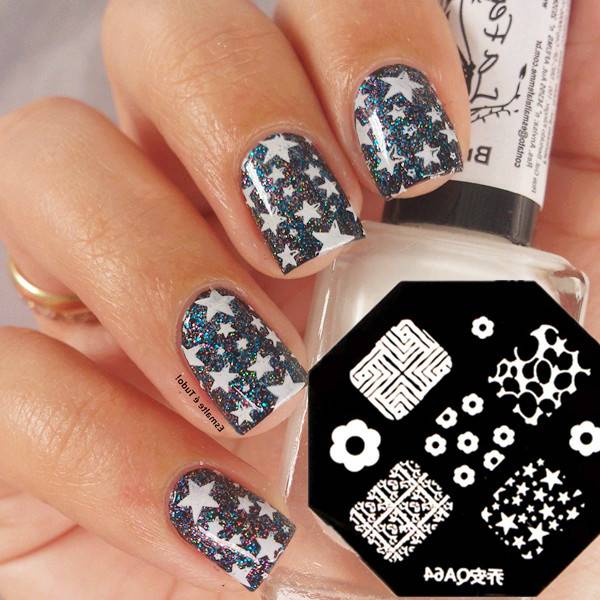
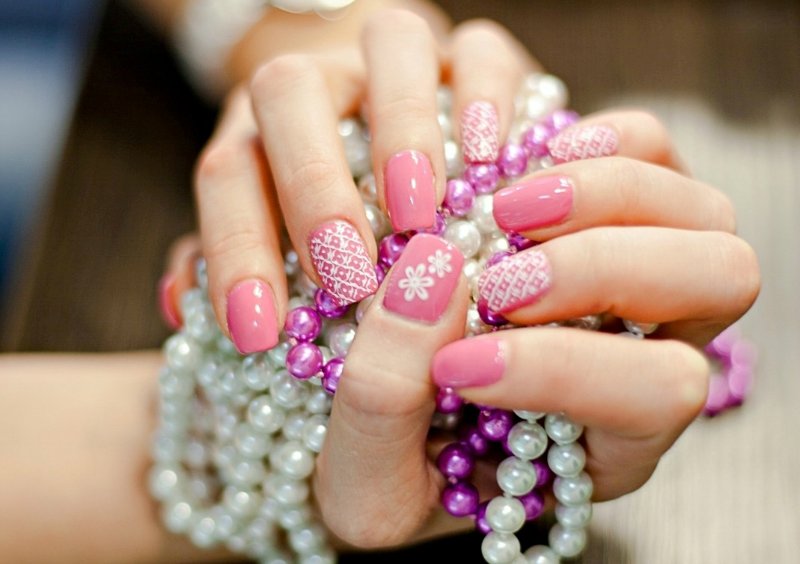
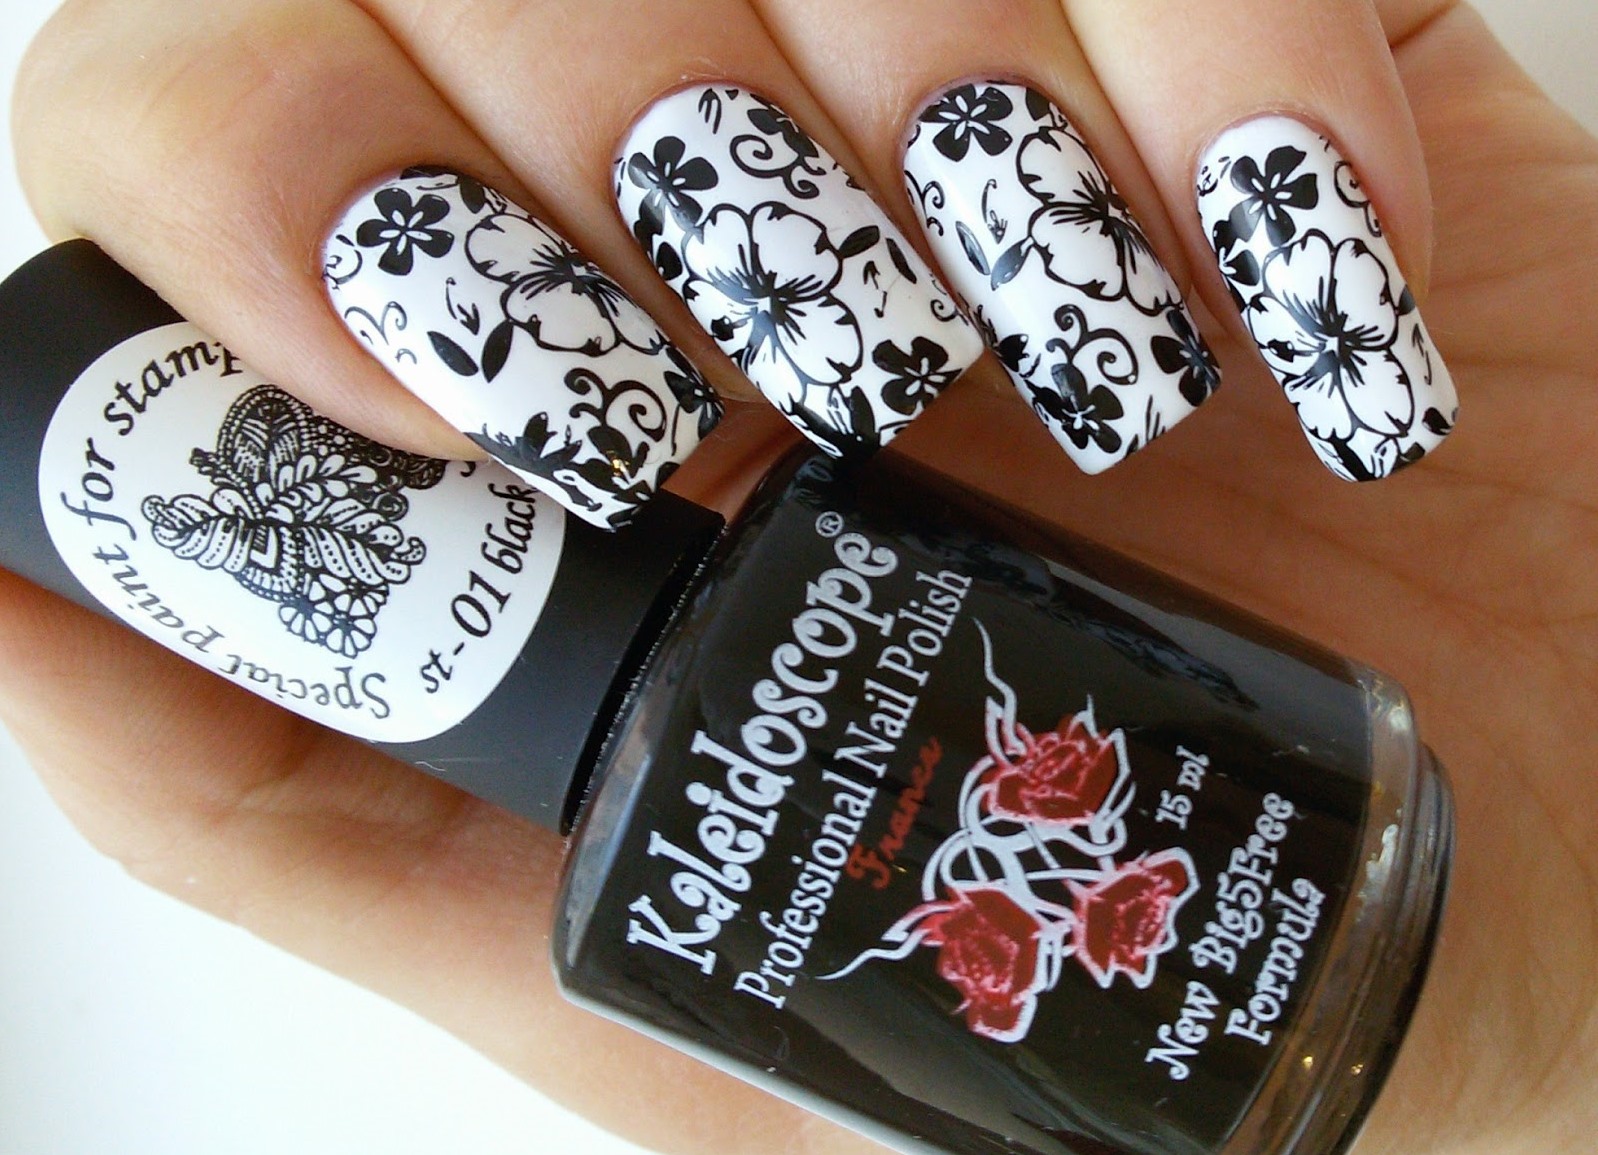
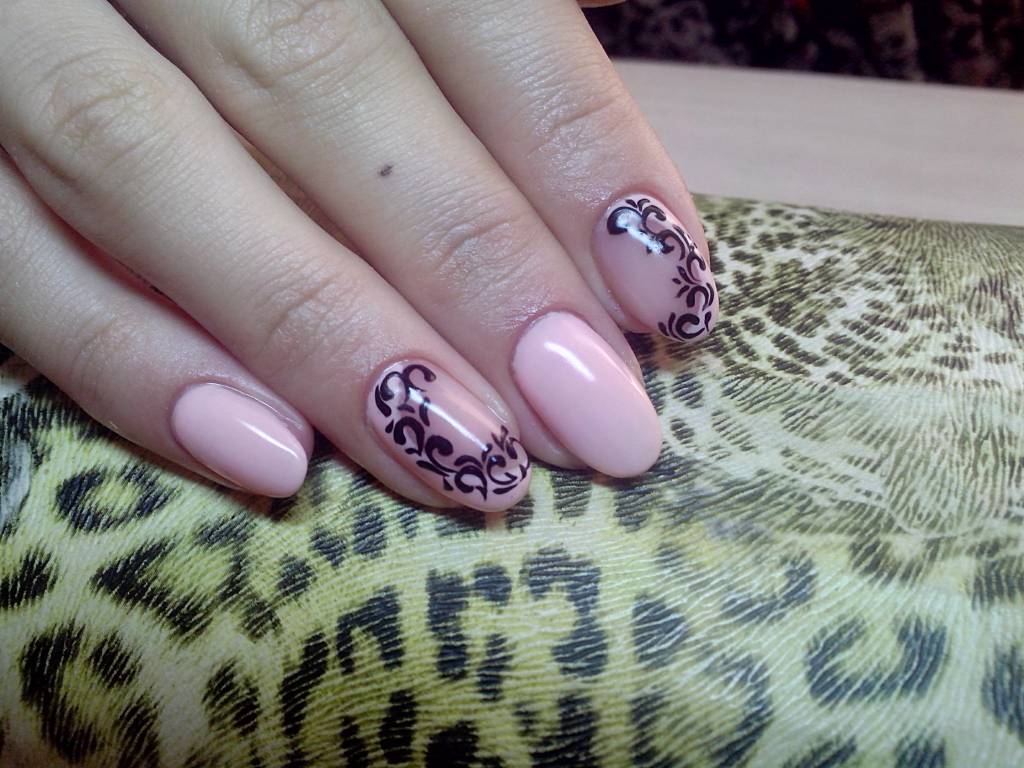
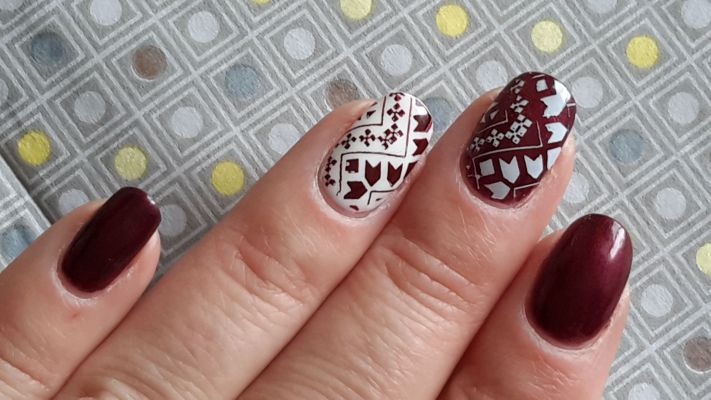
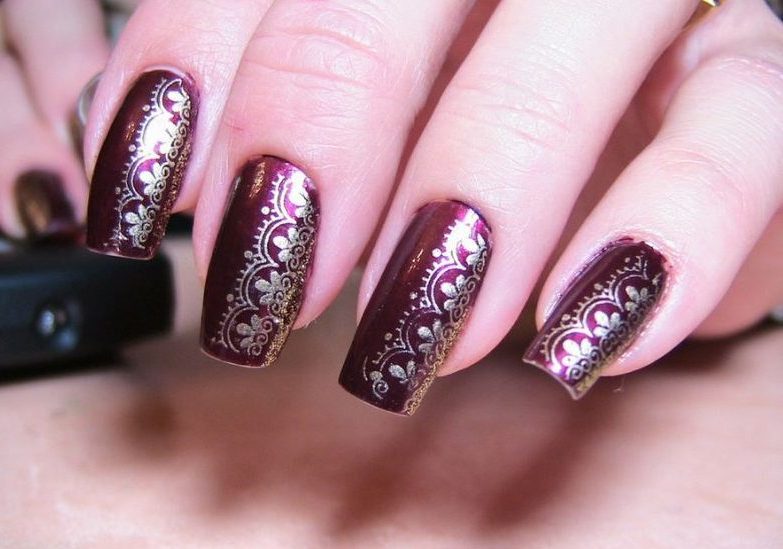
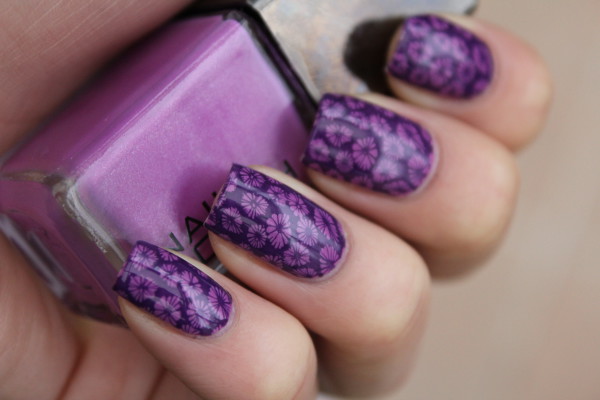
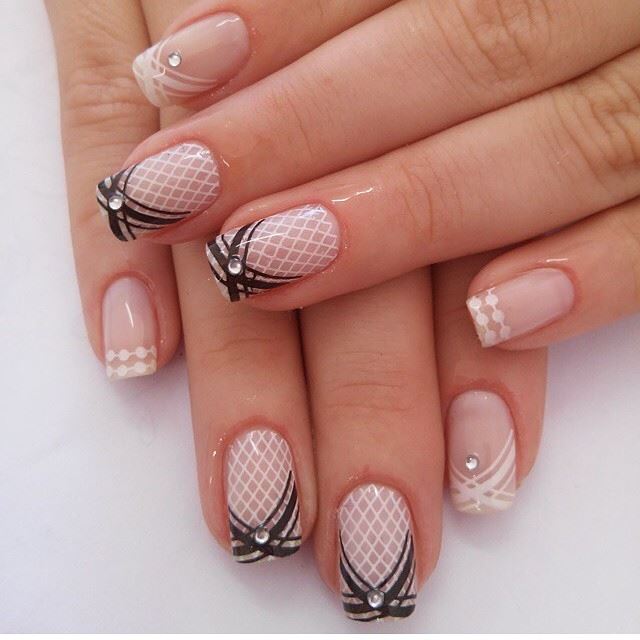
Design examples
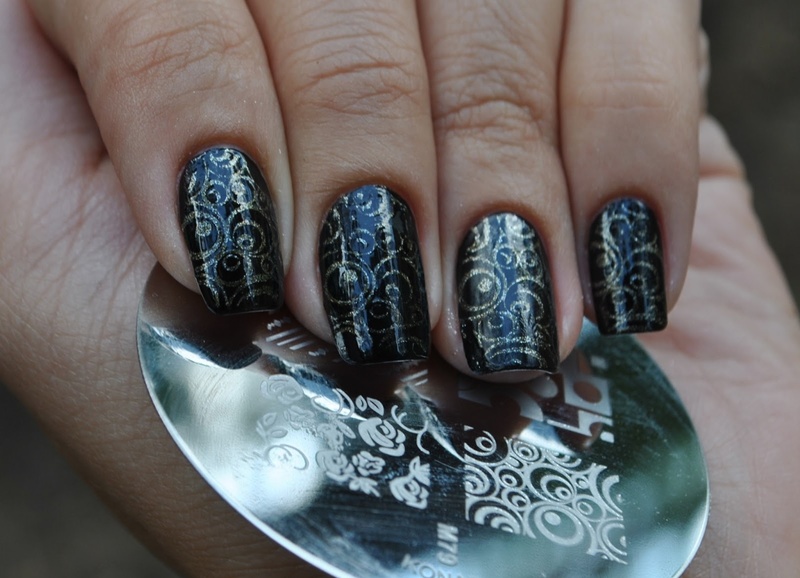
A variety of drawings with a stamping will be able to please even the most fastidious persons. After all, the patterns that are engraved on the plates can be easily selected for each image. It is not difficult to change the drawings on the gel polish, since the background nail covering in the form of a gel cannot be erased with acetone, but requires special methods for removing the gel coating. Consequently, the printing of drawings can be changed at least every day, while the background of the nail will remain unchanged for about two weeks.
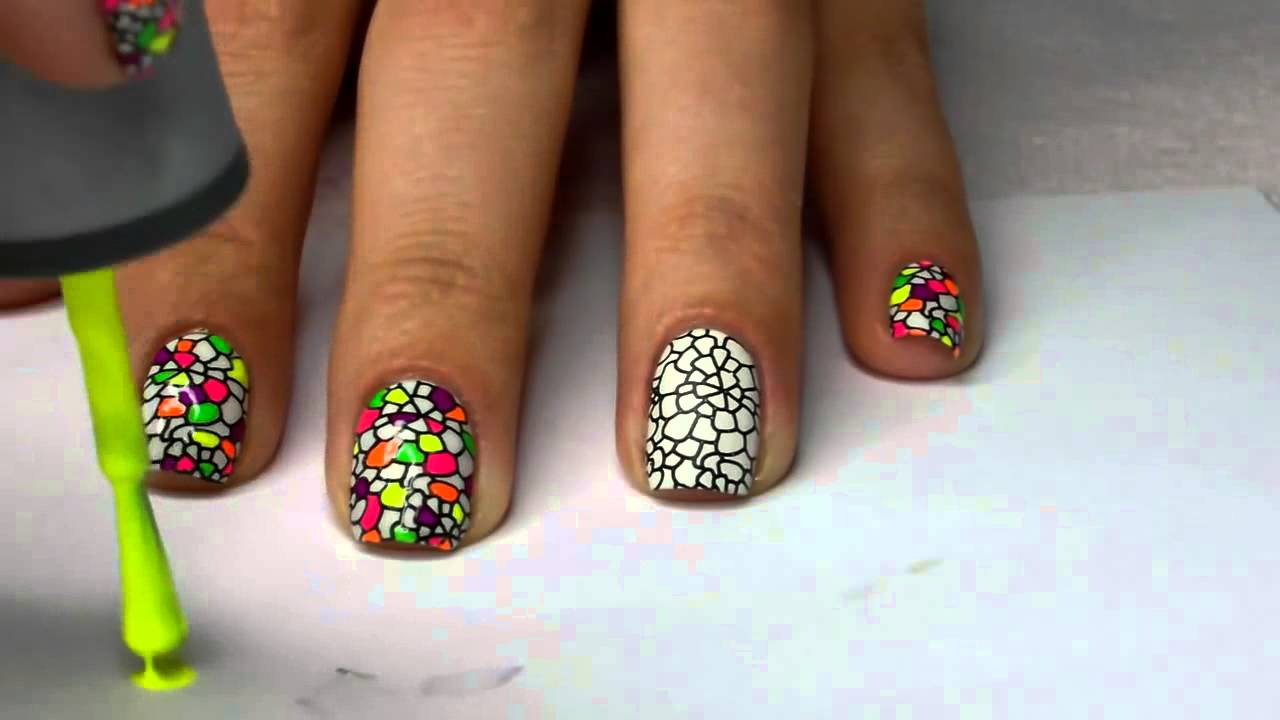
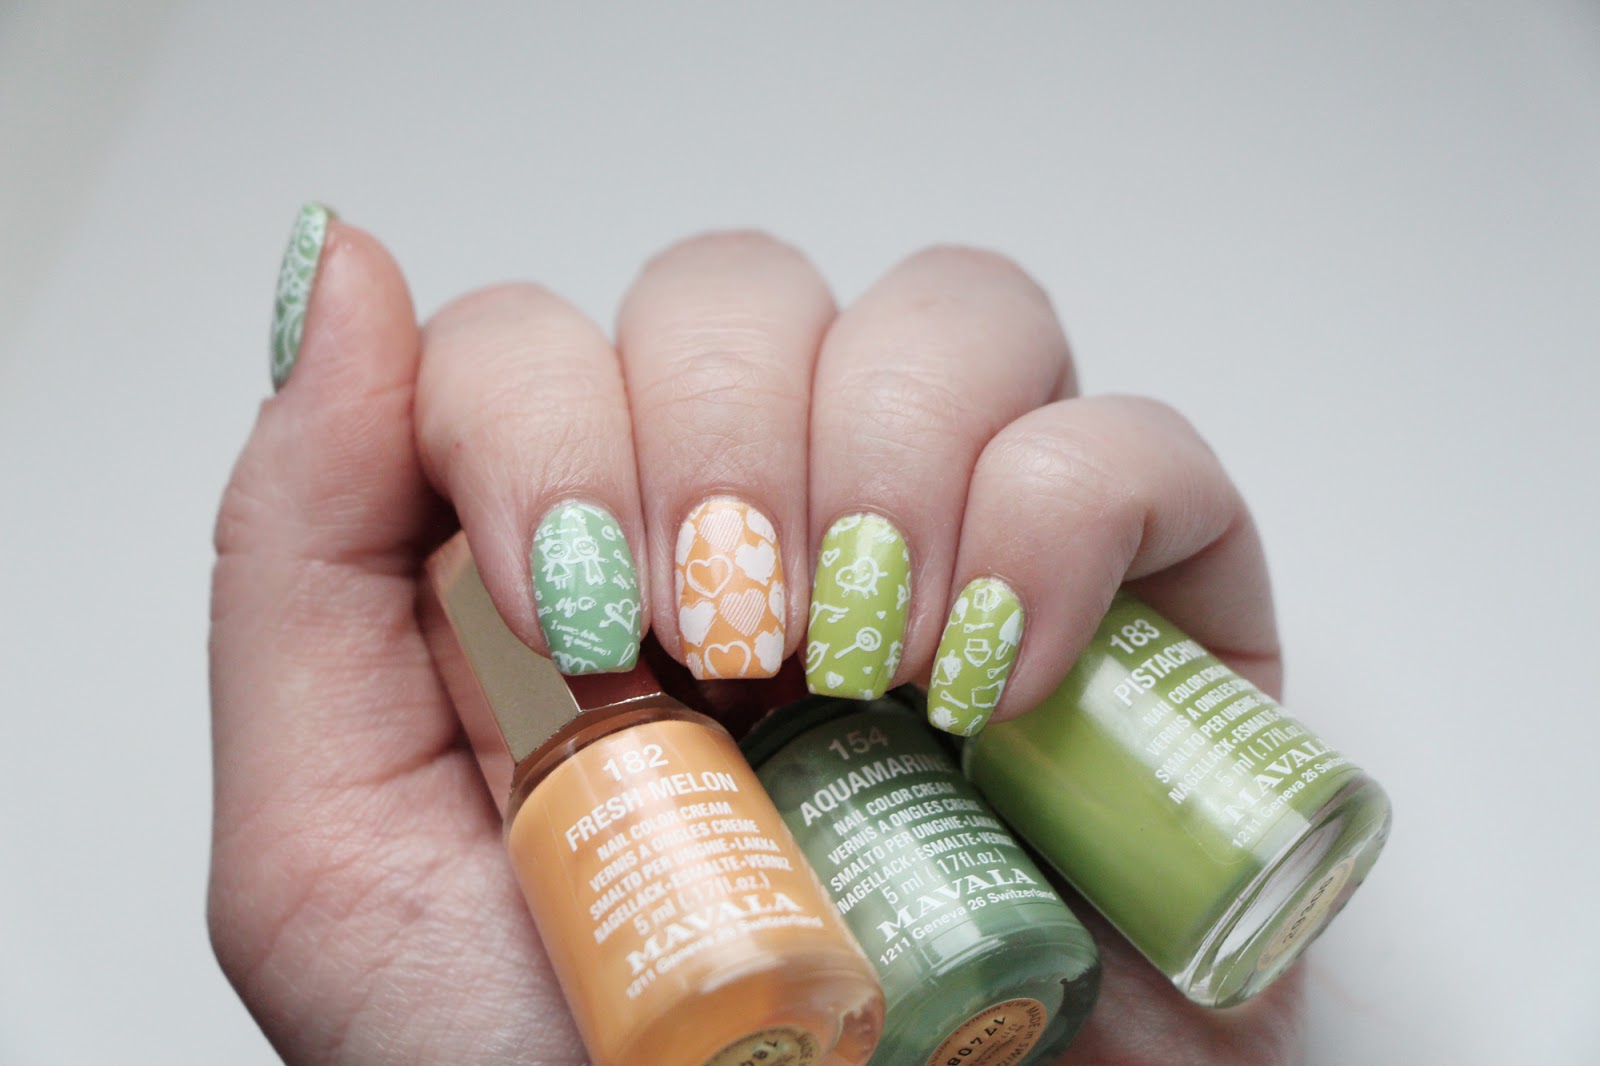
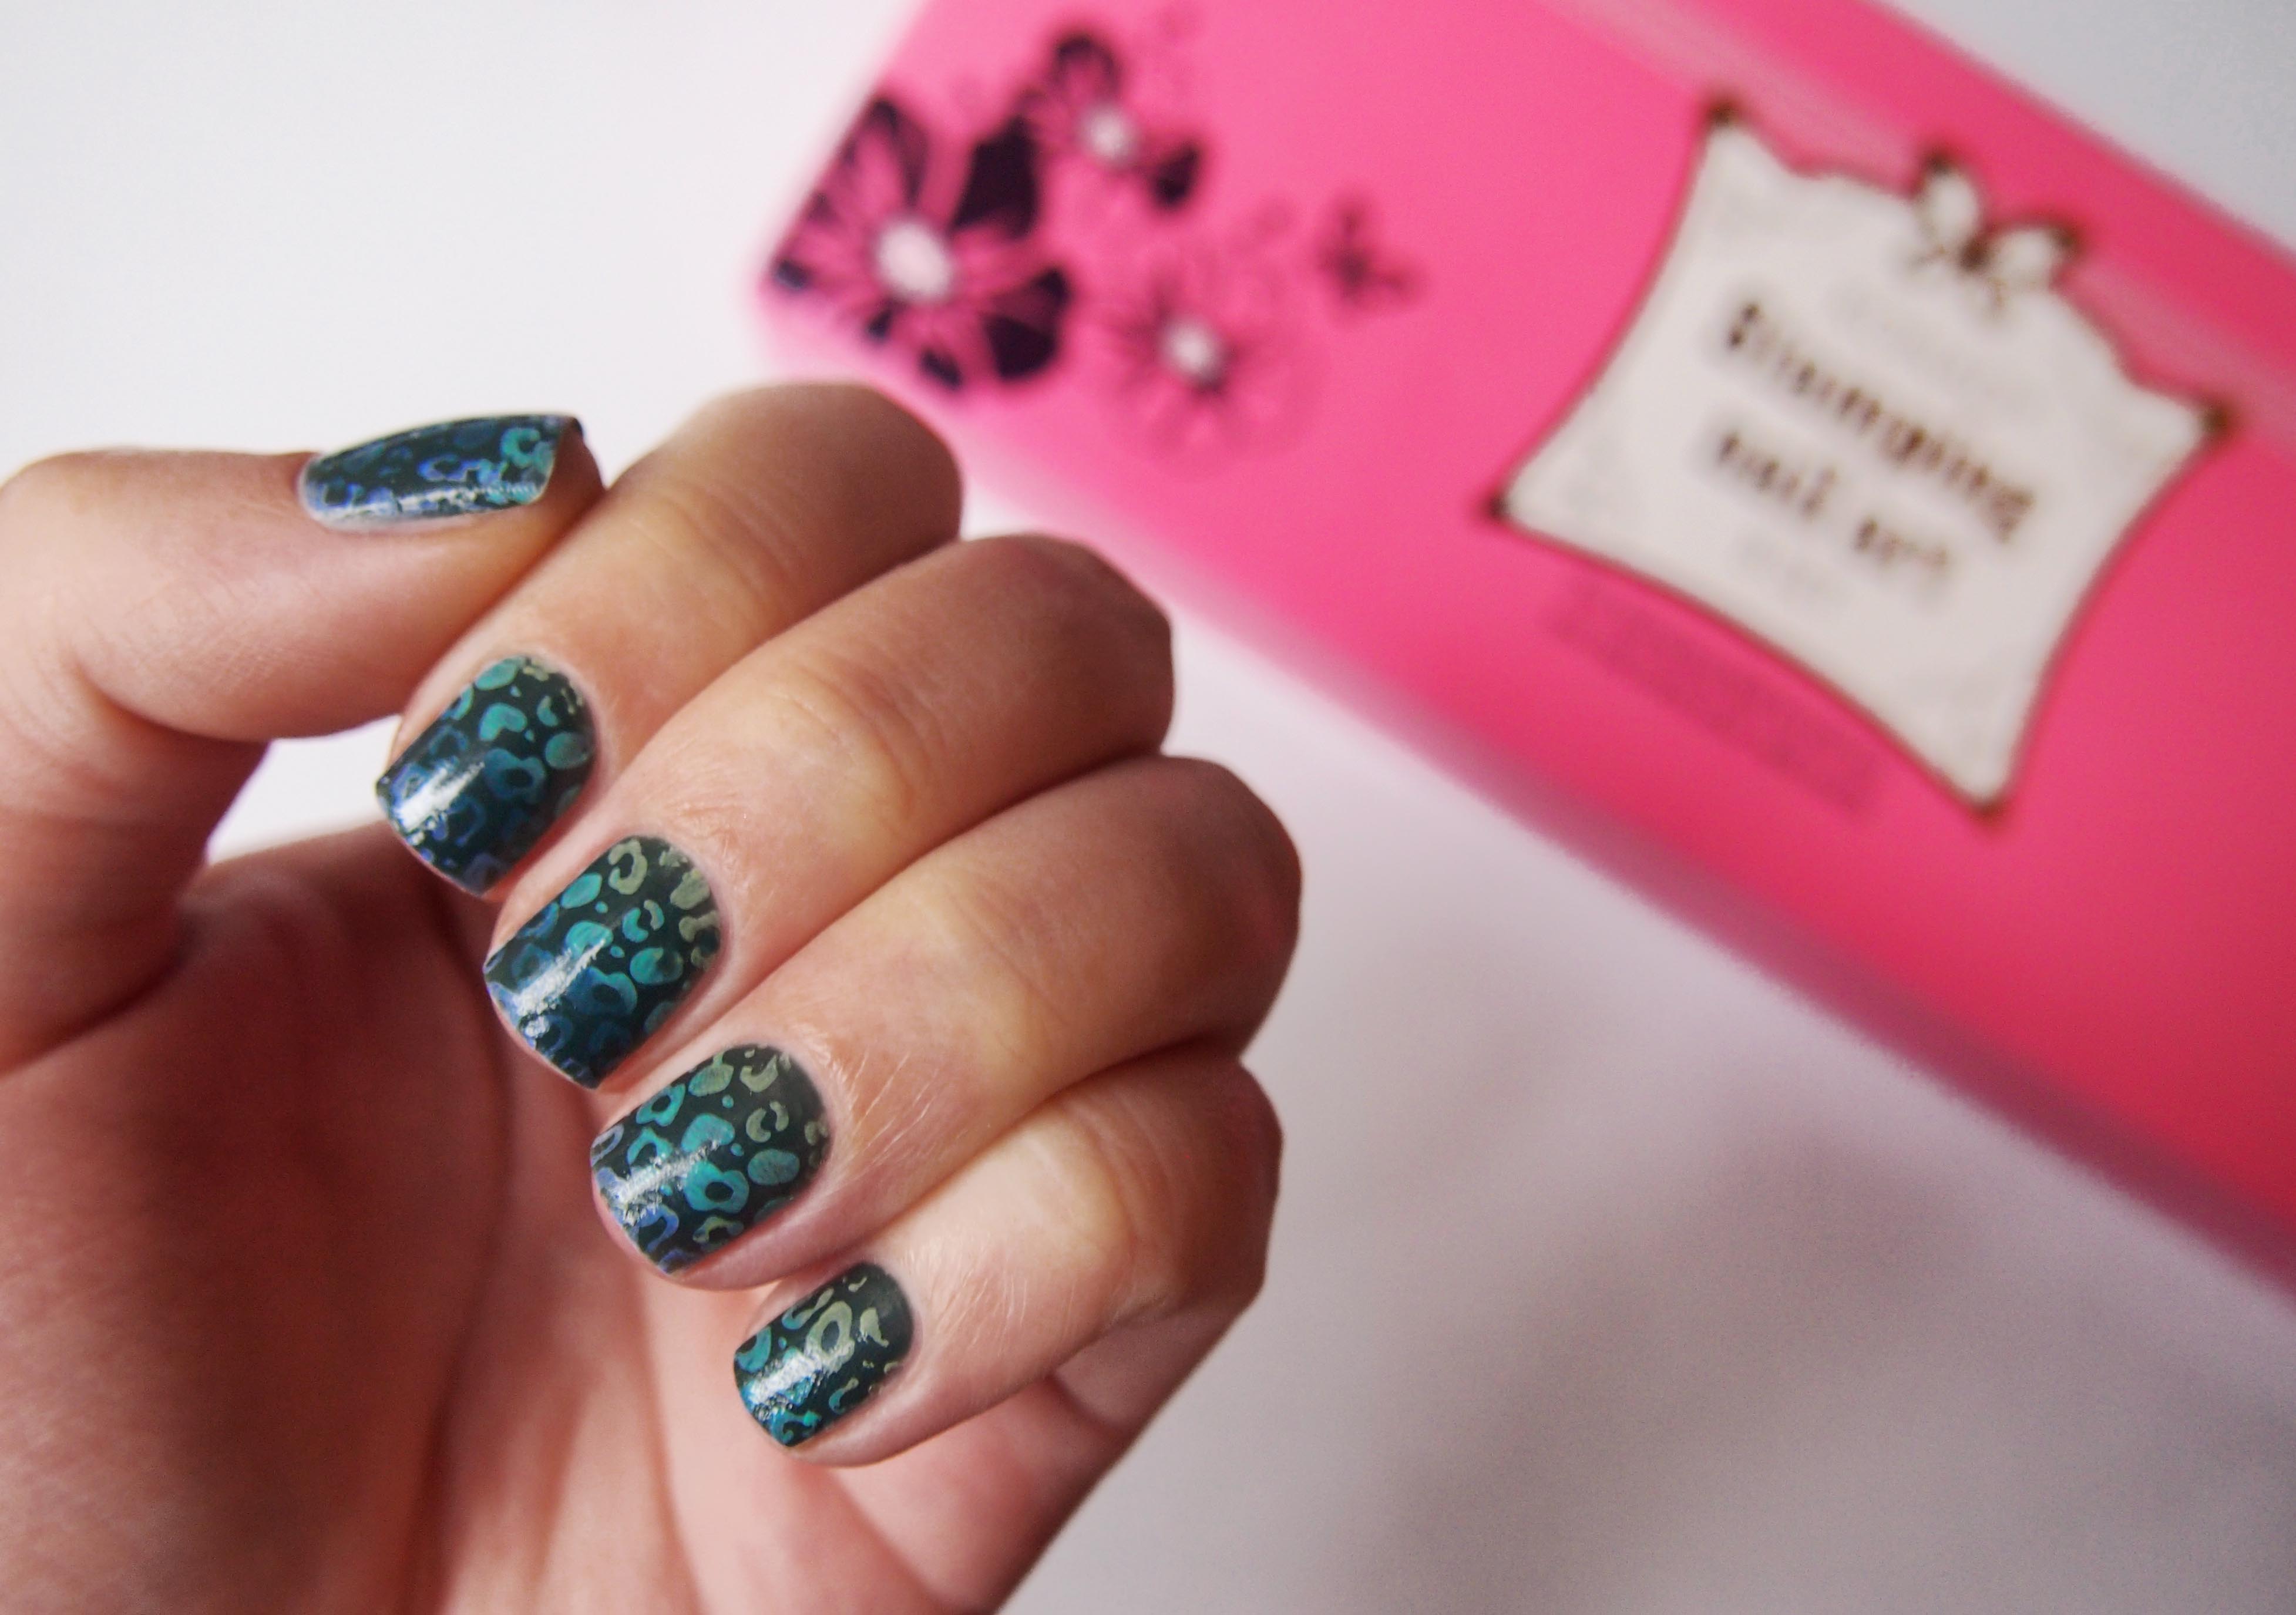
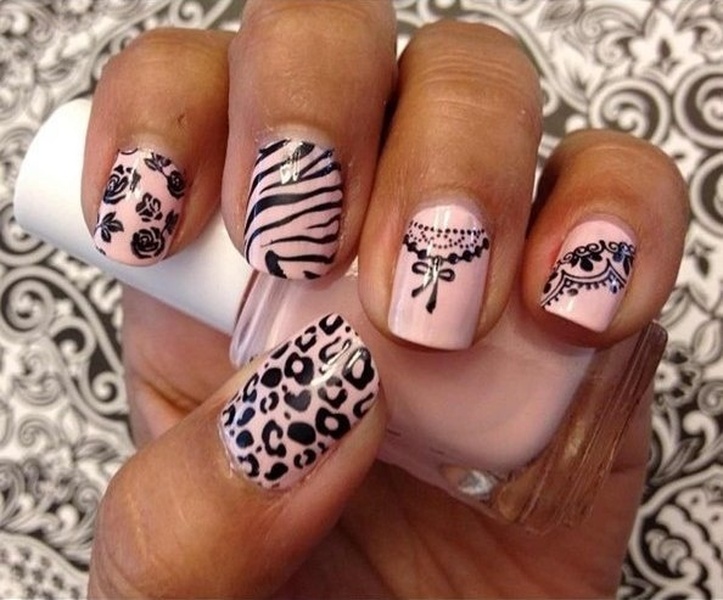
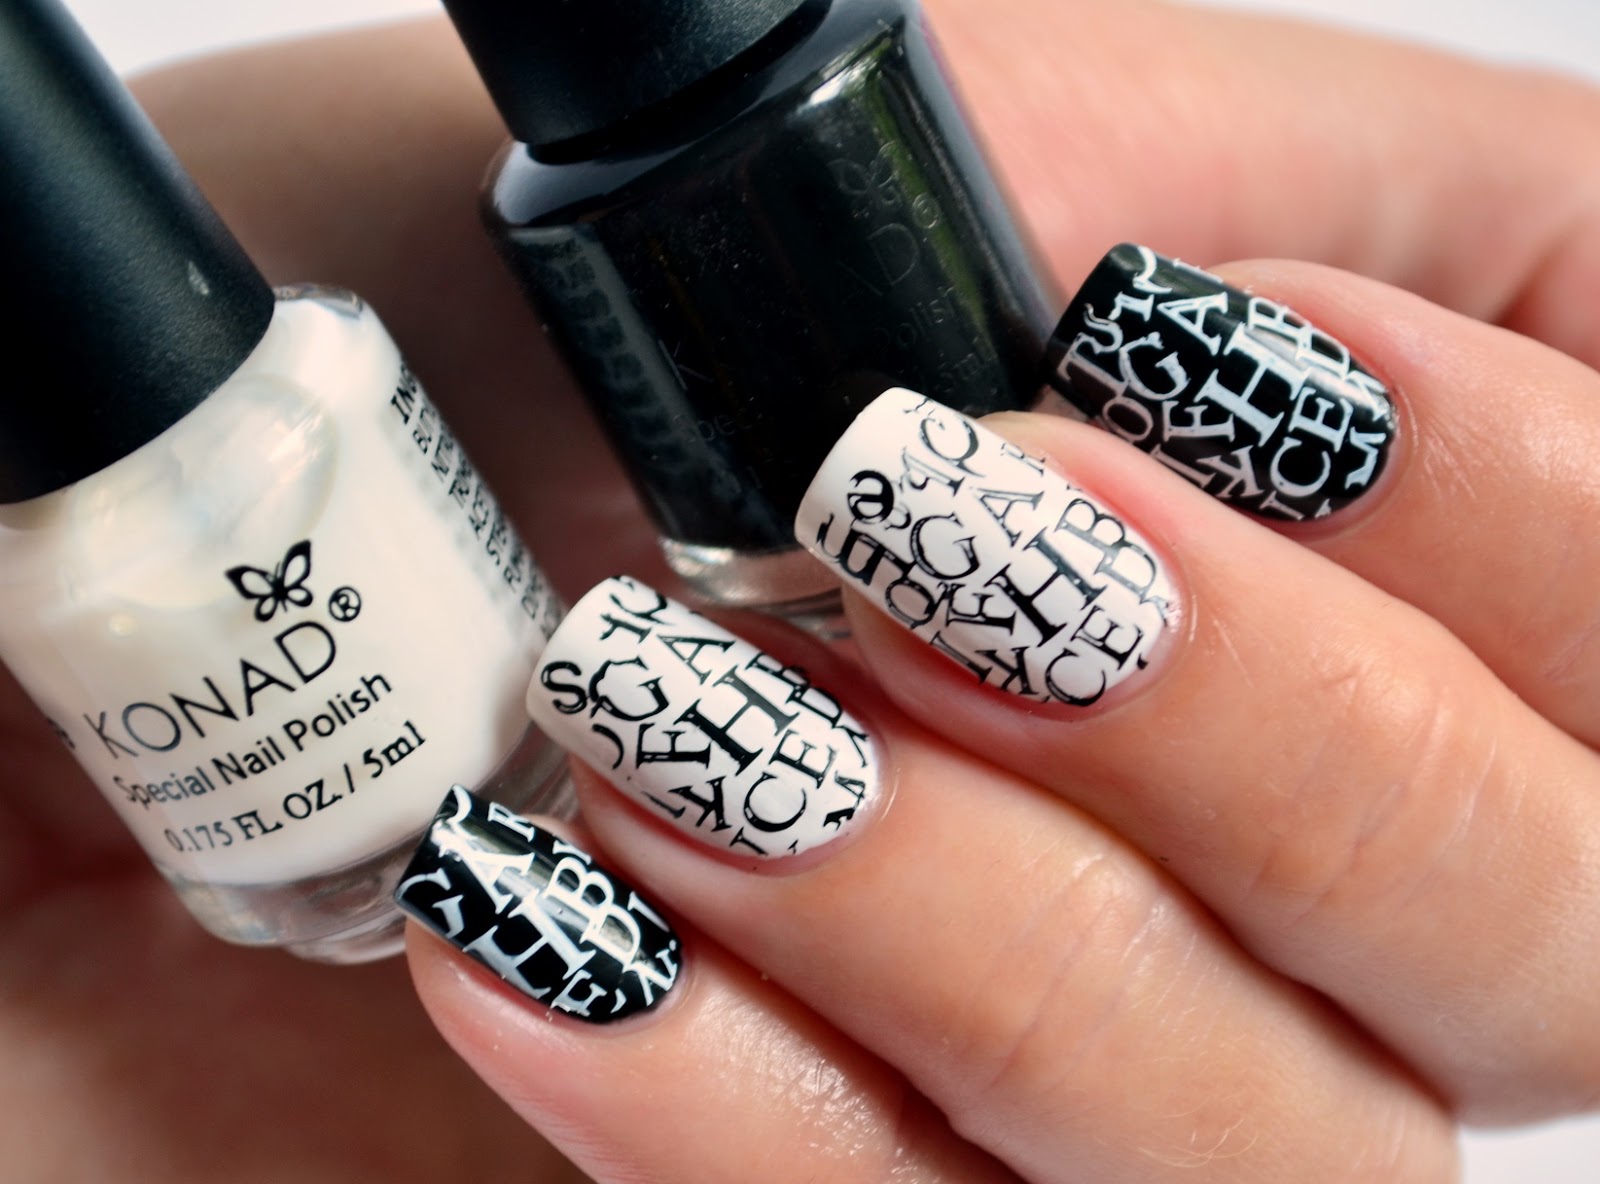
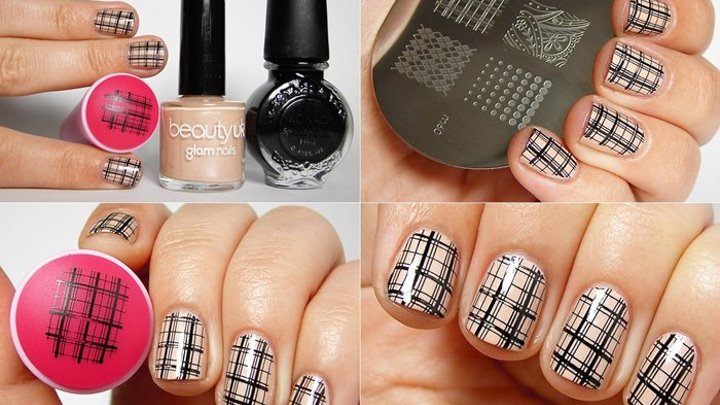
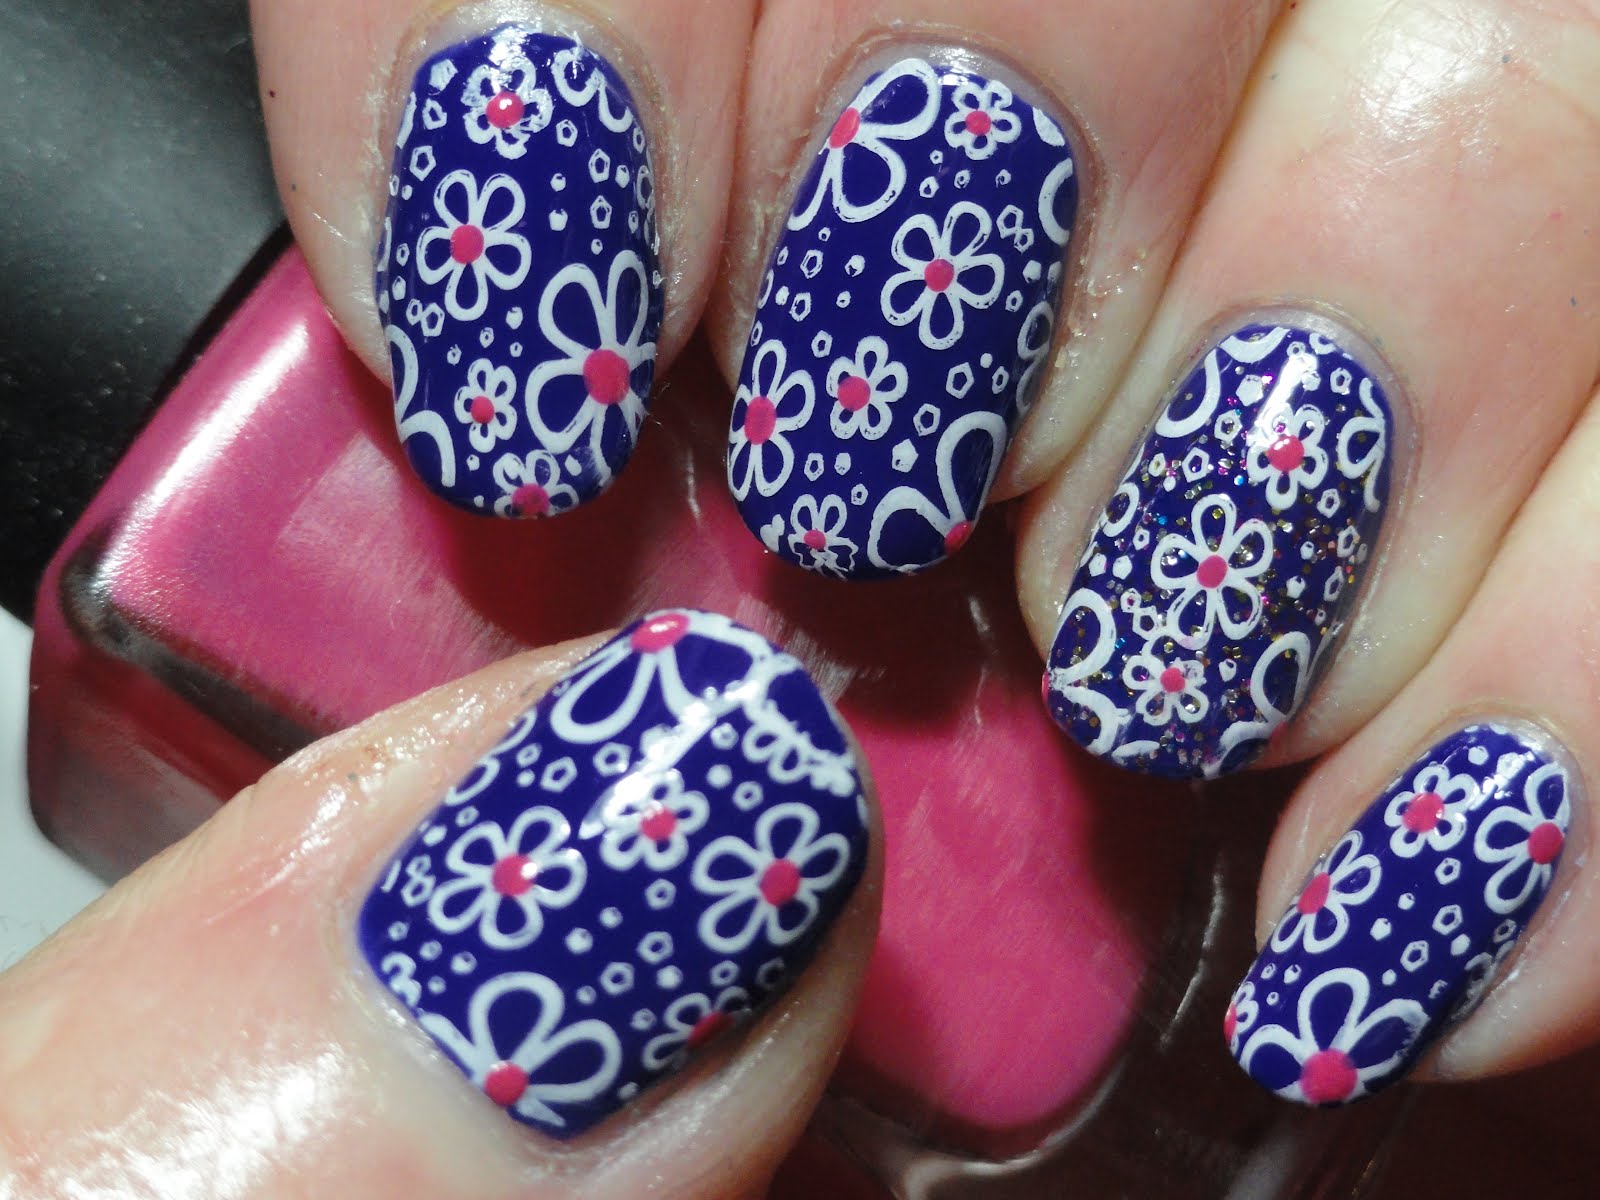
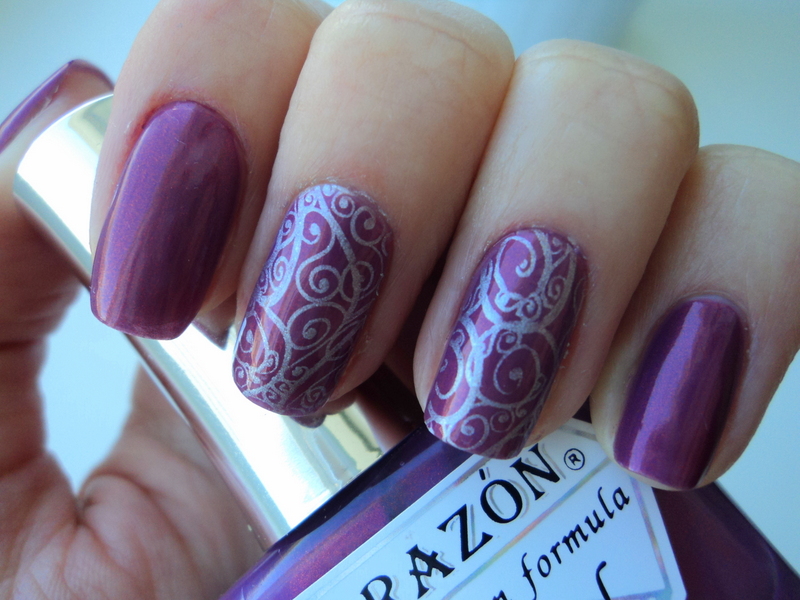
Ornaments on disks come in the form of patterns, lines, geometric shapes, inscriptions, flowers and various animals.

You can find designs on the New Year theme. Disks with the image of emoticons are very popular.
Most often, dark shades of lacquers are used for printing pictures, for example, burgundy, black and blue. But in this case, everything depends on personal preferences, since a manicure, first of all, should be pleasant for its owner, which means that you can create even the most courageous decisions, because all innovations originate in this way.
How to make a manicure
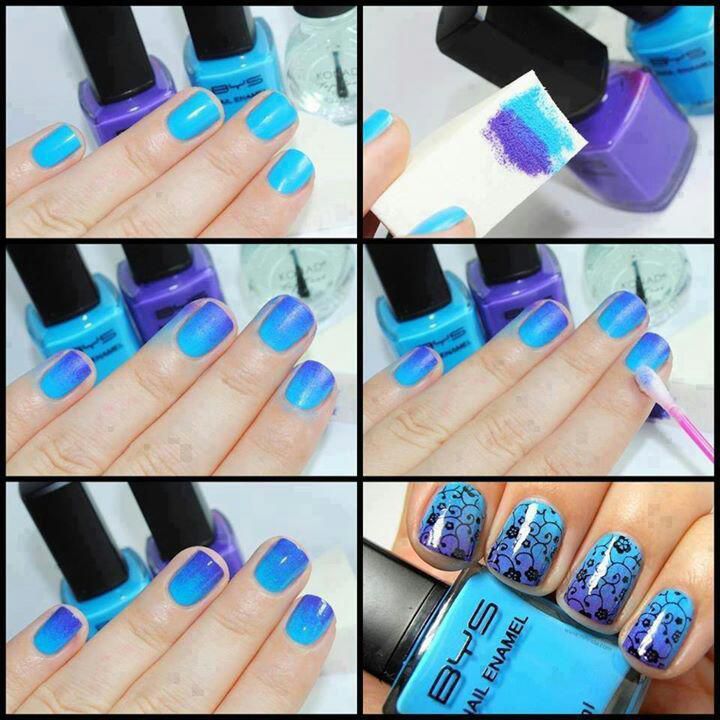
With the help of stemping, you can create a variety of patterns in seconds even without any special skills for drawing. Technology stemping gel varnish is almost the same as the application of drawings using conventional.The main thing is to take into account the specifics of the gels in the work, and then an amazing result in the form of a beautiful manicure will not take long to wait. Before you begin to apply the stamping, you must follow the simple instructions.
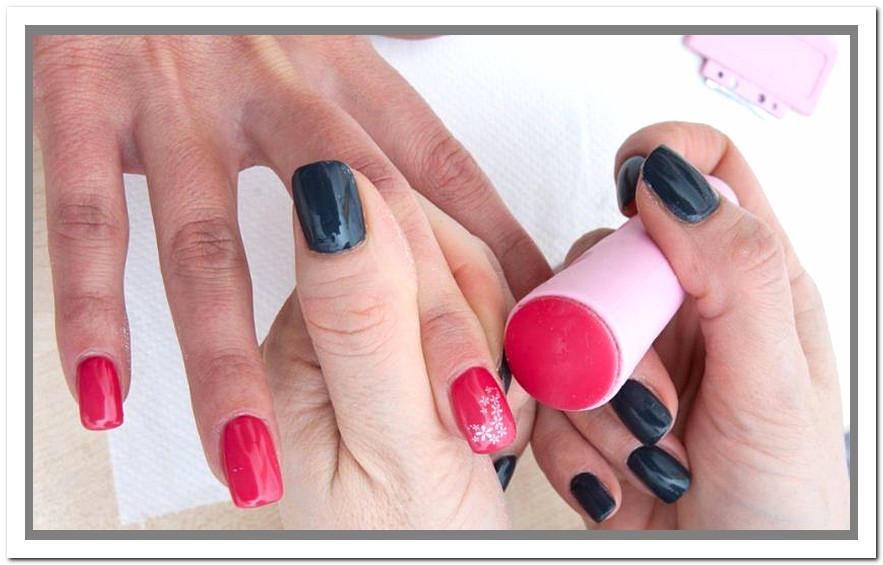
- First necessary apply colorless gel polish on prepared nails and dry it thoroughly under the rays of an ultraviolet lamp.
- Further it is necessary paint the nails in two layers of the color you want to use for the background and dry after each application.
- Then cover the nails fixer or top and again use the dryer in the lamp.
- Next, remove the sticky layer with a top coat using a standard cotton pad, pre-moistened with a solution.
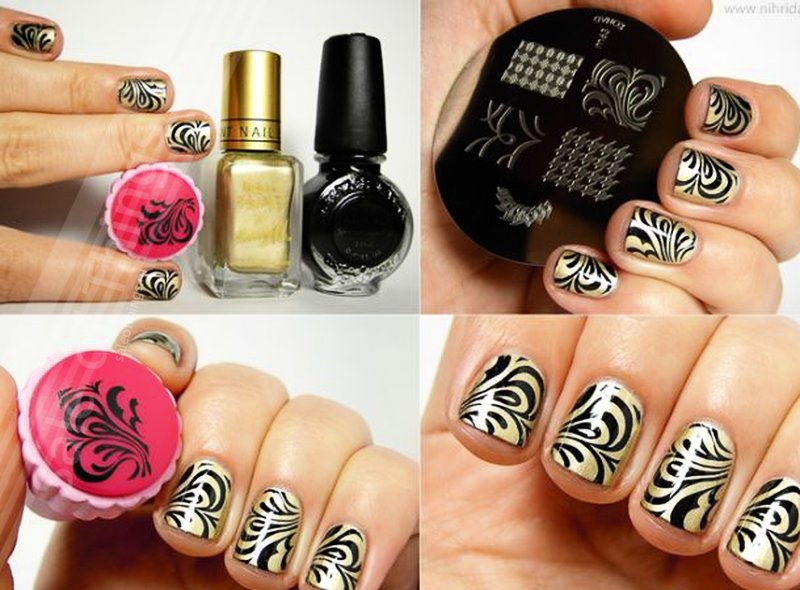
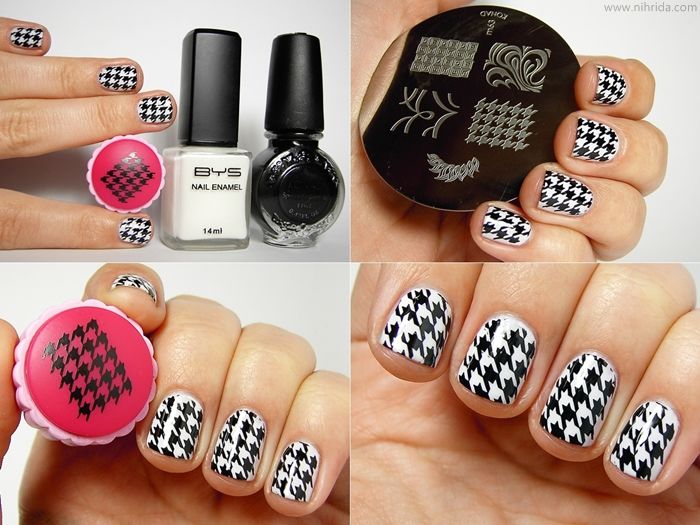
- To proceed to the drawing process, it is important to prepare a set for stamping.and wipe each item with nail polish remover. This will help to print the image in a clearer way.
- The next step involves applying decorative varnish. on a plate with a pattern. The tool is evenly distributed over the surface of the pattern, and the surplus is removed by a quick and sharp movement of the hand with a scraper.
- Finally, copy the pattern from plate to stamp with a light and rolling motion. and try to quickly transfer it to the nail. All minor tweaks can be easily removed with nail polish remover without damaging the main nail coating at all, because, as mentioned earlier, acetone does not affect gel polish.
- In the event that the ornament turned out as it was intended, then we can safely apply an additional layer of the fixative. This method will help the drawing to remain whole as long as possible and delight with its beauty and grace.
Such a design with a stamping on the gel polish can last up to two weeks, which will allow you not to worry about the appearance of the manicure and enjoy its original patterns.
An important point in working with a stamping: the actions must be quick, and after creating a pattern on each nail, you must use nail polish remover and carefully wipe all items to create a stamping.
Most naively believe that gel polish can be used in stamping when printing patterns. This opinion is deeply mistaken, because for the technology of stemping you can use the gel as a background for the nail, and not for printing patterns. The fact is that gel polish is not designed to perform such tasks. Its consistency does not allow the means to imprint on the stamp, and therefore the transfer of the pattern from the plate to the nail is beyond its power.
The most suitable option for creating beautiful and truly high-quality drawings with a stemping are traditional varnishes of viscous consistency and special acrylic varnishes. With their help, you can create real masterpieces. A little training and a share of imagination will help every girl to easily translate their ideas into reality. With acrylic paints, all small outlines of the pattern are fairly well preserved. All its fine lines and details go from plate to nail. The dense shade of lacquer will help to create a colorful pattern that will look gorgeous on the nails of its owner.
By the way, the manicure looks quite impressive when the stamping is applied only to the ringless fingers, and on the remaining nails there is a monochromatic gel-polish coating.
Master Classes
Fashion trends stemping do not stand still, because this unique way has become one of the most popular nail designs among most girls. Fashionistas, who mastered this technique to perfection, did not dwell on the results achieved and rapidly improved in these matters. Such experiments were not in vain, because already today a new type of steamping appeared, which is called “reversible”. More recently, this technology was familiar to few, but today it is the main trend in the art of nail.
Reversible stamping is a colored manicure design that was originally created not on the surface of the nail, but on stamping.
The painted pattern should harden well, and only after that should remove the formed film with an ornament and gently glue to the nail. This method is translated from English as "reverse". This name came out for a reason, but because the film with the picture falls on the nail inside out. For a more detailed consideration of this issue requires a step by step study.
The technique of transferring the drawings to the nails is quite specific and differs markedly from the usual stamping of images by stamps. The technology of application requires accuracy and perseverance at all stages of creating this unique manicure. How to use reversing stamping can be found in the following instructions.
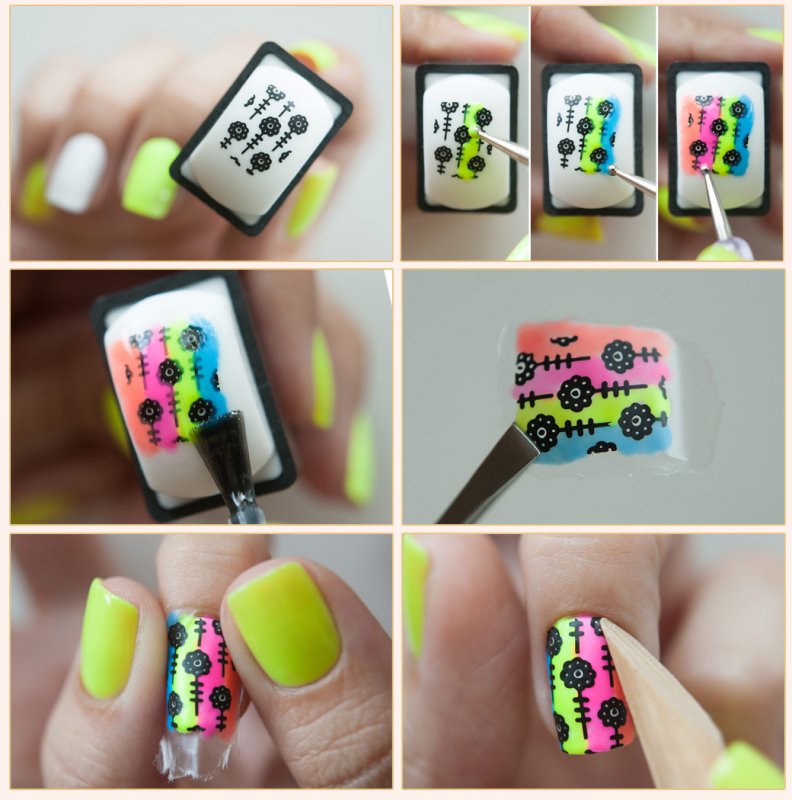
- To start You need to put on the nails that shade of lacquer, which will be well combined with the pattern.
- Next you need to apply acrylic varnish on a plate with patterns. Having chosen the drawing you like, you should fill it with paint.
- Then use the scraper to remove excess varnish., evenly distributing the paint on the pattern.
- Now you need to transfer the image to the stamp. Smooth movement is necessary to touch the disk with an ornament and lightly press the stamp.
- Further actions will be carried out only on the stamp itself. Having opened color varnishes for coloring of patterns, it is necessary to put on two drops of each such paint on any plain surface.
- Use the brush to paint the entire drawing smoothly filling all the details of the picture.
- After drawing the pattern must be applied clear varnish thick enough.
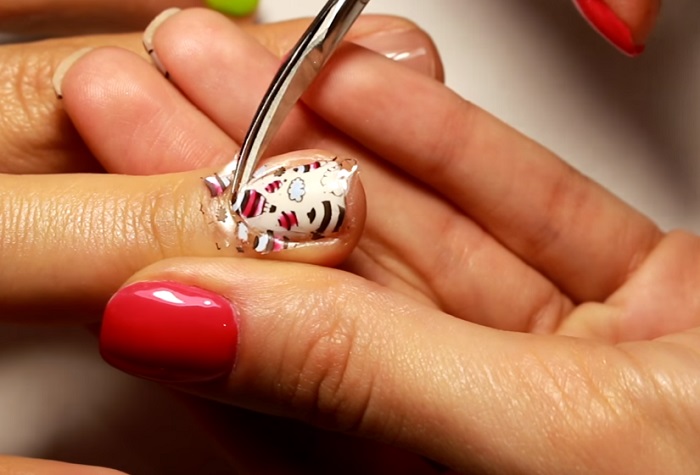
- To understand that everything is done really correctly, you need to wait until the varnish dries well. Gently lifting the formed film with a pattern using tweezers, you can judge the state of the image.
- In case the varnish is dry, carefully separate it from the die. This is done as carefully as possible so as not to damage the film with a pattern. It should be borne in mind that it is quite fragile and with sudden movements it may burst. The transfer should be smooth and neat.
- The finished slider is transferred to the nail. Varnish on the nails themselves must be fresh so that the film can stick well. If the nail polish dries, you need to paint it again with a colorless agent. The film will not adhere to the dry base. The resulting sticker must be carefully smoothed, so that it fits well to the nail.
- While the film is tightly laid on the nail, You can use scissors to cut off excess edges. Often, many girls use a brush dipped in nail polish remover instead of scissors. This method also allows you to get rid of excess paint on the edges of the nail. In this case, everyone chooses the option that is most appropriate.
- At the end of reverse stemping, apply a fixative on the resulting pattern.

Reversible stamping is quite complicated in execution, therefore it is necessary to adhere to all the rules for its implementation.
Lessons for beginners will be a great help at the beginning of learning this difficult technology to create a manicure. Such a manicure is perfect for creative individuals who like to create this kind of masterpieces. The technique of applying reverse stamping design will give unforgettable emotions from an interesting creative process, and a manicure will not go unnoticed by others.
You will learn more about the technology of applying stamping on the gel polish from the following video.
Reviews
Most girls rightly point out that using a stemping saves a lot of time, which is spent on creating unique versions of nail design. This method can be freely practiced at home, as it does not present any particular difficulties even for beginning manicurists.To create such a design, it is not necessary to draw with brushes and needles, the main thing is to gain experience and quickly print ready-made drawings. In stemping important speed of movement.
As for reverse stemping, in this case the main thing is to follow all the points in the instructions for performing this type of manicure, as well as constantly train in this technology.
Based on customer reviews, silicone dies are more convenient than rubber ones.
They print high quality acrylic paints and varnishes of various textures. However, there are stampings that copy patterns poorly. This happens when the stamp is not cleared from the factory funds applied from adhesion. If you get exactly such stamping, you can gently walk on their surface using a nail file. But in this case it is important not to overdo it and act as carefully as possible. This procedure will help remove the gloss from the stamp and the patterns will be just perfect.
Many enthusiastic reviews about the technology of stemping only confirm its immense popularity in the modern nail industry. Stamping with gel polish as a background can be updated in accordance with the new outfit and accessories.