How to glue rhinestones on gel polish
Not everything that glitters is gold and precious stones.. Also beautifully shimmer, sparkle and dance at the glare of light, small faceted glasses, called rhinestones.
In the second half of the 18th century, a French jeweler named George Frederick Stras came up with the idea of a metallic coating for the bottom of a transparent crystal, which shone from the substrate to the outside through the stone. Thus were created the same rhinestones that we know today. Later, Daniel Swarovski managed to imitate the facets of gems while creating rhinestones, and therefore their popularity has grown incredibly.
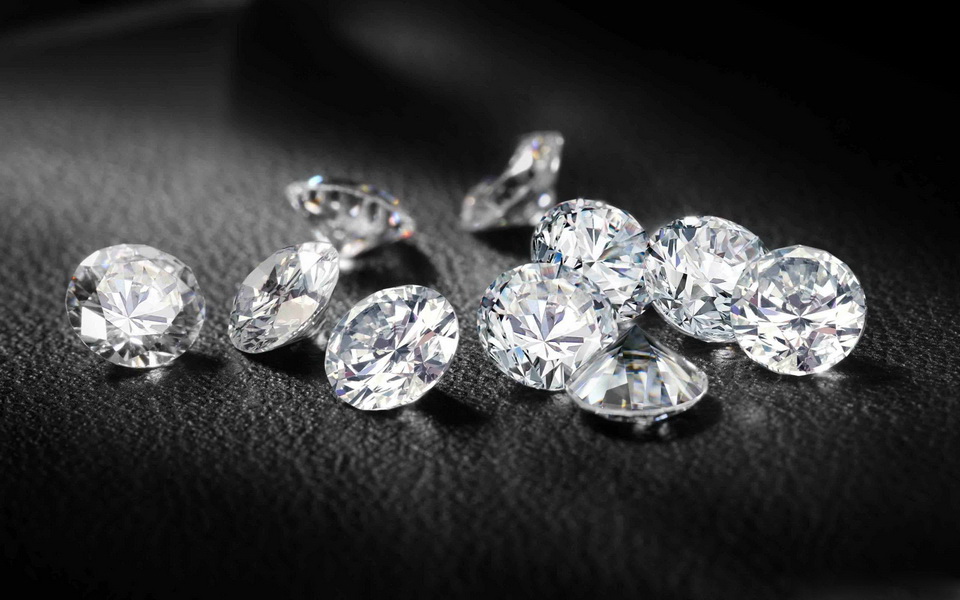
Today, rhinestones are relatively inexpensive and are made of glass, acrylic paste or quartz. They are used to decorate a variety of items - from wedding tiaras to women's marigolds.
Application features
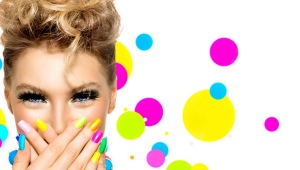
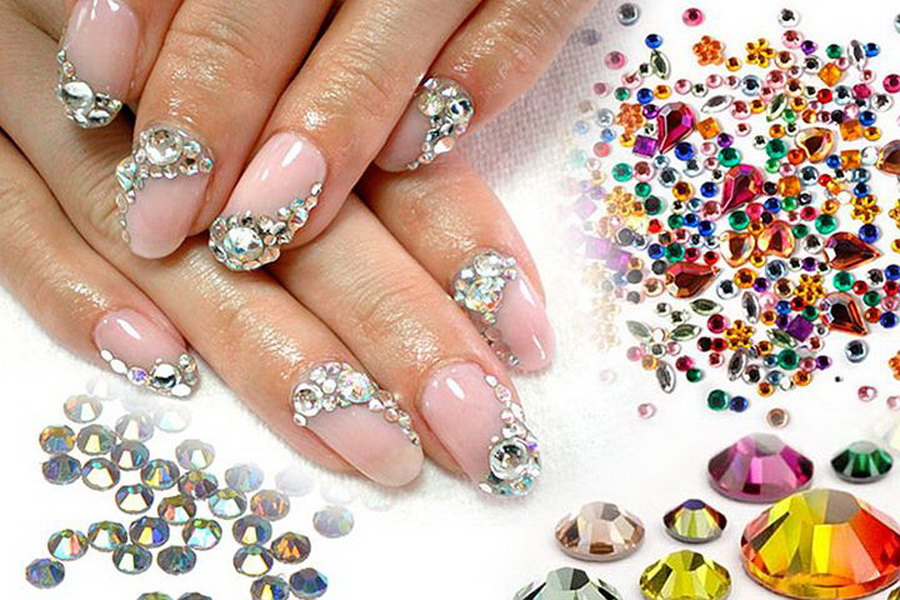
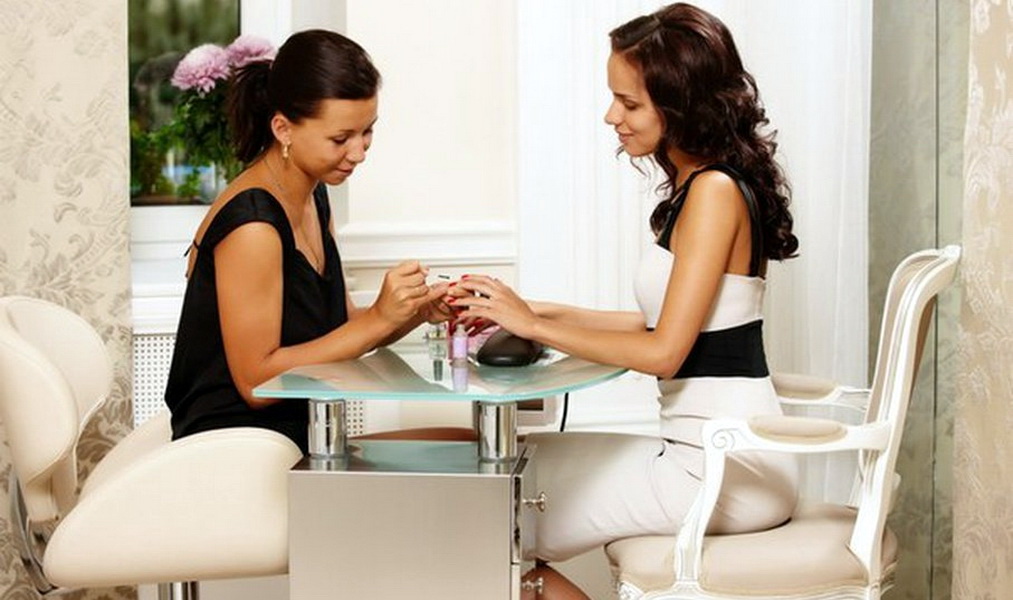
Nail art, as it is now called a new type of manicure, using gel varnish or shellac, allows you to create real paintings on your nails. Often inlaid with rhinestones is often used as an effective accent.

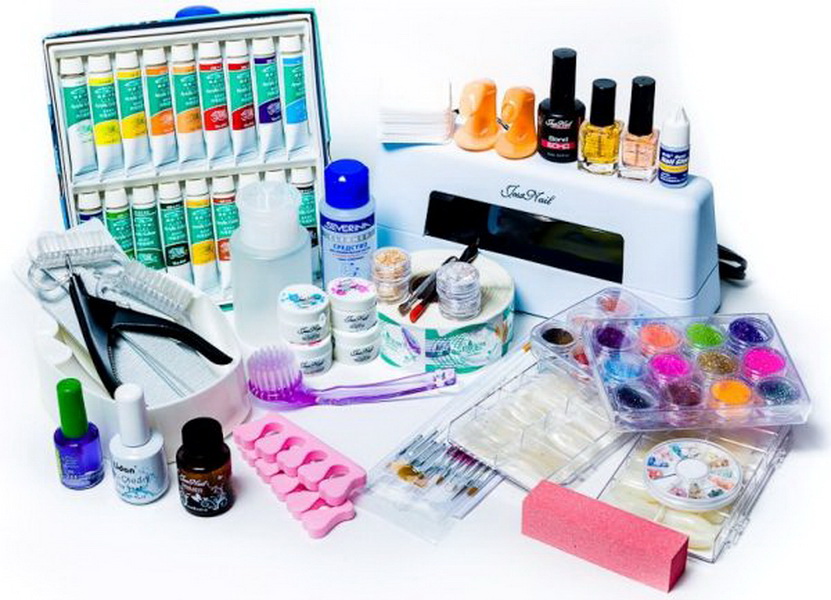
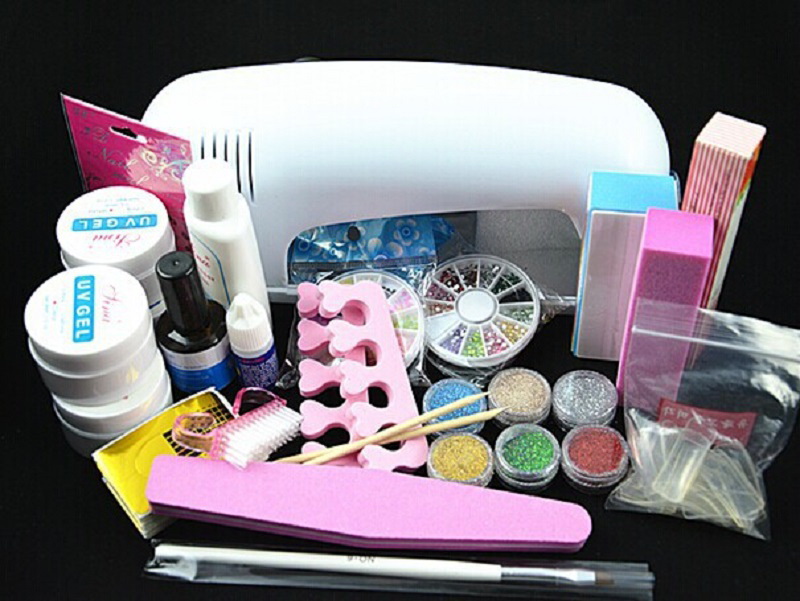
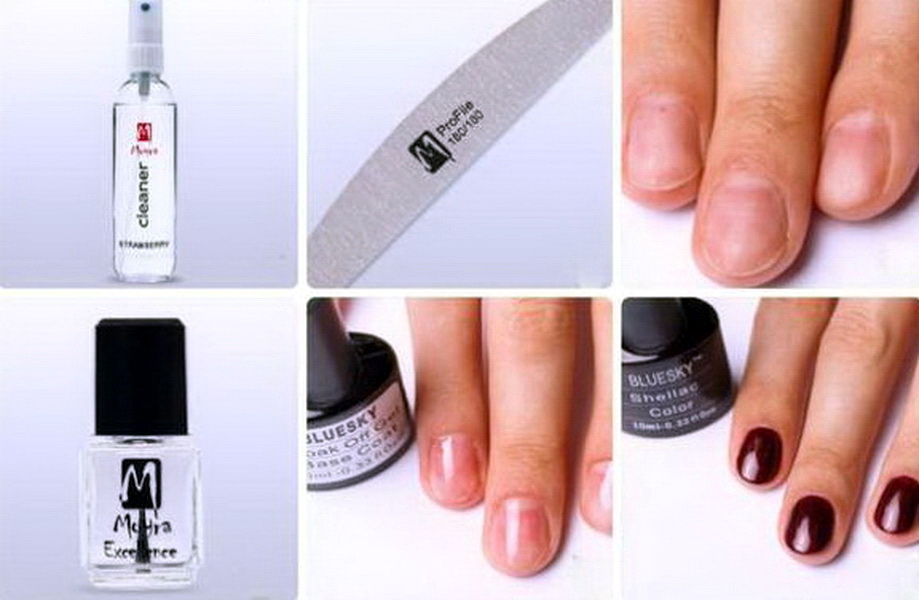
To create such an ornament, you need to prepare everything you need in advance:
- Bath with warm water for washing hands;
- Moisturizing cream;
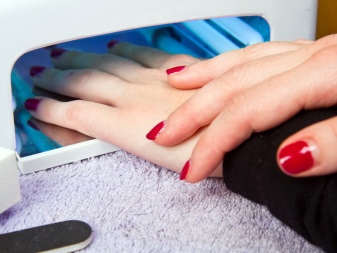
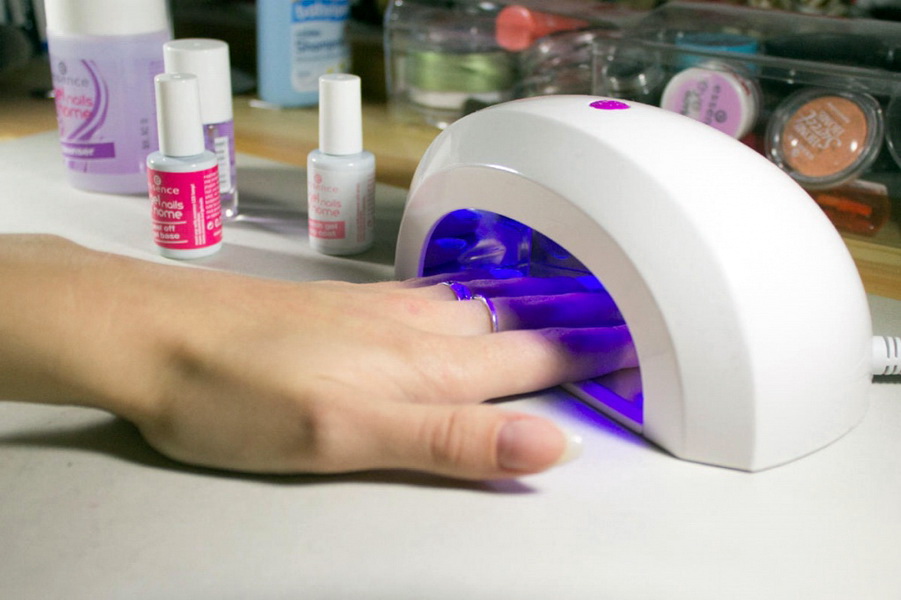
- Ultraviolet (UV) lamp;
- Primer;
- Gel polish, serving as the basis;
- Color gel nail polish;
- Top, or fixer;
- 1 orangewood handle (orange stick);
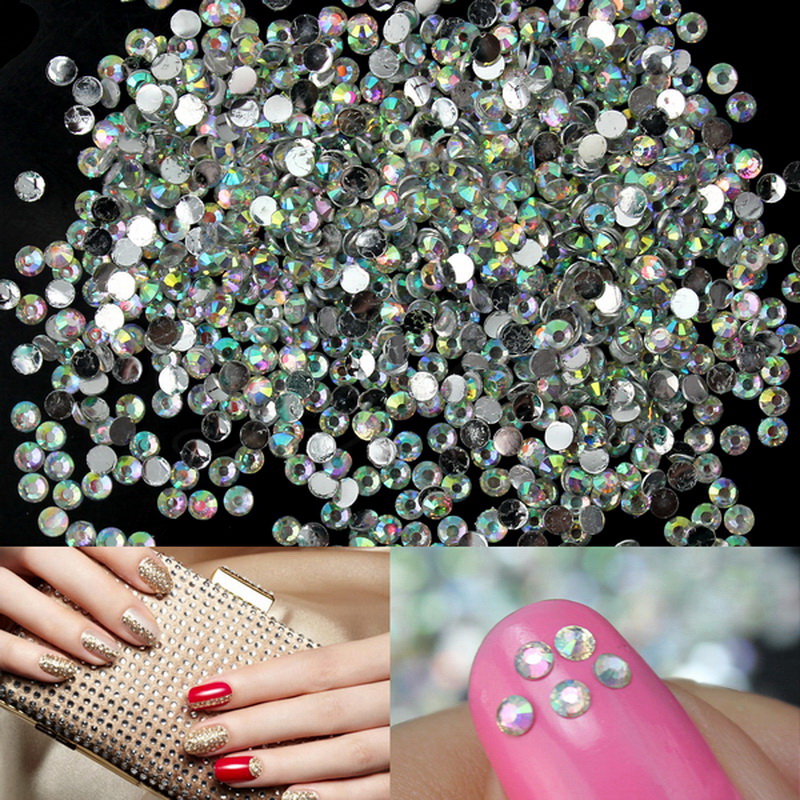
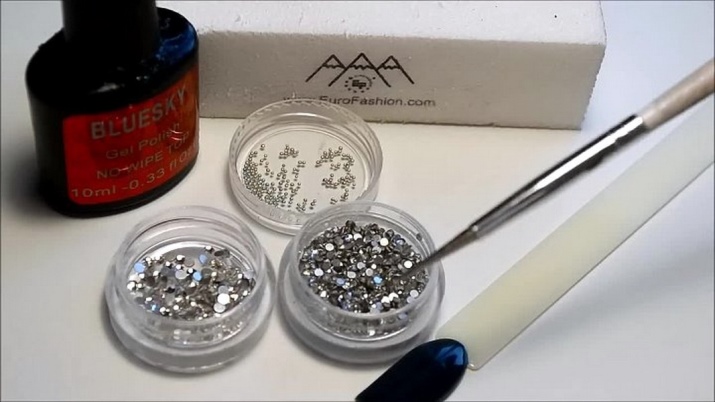
- Swarovski crystals (1.8 mm are ideal for nails);
- Thin and medium tassels;
- Medical alcohol;
- Clean dry towel.
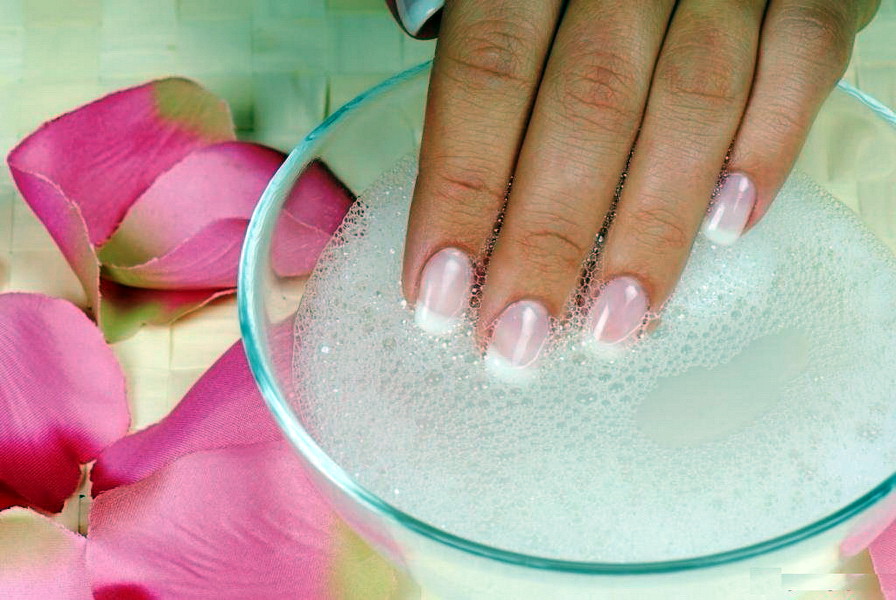
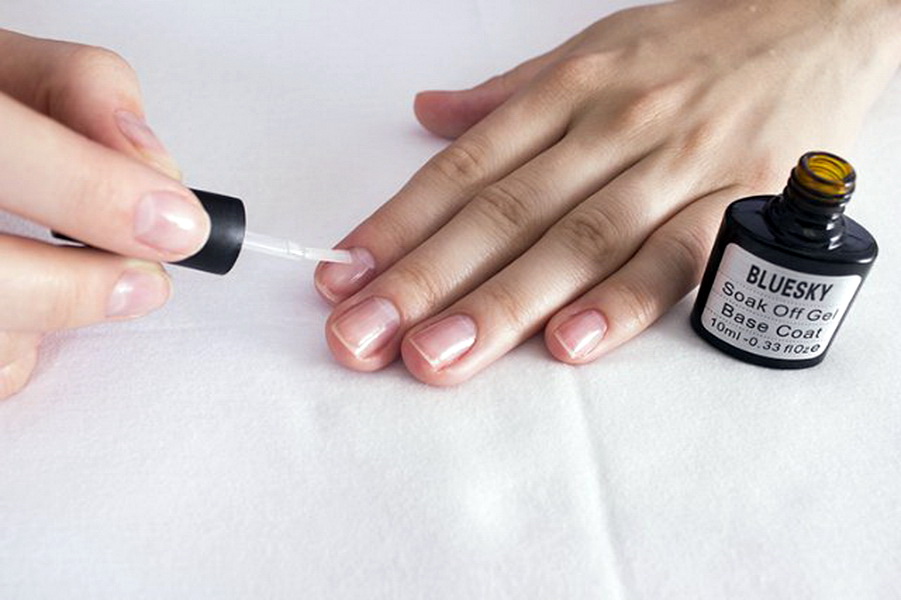
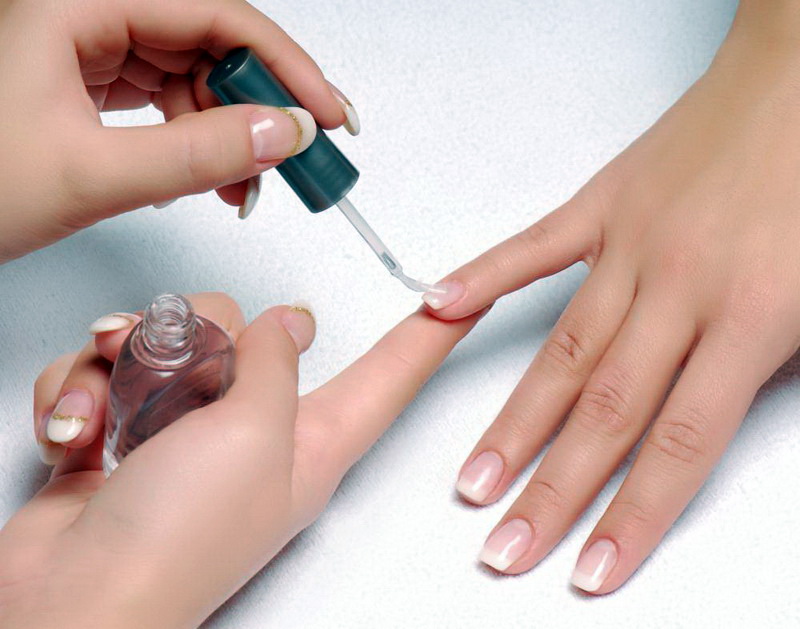
- To attach the rhinestones only on the treated nails, or immediately before applying the fingers, you need to immerse them for 10 minutes in the bath with soapy water in order to remove all kinds of dirt. Then a primer is applied to the nail plates.
- It is necessary to apply the base, starting with the thumb, This should be done as carefully as possible, without affecting the cuticle and the skin around the nail. After applying the finger for 2 minutes is placed under the UV lamp for fixing. Also processed every finger.

- Second phase - this is a coating of colored gel, which occurs in 2 layers, each after application must be dried under the lamp. In the case when, in addition to rhinestones, the composition must also have a painting, it should be applied on the second layer.
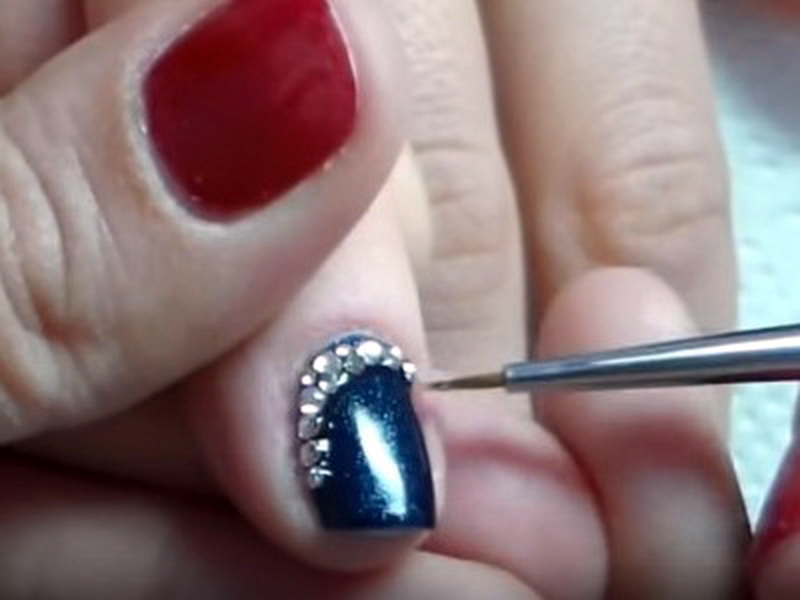
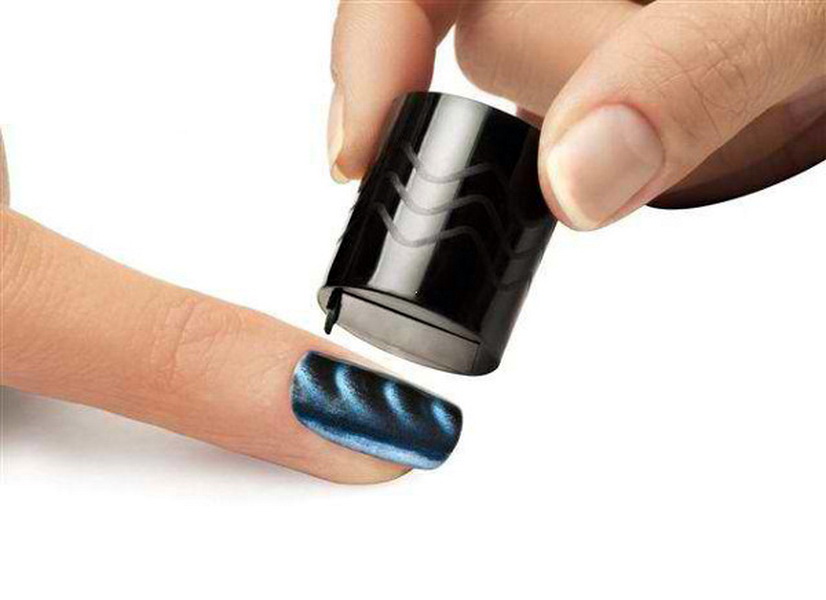
- Top, or fixer for gel polish is applied to all nails, which are not planned to apply rhinestones, after which the nails are dried under the lamp. On the nail, which is decorated with pebbles, also put the top, which will glue rhinestones. They take pebbles or an orange stick (a thin stick of orange wood with antiseptic properties) or a toothpick.

You need to gently touch the pointed end of the stick to the top of the rhinestone.to pick up the crystal and then place it in the selected position. In order for the rhinestones to stay on the nails for a long time, they must be fixed in the top, or, as they say, “drown” in it.
You should not put the top on top of rhinestones, because of this, they will lose their luster. It takes 2 minutes to dry the rhinestones, then over the entire free space of the nail, you must repeat the application of the stamp, especially by carefully avoiding all the pebbles. To do this, use the thinnest brush. Be sure to dry in the lamp.

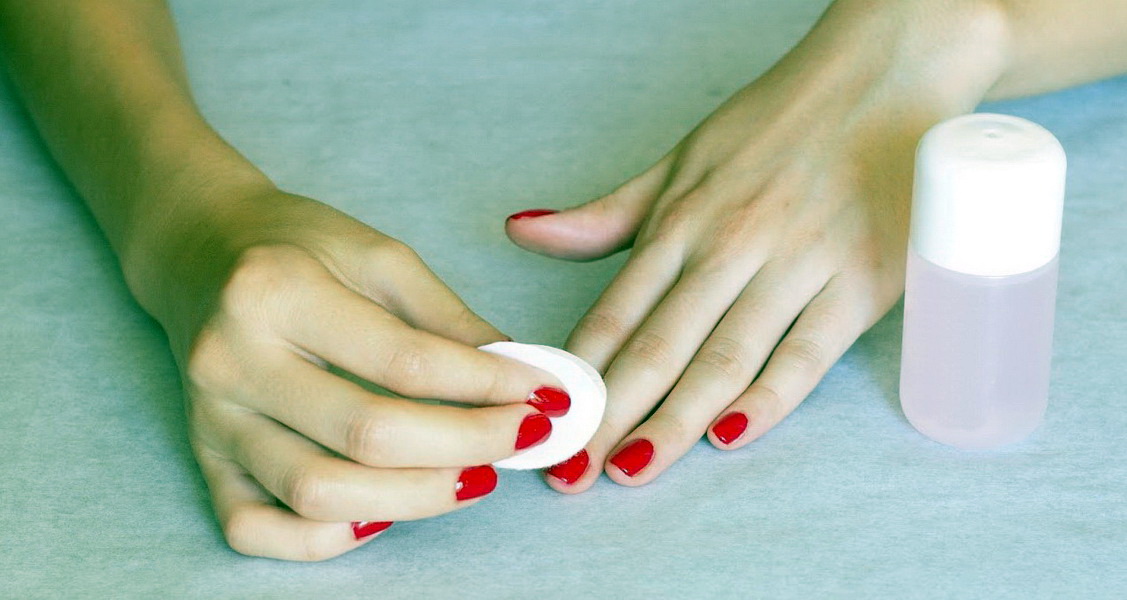
As a final touch it is necessary to remove the remaining sticky layer from the varnish, for this purpose a cotton swab moistened with alcohol is used.
Design Ideas
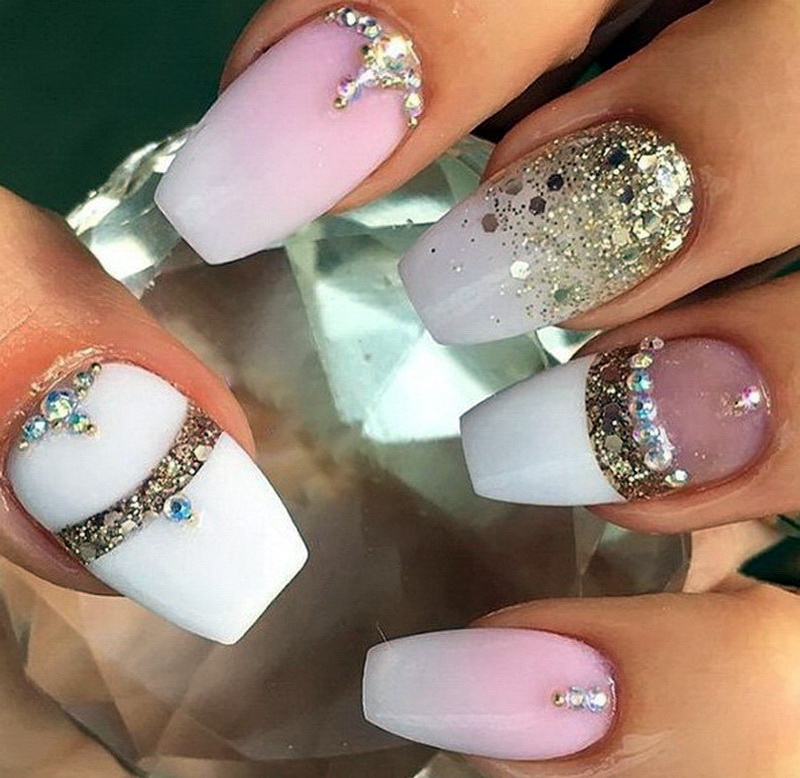
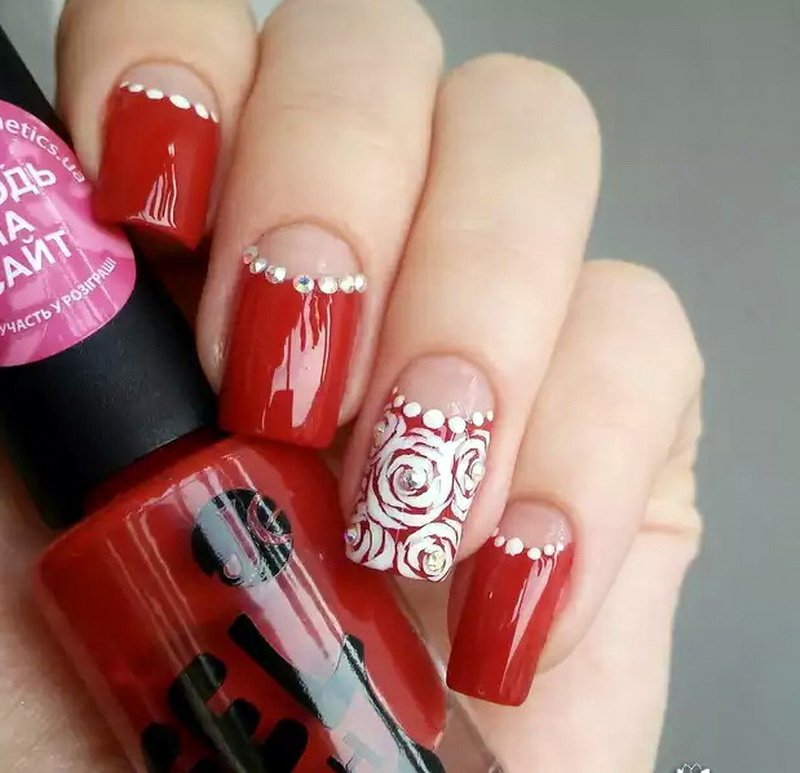
Crystals reflect light and add shine and volume to any manicure. There are variations of the arrangement of rhinestones on the nails, which have already become a classic of nail art:
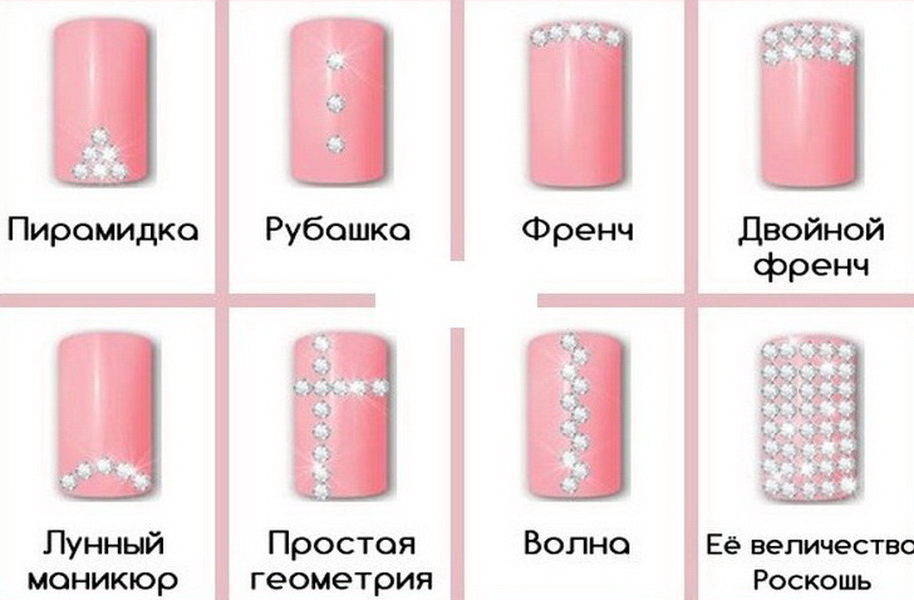
- «Shirt"Consists of 3 separate pebbles, located in the middle in the middle of the nail plate;
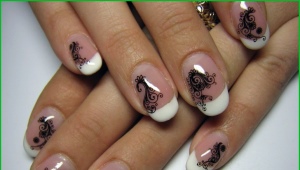
- «French"- a strip of 5 rhinestones on the outer edge of the nail;
- «Double jacket"Represents 2 strips of pebbles along the outer edge;
- «Pyramid"Is a pyramid of 5 stones on the base of the nail;
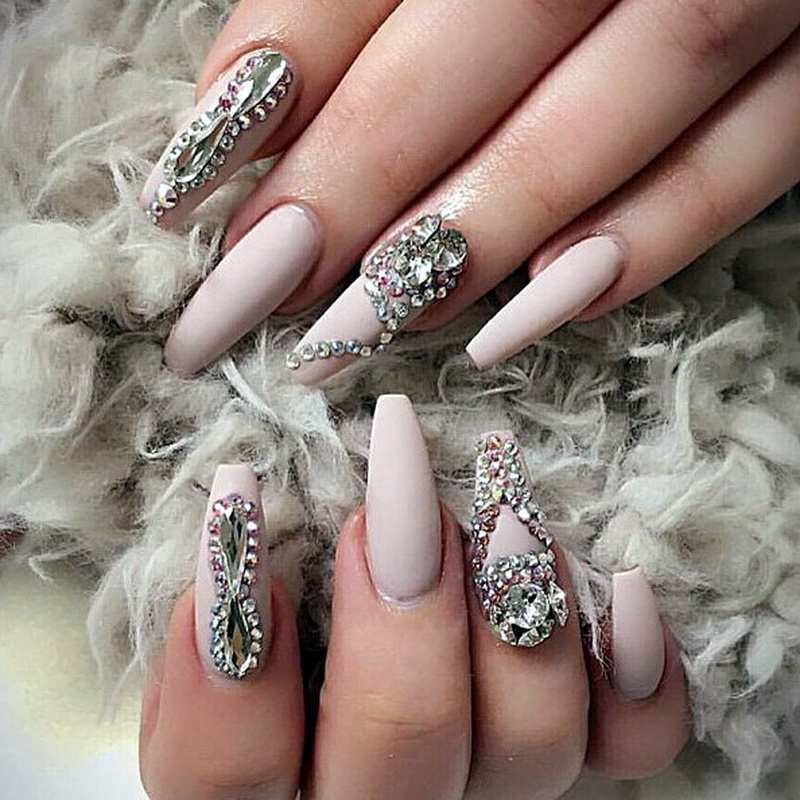
- «Geometry"Represents an arbitrary intersection of two lines laid out with rhinestones;
- «Wave"- this is an imitation of the wave pattern along the middle vertical of the nail;
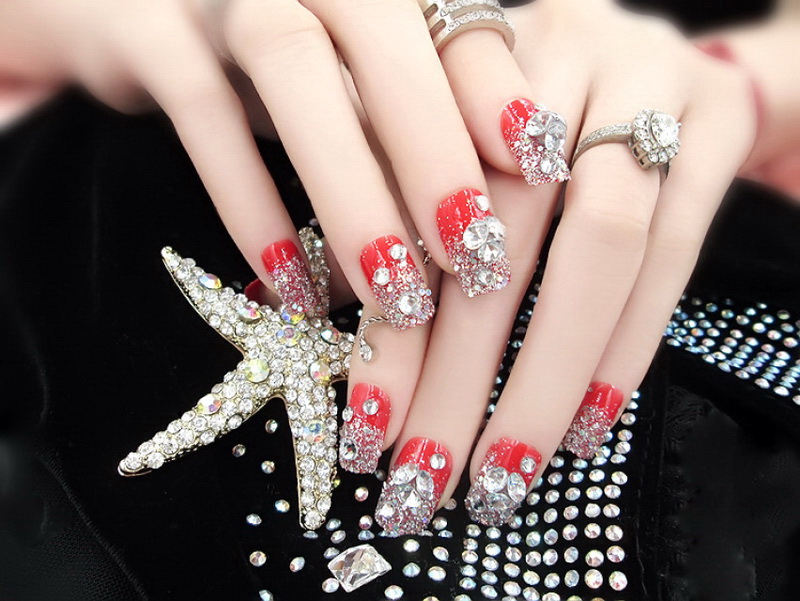
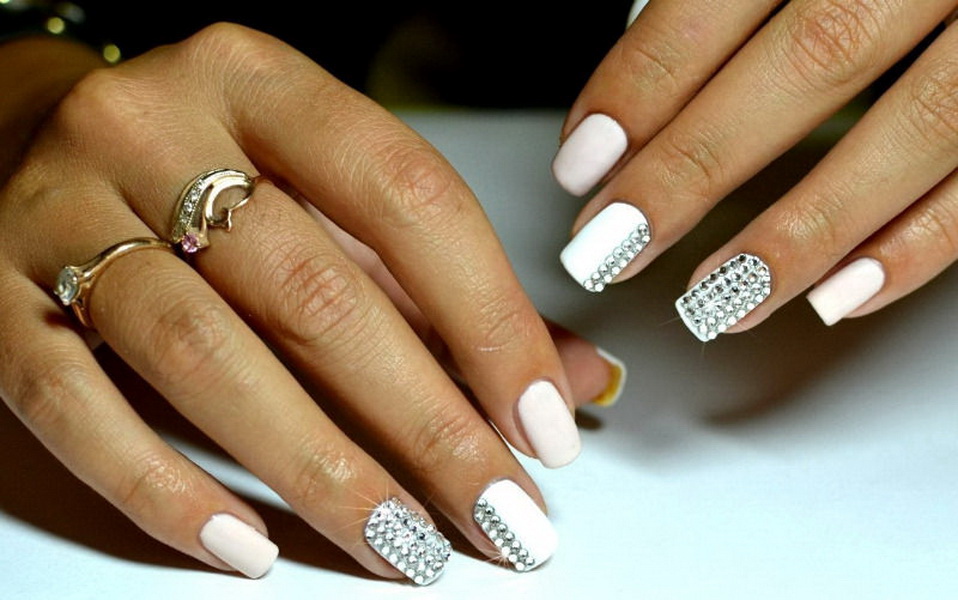
- «Luxury"Call the full display of stones on the surface of the nail.
However, using rhinestones, you can do not only those that have become familiar compositions. Each manicurist is an artist and is capable of both repeating interesting designs and creating his own. The main thing to remember is that the nails on the ends are still flexible, and therefore it is advisable to fasten large stones closer to the base.
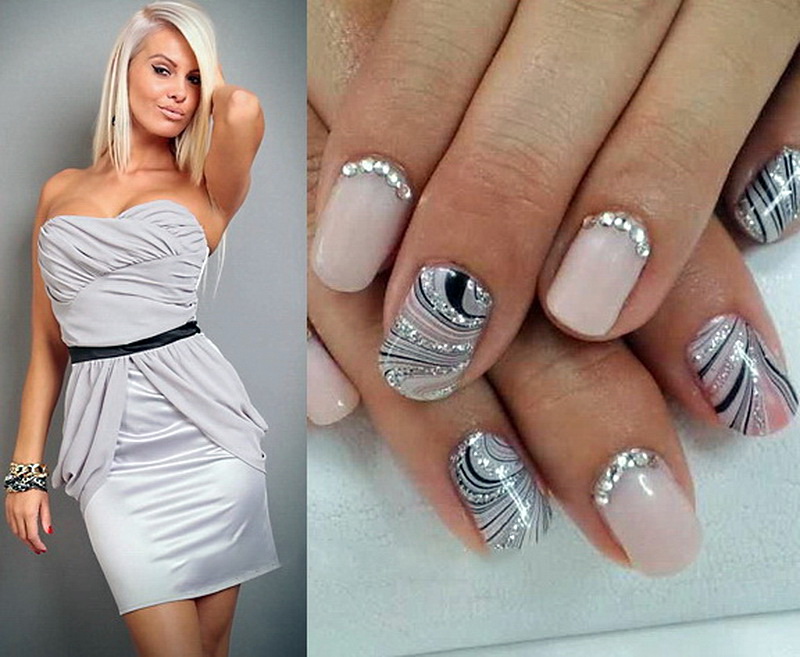
Even before deciding whether to apply a pattern of crystals, you need to decide whether you want to get rounded or square nails, or perhaps a sharp tapered version of the shape “stylet" or "butterfly". Then you need to decide on the texture of the surface, because it can be both glossy and matte, especially popular this season.
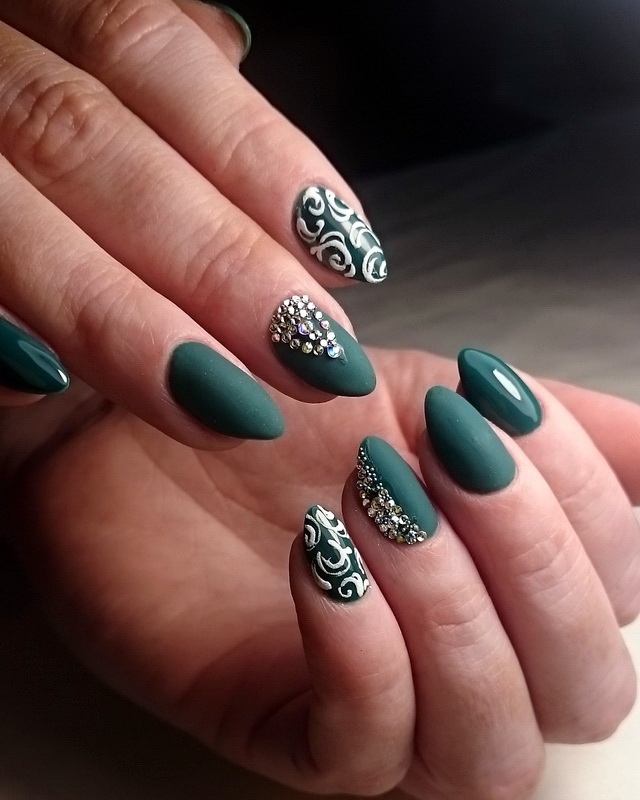

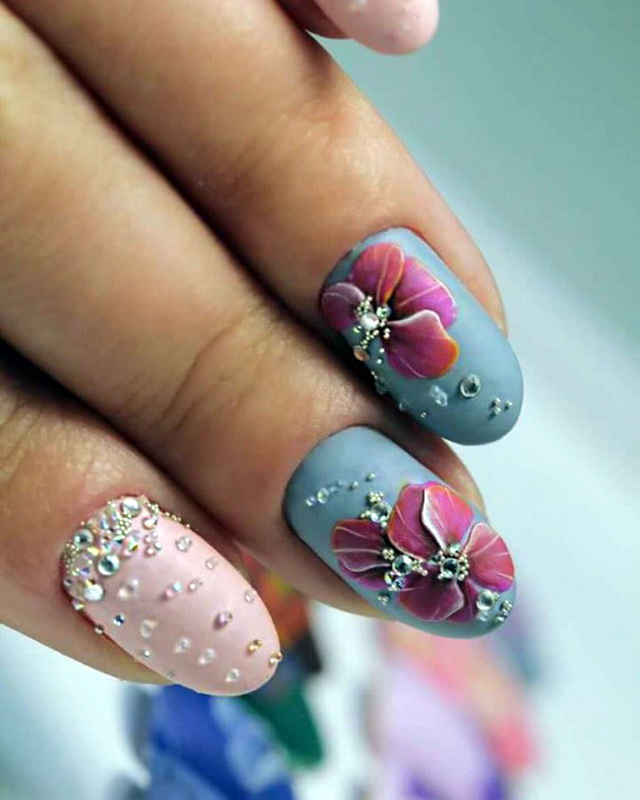

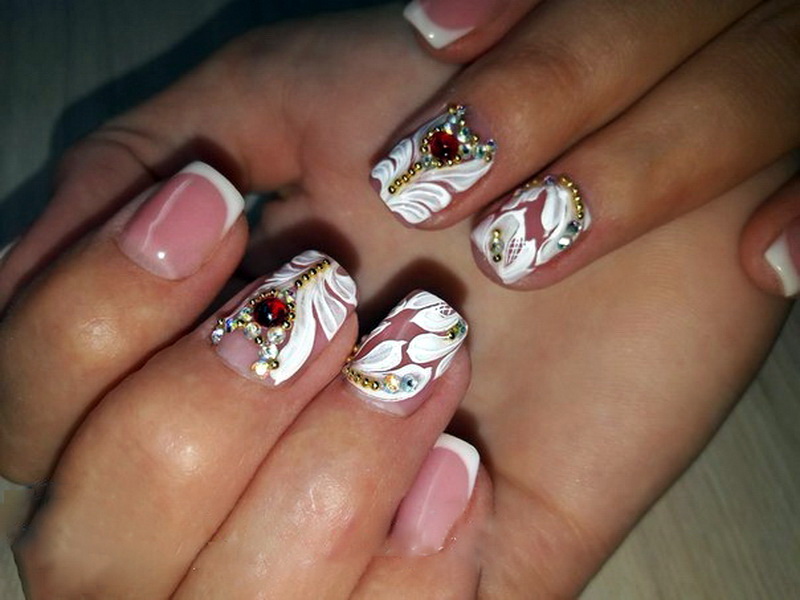
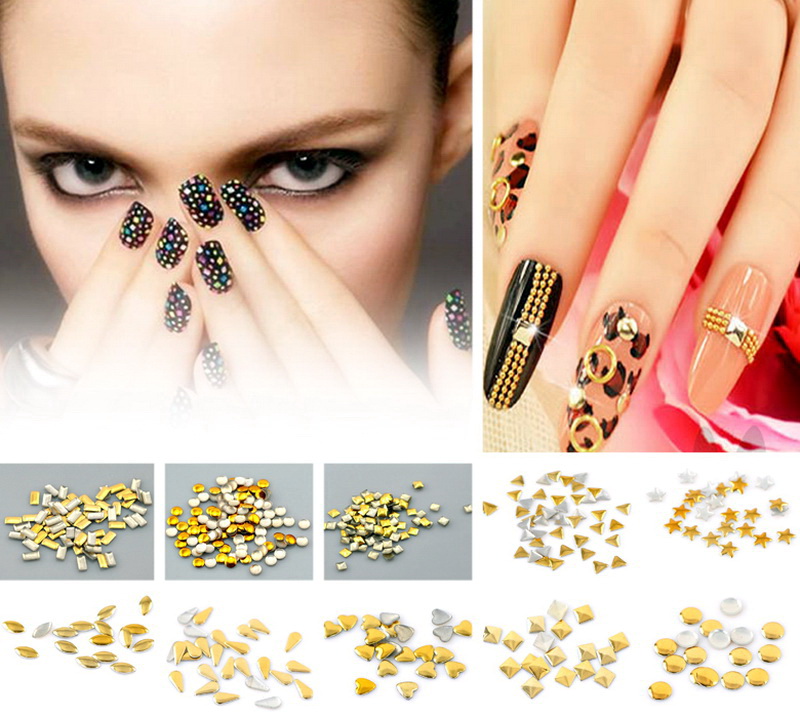
Many variants of nail design, existing today, offer to sculpt crystals both in monochromatic colors and on nail plates painted with subtle patterns.
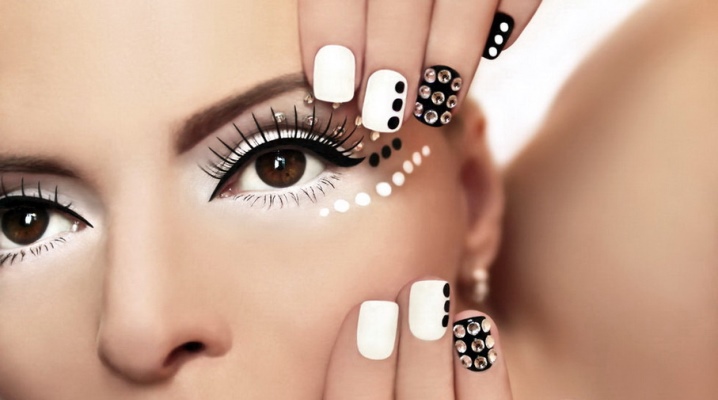
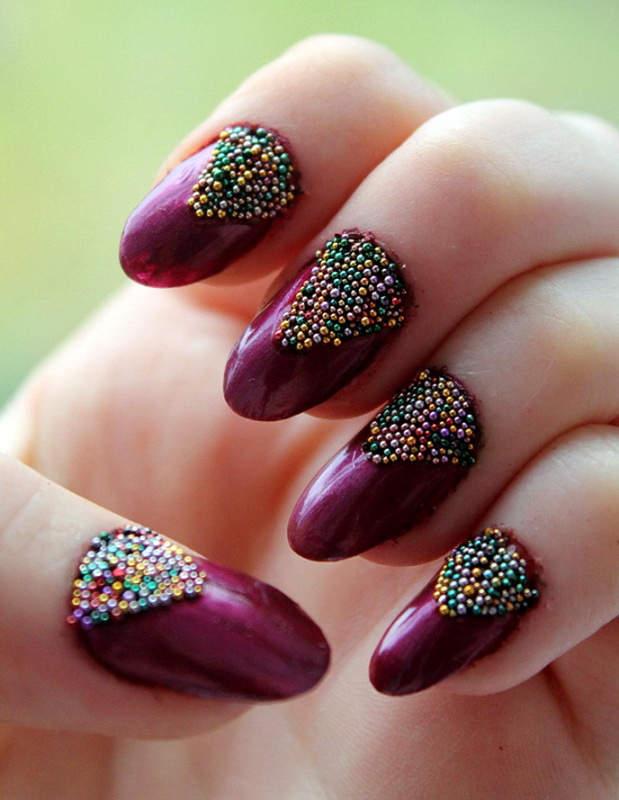
In addition to rhinestones, small beads can be applied to the nail, this option is also called "caviar manicure" or design with bouillons. With the help of beads, you can put hearts, bows or initials on the nails, which are emphasized by one or two shining crystals. But in this case it is worthwhile to pay special attention to the choice of shades of rhinestones, beads and varnish, in order to preserve harmony and not create an excessively vulgar pattern.
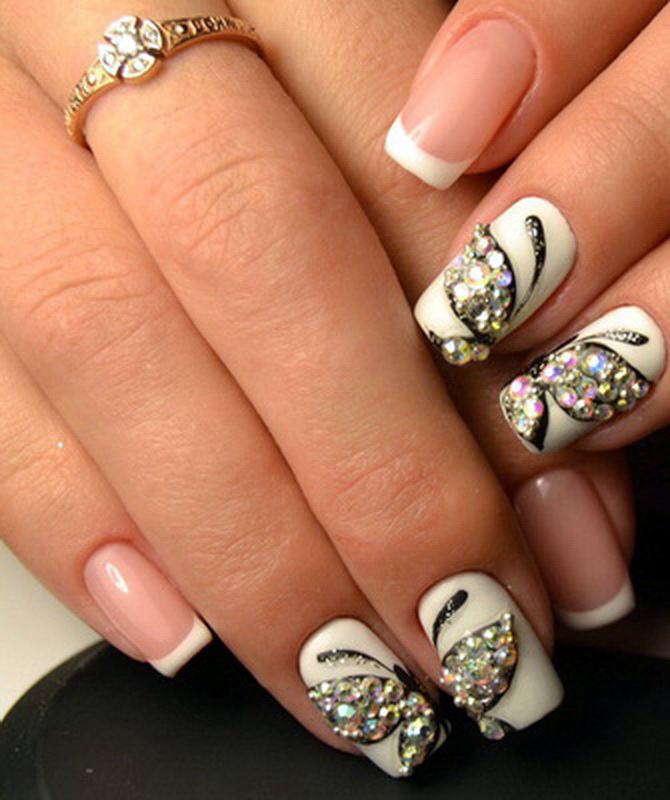
Rhinestones on the nails, made of crystals are very popular. Swarovski. Beautiful shine in various colors, which comes from the refraction of light in natural products Swarovski, is a great decoration for nails.
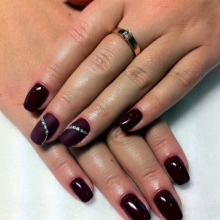
Rhinestones on the same finger on both hands is a restrained, but very effective detail that enriches the entire manicure. Often, rhinestones on all nail plates seem overkill, but on one nail will look very impressive.

In addition, beautiful nails with crystals imply not too large a set of ornaments on the fingers, maximum - one or two thin rings. The relevance of manicure to the style of clothing is also important, because such an adornment, like a nail design, lasts for about 2 weeks, so it is worthwhile to imagine in advance how harmonious it will fit into your everyday wardrobe.
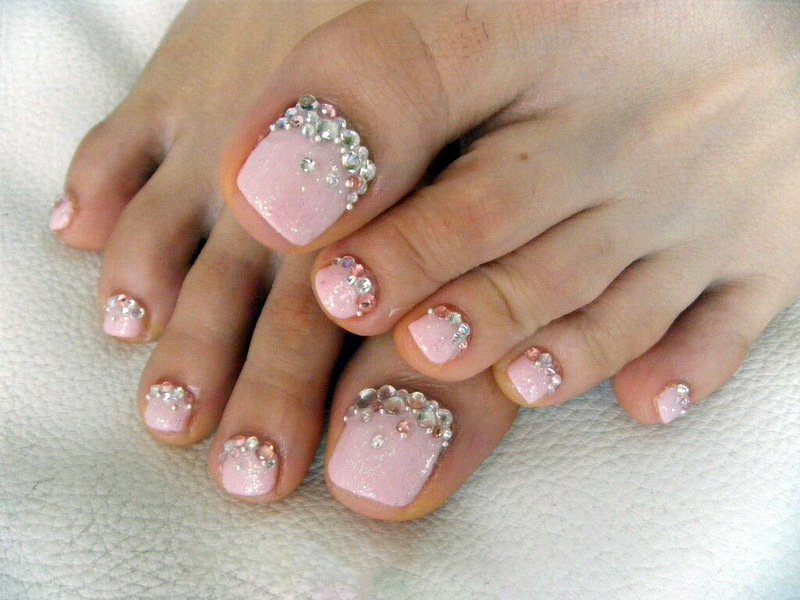
It is not recommended to attach rhinestones for manicures on the legs, since they will disappear very quickly.
New season
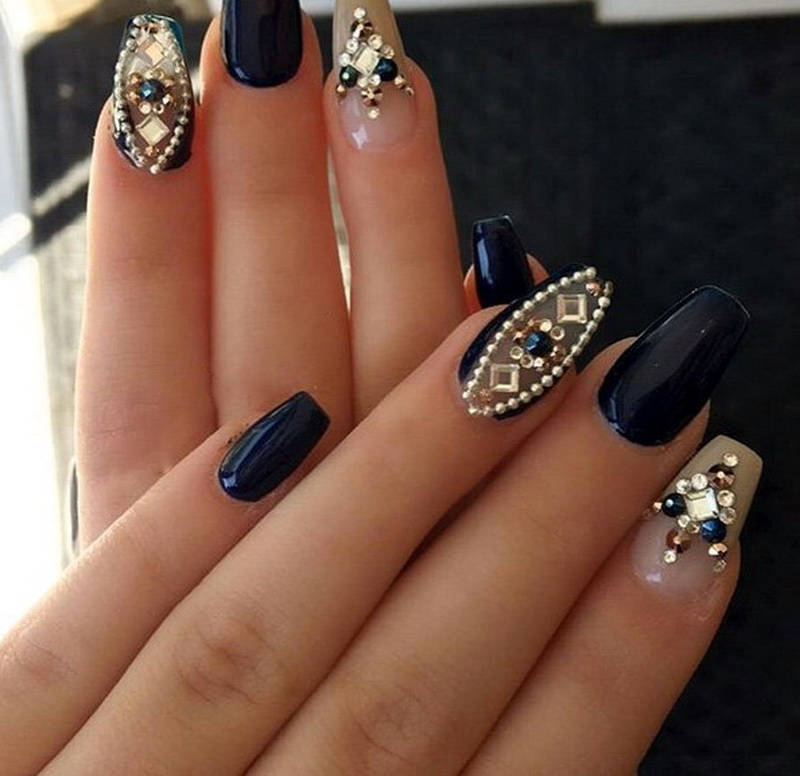
№ 1
This luxurious manicure in gray-brown tones is kept in the top of popularity over the past two seasons. Somewhat reminiscent of India and its gorgeous beauties. Rhinestones enrich the picture, their appearance echoes with a double ring on a chain. It should be noted that this type of rings is also an absolute hit of the last time.

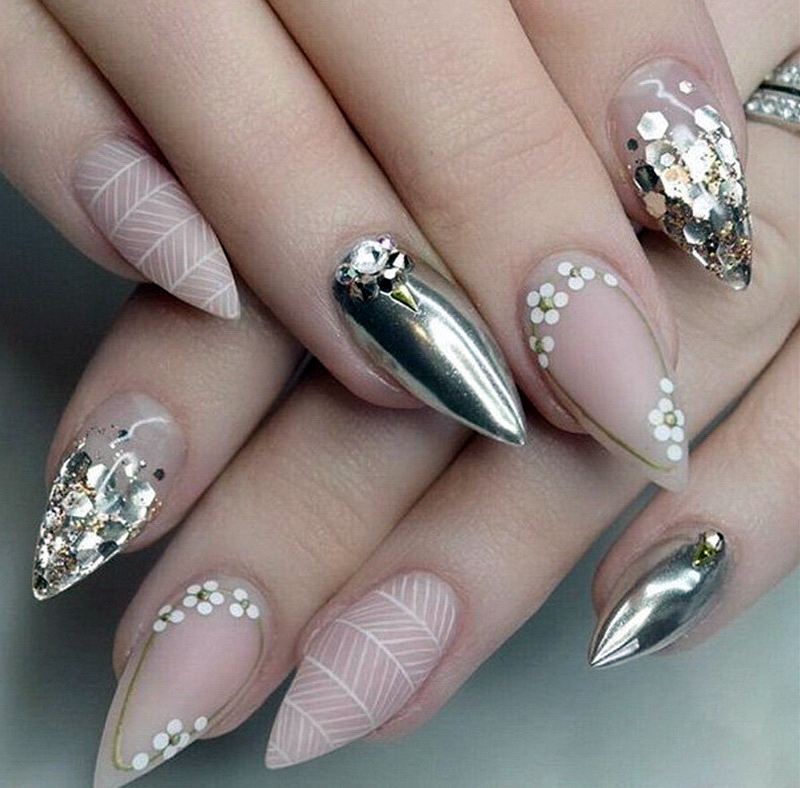
№ 2
These nails are reminiscent of the Snow Queen. Long, narrow, decorated with neutral shades of pink, which are always popular, with a lot of rhinestones - they are a real decoration.
№ 3
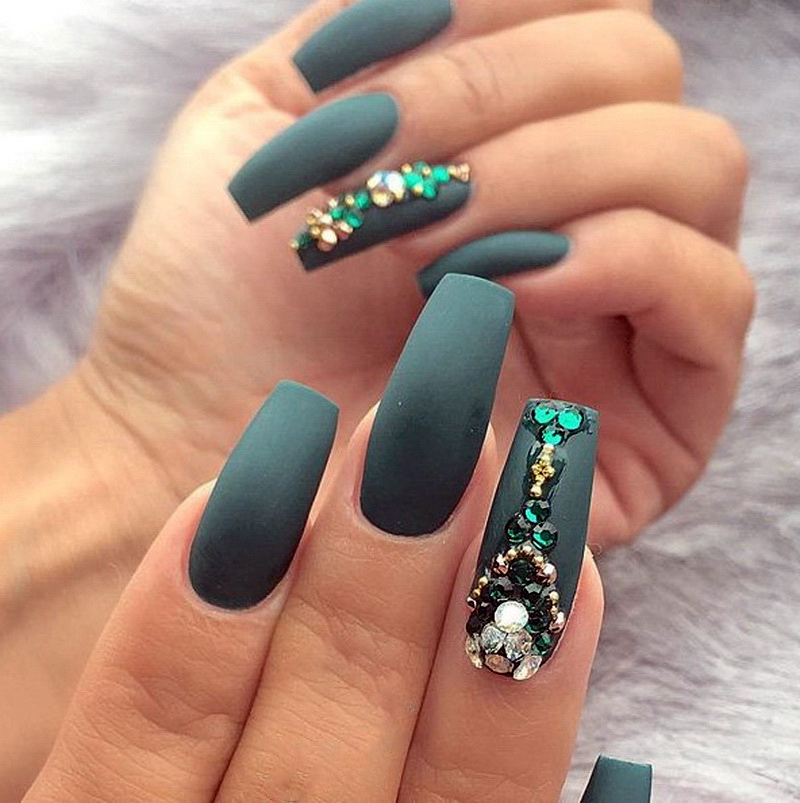
A manicure with a matted surface has appeared relatively recently.. In this case, uses a very beautiful dark green shade, called the royal. Also maroon or lilac frosted nails look great.
№ 4
A beautiful combination of dark blue and beige lacquer with rhinestones in tone softens the deliberate extravagance of blue shiny lacquer and creates a memorable combination. This design is possible on any length and shape of the nails.
№ 5
The combination of matte lacquer, glitter, rhinestone and metallic metallic lacquer looks topical and catchy. This option is suitable for girls who believe that to cover all the nails in the color "metallic" is too much, so they give this color to one or two nails of both hands, adding sparkles and crystals. This will be enough to get a radiant manicure that will not go unnoticed at a nightclub or at a friendly party.
№ 6
Deep ink blue and moderately long nails are an excellent choice. White nail polish is added to serve as a backdrop and to highlight the charm of velvet dark blue crystals.

№ 7
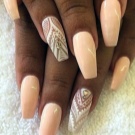
Not every form of nail is suitable for all ladies. The exception is, perhaps, almond-shaped manicure with a cut edge, which visually narrows and lengthens the nail. Rhinestones in this case are golden, as are the beads that complement the pattern, and the nails are separately varnished with glitter.
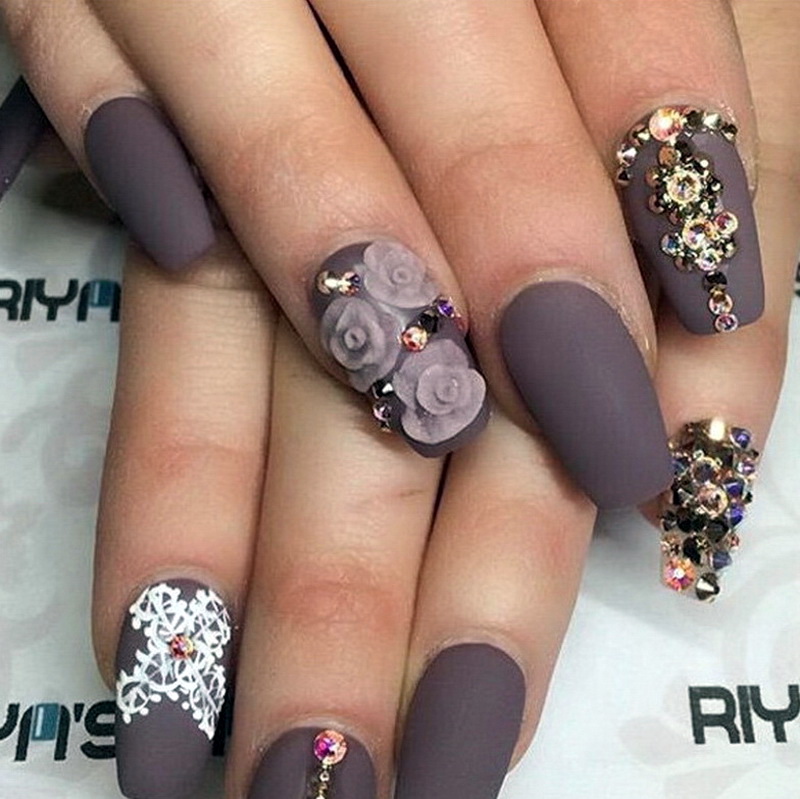
№ 8
Nail art with false roses on a matte surface can be called the trend of this season. In this unique composition, roses give softness, zircon is a luxury, and the white detail on the index finger refreshes autumn colors.
№ 9
A rich and luxurious composition, consisting of a combination of pastel shades, made in the technique of "ombreAnd rhinestones in gold. The design imperceptibly resembles one of the magnificent tales "Thousands and One Nights". Suitable for a wedding ceremony in oriental style.
№ 10
French manicure is always in trend. Each lady has the right to decide for herself whether it will be a simple low-key manicure or it is worth giving it a little richer, decorating it with painting and shining crystals. In the latter case, it turns out a great version of evening nail art, which will be appropriate to look with casual clothes.
Tips for manicure at home
You can do a manicure at home by following the simple and affordable tips below. If desired, and zeal can achieve good results, as well as save money and time, avoiding visiting salons.
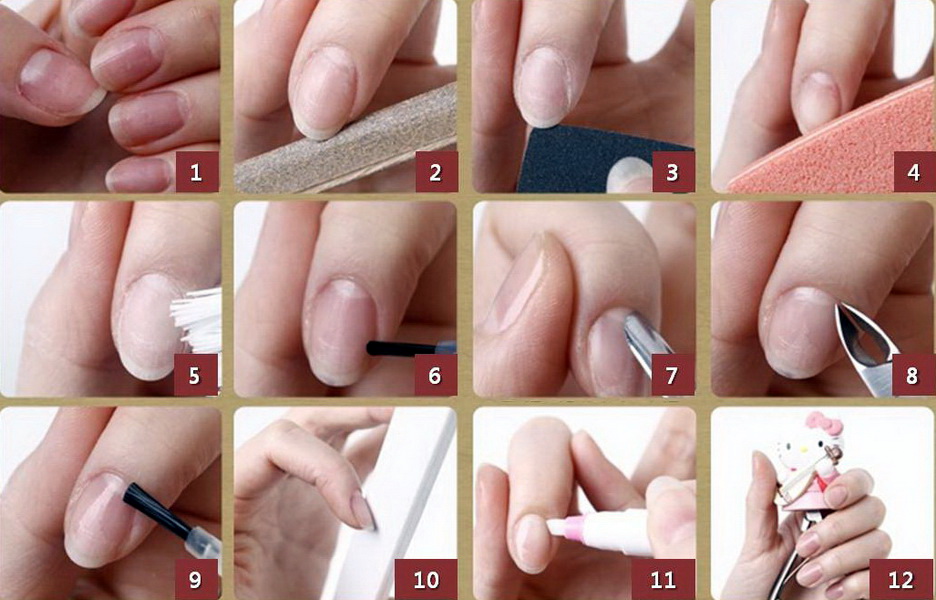
- First you need to remove the old nail polish (if there is one): To do this, soak your nails in a jar with warm water for a couple of minutes. This will soften the cuticle. You can remove the usual nail polish with a nail polish remover.
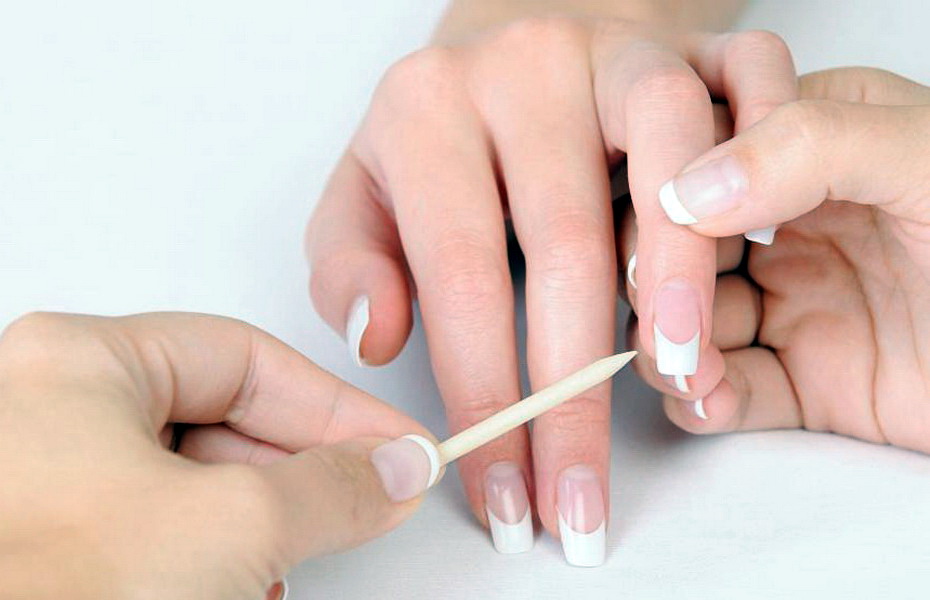
- In the next step, you need to move the cuticle. To do this, apply lotion or cuticle oil at the base of the nail to soften it. Then gently push the cuticle with an orange stick, which has antibacterial properties. Do not trim the cuticle, as it protects the nails from infection.
- Then you should polish your nails, and, if necessary, give them the desired shape. It is advisable to avoid reciprocating movements, as this weakens the nail plate and leads to its separation.
- The edges of the nail can be made square, round or tapered, or choose a combination of square top and oval edges. Round-shaped nails, reflecting the shape of the cuticle and slightly widened beyond the edges of the fingers, will look stylish and discreet.
Coloring usually starts with a thumb.
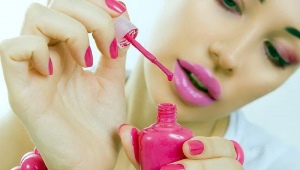
- Apply a base coat of varnish should be, starting from the cuticle and bringing the movement of the brush in one stroke to the end of the nail. For three passes, the varnish should cover the entire nail. Then, for at least 2 minutes, the finger must be placed in the UV lamp so that the composition is completely dry.
- Before applying the color gel polish you need to stir it right in the bottle. It is not worth while shaking the bottle with varnish, as this will create bubbles and the varnish will not be smooth when applied. It will be correct to take the vial between the palms and quickly turn it back and forth, then the pigment will be distributed perfectly evenly.
- When applying two layers of colored varnish, the nail is also covered in three sets., then in both cases should be drying under the lamp. Those nails that are not planned to be decorated with rhinestones are covered with top (top layer) and dried. The top layer protects the manicure and color from chipping, it makes sense to refresh it every 2 to 3 days so that the nails look shiny and fresh for a longer period of time.

Also, the top serves to attach crystals to it: they need to be carefully picked up with a thin end of an orange stick and glued, laid out on a top-coated nail plate. Attaching heavy rhinestones in accordance with the pattern is quite difficult for beginners, so it is better to perform a test manicure using small crystals. Dip the stick into the water and wet the excess moisture on a cotton ball or cotton pad, which will help the crystals to adhere to the instrument more easily.

Ate in the process of applying varnish, he gets on the skin, you can remove it with an orange stick, by no means putting such smudges for drying under the lamp.
When applying the manicure itself, it is worth starting with the dominant hand (for a left-handed person, this is the left hand), since it will be easier to subsequently process the nails on the second hand.
Why not hold
It becomes embarrassing when in trying to give a hand beautiful nails lose rhinestones. Thus, the length of the term that rhinestones hold on the nails is of particular importance.
Each manicurist has his own tricks and subtleties., which show the class of skill, which can only be gained by experience.
Therefore, in order to avoid unpleasant emotions in connection with strazines that fell from the nails, it is worth knowing in advance the reputation of the specialist to whom it was decided to apply. Best of all, of course, use in this case the recommendation of good friends.
In many cases, when customers complain about crumbling rhinestones, it can be used either not very resistant glue (in the case when the master uses exactly glue for fixing), or the master simply misses one of the important technological points.
Such shortcomings can be many, ranging from the lack of a sufficient amount of top on the nail plate, when they begin to spread stones on it, and ending with insufficiently careful processing of the edges of each crystal with a top, which is a very laborious procedure.

In any case, when performing such a complex manicure in the salon, ask about the terms for which the master can give a guarantee. In the absence of such, it is worthwhile to look for another salon, and in the case when the crystals crumbled during the warranty period, you can contact the master for correction.
Glitter correction on regrown nails
Well-made nail art using rhinestones can last long enough, sometimes up to a month. Naturally, during this time, the nails continue to grow, so the cuticle has a shaded area, spoiling the aesthetic impression.

There are several ways to get rid of this trouble:
- Use resistant varnish, eg, "Phenom"from brand Jessicaapplied without drying in the UV lamp in order to paint over the free area of the nail at home;
- Apply a manicure option, called "moon": draw a semicircle in the shape of a moon disk on the grown nail as carefully as possible, such a covering looks stylish, moreover, “moon manicure” is in the top of the last season;
- Make a correction manicurein which a semicircle of glitter and metallic lacquer is formed on the regrown area;
- An interesting way out can be to glue up the overgrown part of the nail with small rhinestones or beads - bouillons.while the manicure becomes visually advantageous, and there is not even a hint of the correction of the regrown area.
Master Classes
The theory of installing rhinestones on the nail plate is simple enough to put this into practice, many masters give detailed instructions, which explain step by step what the sequence of actions is.
Master class on creating a moon manicure with rhinestones
Necessary components:
- Base gel-lacquer "Frenchi";
- Red gel polish "Jerden Gel Finish";
- Quick-drying top "LCF";
- White acrylic paint;
- Rhinestones of glass;
- Brush for painting;
- Dots.
- First of all, a transparent gel base is applied to the nails, which is dried under a UV lamp. The next stage is the application of red lacquer in 2 layers, this happens with the constant drying of each of the layers. The border of the lunar part of the manicure is selected either by stencil for a jacket, or arbitrarily, to your taste. The drawing is done with a thin brush and the depth of the moon looms as carefully as possible.
- Then you can proceed to the decoration. The nail on the ring finger should be decorated with painted white roses. On the remaining nails, small dots are applied with the same white paint using dots. After that, the top is applied to the surface of the nail plates and dried in a lamp.
The exception is made by those nails on which it is planned to fix crystals.
The top of them is not dried until the stones are installed and pressed into it. They will look great in the center of each rosette, on the middle nail will successfully draw the border of the moon manicure. Too many crystals can overload the design, so they need to be "selectively" planted.
Master-class on creating a manicure with the use of gel - lacquer Masura "Gems" and rhinestones.
Necessary components:
- Primer;
- Basic colorless gel varnish Masura;
- Masura gel black varnish shade 290-19;
- Masura Lilac Gel Polish shade 295-08;
- Magnet for manicure;
- Rhinestones in three sizes;
- Top;
- Thin brush.
- At the beginning it is necessary to degrease the nail plate, then apply a base on it, not forgetting to “seal” the edges. Then the nails are sent to the UV lamp for 2 minutes. Then as a substrate is applied black lacquer from the series “Masura Gems"And also dried for 2 minutes.
- As a second layer, Masura lilac gel polish is applied to three fingers. 295-08The second layer of black lacquer is applied on the remaining ones. Do not forget to "seal" with the edges of the nail plate. Then necessarily occurs drying in the UV lamp.
To get the effect of gems, purple lacquer is applied with quick movements across the nail plate, working through one side first and then the other.
- Now it's time to use the magnet.. It is brought first in the direction of growth of the nail, and then across it. This produces a shining effect in the center of the nail. Dry after that the nails also need 2 minutes. The next stage - you need to impose a top and dry, after which it is time to decorate the manicure with rhinestones. In order to reliably stick the crystals, a strip of top is applied, on which the rhinestones are fastened, after which the manicure is dried in a lamp.
- At the final stage, all the rhinestones around the edges are topped with a fine brush, preferably twice, with the last application in the composition can be put smaller straziki. At the end of the laying, they are also bypassed with a top and dried in a UV lamp.

In the next video you will learn how to fix the rhinestones on the gel polish, so that they hold on throughout the socks.