Manicure with mica
Every girl wants to be irresistible, and sometimes in order to show herself to the world, there are enough of a couple of catchy drawings or beautiful iridescent parts on the nails. Such a manicure looks very stylish and expensive, but in fact is not a big deal: the main material is mica, and it is very easy to work with it.
What it is?
First of all, mica is a mineral. It is often found in nature and has a pleasant iridescent mother-of-pearl look, glitters and has a very pleasant texture. She found application in jewelry and cosmetic. Mica is most often used for manicure, but this is not the same natural material, but an artificial one, but completely repeating the properties of a natural fellow.
Kinds
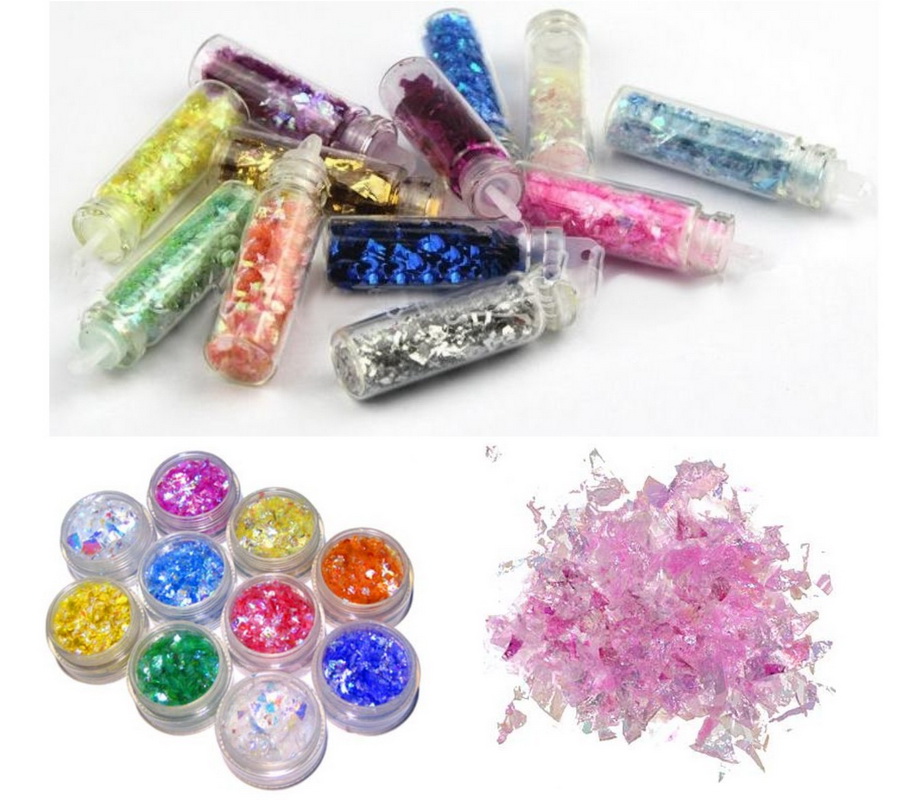
Most often, artificial mica is produced in liquid or dry form - the first option is more popular, the liquid texture is easier to use, it is well distributed and most often found. Liquid mica is almost non-relief fine sparkling powder in a varnish form, so the manicure with it comes out smooth and perfectly even. It can be used on both short and long nails, as well as at home - just work with liquid mica. Dry mica also has the appearance of very small shiny dense plates that look like foil or shavings. It is easy to confuse with a holographic rub. One-color friable mica is found, with combined colors or plates of different sizes and shapes - the choice is truly huge, and it is sold in every major cosmetic store. This type is most often used when building or the so-called design "Aquarium».
Also separately mentioned is mica chameleon. It can be both liquid and dry, and is a shimmer of similar shades in the sun — for example, red and orange or pink and purple. They are refracted under the sun and create the effect of a color change.
Features
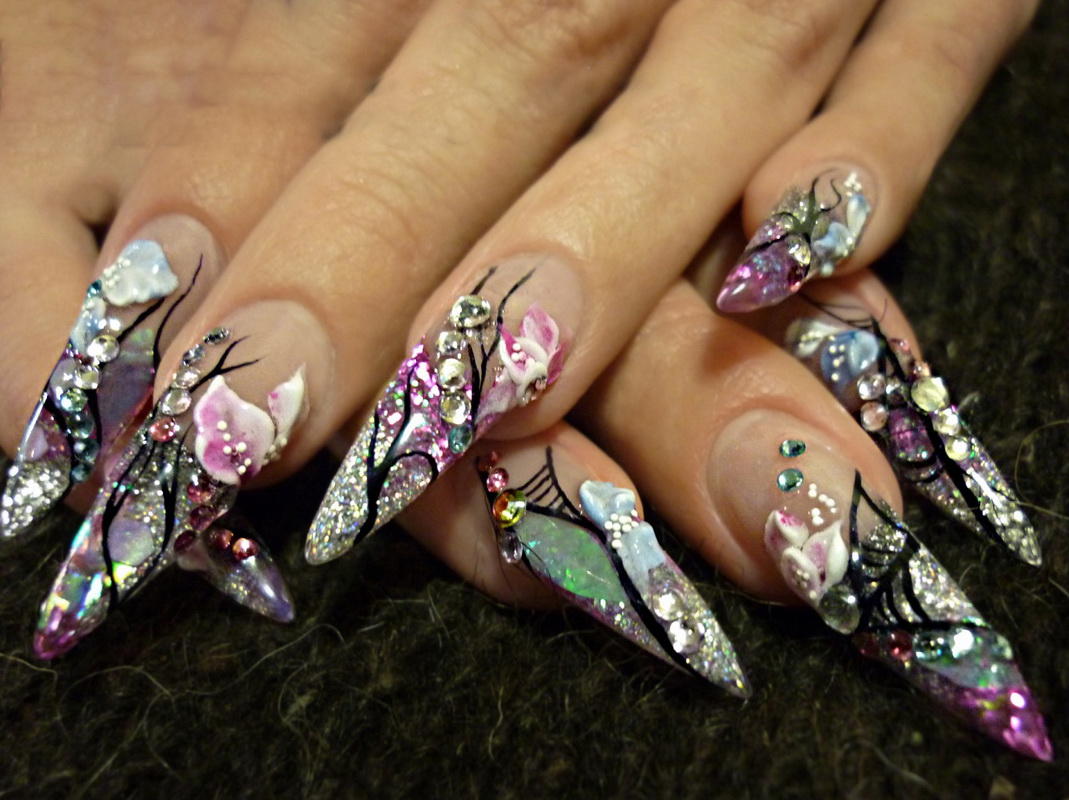
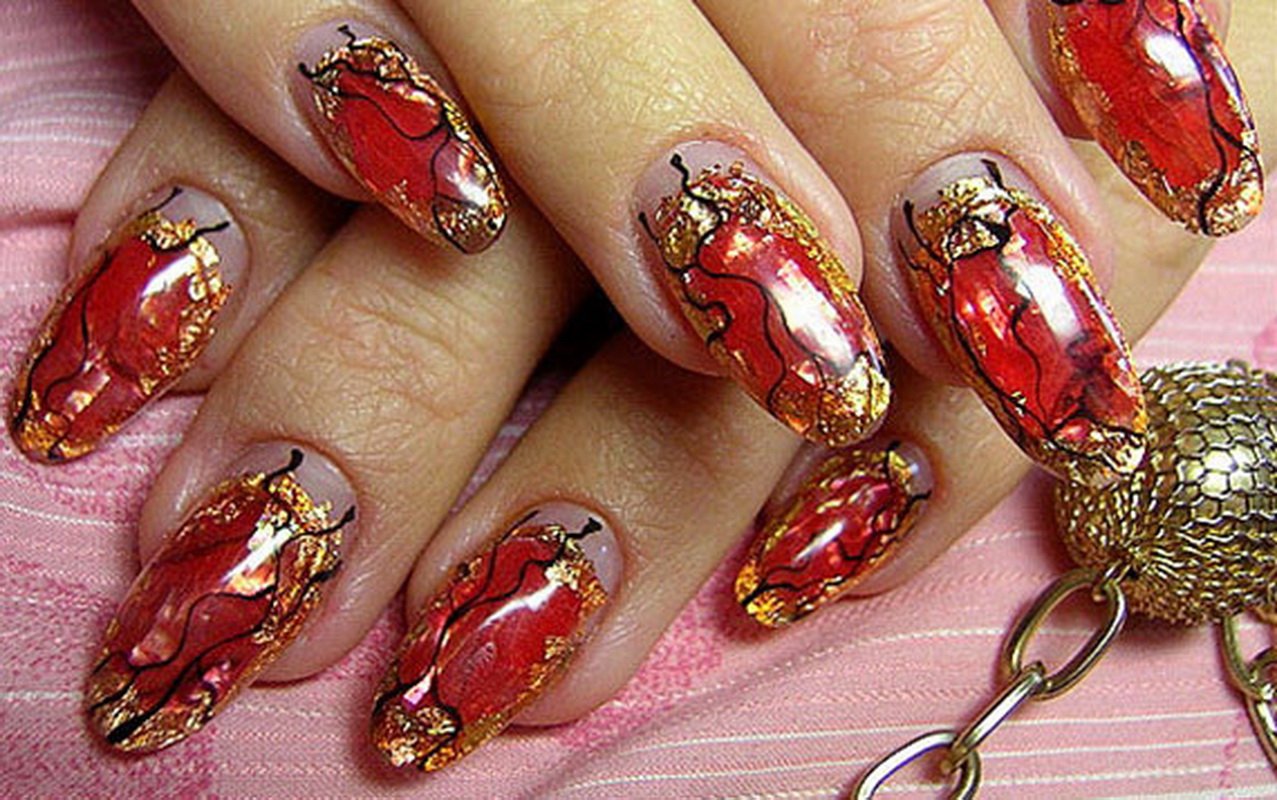
It is thanks to mica, you can create a 3D effect on the nails. It can create a truly embossed pattern with a flat, smooth finish. Different patterns under the transparent top look very interesting, especially in combination with rhinestones, beads and patterns. In general, manicure options with this miracle of the cosmetic industry are amazing. It will be equally interesting to look like a jacket with iridescent tips, patterns and drawings of mica, combinations of several different colors on the nails.
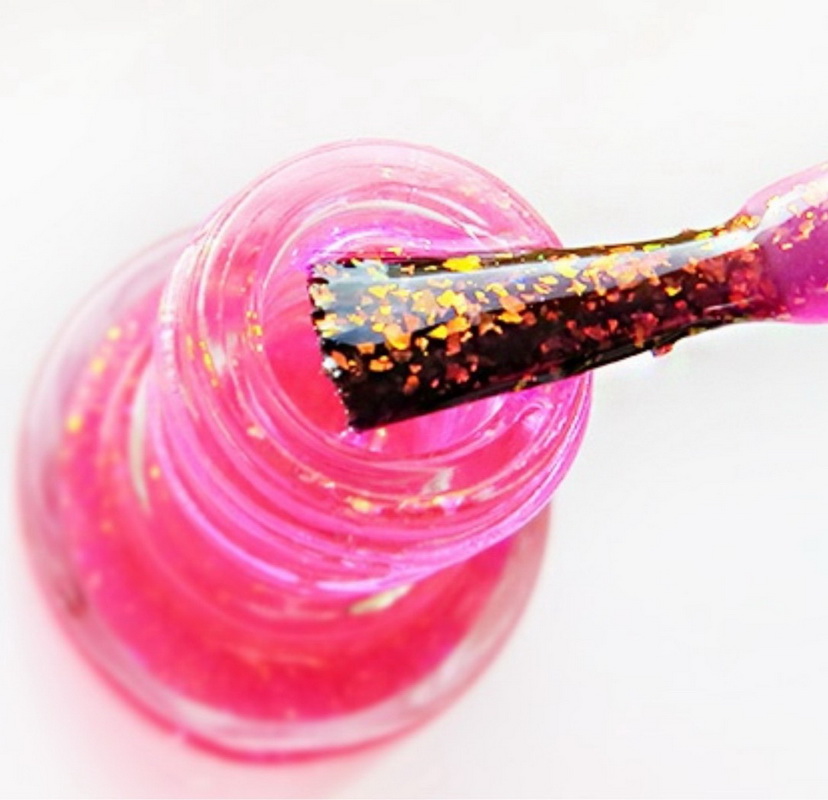
You can also find varnishes with mica - its particles are already interfered with the varnish, so it remains only to cover their nails.
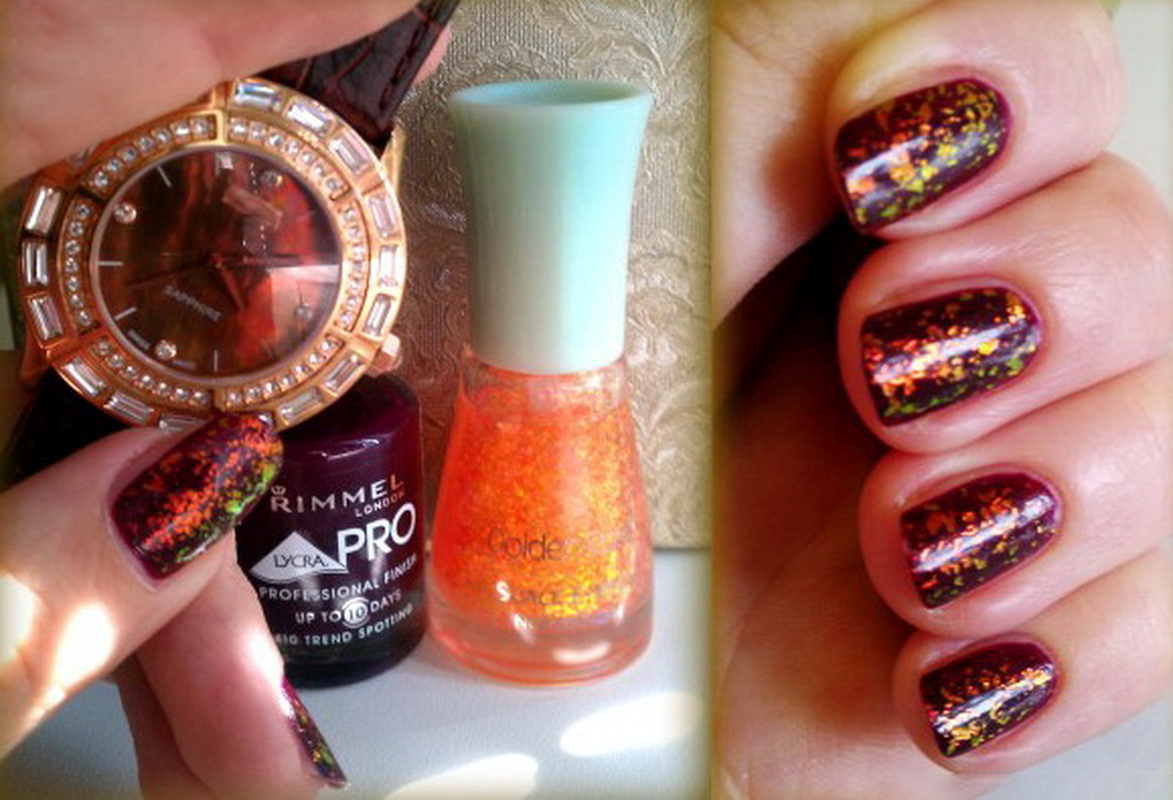
With dry mica, you can create a real holography on the nails - particles of different sizes are differently refracted in the light and sparkle differently. Liquid mica from a distance is more like a familiar glitter. And still dry mica can, if necessary, be ground by nail scissors by yourself. And the price of mica is really amazing - it costs quite a lot of money, and if you use not ordinary gel varnish, but ordinary one, then you can also save on materials.
How to use?
Work dry and liquid mica, of course, quite different from each other. However, there is one constant - nails should be prepared step by step in any case. File them, remove or tidy up the cuticle, use a peeling or salt bath, and at the end thoroughly moisten them, after degreasing. Next, apply one coat of gel polish and dry thoroughly. After - the second layer, but do not let it dry completely and do not remove the sticky layer, because it should be fixed on the mica. With an orange stick or toothpick, start transferring mica plates onto your nail.Act gently, quickly, but not hastily - the particles should not touch the side rollers and cuticle.
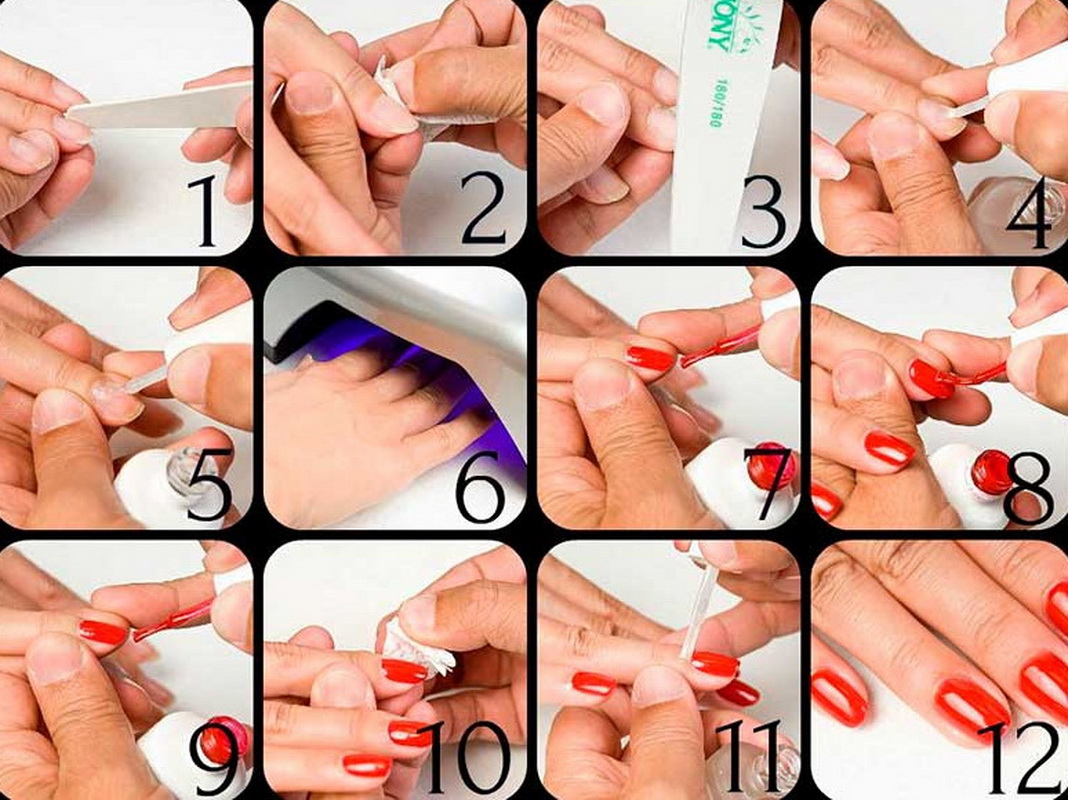
Now the turn of the food film. Carefully pack your finger in it, at the same time gently pressing the mica to the nail with the clapping movements of the fingertips. Send your finger under the gel lamp for twenty to thirty seconds. At the final stage, apply a layer of fixative. Make sure that the mica lies tightly under it, does not fall off - the nail should be perfectly smooth, without roughness. Pollen can form - shake it off, apply another fixative and now you can remove the sticky layer.
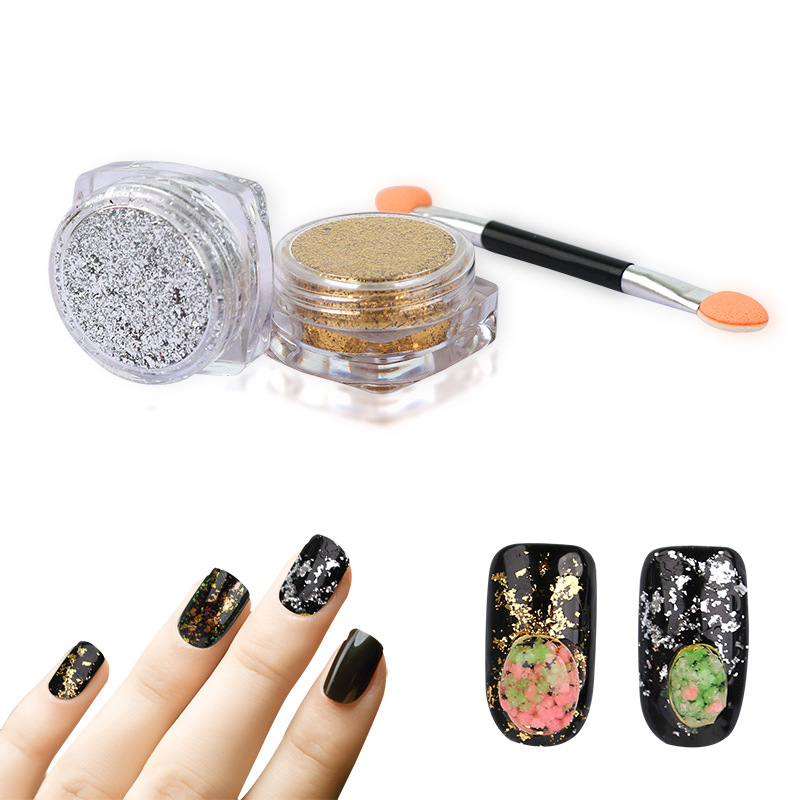
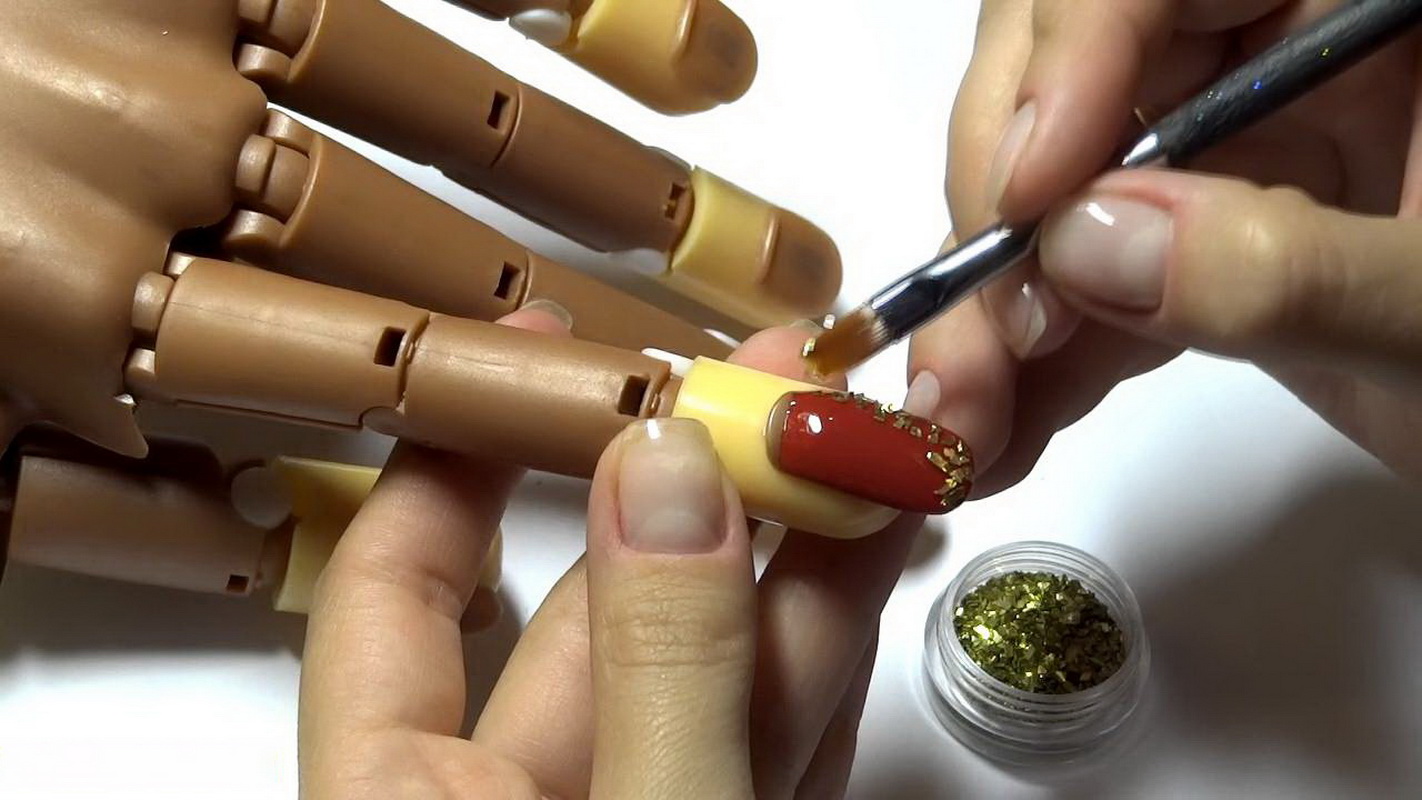
It is also precisely crumbly mica used in the building.
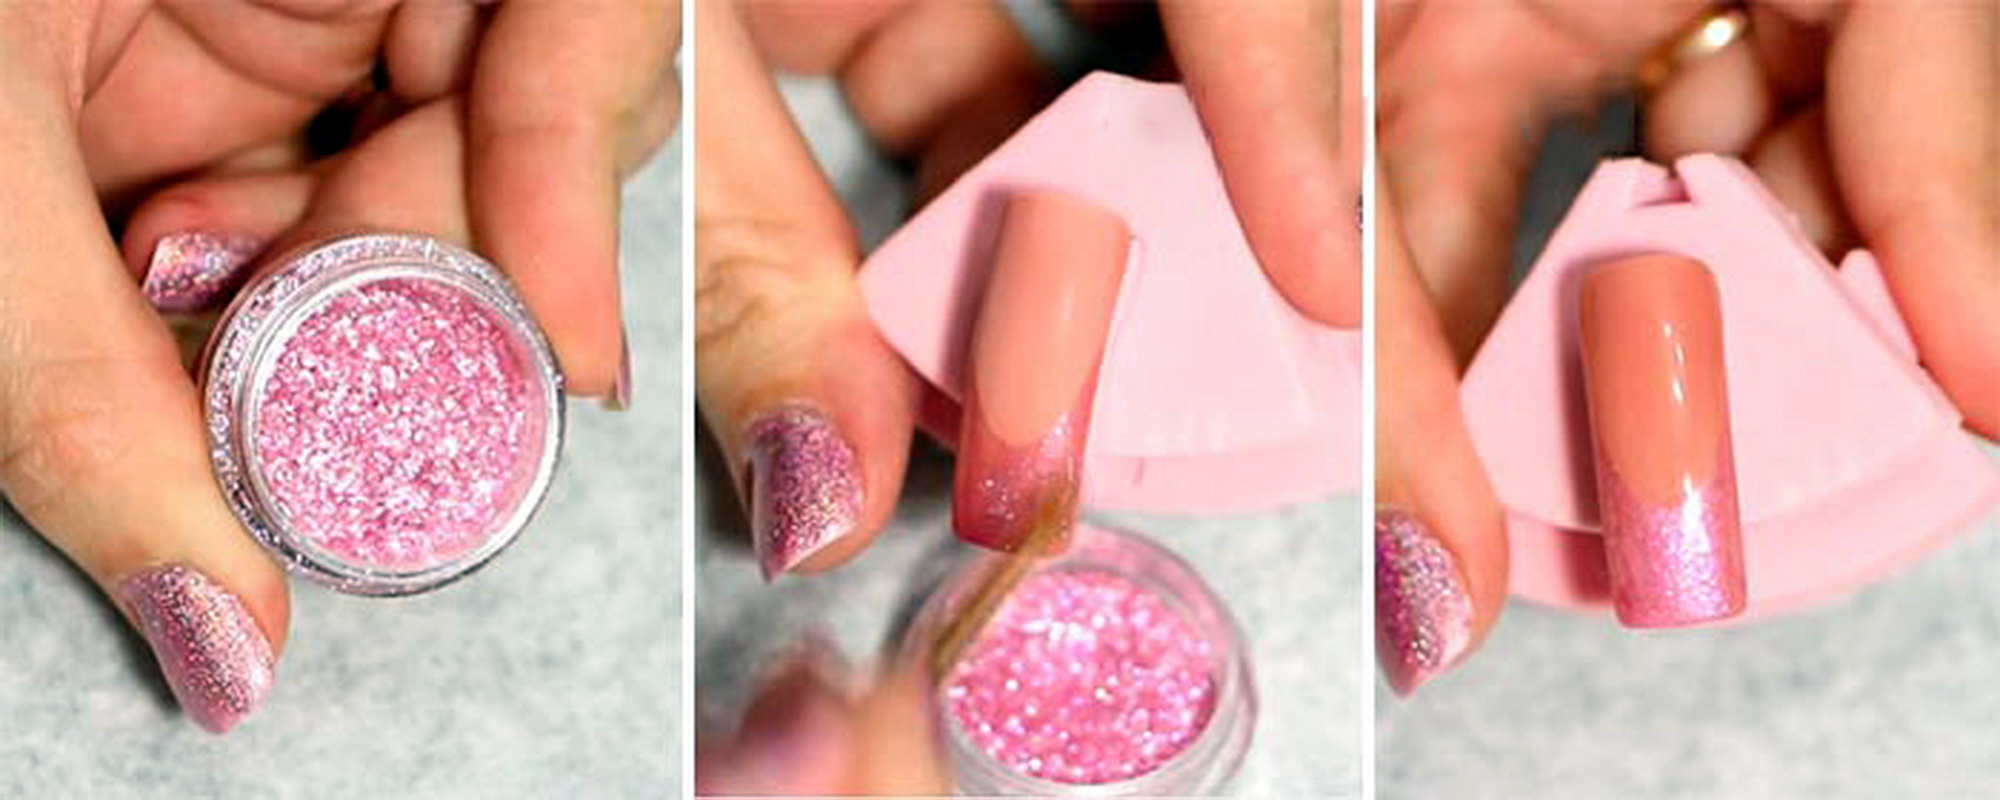
Getting started is no different from the usual extension - you need to form a nail in special forms with acrylic or gel, located under the free edge of a natural nail. After applying the colored varnish and gently orange stick or toothpick, you can dotsom distribute the pieces of mica on the not completely dried coating. Next, dry the nails in the lamp and cover the top - if necessary, twice. Unlike dry mica, the liquid is distributed by a flat brush or the one that comes with it in the package. You should also just dry the first layer of varnish, without removing the sticky layer, gently distribute the powder on it - it easily falls - and dry in the lamp for about twenty seconds. In the case of liquid mica, the application of the second layer of the top is optional - the nail plate is aligned and so.
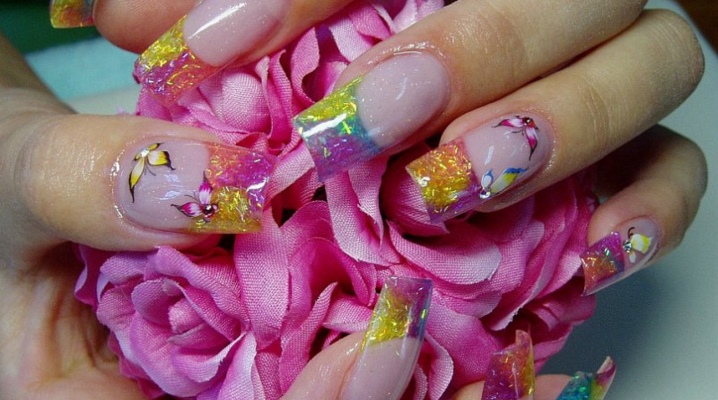
Aquarium design
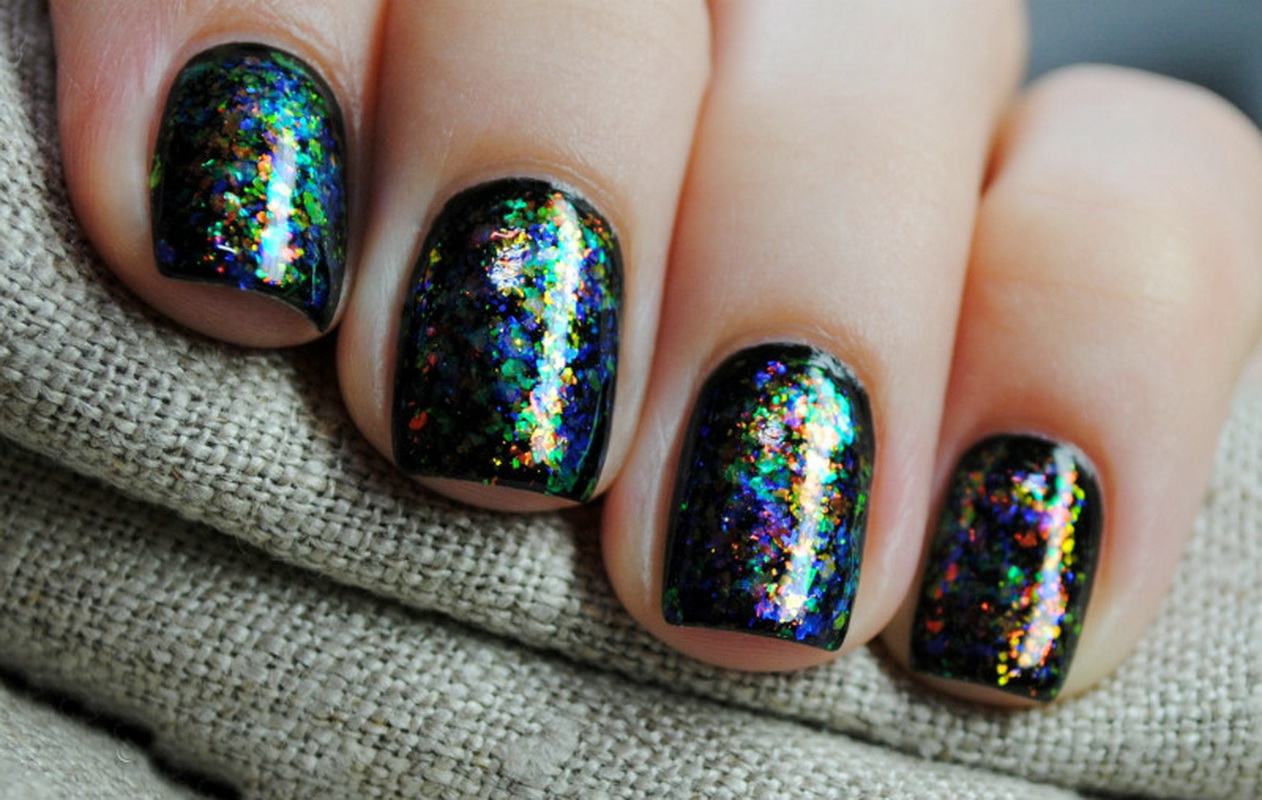
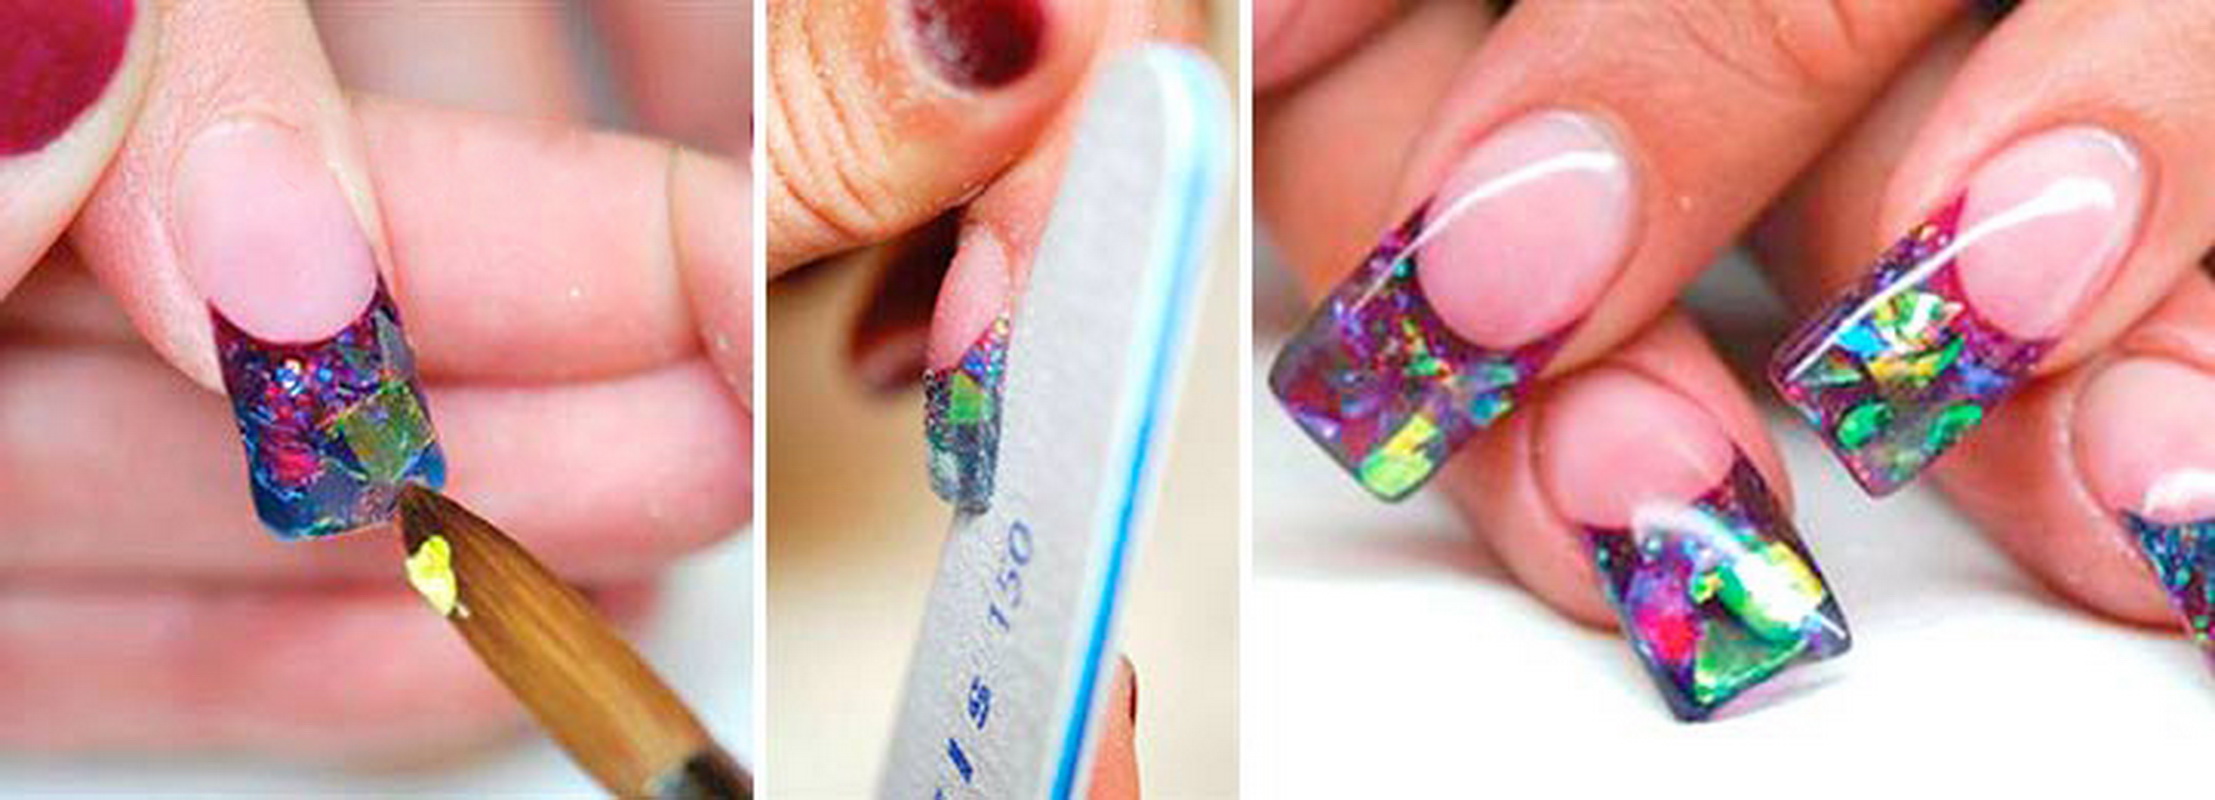
Special mention is the design called "Aquarium“Because mica became popular precisely because of it.” This technique allows you to apply three-dimensional patterns or compositions of various materials (mica, glitter, sequins, powder, dried flowers) on your nails and hide them behind the “glass” top - a tool that creates three-dimensional effect. When considering it seems that the images are hidden behind glass, placed in an aquarium with water. "Aquarium"Also differs not only beauty, but also durability and durability - the" glass "top lasts about eight weeks and reliably seals the design, which allows you to safely engage in any active business. It is suitable for any length and shape of the nail, with it you can do and building - on long nails more simple and pleasant to draw.
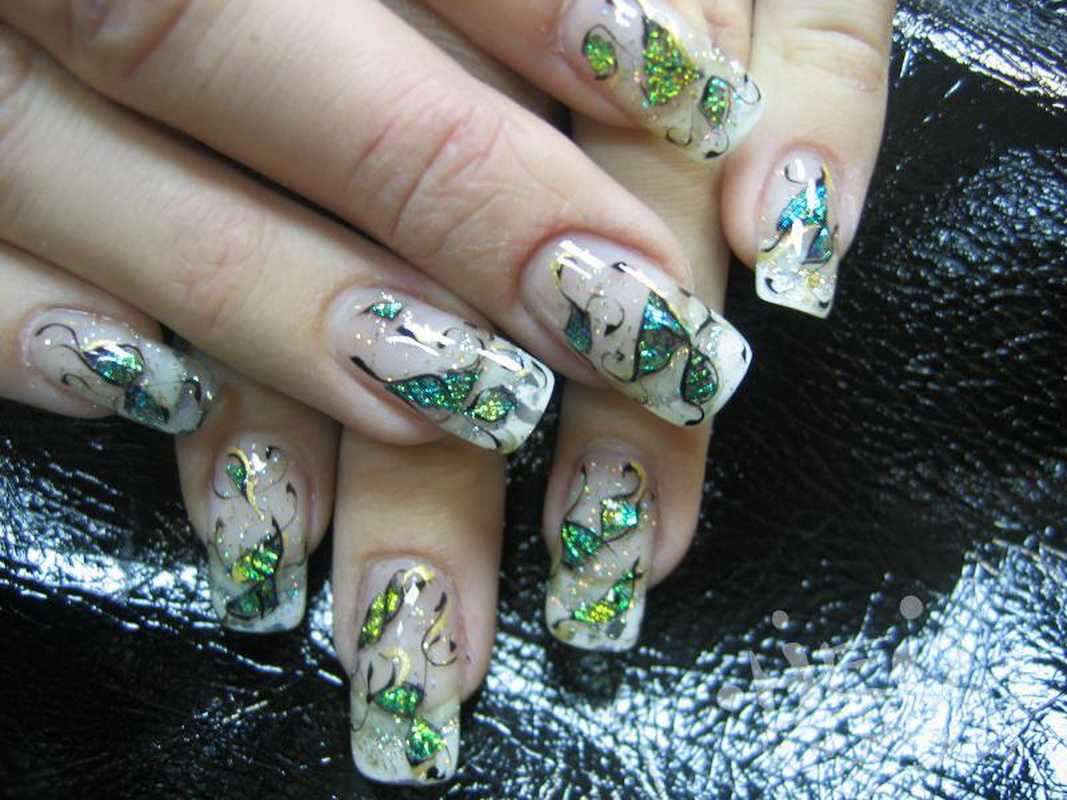
Mica is ideal specifically for this technique, because it is an iridescent plate or sand, the luster of which only increases under the glass coating. It also completely smoothes out any irregularities that may appear in the case of a dry type of product and, as it were, fill in all the flaws and micro cracks of the lacquer itself. As a rule, such a manicure looks very difficult - it seems as if the drawing was made with special paints or in several layers - but the whole thing is in the glass top.
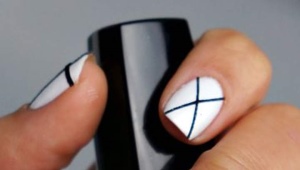
Nail geometry
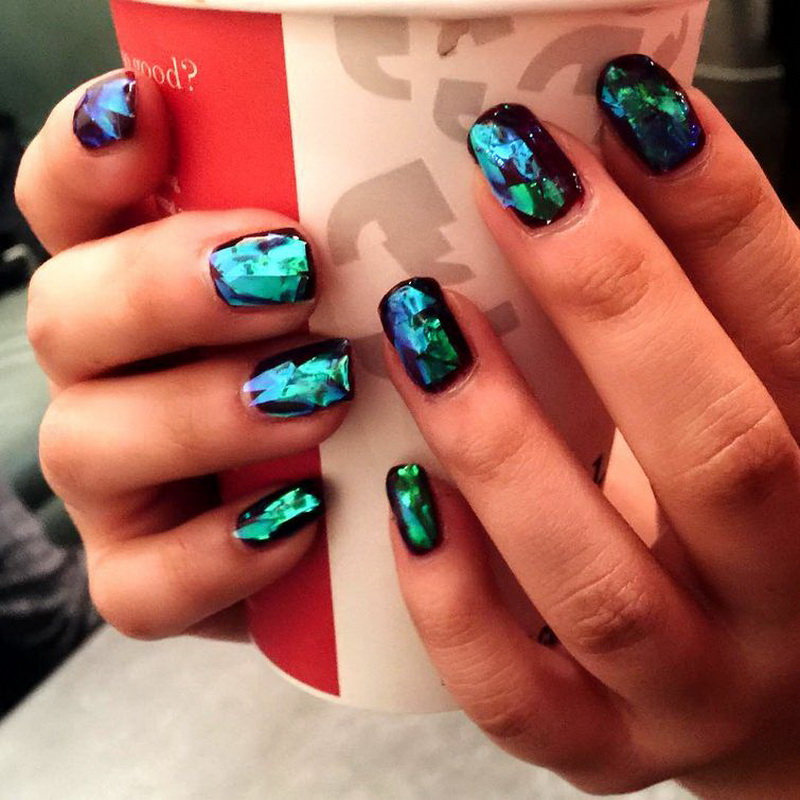
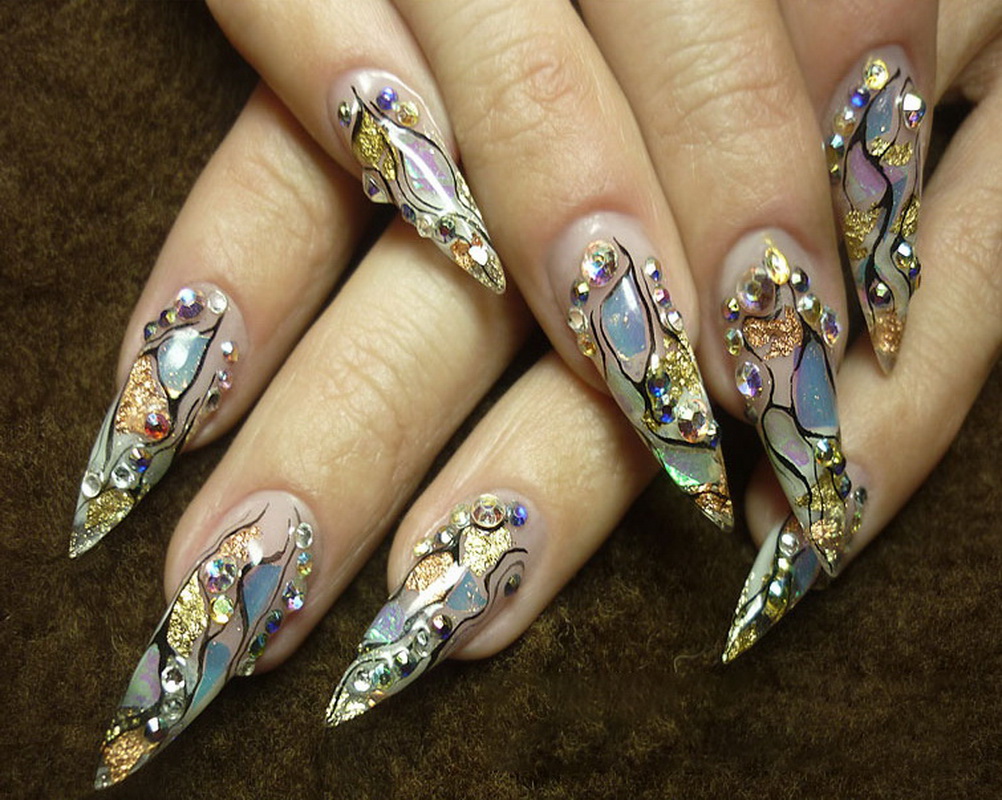
Large, dry mica is ideal for creating geometric patterns. It can be cut into different pieces and create the effects of cracked glass or fragments. The main principle of a geometric manicure is to use different shapes - triangles, squares or rectangles, which are easy to cut from dry mica. In this case, you will need a lacquer base - it will look great black or any other dark shade, a set of gel polish and light large dry mica. You have to come up with a pattern in advance, cut the mica into the necessary pieces and later gently glue it on a still sticky layer of varnish, cover it with food film and wait.
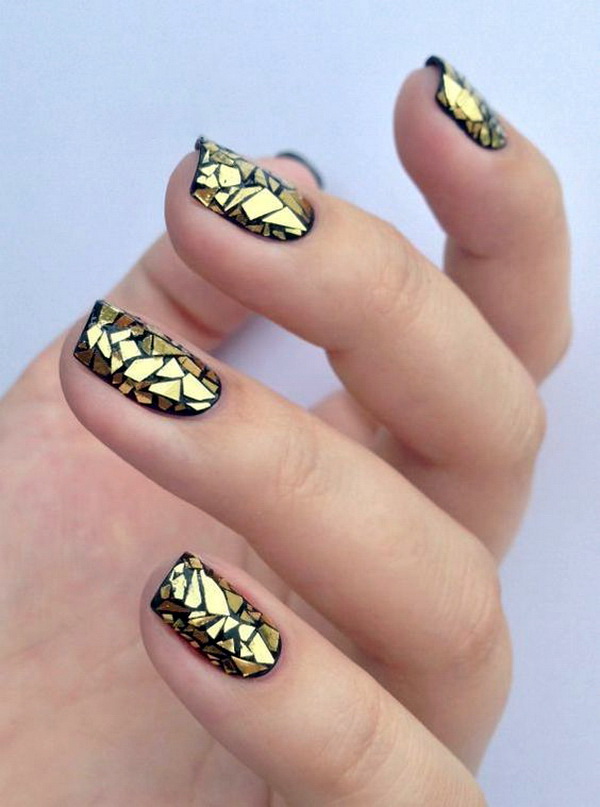
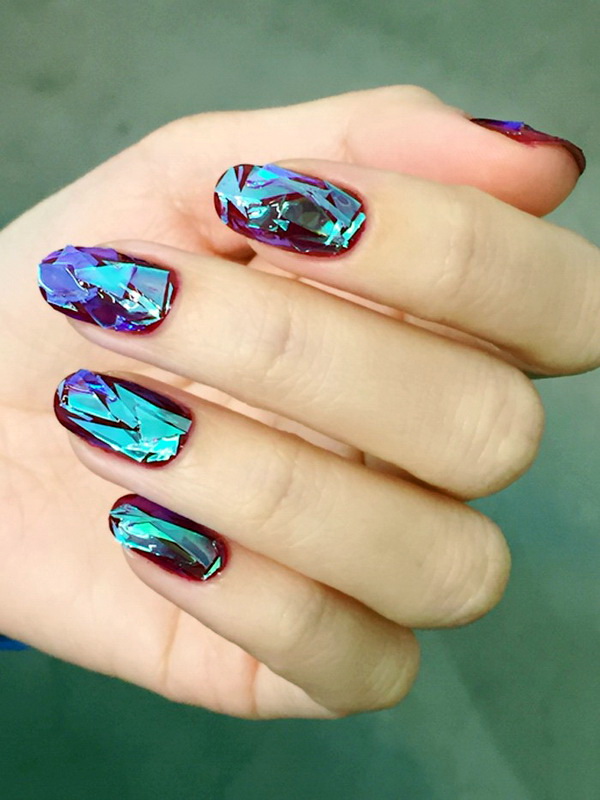
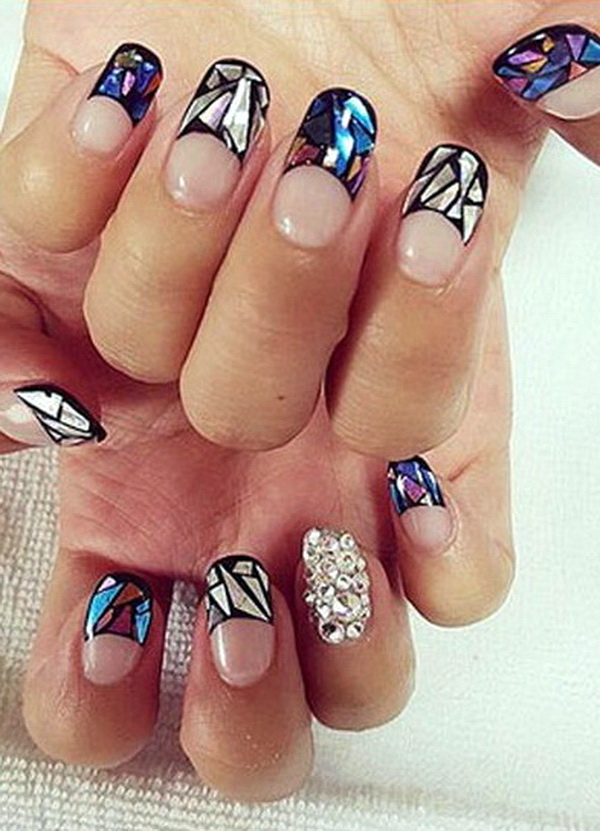
The lacquer base can be matte, which will create even greater contrast, and you can also use mica not on all fingers.
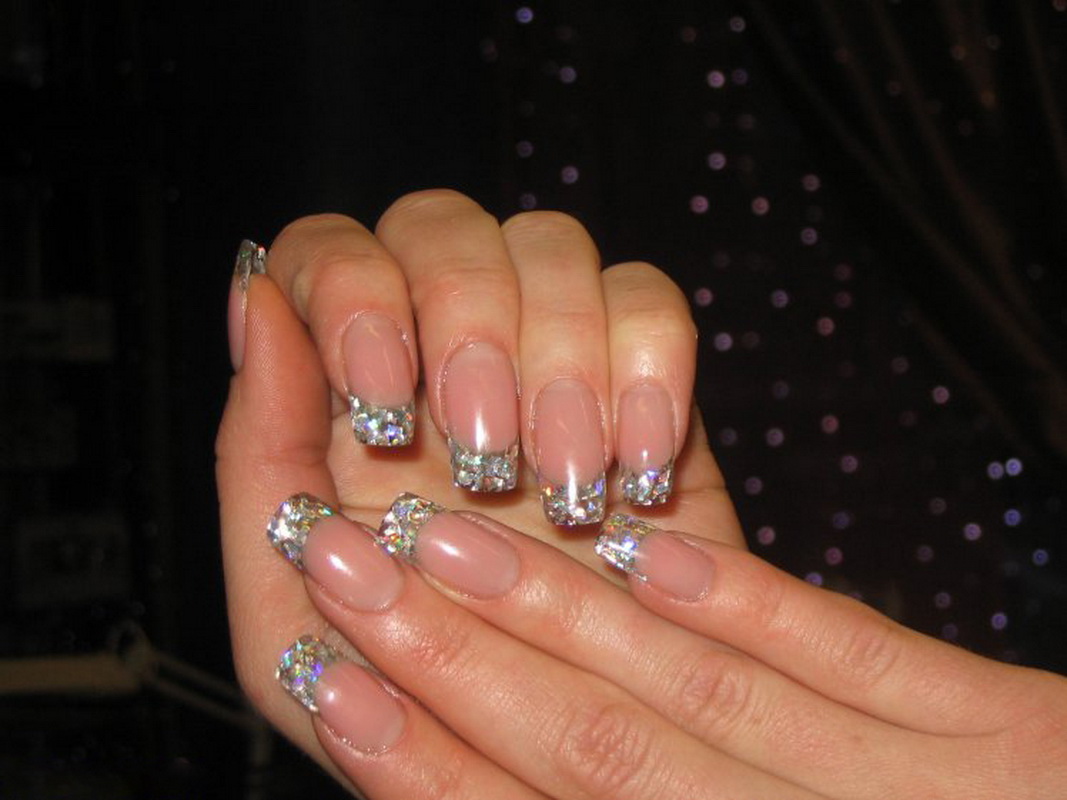
French
French manicure - unshakable classic. This is the manicure, when the tip of the nail is covered with a darker varnish than its base. But no one bothers to slightly change this design - for example, paint a plate with roses or other colors, and make the tip sparkling.To do this, you will need a familiar set - gel polish, gel lamp, stencils for French manicure and directly mica - can be both liquid and dry. In the case of nail extensions are also forms and materials. The principle of action is not very different from covering the entire nail with mica - it is only a matter of stencils. First of all, prepare the nails as usual - file, trim, deal with the cuticle and degrease.
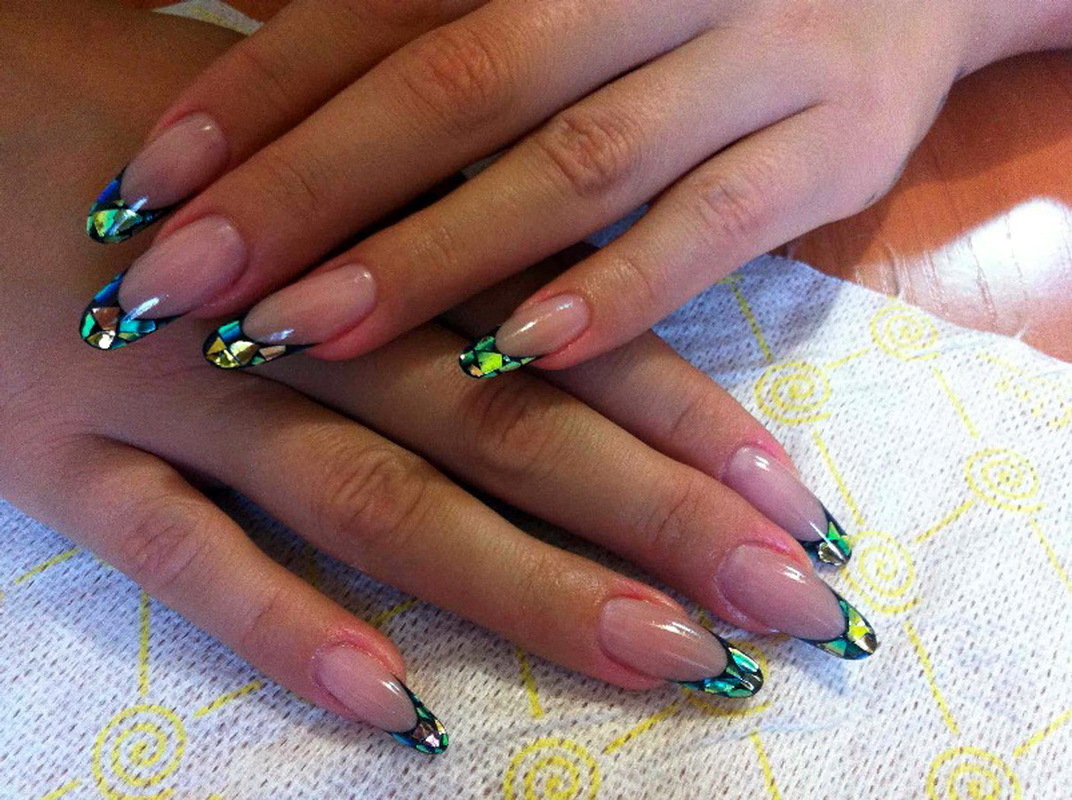
Apply a layer of gel polish on the entire base of the nail - the varnish does not have to be strictly white or transparent, as in the classic version, experiment with contrasting colors. Let it dry, do not remove the sticky layer. Now use a stencil - for a french coat, it is a strip of rounded shape that needs to be attached to the nail, forming a tip. And it is on the tip that you now need to apply mica - use a brush in the case of a liquid and orange stick or dots for dry. Do not be afraid to go to the stencil - it is still removed, but the plate below it should not be touched. Stencil gently peel off, pack the nail into the food film (with dry mica) and send to dry under the lamp. Do this manipulation with each nail, and voila - an exquisite sparkling jacket is ready!
In the next video - a master class on the manicure with mica.