Sponge manicure
Sometimes monotonous nail cover bothers, really want to make a variety. You can try a variety of interesting drawings and popular techniques for performing manicure. This, for example, a manicure with a sponge, which has become very fashionable recently.
What is it like?
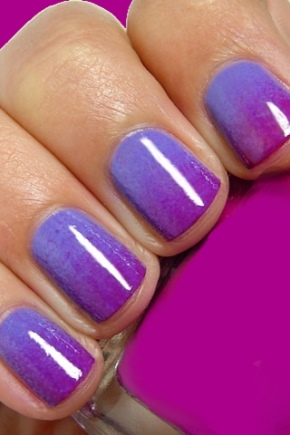
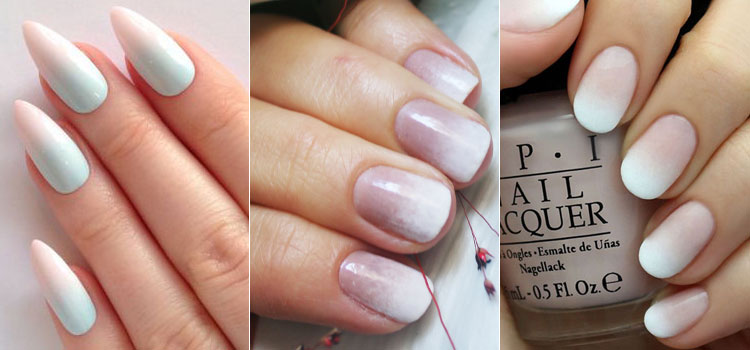
The sponge is used to create a gradient effect, this is called an ombre. With this technique, you can get a beautiful smooth transition from one shade to another.
Most often, the transition is made from the base of the nail to its tip. You can also change the shades horizontally and diagonally, which will give the manicure even more originality.
Sometimes only one color in two colors is used for an ombre: the first is lighter, the second is darker. A more common option is when two contrasting shades are combined. You can also find more complex ways when using 3-5 different colors - even 7, to draw a rainbow on your nails.
Most often, the transition goes from a lighter shade to a darker one, but this is not at all necessary; it can be done and vice versa.
What colors to choose?
Always be guided by your personal preferences when choosing varnishes. An important rule - a manicure should look organic in a particular image and at a specific event.
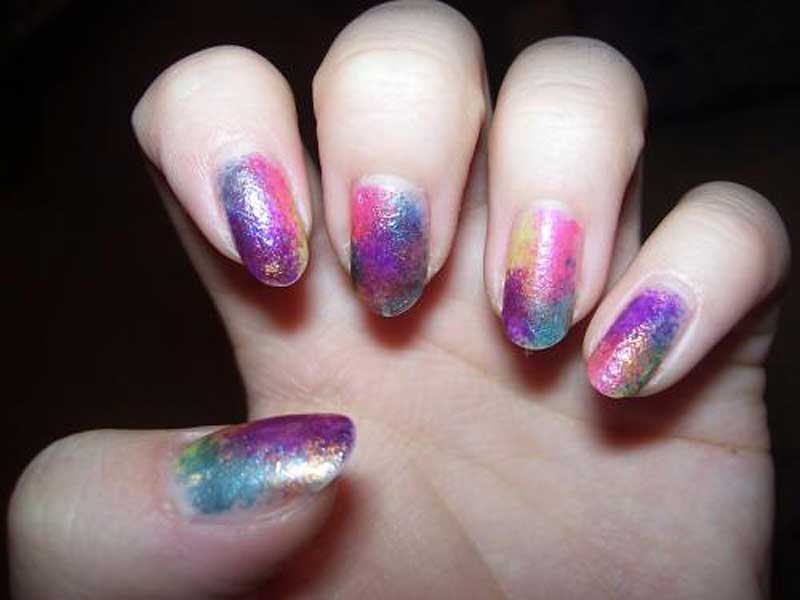
Bright acid colors will not be appropriate at work in the office, but for a hot summer party - this is a great option. In this case, you can safely combine contrasting shades: yellow and blue, red and green, pink and orange, as well as many others. Feel free to experiment, it all depends on your imagination. The main thing - to selected colors of varnishes combined with each other.

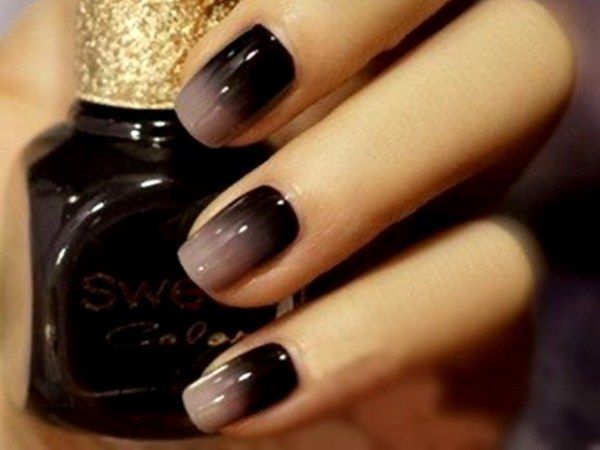
For a sophisticated evening look, gold and silver are the best fit. You can highlight the tip of the nail color of the noble metal.
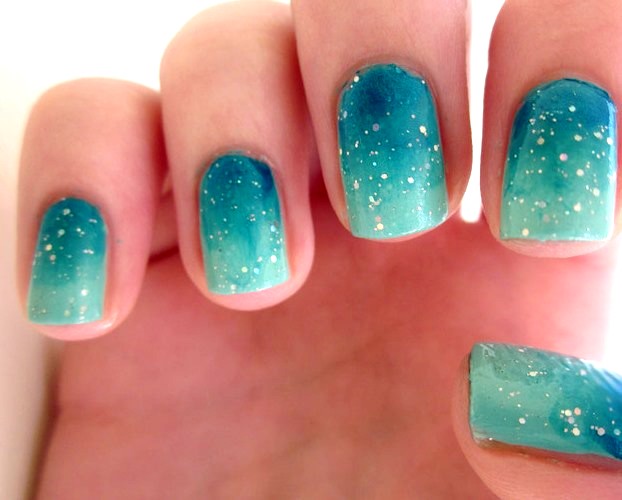
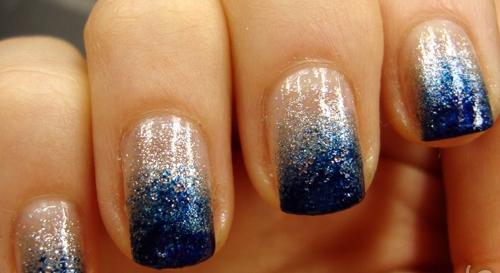
In winter, blue gamma will look good on nails: from light blue to deep turquoise and royal blue.
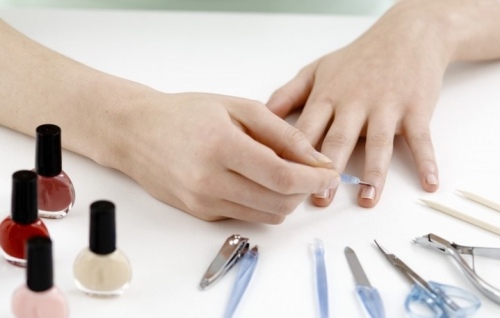
Instruments
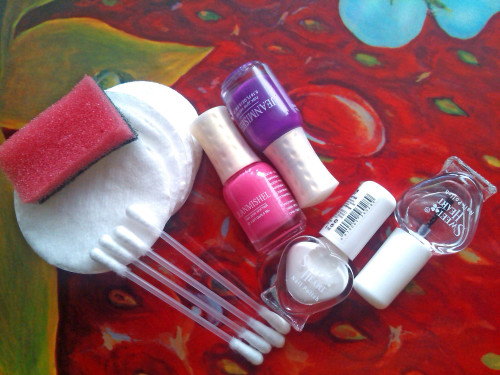
If you are going to start a manicure with a sponge, make sure that you have all the necessary tools for this. You will need the following:
- a means by which you can remove the varnish;
- standard manicure accessories (scissors, nail files, tweezers, polishing and much more);
- wooden stick;
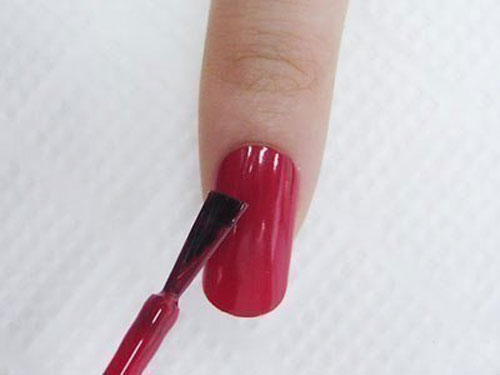
- base coat and nail polish;
- two or more colored varnishes;
- hand cream, which is characterized by high fat, or petrolatum;
- a small piece of foil, cardboard, plastic or other material to choose from (varnish should not be absorbed into it) - for mixing different colors;
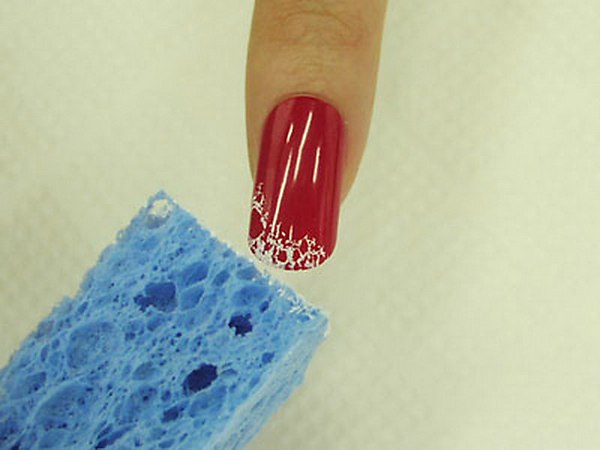
- A piece of sponge - the main tool with which the varnish will be carried.
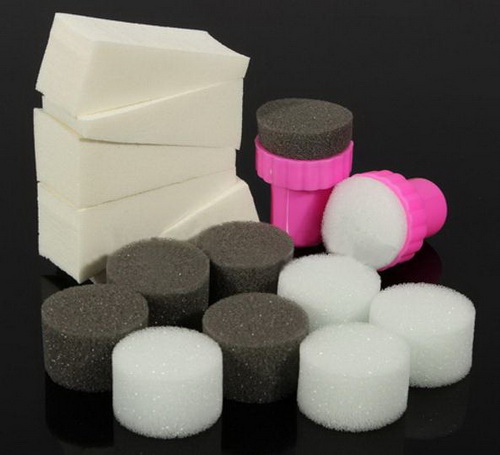
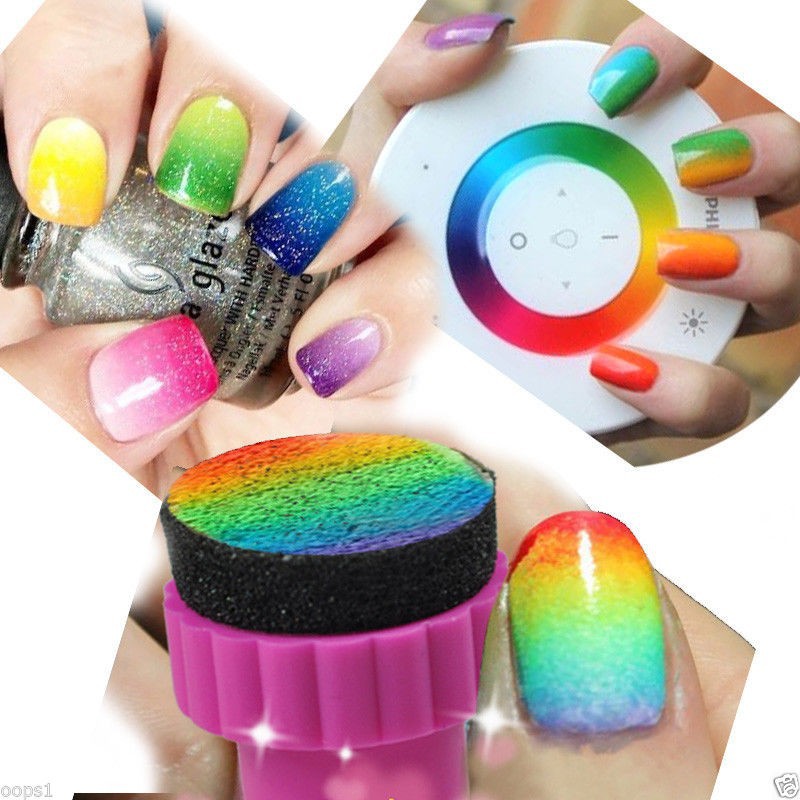
If there is no special sponge, it can be replaced with an ordinary sponge - for example, for washing dishes. The only requirement is that it should be clean and dry.
Performance technique
It may seem that to achieve the ombre on the nails is very difficult. But do not rush to run to the nearest salon for such a manicure. You can do it yourself. Of course, you have to spend a little more time and effort than on a regular manicure, but the result is worth it.
So, it is necessary to understand step by step what is needed in order to perform a manicure with a sponge at home.
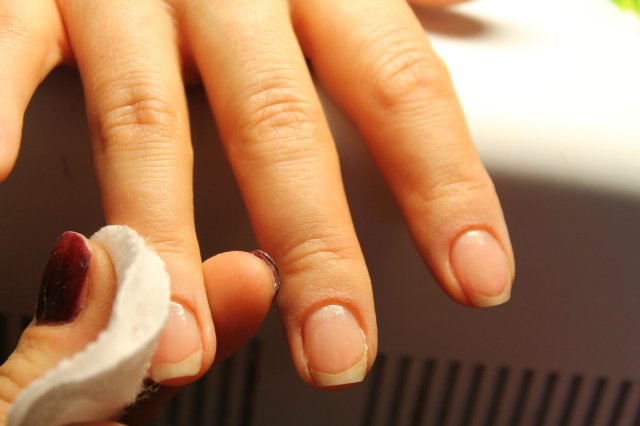
First you need to process the nails:
- get rid of old varnish;
- keep your hands in the bath;
- get rid of the cuticle;
- trim the length of the nails, give them a neat uniform shape;
- be sure to degrease the surface of the nails with alcohol;
- apply a base coat.
Then abundantly lubricate the skin around the nails with a fatty agent, but in no case should you fall on the nail itself. This is necessary in order not to stain your fingers with varnish when applied with a sponge.
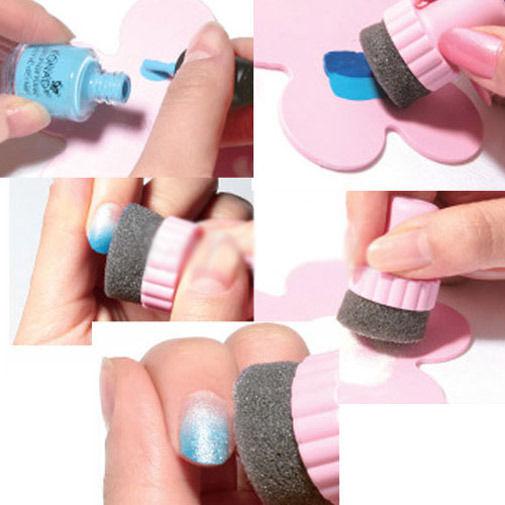
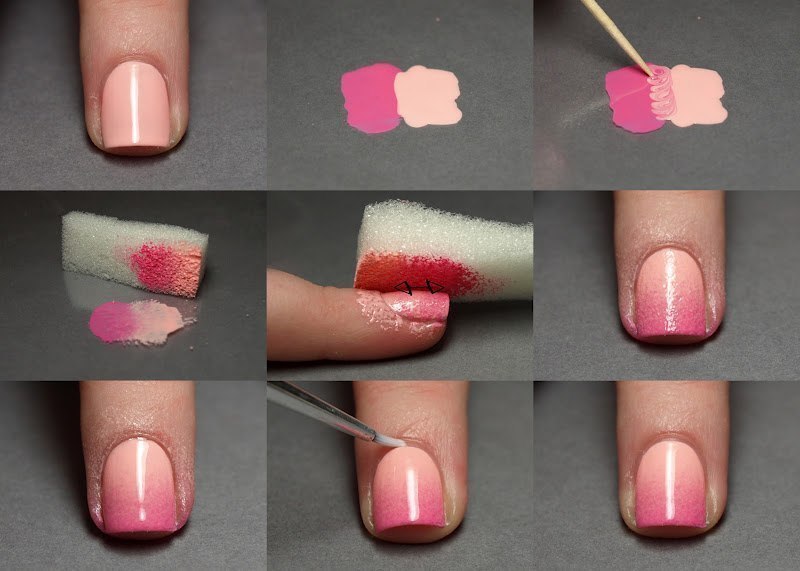
When the preparatory stage is completed, you can move on to the most interesting - creating a gradient:
- Apply varnishes on foil or another surface. Between strips of varnish there should be no free space.
- Erase the borders of shades with a manicure wand or a toothpick.
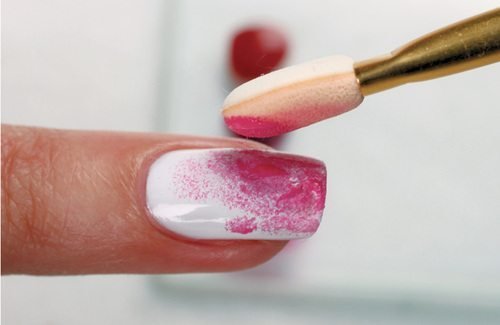
- Blot the varnish with a sponge.
- Press the sponge firmly and evenly to the nail and hold it a little.
- You can repeat the previous procedure a few more times - for a brighter color coating. In this embodiment, the layer of varnish on the foil needs to be updated.
- When the gradient layer has not yet dried, apply a topcoat - for smoothness, durability and color protection.

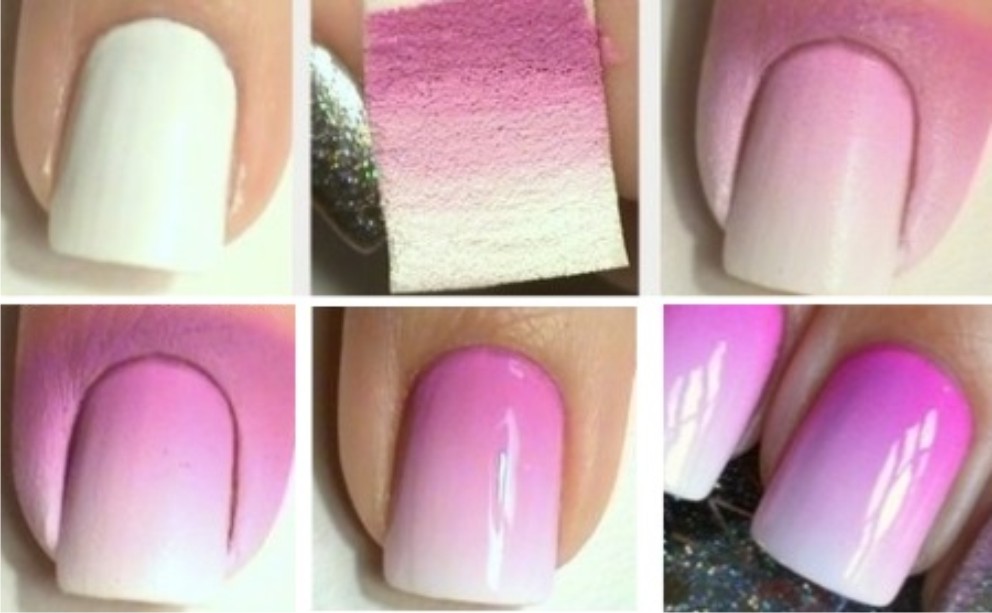
There is another way to create a gradient:
- Cover your nails with colored lacquer.
- When it dries completely, apply another shade with a sponge. The sponge should cover only part of the nail - for example, the bottom.
Best Gradient Manicure Ideas
The options for the ombra at the present time are many. In the gradient manicure, you can combine different colors: the same in saturation, delicate with deep, neutral and bright. Even if some color seems too catchy, in this type of manicure it will look appropriate. After all, it can always be balanced in a different color, and it will play in a new way.

You can create a different play of colors on each nail. Choose a range of several varnishes and combine them in different variations for each nail. The result will be very original.
In this technique, you can perform a classic French manicure. Very nice and bright ombra looks like a rainbow.
You can also combine different textures: glossy, matte, metallic, gel and others.
To the gradient, you can add any pattern (on one nail or all), rhinestones, stickers and more. You can experiment with the finish coating, choosing a tool with glitter or glitter.
The direction of the gradient on the nails can be made different - vertical, transverse or even diagonal. Wide nails will visually “stretch” the longitudinal ombre, and long and narrow will decorate the transverse. If you have a good nail shape, you can choose any option that you like.
Little secrets
There are some features and recommendations for the implementation of a manicure sponge at home:
- Sponge for applying varnishes should be wet.
- Do not neglect the base coat: so the surface of the nails will become even, the manicure will look better overall. In addition, it protects and strengthens the nails.
- Update the varnish on the sponge should be for each nail.
- Light varnishes are easier to apply to create a gradient manicure than dark ones.
- The fixer is recommended to be applied before the final drying of the gradient. The sponge has a porous structure, so when using this product for applying varnishes, the surface of the nails becomes rough. Smooth them will help a layer of colorless varnish.
- If you want to apply several shades of the same color to the nail design, it is not at all necessary to buy them all in the store. You can make them yourself, avoiding significant expenses. To do this, simply dilute the basic color varnish with white. Varying the proportions of white and color, you can get a lot of shades of the same color, to achieve beautiful modulations.
- When using two colors of varnish they can be applied directly to the sponge. If you are going to combine 3-5 options, you can not do without an additional surface in the form of foil, thick cardboard.
- To protect your fingers from nail polish, instead of cream or vaseline, you can glue the skin with ordinary tape, and then peel it off. Some girls do not resort to either scotch or petroleum jelly, but simply at the final stage of manicure, remove excess lacquer with a cotton swab dipped in nail polish.
Do not be afraid to experiment. Be sure to try a gradient manicure, if you still have not decided on it. Consider the above tips, take bold ideas, invent your own. The result will surely please you. You can make your image perfect.
How to make a manicure with a sponge, see the following video.