Ice Cream Manicure
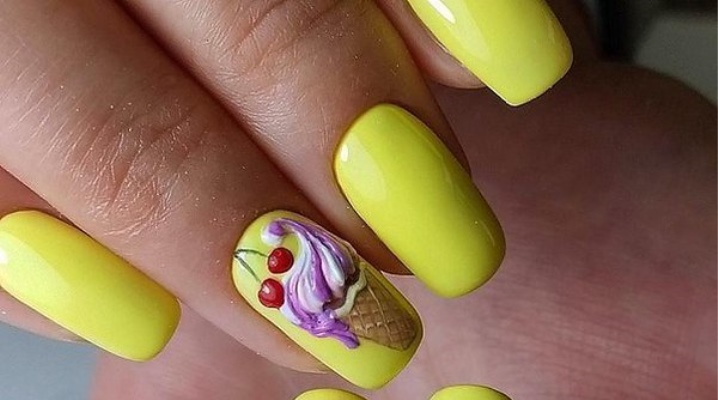
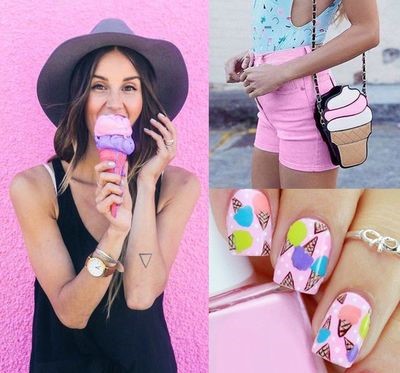
Beautiful manicure is a must-have attribute of any stylish look. Today, it is very popular to draw various confectionery products on your nails, including ice cream with colorful balls.
Design Ideas
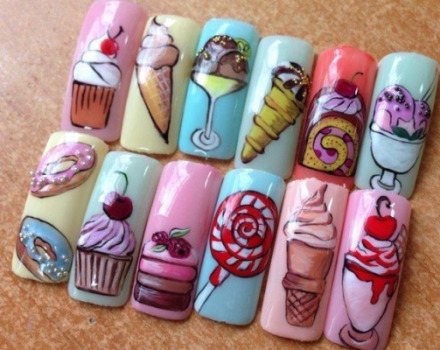
Modern fashion for drawing sweets on the nails is very diverse, you can bring to life any interesting idea.
Almost any summer look can be combined with such a manicure, and the owner of such fashionable marigolds on the beach in combination with a swimsuit will look very stylish and fresh.
Manicure design ideas with sweets can be very diverse, but you can still break them into small groups:
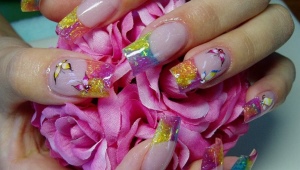
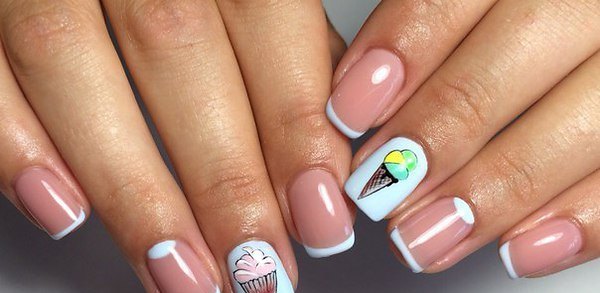
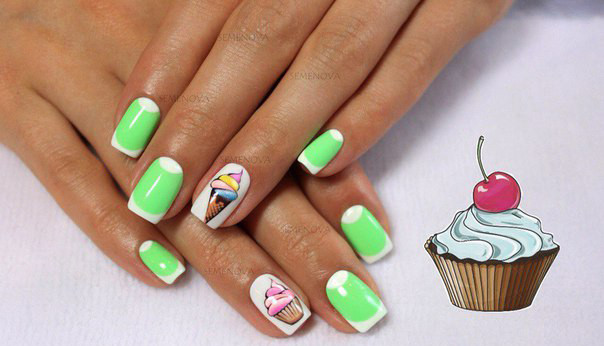
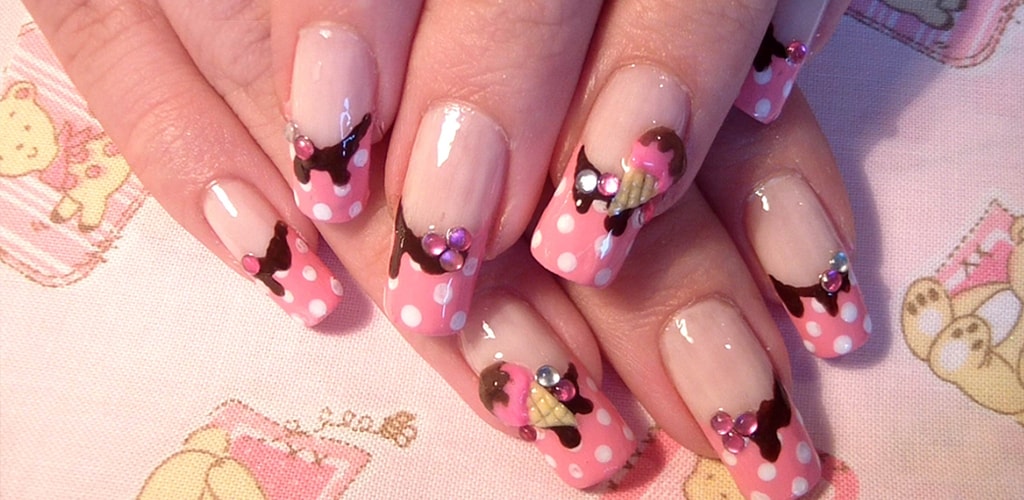
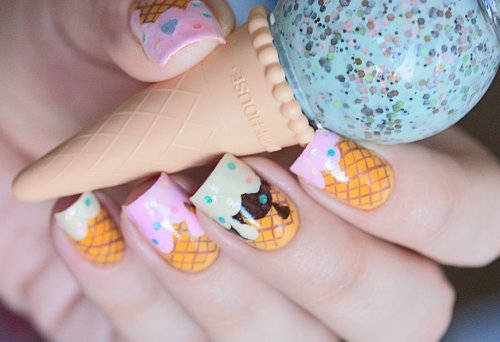
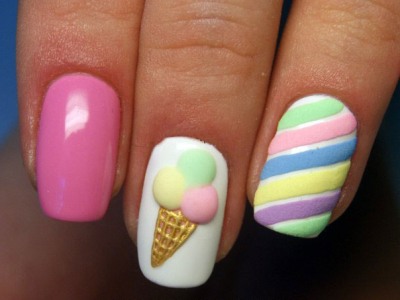
- With ice cream. Bulk or flat, patterned or smooth, ice cream balls can be drawn, and can be applied using a stencil. They can be in a regular cup or in a waffle cone.
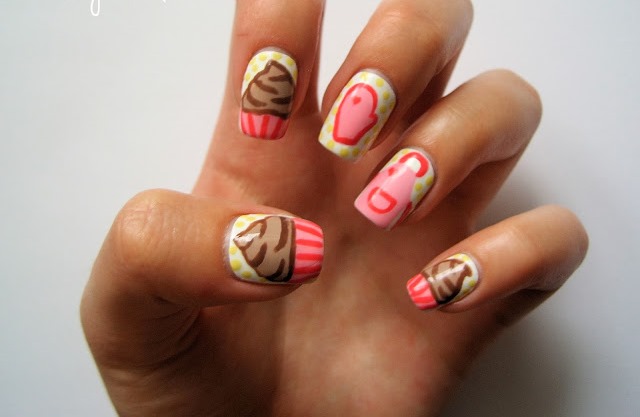
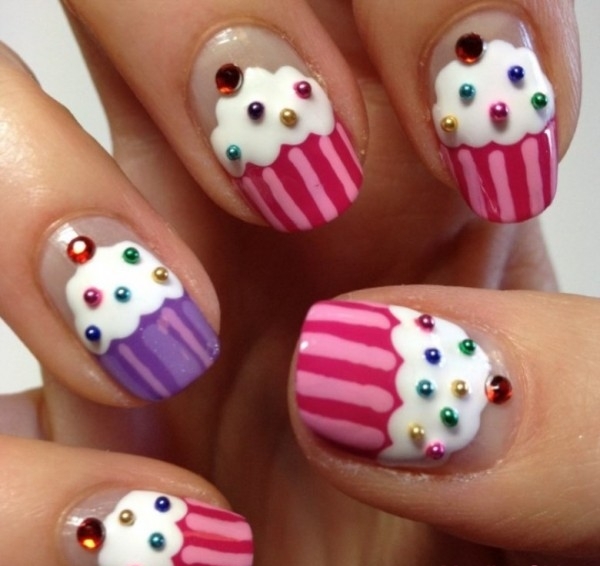
- With cake. Typically, this design uses the brightest colors of lacquer - green, pink, red and blue. An interesting idea: on four out of five fingers cakes are drawn intact, and on one - bitten. Any woman of fashion will not refuse manicure with such decor.
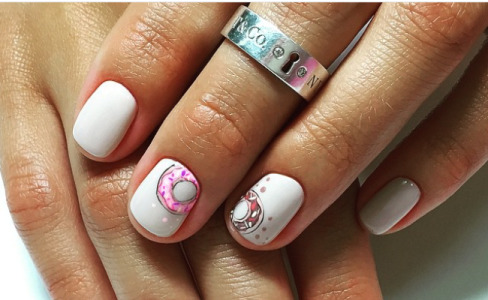
- With donuts. Different in size and diameter, with sprinkling or without, with a glaze of any color - a manicure with donuts remains one of the most favorite designs of recent years.
- With cotton candy. For lovers of glamor or Barbie style, this design is perfect. Bright pink sugary cotton candy on a white background looks very impressive on paper and nails.
New Year
Last summer's hit is an ice cream design. Stylists on their models, demonstrating the clothes "Spring-Summer", prefer to see a bright and cheerful manicure with your favorite dessert.
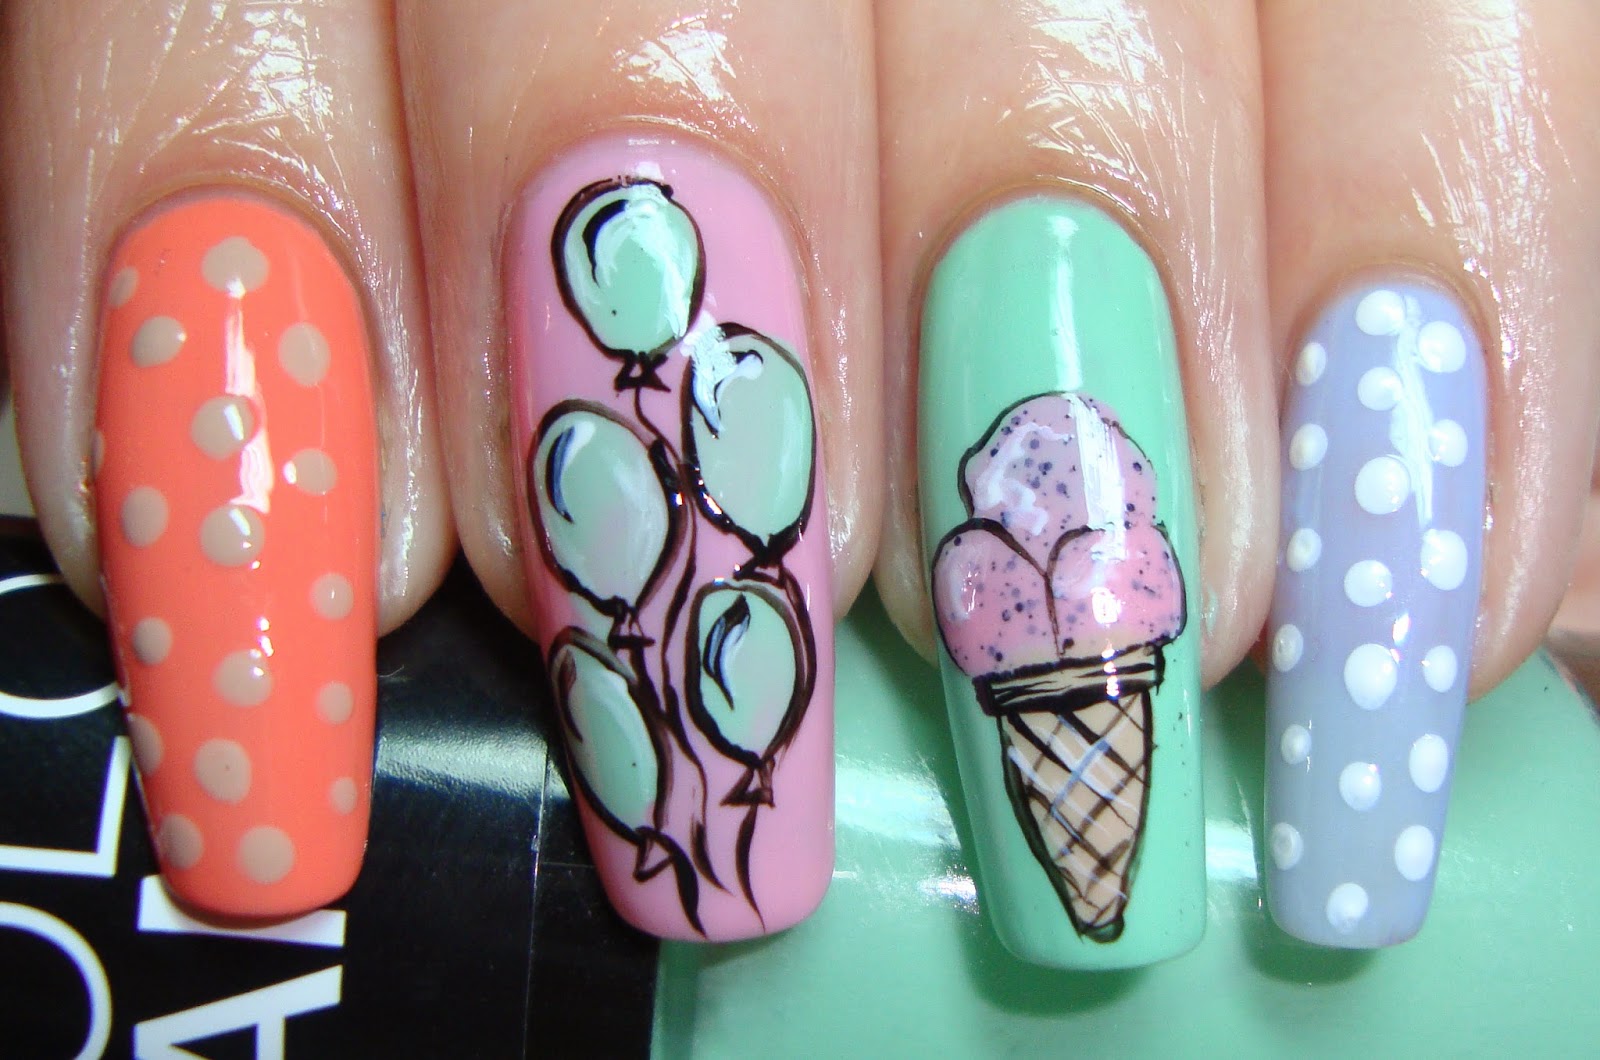
The classic application of a bright and contrasting pattern on one ring finger when dyeing the rest into a single “calm color”, for example, pale yellow or milky pink - this option looks very fun and fashionable.
Poured from pale to bright color, starting from the thumb and ending with the little finger also looks very interesting. On one or two fingers you can draw an ice cream, for example, in a waffle cup, and you can stick to the same colors as the main background, but use brighter shades. For example, to make a background of soft-purple, and ice cream balls to decorate in blue, purple and purple.
Another fresh idea is to use the brightest and most acidic shades. Nightlife lovers will appreciate the bright nail design using glowing varnish. Feeding on daylight, fluorescent varnish will stand out very brightly at night.
You can also use different designs on different nails. Lunar design will look very gentle along with French manicure, and a tiny cone with ice cream in the upper left quarter of the nail will be a spicy twist in the whole image.

Various strokes, polka dots and bends will be interesting to look like the background for the main pattern, the main thing is to choose the right color so that there is no fusion or unnecessary pretentiousness.
For those who like experiments, there is another interesting image: cover four nails with absolutely black lacquer, matte or shiny, and on one paint a horn with a ice cream. With such a fairly strict, but with a simple design, you can go to work or go on a date.

Lovers to draw sweets on the nails should not overload the image with numerous drawings on all fingers. If, for example, you draw all the sweets in a row, then you will simply have a merging mass of bright colors, and as such, the accent in the figure will not be possible.
Decor
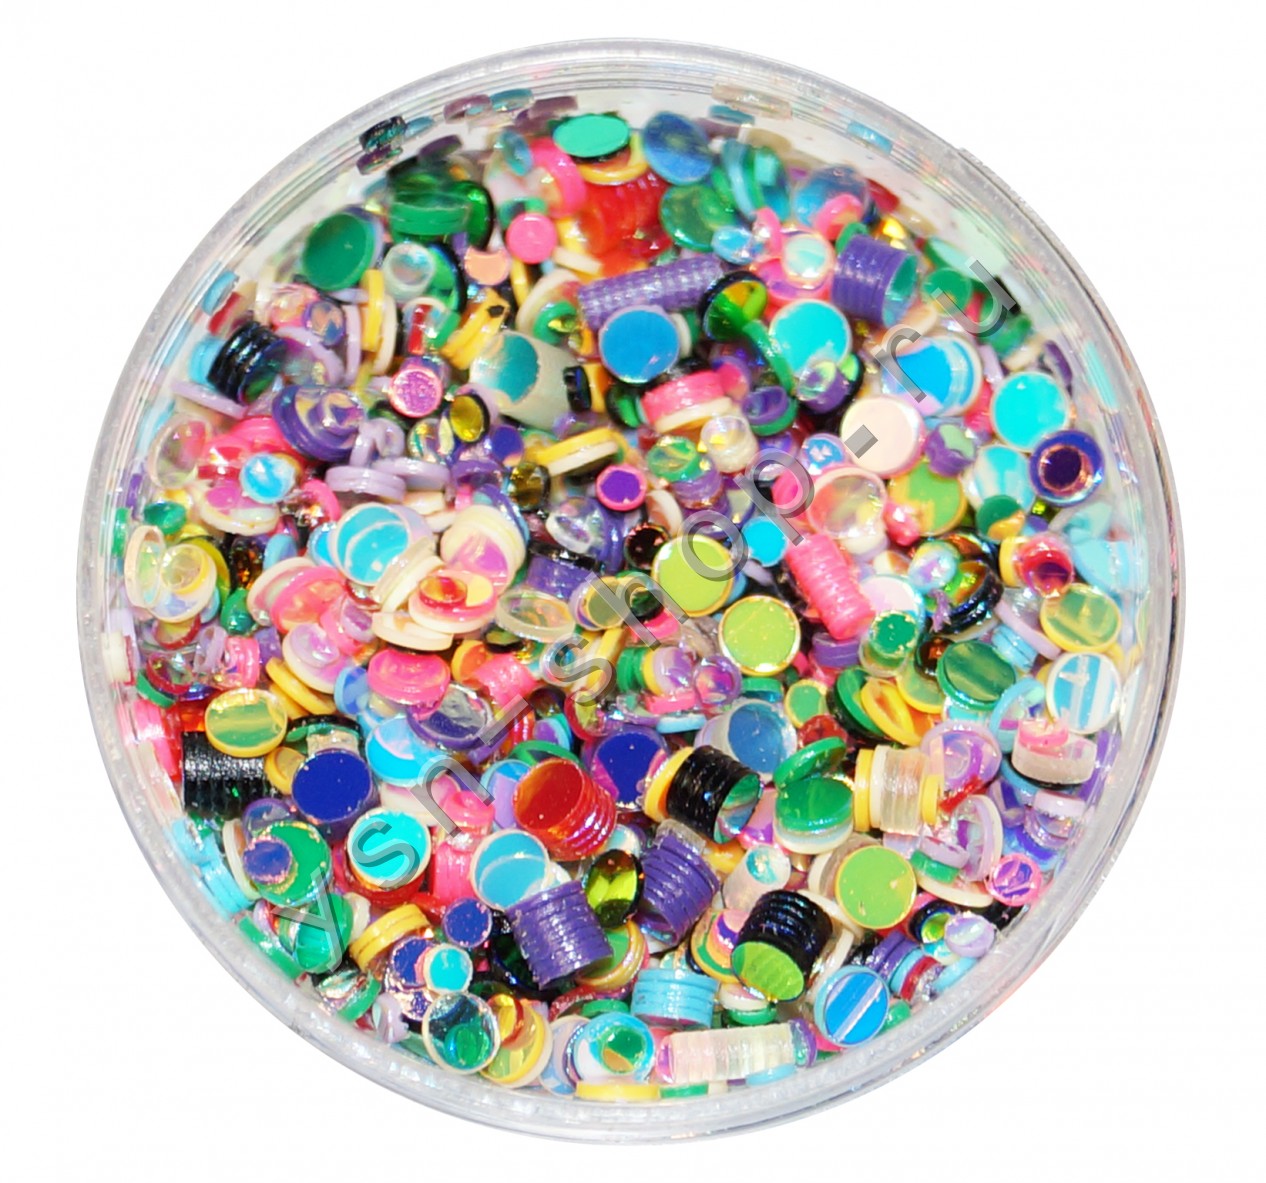
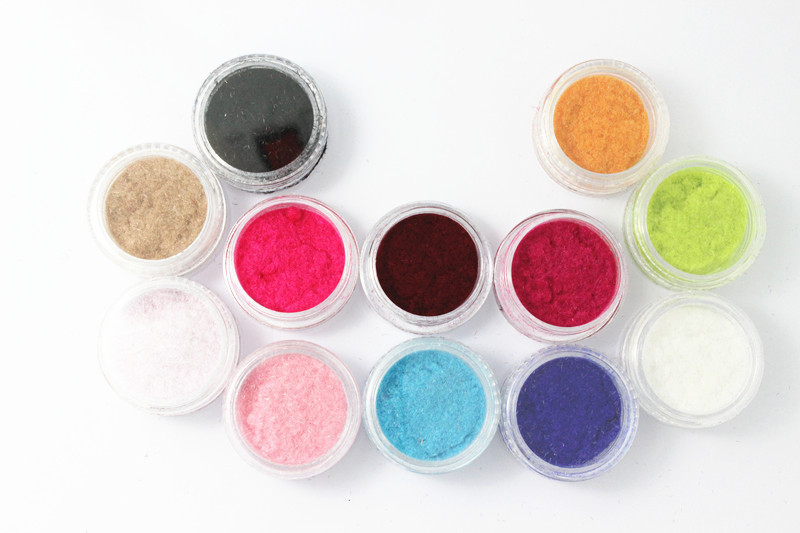
The modern market offers a huge amount of jewelry for manicure, with which you can implement the most interesting ideas. For example, powder can serve as a means of decoration, as well as a way to strengthen nails.
Acrylic Powder - the most uncomplicated solution. With it, you can create a design of "ice cream with sprinkling." It creates additional volume, easily highlights the desired parts of the picture. There is also a brilliant powder that glows in daylight.
Rhinestones - A great way to decorate the finished picture. Stones of different colors can be used as ice cream balls.
Confetti can be used as a sprinkle for nail design with ice cream, donut or cupcake. It looks very bright and festive.
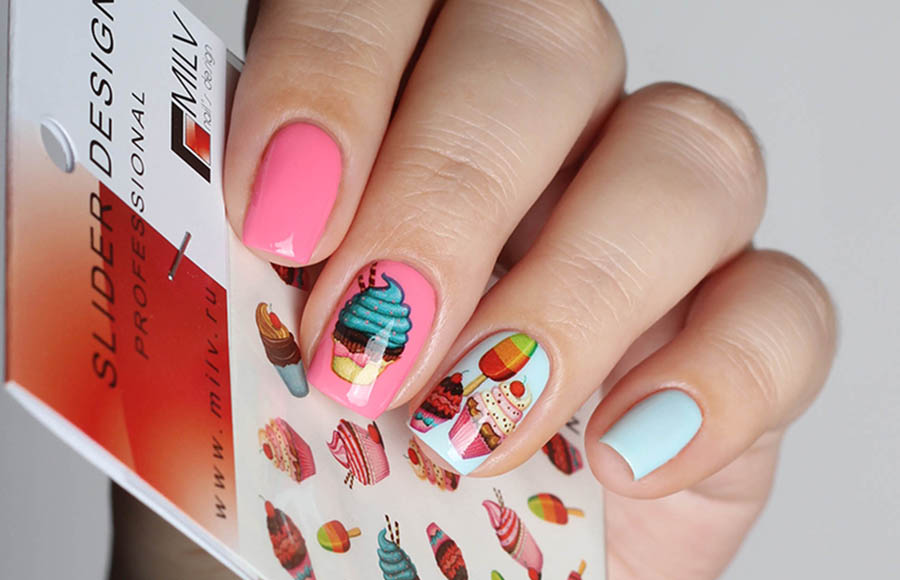
Using stickers, you can not apply the drawing yourself, but buy it already. To date, the assortment of stickers with the image of your favorite sweets is truly huge.
Manicure technicians often use sparkles to create an interesting background to the main picture. For example, the matte colors used for the main pattern are perfectly combined with a slight glitter and shimmering background.
Metal applique suitable for creating a more rigorous design, while bright colors on the nails will look out of place. Using silver, black and white lacquers, you can create a discreet image, while applying the most trendy theme.

Walkthrough and Master Classes
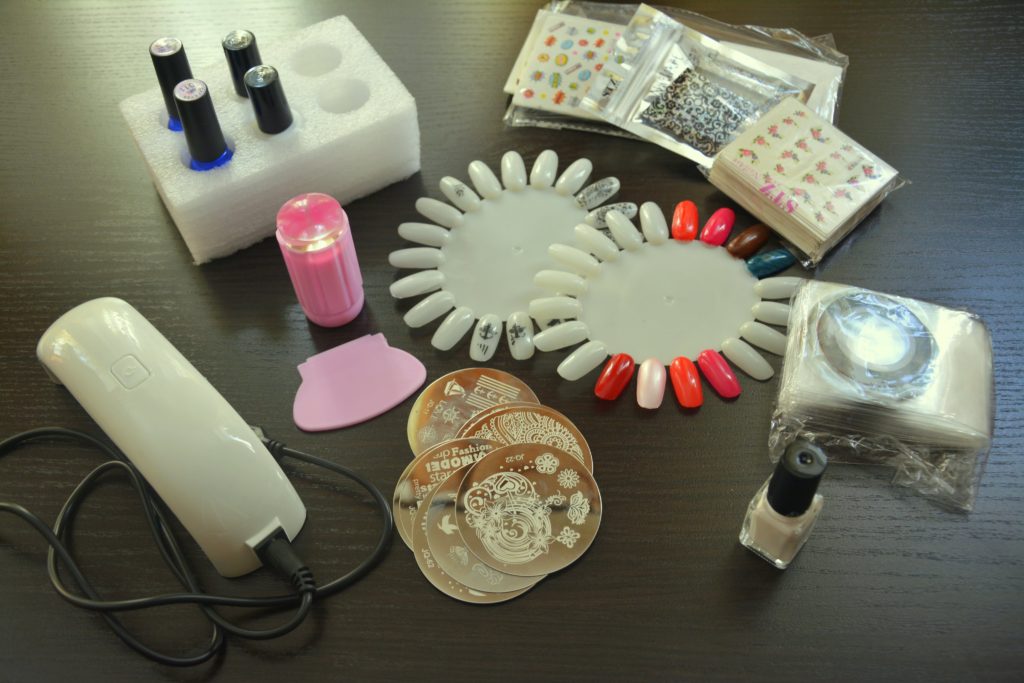
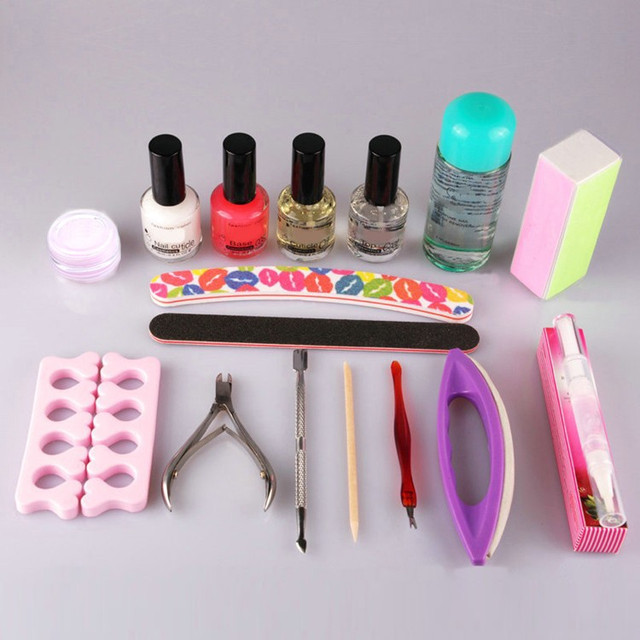
If you have an idea to create a manicure with ice cream, then you should think in advance about the materials that may be useful. A simple step-by-step guide will help fashionist women make such a manicure at home on their own.
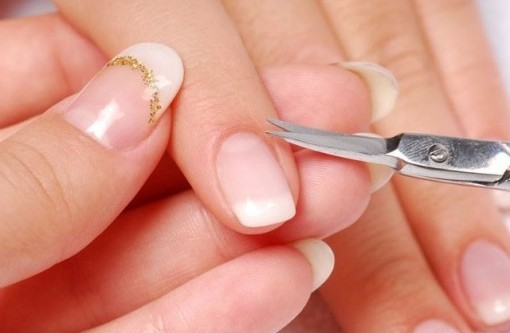
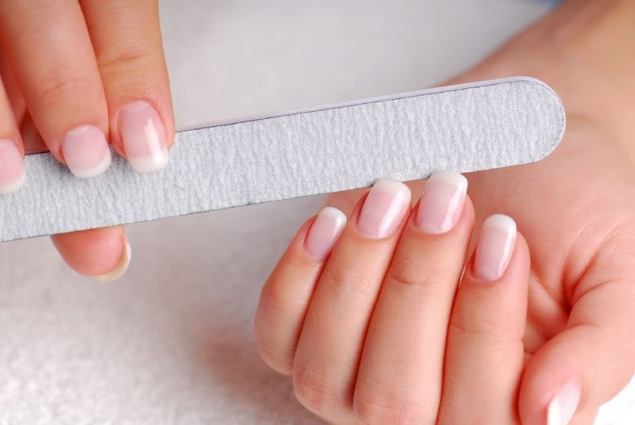
- Before applying the lacquer, you need to put the nail in order: wash your hands with soap, thoroughly dry the nails and remove all the dirt under them. Using a file, give the long part of the nail the appropriate shape. Then we remove the cuticle from the nail plate and polish the surface of the nail with a special soft nail file, cleaning it.
- Then the nails should be degreased. Using napkins, wipe your nails with a special liquid.
- Applying a primer or bond provides gel varnish with a better grip, it will not peel off and will hold firmly for at least three weeks.
- Then apply the base or topcoat.
- After the preparatory stage is completed, proceed to applying the gel polish base on the nails. It is applied using an ordinary brush and then placed in an ultraviolet lamp for 30 seconds.
- When the base coat is completely dry, apply a layer of colored gel. You need to apply an average amount of varnish, since a large drop will be smeared all over the finger, and an insufficient amount will “polish” on the nail.
- Then we put the main drawing, in our case, three balls in a waffle cone. For balls we use acrylic powder, and we draw a gel polish with a special thin brush with a cone. We apply drawing on anonymous fingers of both hands. All other fingers are simply painted in a single color.
- The final step is to apply a top coat on top of the main pattern, do not forget to cover and cut the nail, and then polymerize.
How to draw an ice cream cone on nails using the velvet sand technique; see the following video.
Master class in creating the drawing "Velvet ice cream"
- First you need to prepare materials: velvet powder, tweezers, a brush, a top base, a basic color lacquer, as well as decor colors at its discretion.
- After applying the top base and drying it should be applied primary color. Allow the first layer to dry completely, and after applying the second layer, sprinkle it with velvet powder. For example, it may be sprinkling for ice cream.
- Using tweezers, adjust the villi in accordance with the pattern, then gently brush off excess material with a brush.
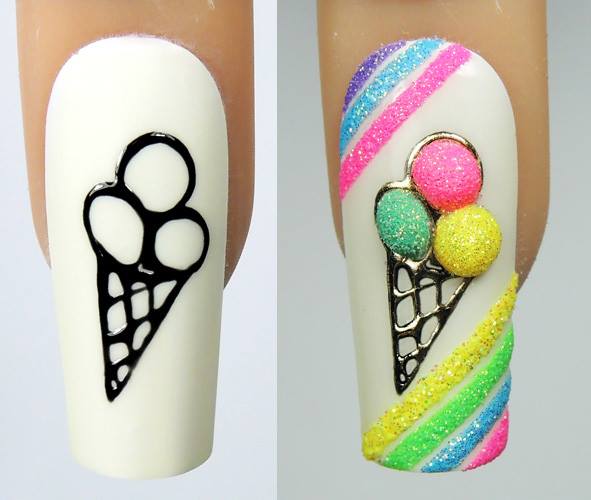
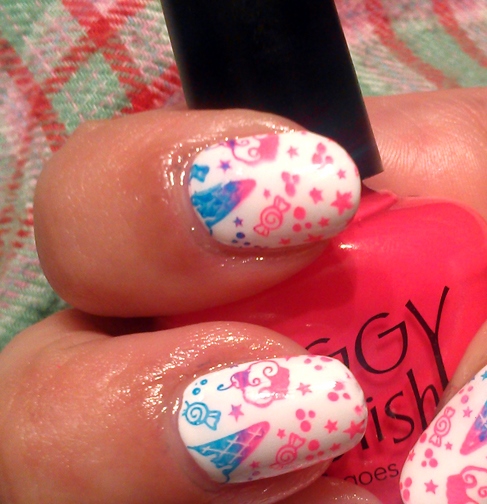
Master class on creating a stencil pattern "Ice Cream"
- We will prepare several bright lacquers, a top coating, a die, a metal disk, we pre-select a stencil with an image of ice cream. We will prepare all the necessary materials and break the preparatory stage.
- Remove the cuticle, polish the nails, file off excess edges. Be sure to degrease the surface of the nail.
- After applying and drying the top varnish proceed to the application of the background color. If the nail for the design is only one on each hand, then it is necessary to pre-paint and dry all the nails, and then proceed to the drawing.
- On the disk, fill in the ice cream pattern with multi-colored varnishes. Putting paint on a stamp with a touch. Then, with precise precise movement, we transfer the pattern to the nail plate itself.
- After applying the picture give it to dry under the lamp for 30 seconds.