Moon manicure gel varnish
Well-groomed women's hands - this is something that is always nice to see anyone. One of the elements of hand care is regular manicure and nail polishing. There are a lot of ideas for design - from classic jacket to gradient manicure, using magnetic varnishes and various stickers-pictures. One of the current ideas of this season is the moon manicure, made by shellac.


What it is
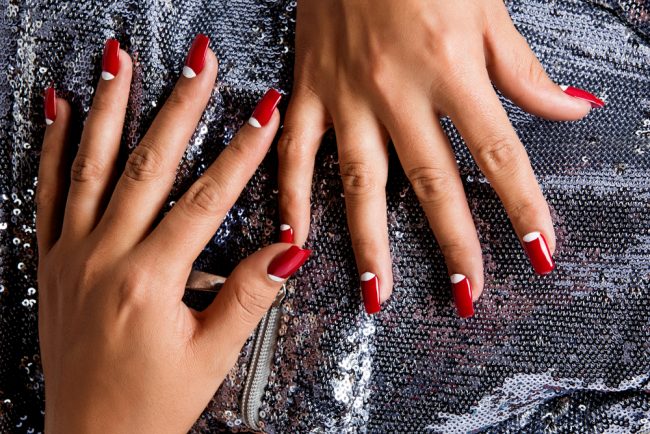
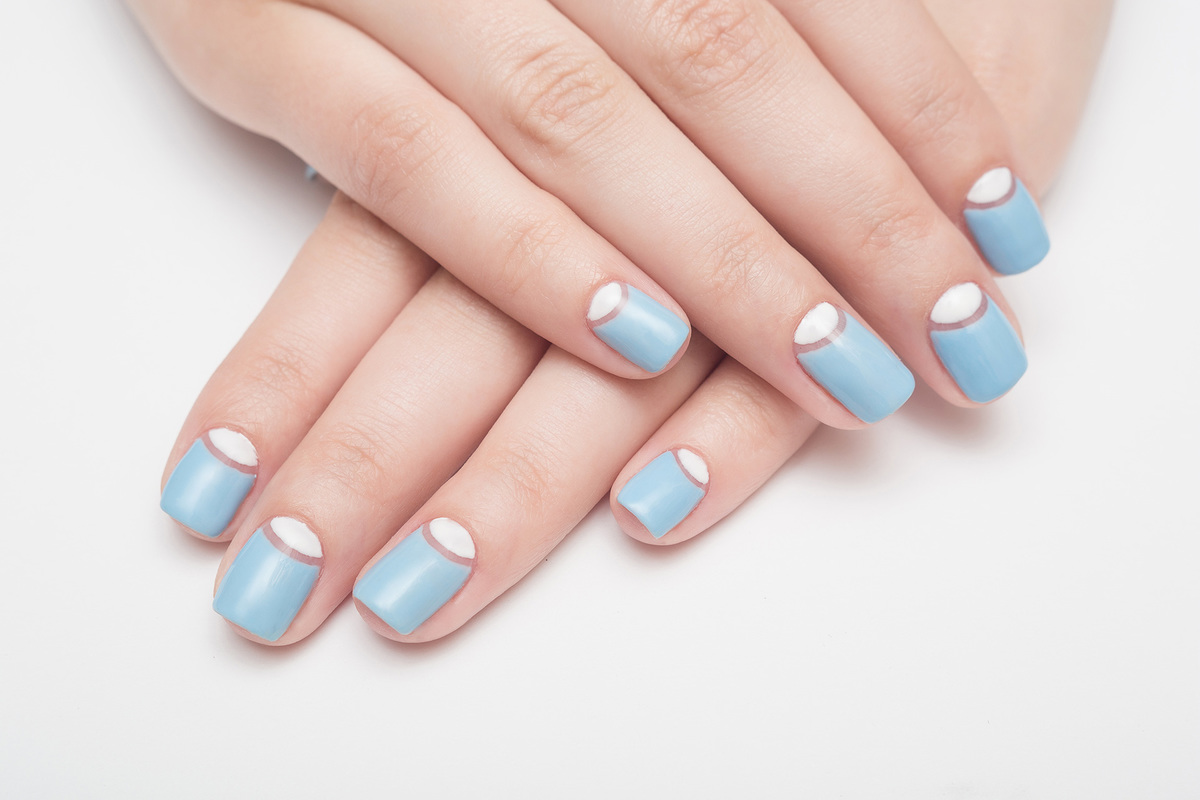
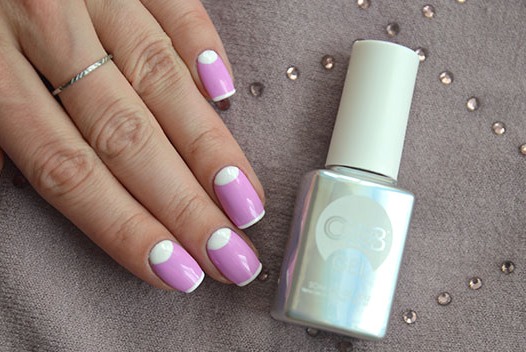
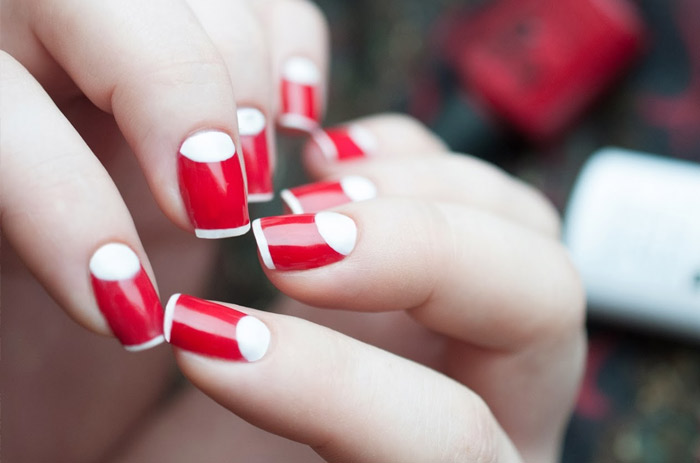
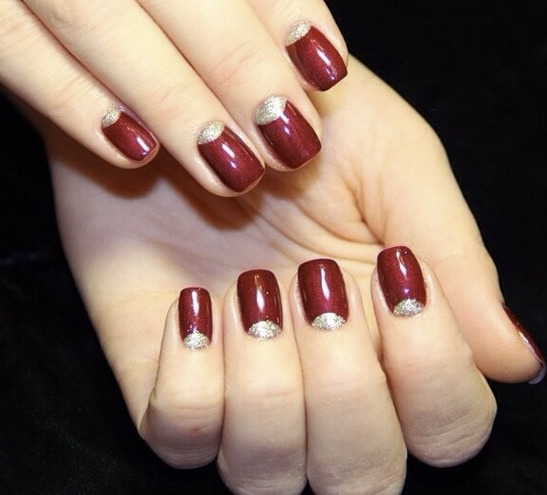
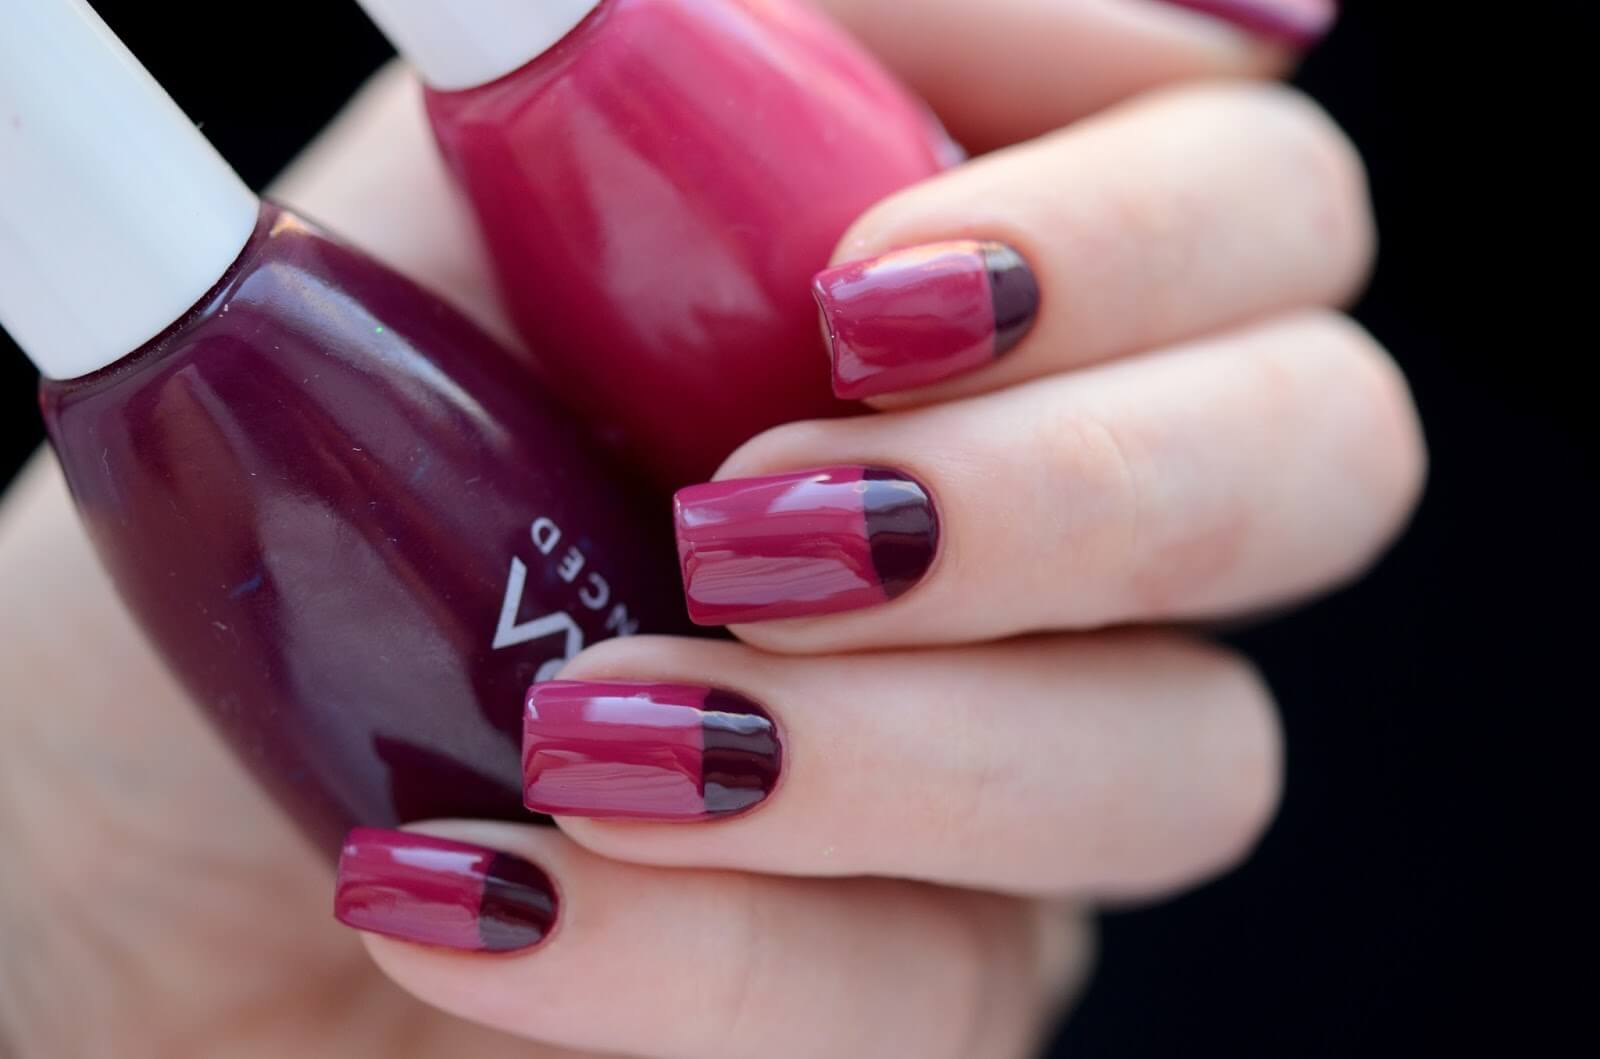
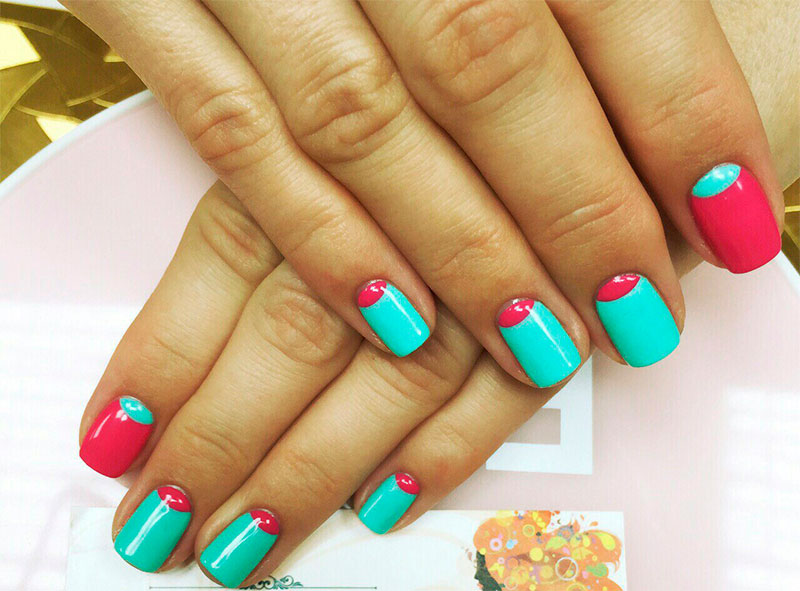
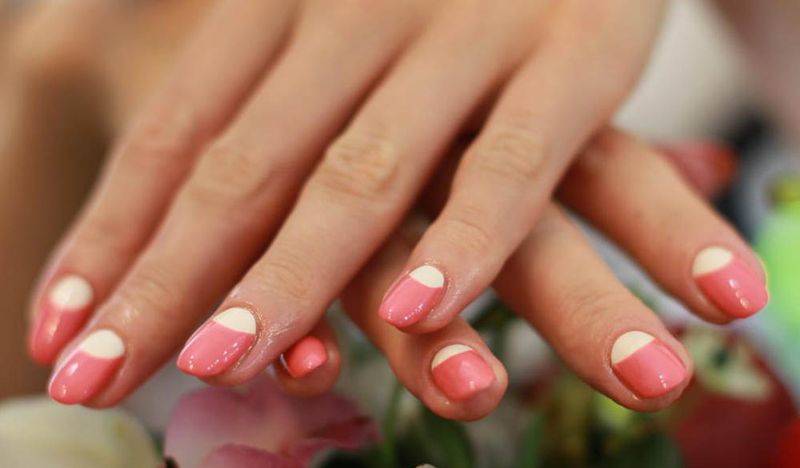
Moon manicure is a type of manicure, in which a part of the nail at the base (moonula) is covered with a lacquer that is different from the base color, forming a crescent shape. It first appeared in the 30s of the 20th century and was then called “reverse french”. The second wave of popularity began in 2010 after the fashion show Christian Dior and continues to this day.
The last few years is gaining popularity manicure, made using shellac. In this tool, combining a gel for nail and ordinary varnish embodied the dreams of girls about the perfect manicure. Here are some of the many benefits of this type of coverage:
- Able to keep on nails for an average of 2-3 weeks and remain attractive at the same time;
- Resistant to external environmental influences (does not erase, does not cleave, does not scratch);
- A rich palette, which includes both the basic basic colors and the latest fashion innovations, which gives room for self-expression and experimentation;
- Also one of its properties is the effect of strengthening, which can allow to treat weak and brittle nails;
- The composition of shellac does not include formaldehyde, various resins and other hazardous substances - it is non-toxic.
Lunar manicure, made with the help of shellac will last up to 3 weeks, will please with a variety of colors and help to restore the nail plate.
New design
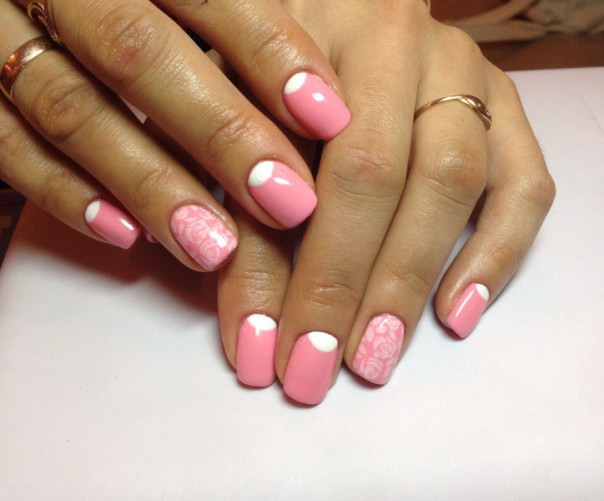
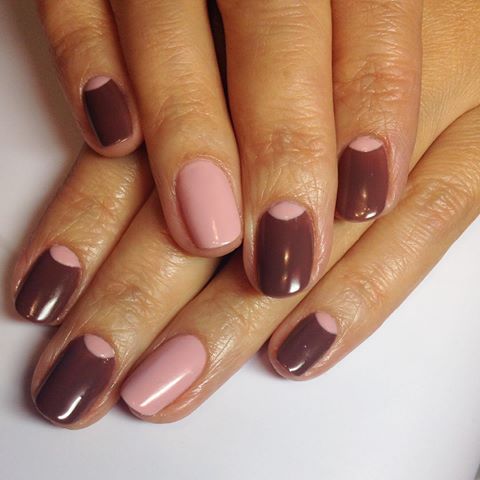
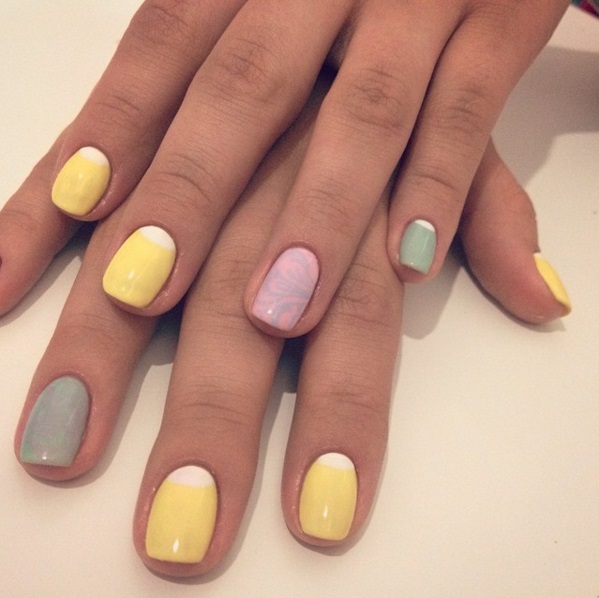
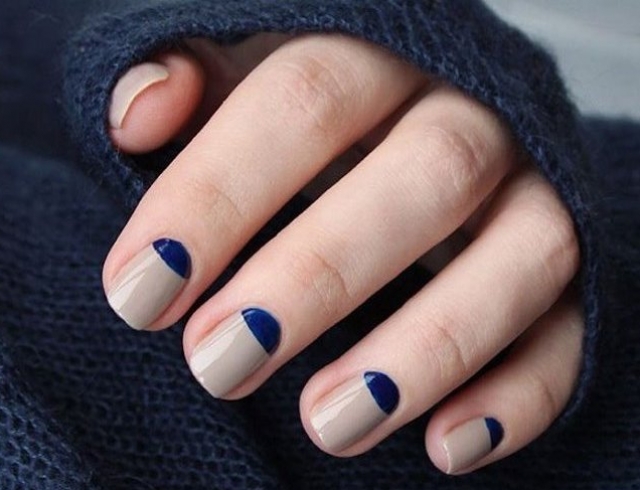
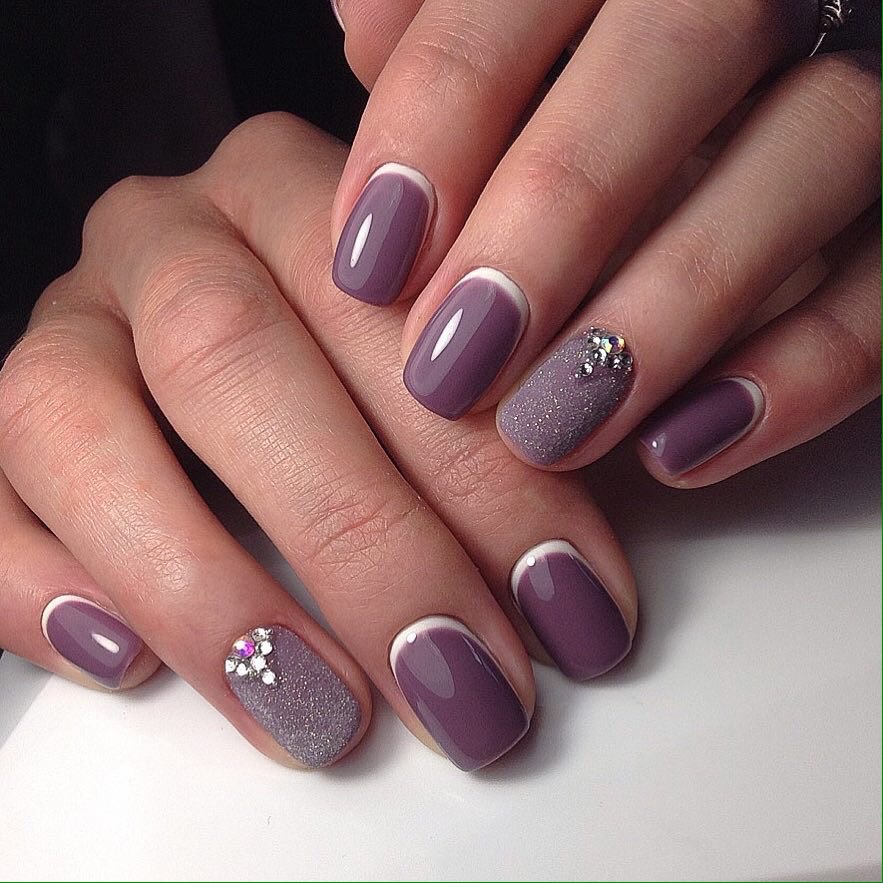
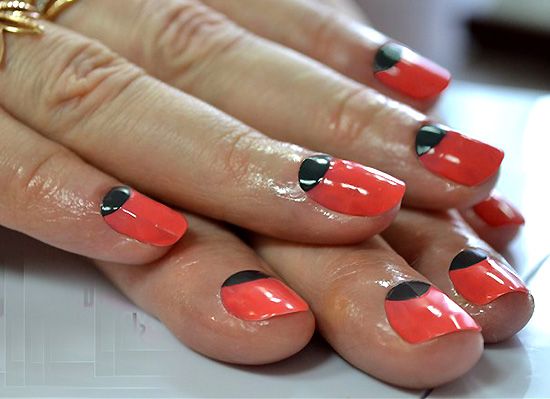
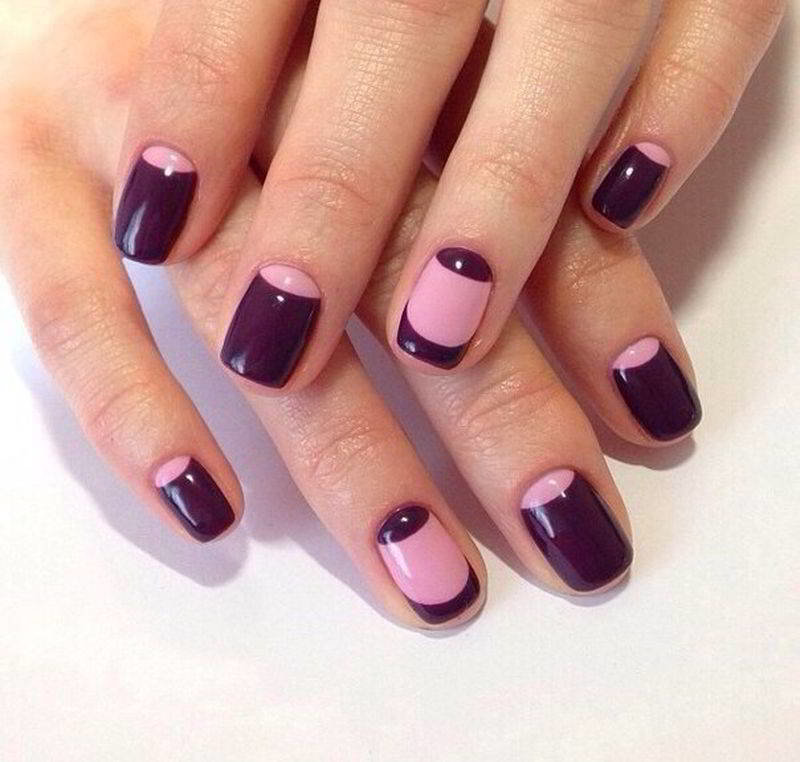
When this type of design just appeared, the moon was left unpainted, and pink lacquer was applied to the rest of the nail surface. Then the reverse lunar manicure became fashionable, when the hole was arched, in contrast to the version adopted today, in the opposite direction. At the moment there are a lot of variants of execution both in the color scale and in the variants of additional decoration and they are limited mainly to the imagination of the manicurist or a particular girl (at home).
Because Moon manicure looks better on nails of medium length or longthen for short nails there is a solution - a half-moon manicure. To perform it, you need to repeat the contour of the base of the nail - you will get a concave crescent.
Such a design with the use of metallic shades will look especially stylish - they are now very popular.
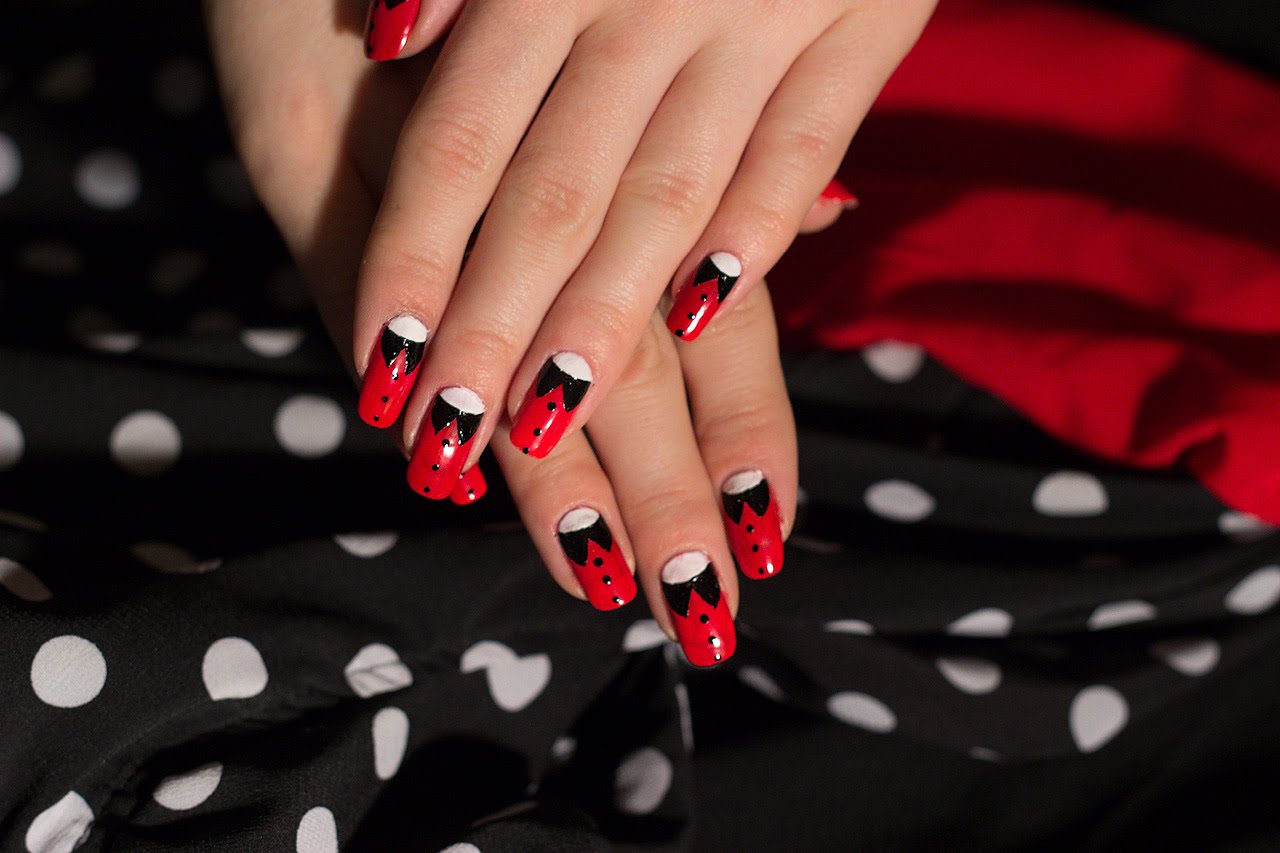
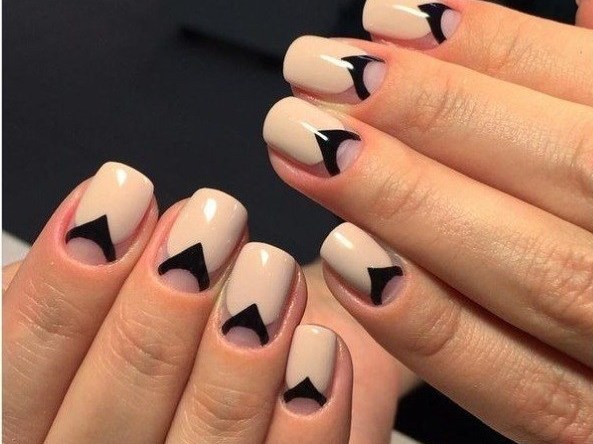
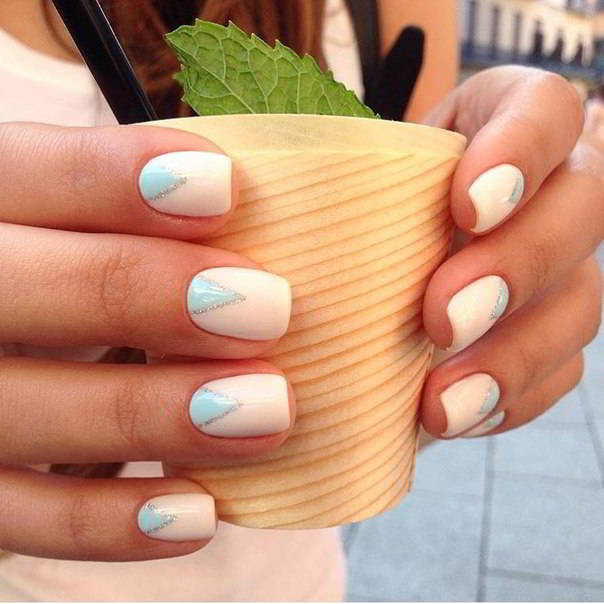
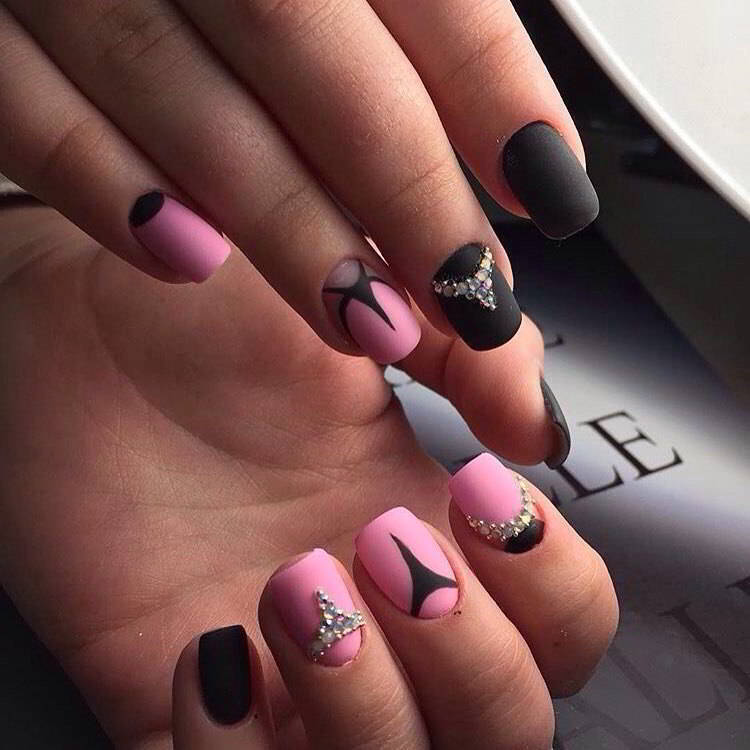
If traditional holes seem boring, you can refresh the image with triangular manicure - drawing in the base of the nail is not a crescent, but a triangle. This design will also visually lengthen the nail plate, and the use of contrasting colors will attract attention and make you talk about yourself.
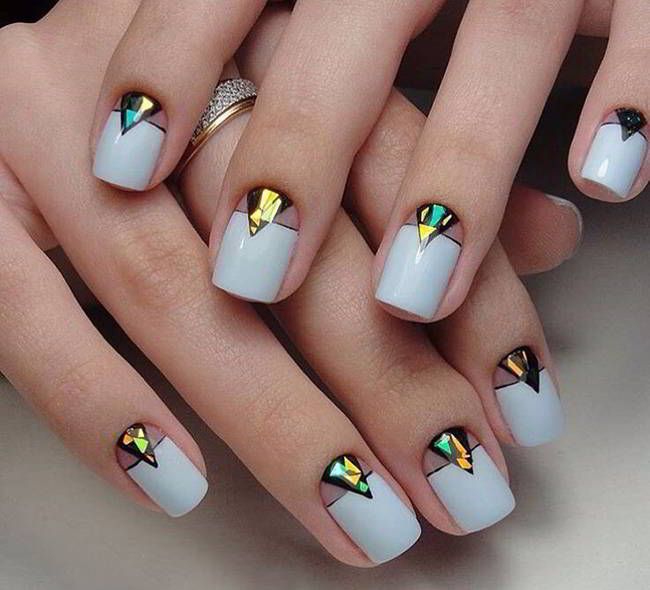
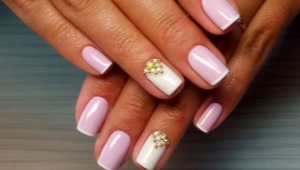
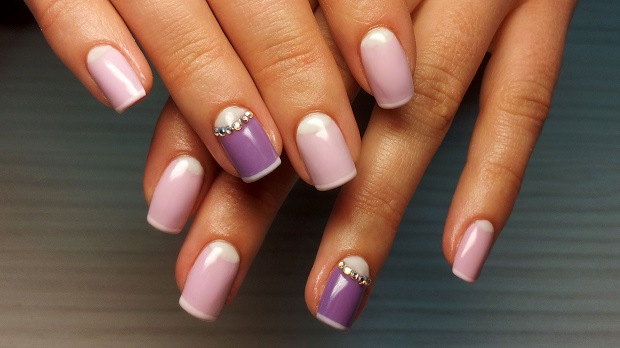
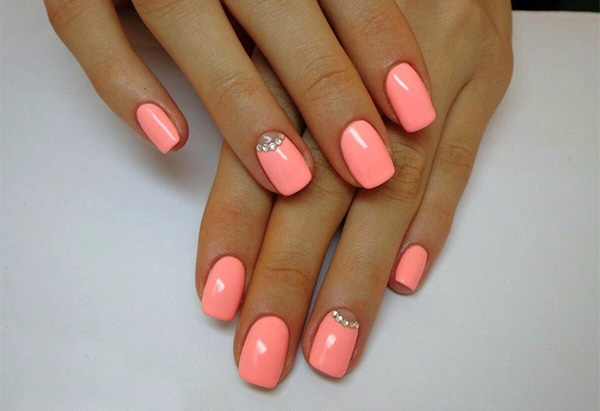
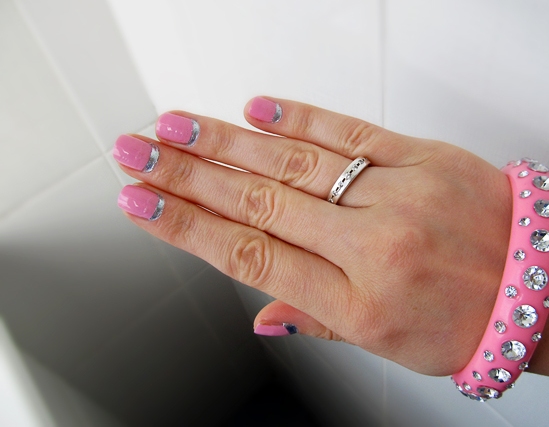
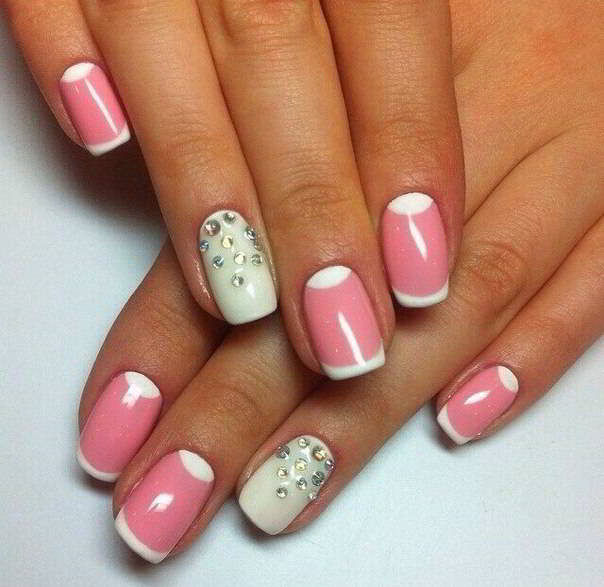
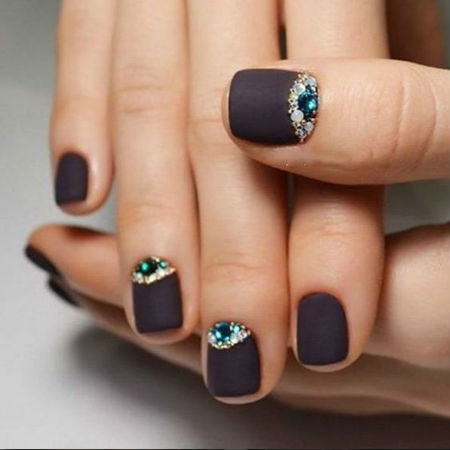
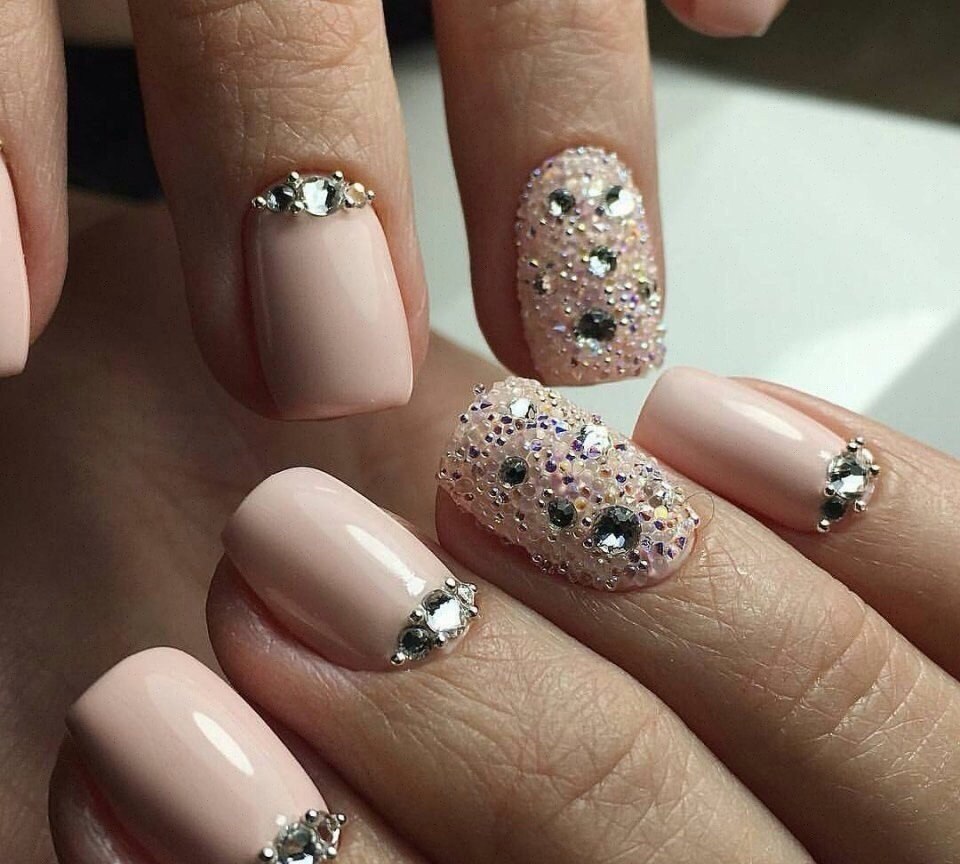
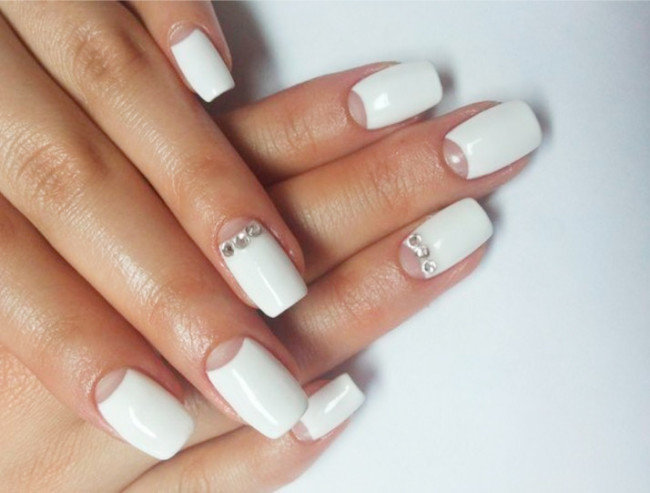
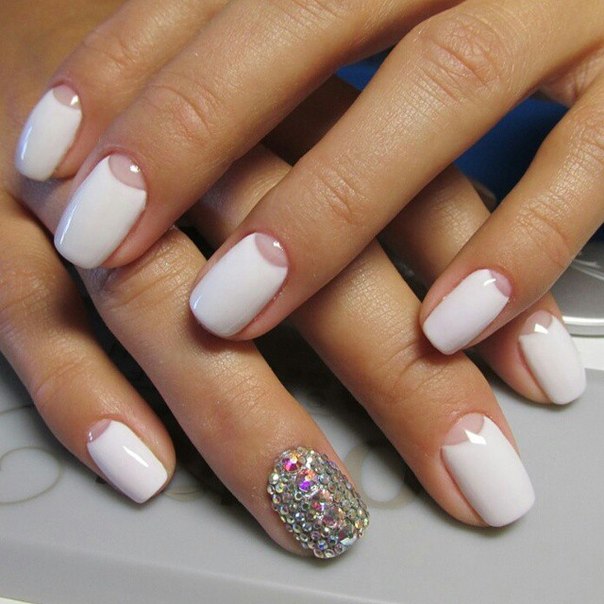
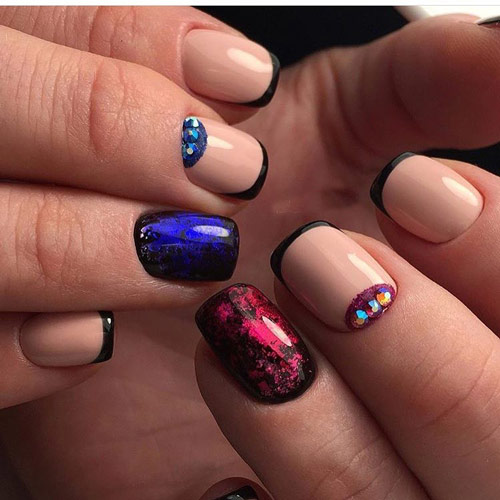
For an evening reception or a date, even a triangular shape is not enough - then it will help design using rhinestones. When performing manicure in reserved shades, rhinestones will give the necessary solemnity and brightness, but will not look superfluous.
For a more elegant look, designers advise using rhinestones not on all nails, but, for example, one by one on the ring or ring and middle fingers - such a light accent looks very feminine.
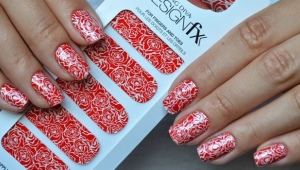
Rhinestones do not always look appropriate in everyday life, but there are girls who love to be bright and noticeable even when going to the store and paying for purchases. For them, the way to stay that way is manicure with sparkles. He has several versions - for example, to cover only the moon with sparkles, only the main part of the nail, or to use a shiny coating as a top when completing a manicure. And as in the case of rhinestones, it is possible to glitter not all the nails, but one or two on each hand - for a moderate accent.
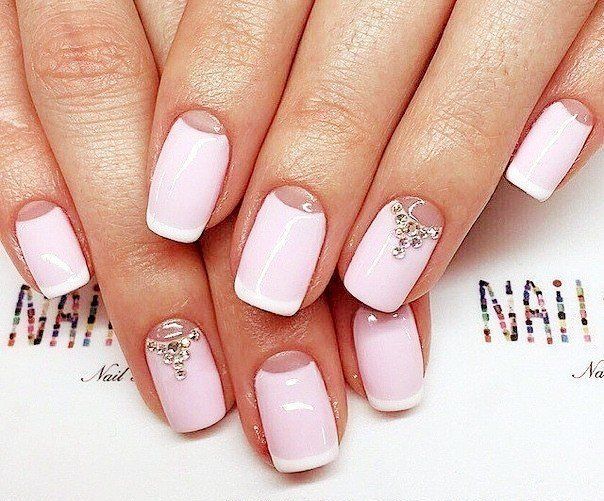
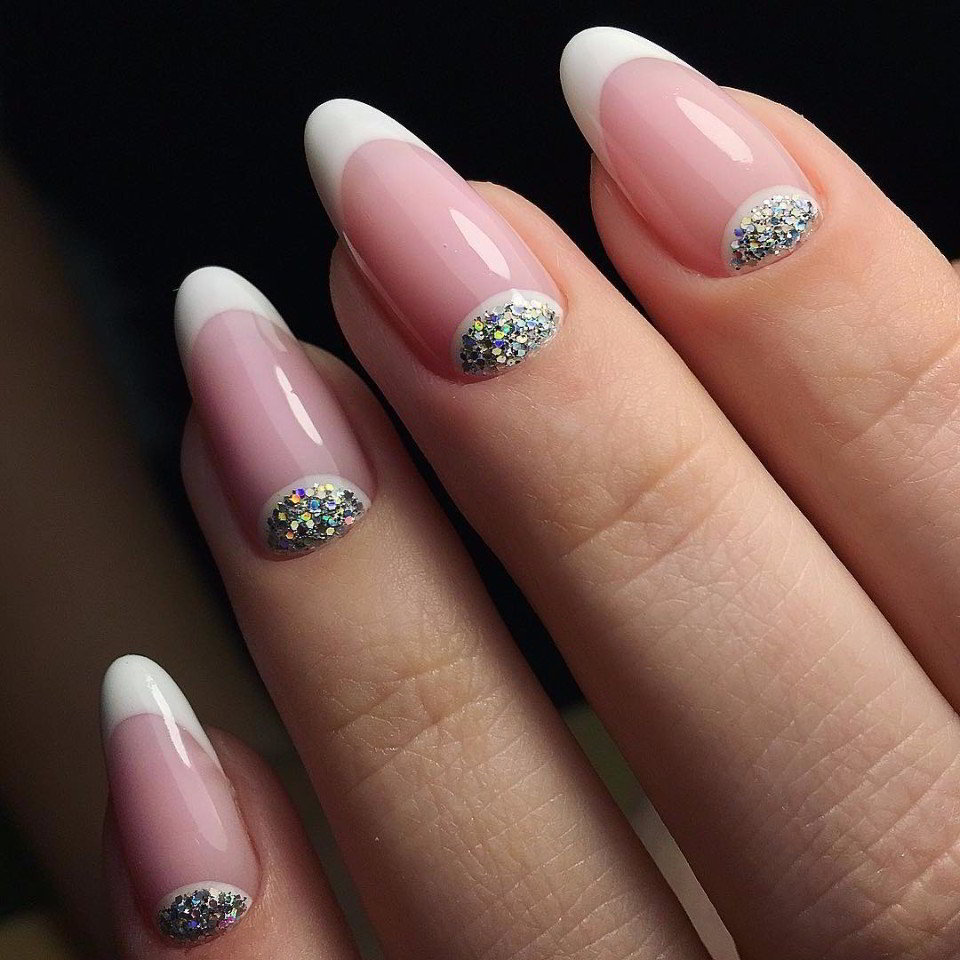
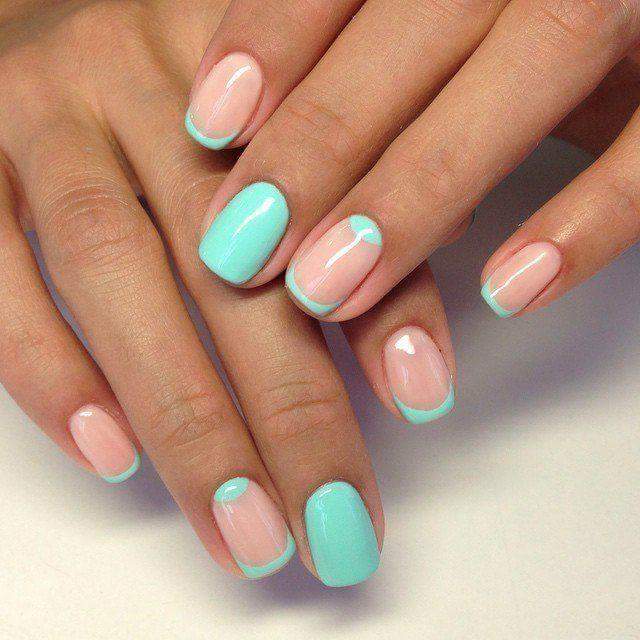
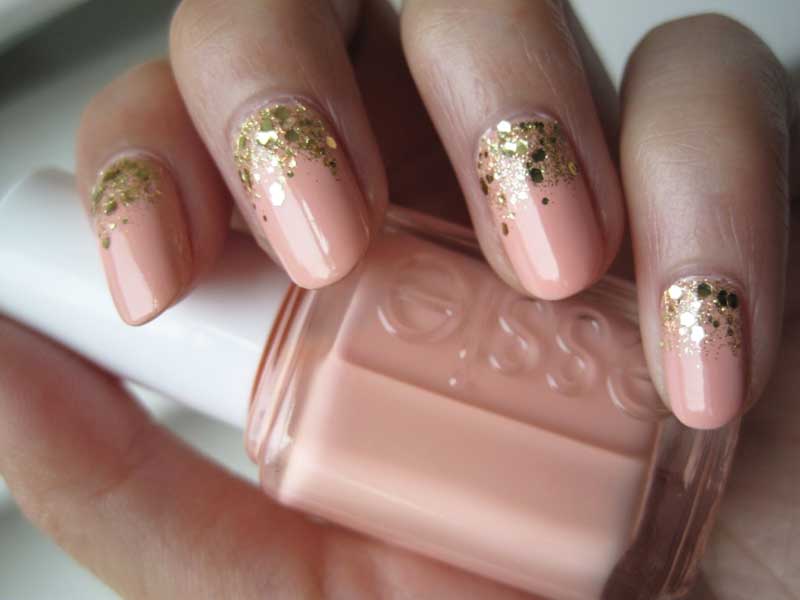
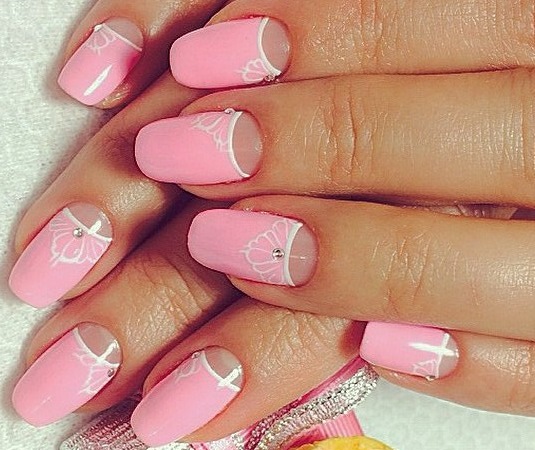
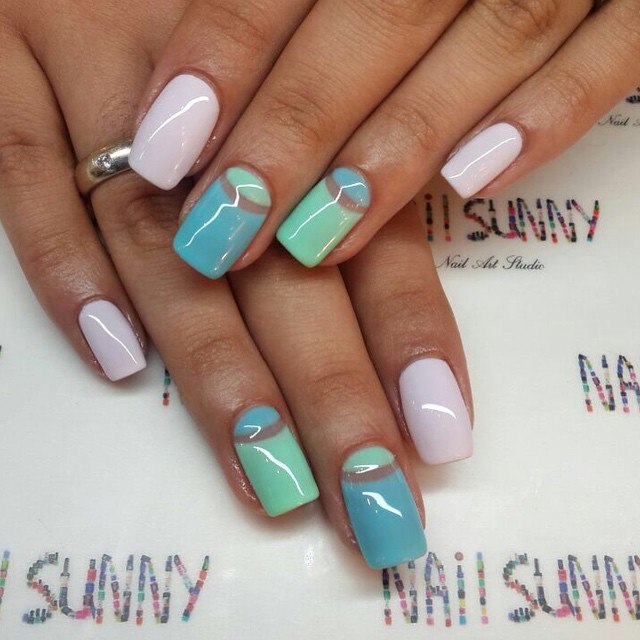
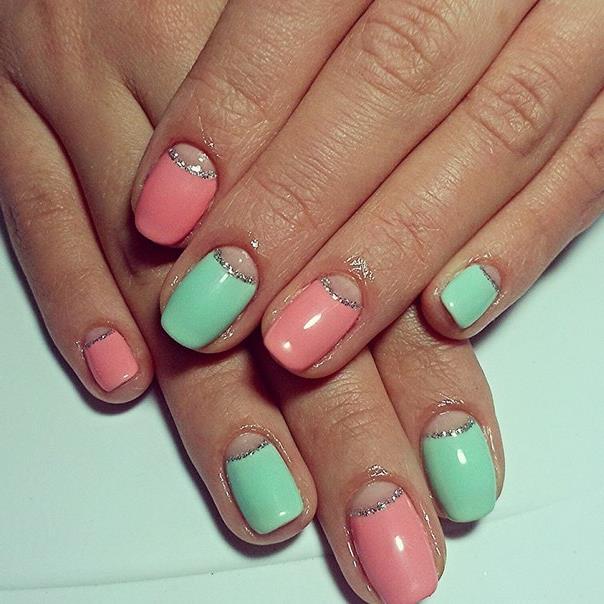
Very gentle design option using a light shade of the base color (e.g. beige, pink, white, blue) and gold or silver elements - This is not the filling of the moon completely, but only the designation of the border between it and the rest of the nail. It combines the latest trend of the season - brilliance, and a low base allows you to wear such a manicure for a long time and combine it with all the elements of your wardrobe - from t-shirts and jeans to evening dresses.
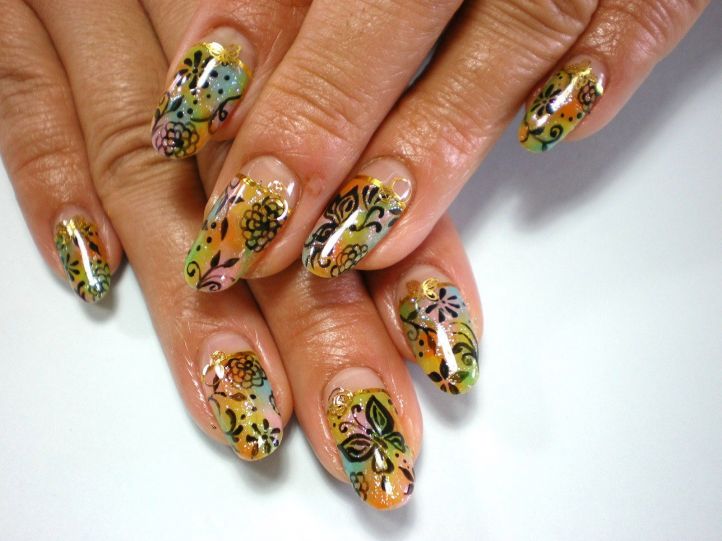
In order not to alter the moon manicure made with the help of shellac, quite often (since the process of applying and removing it, although not very complicated, but still laborious), if, say, the color or design is no longer pleasing, you can get out of the situation with simple nail polish. With a thin brush with its help, you can add a ready-made manicure with additional design elements - for example, with peas, lines of different directions, draw flowers or decorate the border of the manicure.
Such additions will be erased with a simple nail polish remover, it will not take much time, and thus you can provide an update even every day.
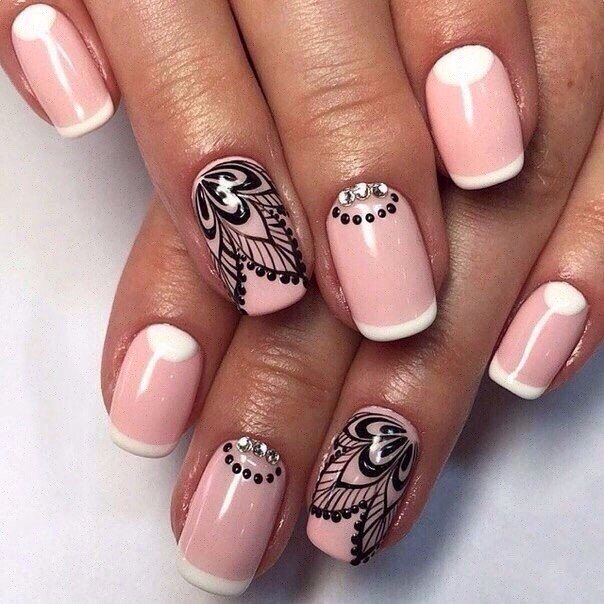
The trend of combining styles that are incompatible at first glance is supported not only in clothing, but also in nail design. Lunar manicure with a jacket with the use of decals on some nails, a mixture of standard and reverse lunar manicures, the simultaneous use of traditional and triangular lunula design - all this makes lunar manicure one of the most universal types of nail design.

Colors
Options for the color performance of the moon manicure are almost limitless - the main thing is that the colors are still combined with each other. The general recommendation before going to the nail art master is to analyze the color palette of your wardrobe. Since the manicure performed by shellac lasts up to three weeks, it will have to be worn for a long time, therefore it is important that it is in harmony with the clothes.
You should not choose too bright neon colors, if there is no special need, after a while they can start to annoy.
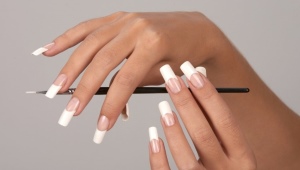
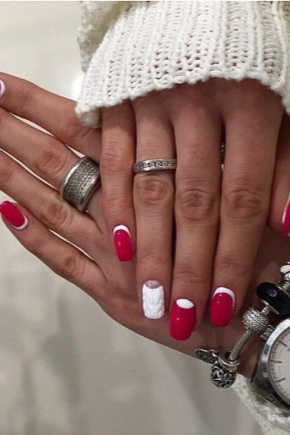
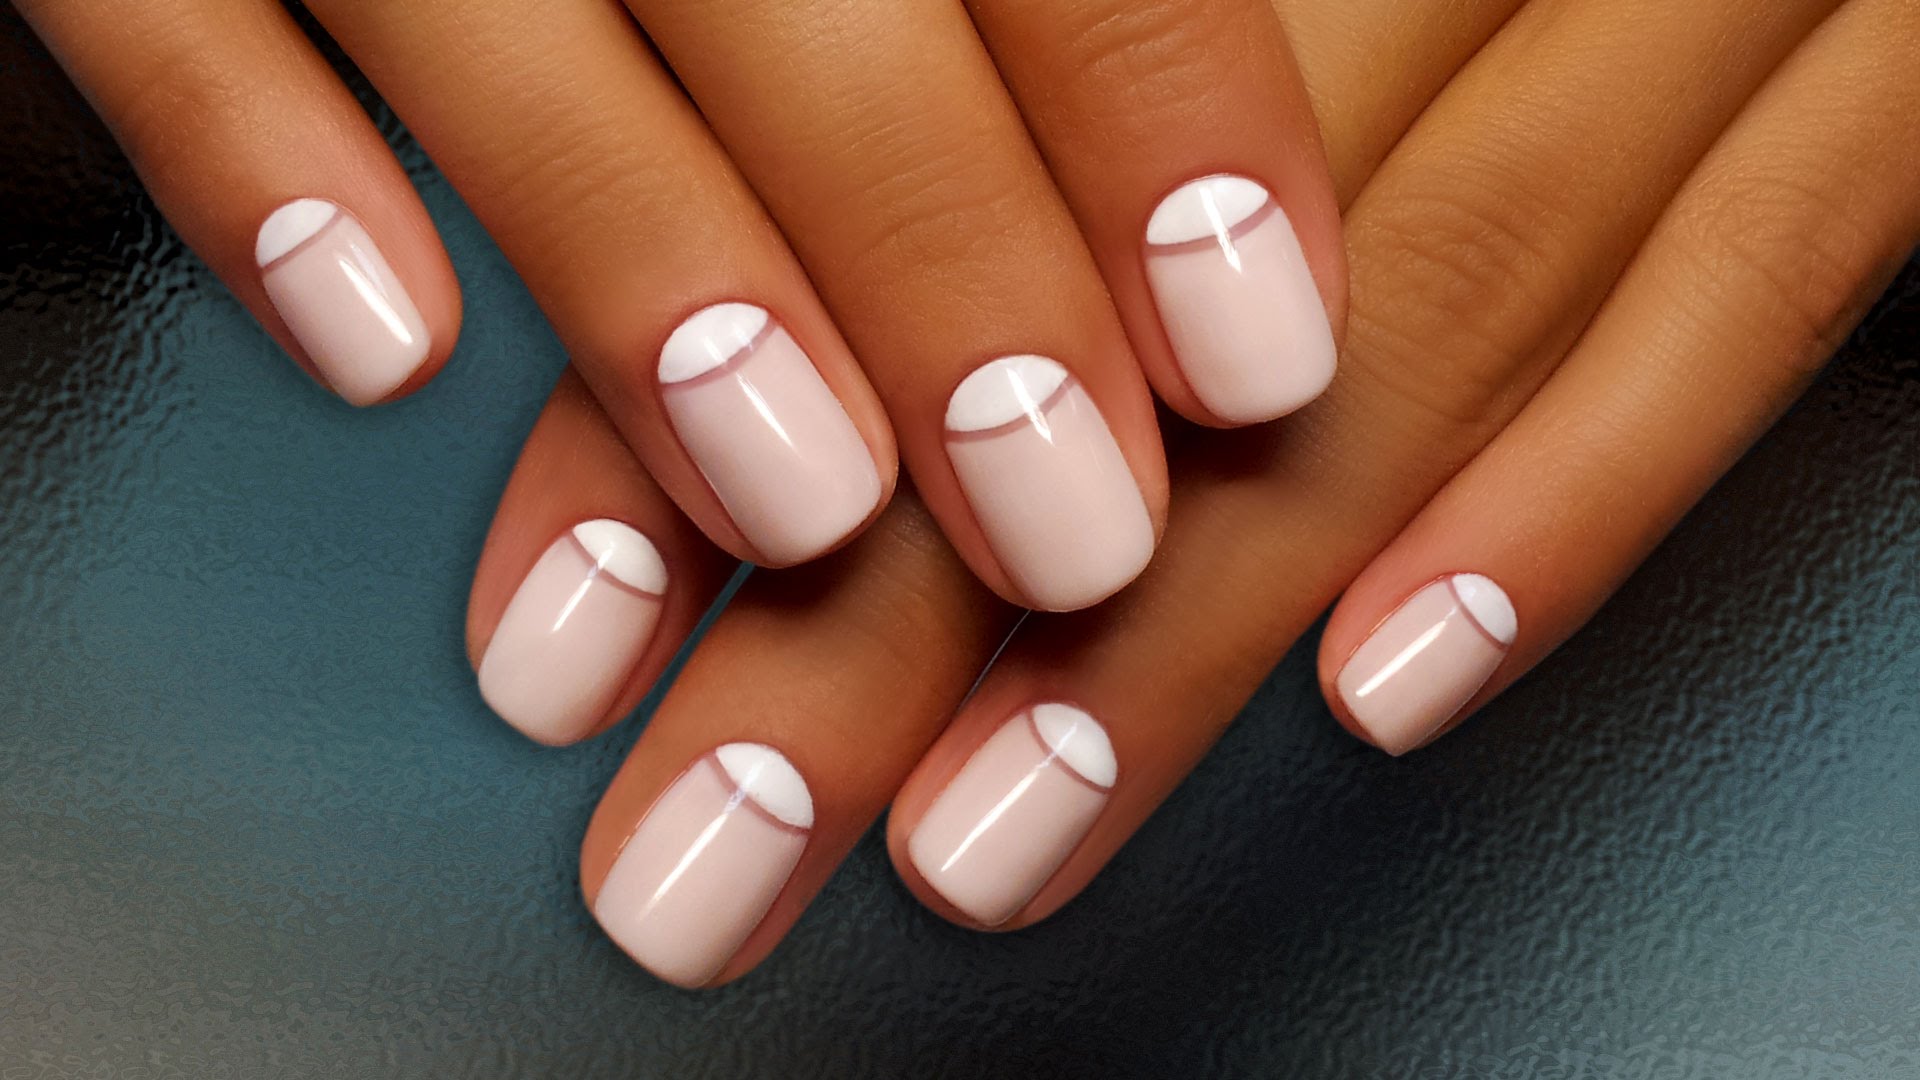
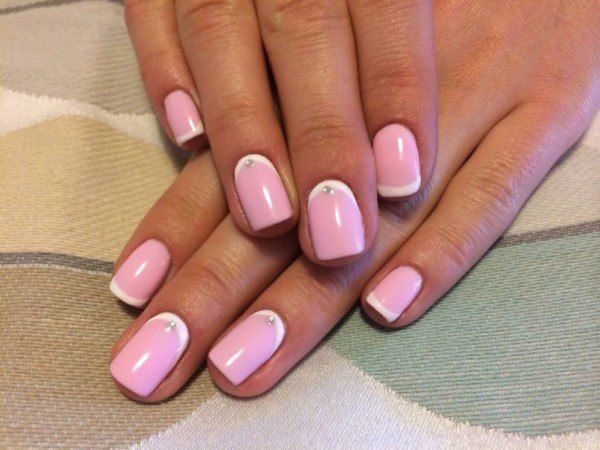
The most natural version of the performance - transparent wells and cover the main nail pink or white. Pink - close in shade to the color of the nail, and therefore such a manicure will be appropriate for those who work in the office with a strict dress code, and for going on a date, and for every day. Hands will look neat, nice and feminine, while not attracting too much attention.
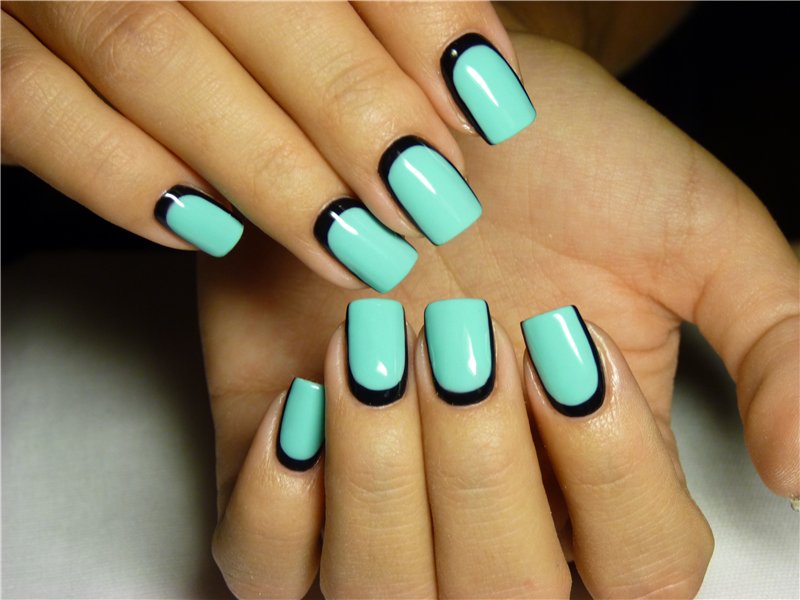
If you want to try something more saturated within the office, you can use red, blue colors for the design of the nail.
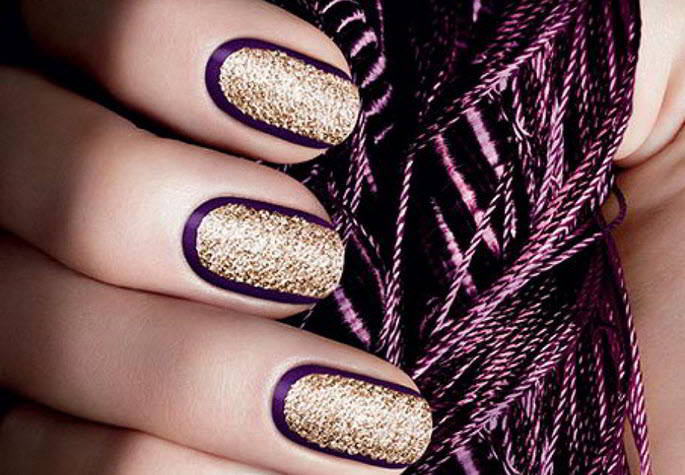
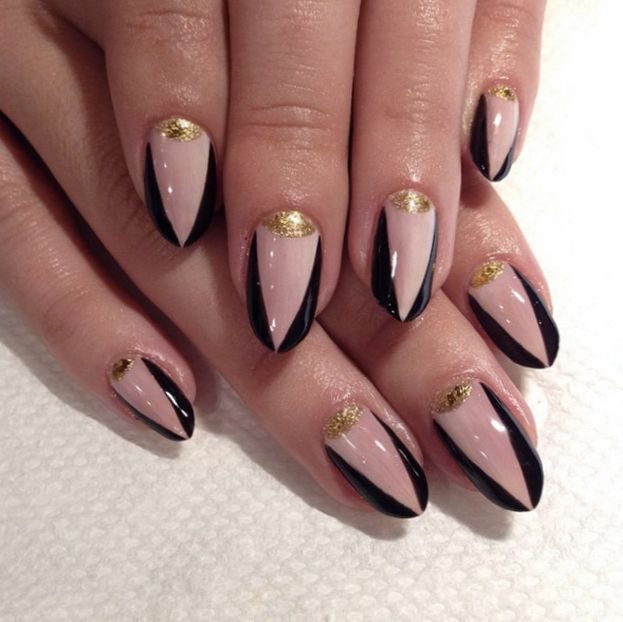
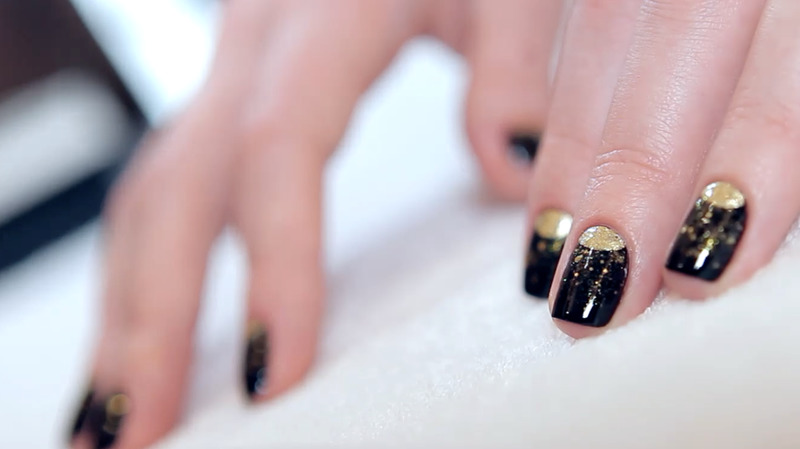
Gold and black colors - one of the most successful combinations for a solemn event. It will fit almost any outfit and give the image of luxury.
In order to create an image in the style of the 20-30s, the most burgundy, cherry, red and scarlet lacquers are suitable. It is important that the same shade be necessarily lipstick - this is one of the conditions for this year's trendy nail art.
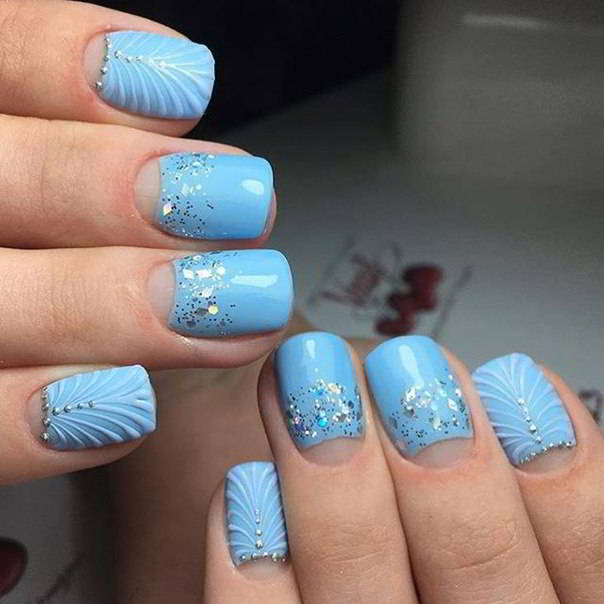
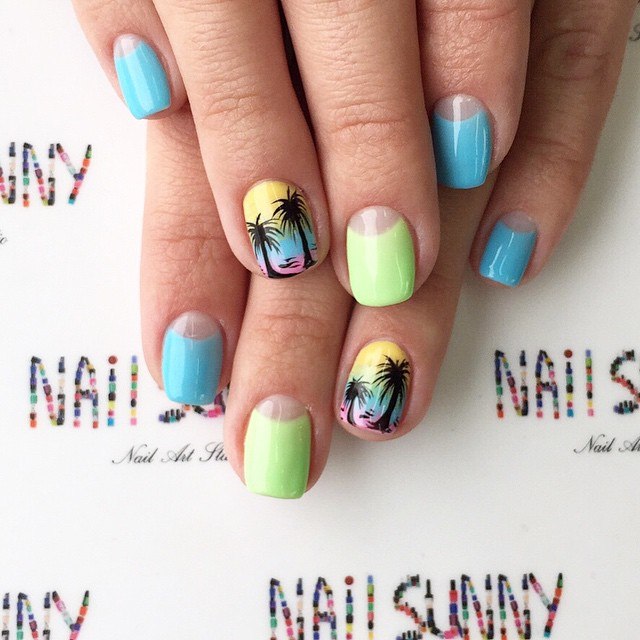
This season trend has bright warm colors - yellow, red, orange and their shades. They will look fresh and summer in combination with white - no matter what part of the nail to cover with what color. It is also interesting to use the same color of different shades - for example, blue and blue.
A good addition - shiny varnishes, gold and silver - hit this summer.
How to do at home
One of the advantages of lunar manicure - the relative ease of implementation at home. Each girl, regardless of financial position, if she wishes, can try the latest trends on herself and conform to fashion.
Lunar manicure can be done with shellac at home in three ways: using a stencil, using a foil or a brush.
Having considered how to make a manicure step by step with each of the proposed methods, you can choose the most optimal one for yourself.

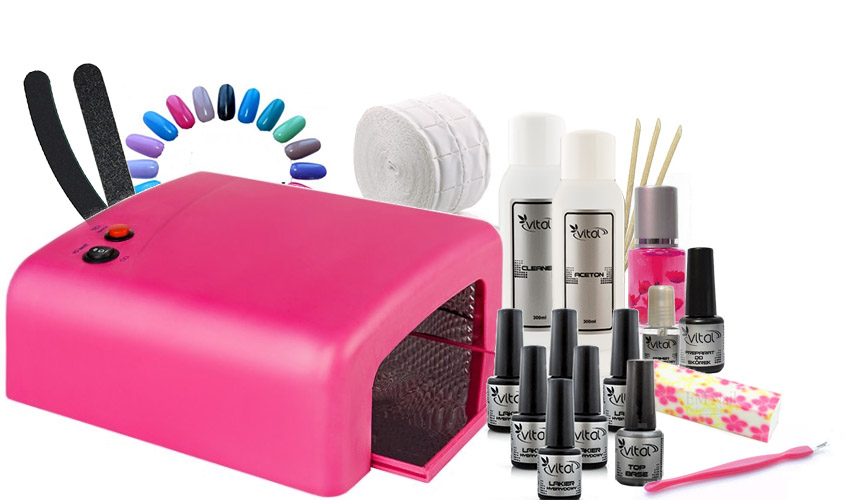
For home manicure will need:
- For pre-treatment of nails, means for removing the cuticle or special tweezers, nail files of different hardness for processing the edges and surface of the nail, degreaser;
- Base coat;
- Two gel polish in contrasting colors;
- Top cover;
- Means for removing the sticky layer (suitable, for example, isopropyl alcohol);
- Lint-free napkins;
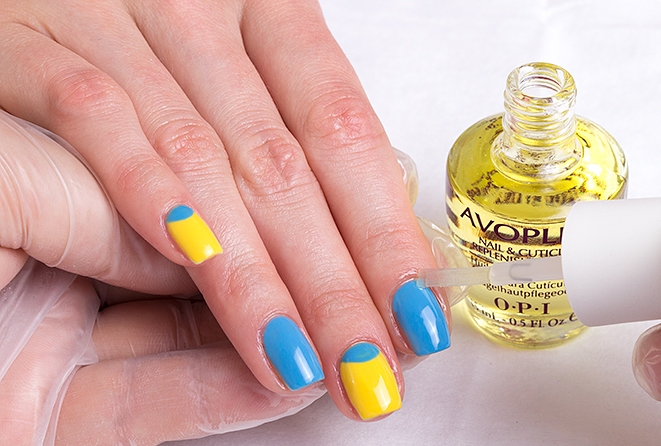
- Cuticle oil;
- Stencils, transfer foil and glue for it or a manicure brush, depending on the chosen method;
- UV lamp.
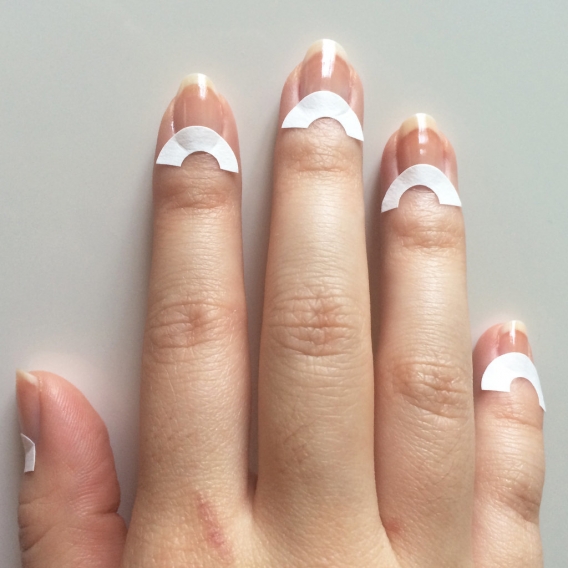
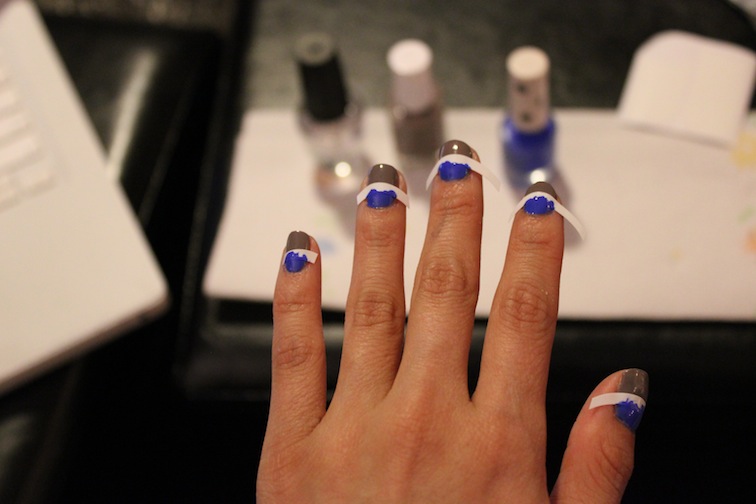
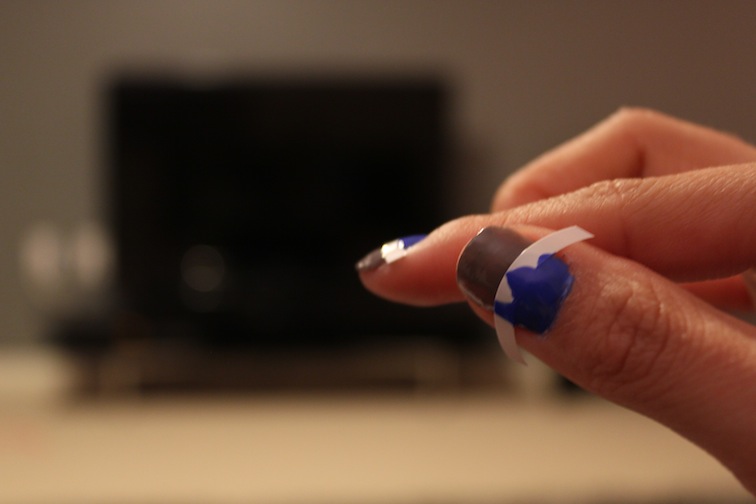
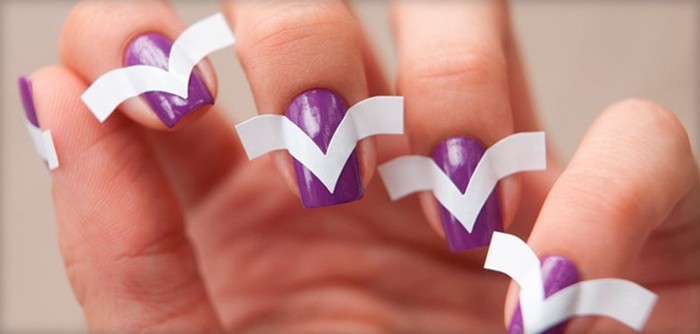
Using the stencil.
Stencils - this is a good solution for those who are just beginning to comprehend the basics of manicure. They will help beginners to achieve a neat manicure and smooth lines. This method is the simplest and therefore widely popular. It consists of the following steps:
- If necessary, you need to make a manicure: remove excess cuticle in any convenient way, file your nails, giving them the desired shape, degrease the nail plate - this will provide better adhesion of the nail polish to the nail surface and it will last longer;
- Apply a base coat and dry it in a UV lamp. Each layer of gel polish requires drying for 2-3 minutes;
- Lacquer the color that is intended for painting the hole the entire surface of the nail and dry. If necessary, for a more saturated color, gel lacquer can be applied in 2 layers, then it is dried each separately;
- Cover with a stencil the place of the hole and apply the gel-lacquer of the primary color in 1-2 layers, dry it;
- We fix the almost finished manicure with the help of a top, the last time we put it under the lamp and the fashionable manicure is ready!
Using foil
Foil is also an option for those who want a neat manicure, but are not confident in their abilities. A variety of bright, brilliant shades, ease of implementation made this technique attractive. Foil design is done as follows:
- Repeat steps 1-2, as when working with stencils (manicure-base);
- We cover the nails with the main color of lacquer in 1-2 layers, dry it;
- Place the hole is treated with a special glue (with its help, foil is printed);
- When the glue dries out a little, we apply a small piece of the transfer foil to this place with the matte side down, hold for a few minutes;
- With a sharp movement we remove the foil. If the hole turned out uneven, then repeat steps 3-4 again. If the pattern turned out, apply the top coat and dry.
A detailed guide to the implementation of this manicure, see the following video.
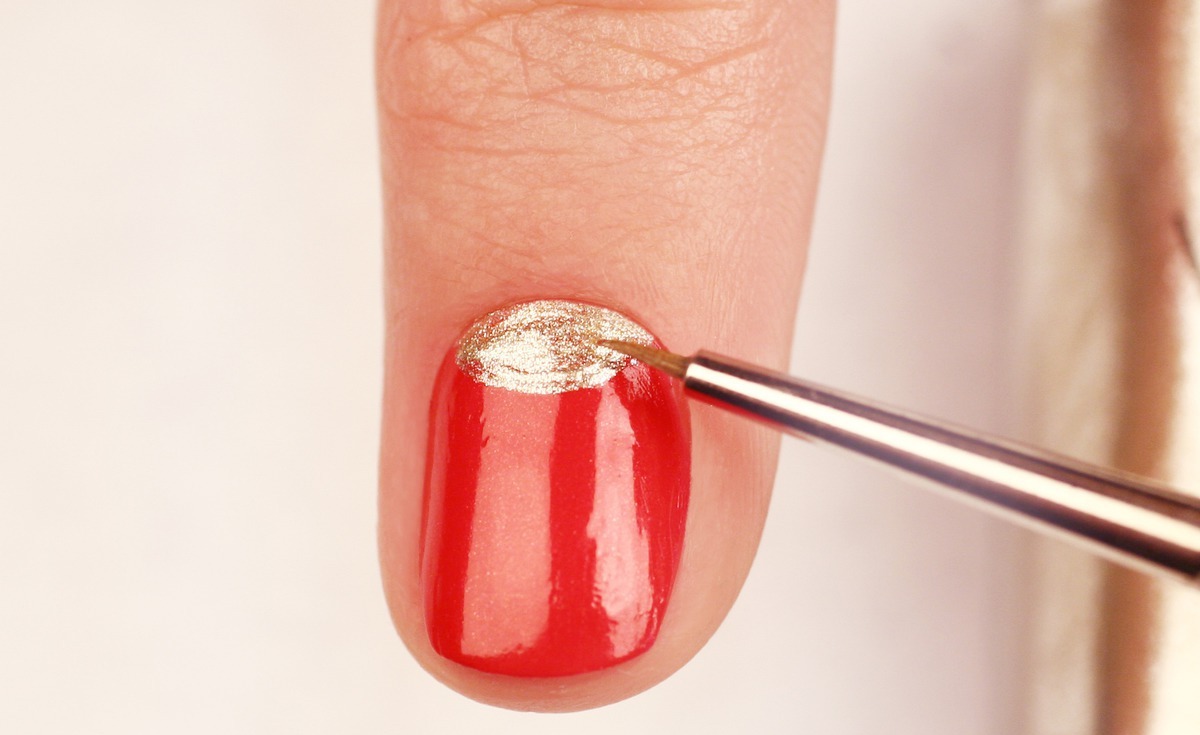
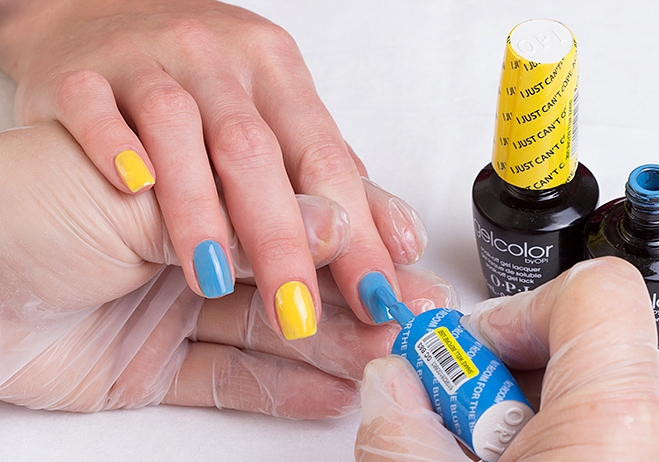
Tassel
Brush - a tool for more experienced girls. It requires accuracy and firm hands, and is interesting because, unlike foils and stencils, it offers more opportunities - for example, a reverse lunar manicure. In order to make a manicure with brushes, you need:
- Treat the nails and apply the base;
- Apply varnish of primary color in 1-2 layers, dry;
- Using a brush, paint the well at the base of the nail with the desired color and dry it again under the lamp;
- Apply the fixative and dry the last time.
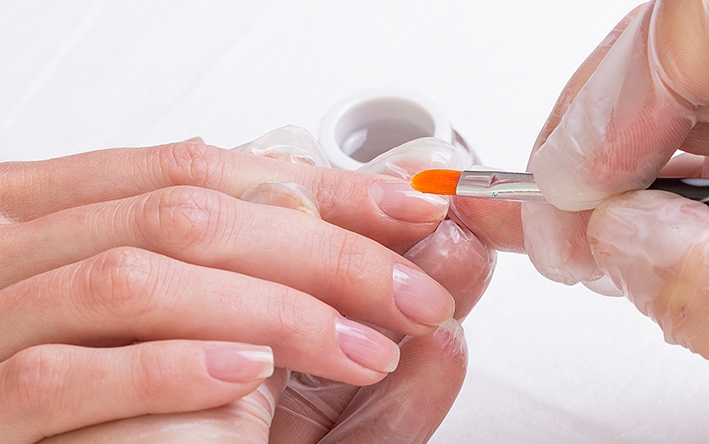
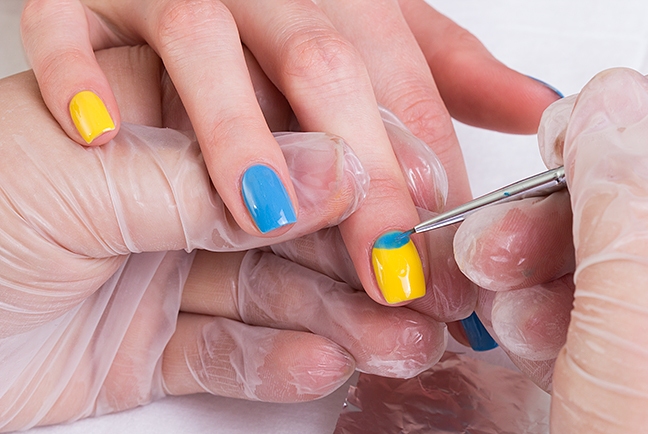
There are several techniques of applying varnish when performing manicure with brushes, having considered which you can choose the most suitable and convenient:
-
1 option - brush the contour of the hole, paint it in two layers, dry each for 2 minutes, and then apply the main coat and dry it for the rest of the nail.
-
Option 2 - use the main coating in 1-2 layers, dry, then draw the outline of the hole and paint it. This method is most common and, according to the girls, it is most convenient to perform.
- 3 option - apply the main coating, leaving intact the place of the future hole and dry it, then paint it and dry the layers.
Techniques and lessons on them lunar manicure are very similar, but at the same time they are different in complexity, which will allow you to learn how to perform manicure with shellac at home and gradually move to more labor-intensive technologies.
Tips
To manicure looked decent and professional, you should be careful during its execution and remember some rules and nuances that will help to avoid mistakes. Properly executed manicure will last a long time, if you follow some tips:
- When performing a manicure using a stencil, before placing your hand under the UV lamp, you must carefully remove all stencils. If, however, remove them after drying, when the varnish becomes hard, then the edges will be torn, sloppy.
In order to draw a manicure with a brush to be even and neat, there are also stencils with a cutout of the desired shape (hearts, stars, drops). You can do them yourself, cutting out of plain paper.
- The optimal power of the ultraviolet varnish drying lamp is 36 watts. It allows for a short time (about 2 minutes) to dry the varnish on the surface of the nails over the entire hand.
- Sometimes it happens that the hand under the lamp is not exactly flat, and then the gel polish slightly flows to one side. If this happened or other irregularities were found on the surface of the nail in the process of manicure - do not rush to remove it and do it all over again. It is enough to file irregularities, and the ugly look will be corrected with the application of the top coating.
- Another reason for uneven coverage is the application of layers that are too thick. It is better to apply two thin layers than one dense - the color of the manicure will not suffer from this, and it will look many times better.
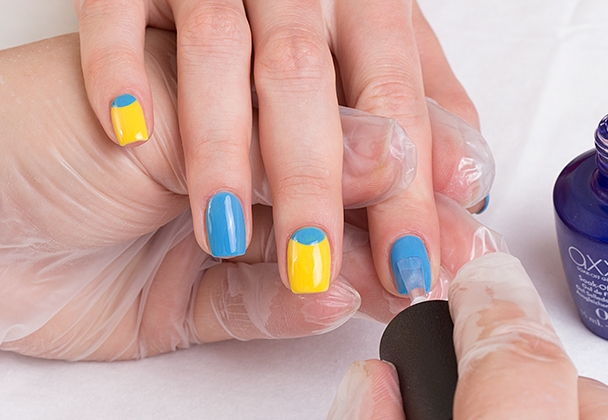
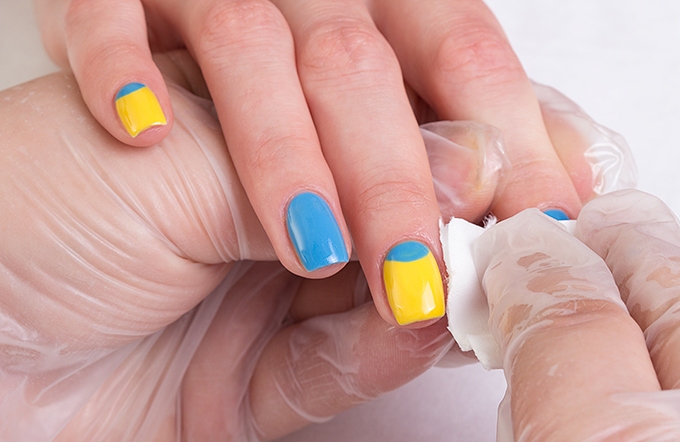
- After the last, fixing layer of varnish dries, you need to wipe all the nails with a lint-free cloth moistened with liquid to remove the sticky layer - this will give the manicure shine. You should not save and use a cotton pad - disc villi may remain on the surface of the nail.
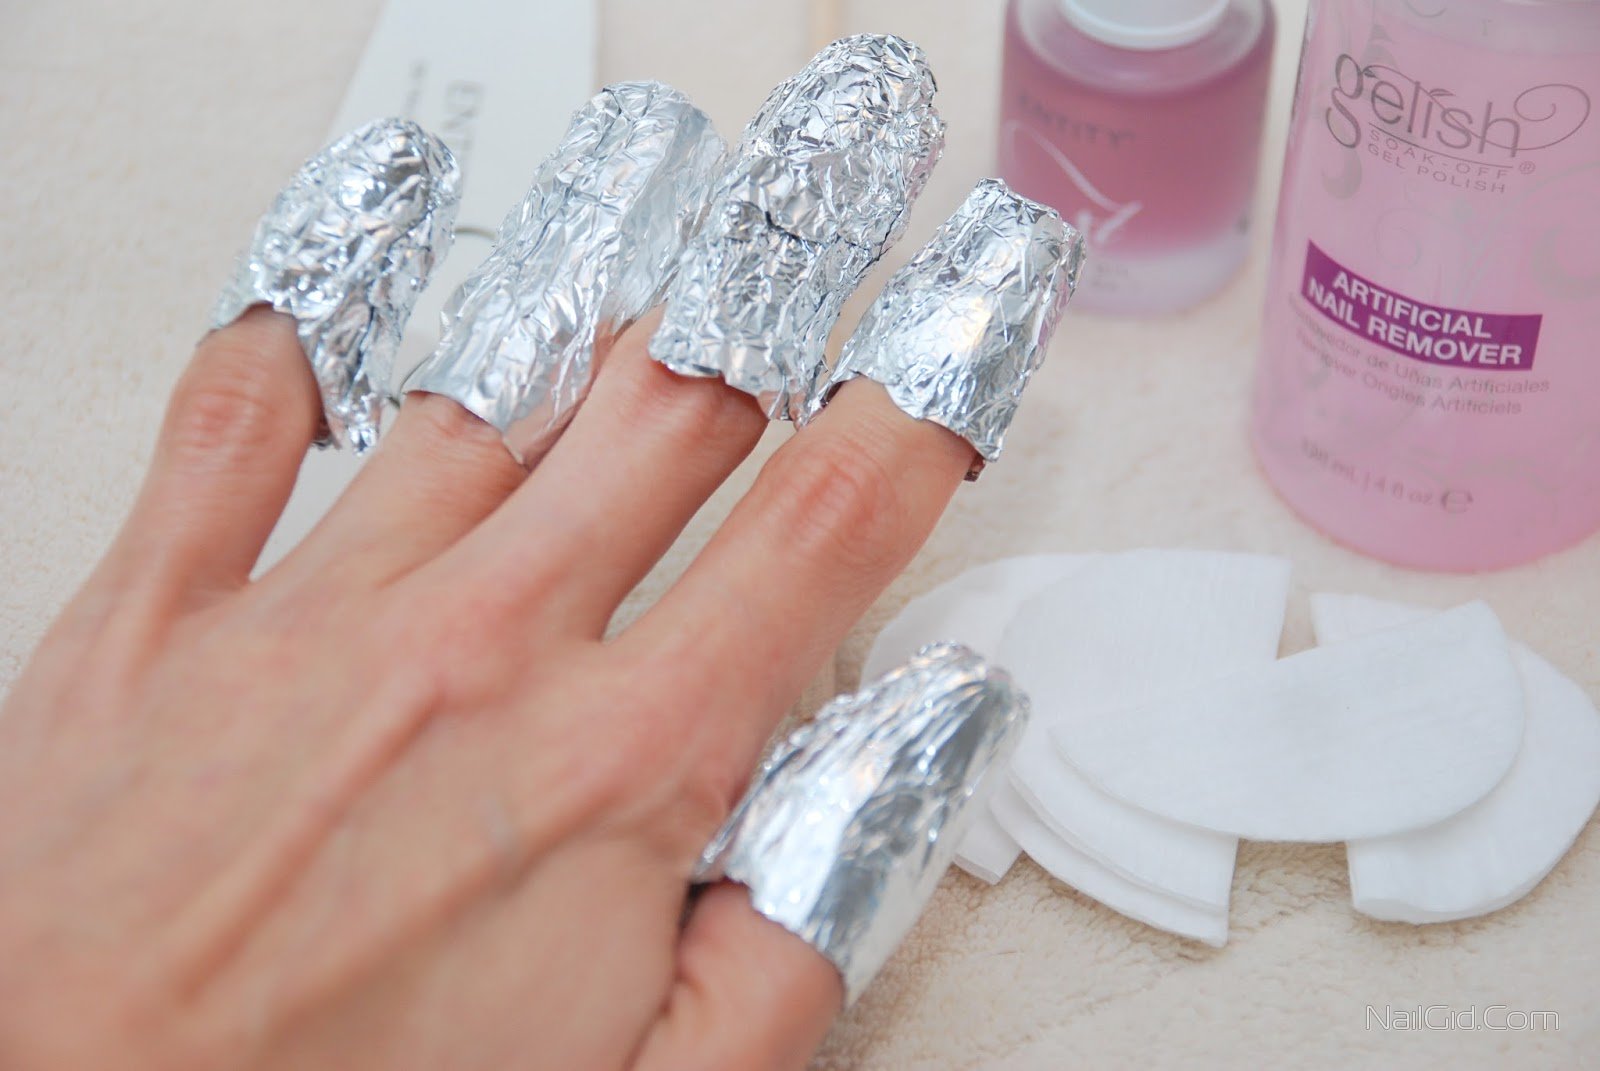
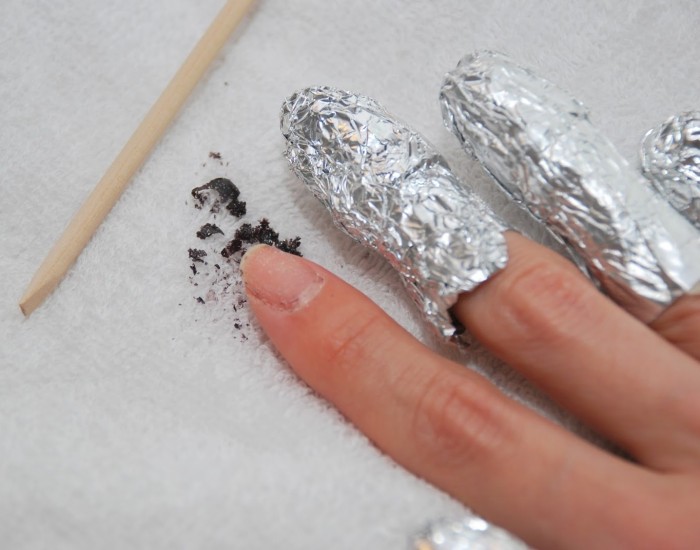
- It is important to know how to properly remove the varnish. First, the nails are lightly treated with 180 files of abrasiveness. Then each nail should be wrapped with a cotton pad dipped in a special liquid for removing gel polish, and wrapped with foil on top and kept for about 10-12 minutes. During this time, the lacquer should move on its own almost completely, and its remains can be easily removed with an orange tree stick.
It is not necessary to replace the liquid for removing shellac with alcohol, liquid for removing ordinary varnish containing acetone, vinegar and other solvents - they can dry out the skin of your fingers and even leave burns behind.
- Since ultraviolet dries the surface of the skin of the hands and the skin close to the nails, do not forget about the care after performing a manicure. To keep your hands well-groomed, you should use a moisturizer and cuticle oil. A light massage of the skin close to the surface of the nail will also be useful - the blood flow will provide additional nourishment, restoration and strengthening.
- It is recommended from time to time to give nails a rest from any coatings. Whatever regenerating and strengthening properties would not have gel polish, the nail plate needs to get oxygen for nutrition. Usually, it takes at least a week to restore the water-fat balance of the nails. The best regime for nails - two cycles of manicure, then 20-25 days of recovery.
- If the varnish exfoliates prematurely, you should not always blame the manicurist or yourself for this, if the manicure is done at home.Detachment can be caused by the individual characteristics of the body, vitamin deficiency, the use of certain types of drugs, disorders in the hormonal system.
- Also sustainability is affected by the frequency of homework - cleaning, washing, washing dishes. A change in temperature leads to the periodic expansion and contraction of the nail plate, as a result of which microcracks can form under the coating, leading to subsequent detachment.
Remembering these simple rules, you can be sure that the coating will please its owner and will not weaken or damage the nail plate. These tips on the technology of applying gel varnish and nail care are suitable for any kind of manicure - lunar, reverse, with rhinestones, with foil and many others.