How to glue stickers on gel polish
Beautiful nails and flawless manicure - the dream of every woman. This is not only a sign of grooming, but also a way to stand out from the crowd, to show their individuality. Today the market of the nail industry offers a lot of original products, with the help of which any manicure acquires a special style and allows a woman to be the center of attention. One of the most spectacular attributes of the ideal nail cover are the sliders. What are their features and how to glue such stickers on gel polish?
Features of the decorative element
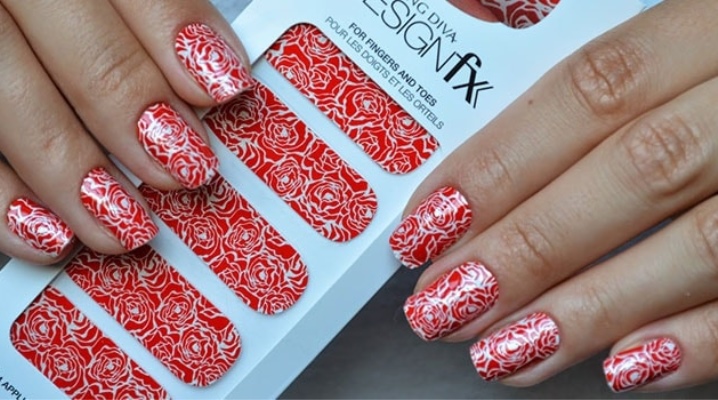
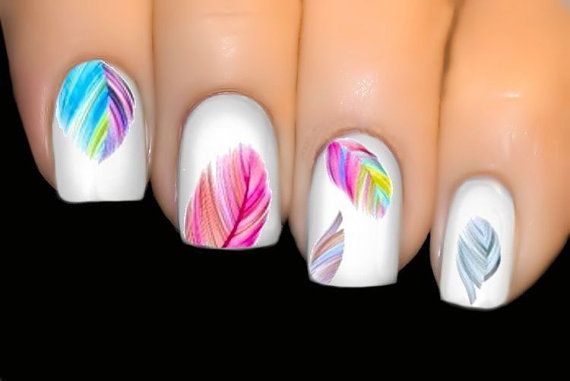
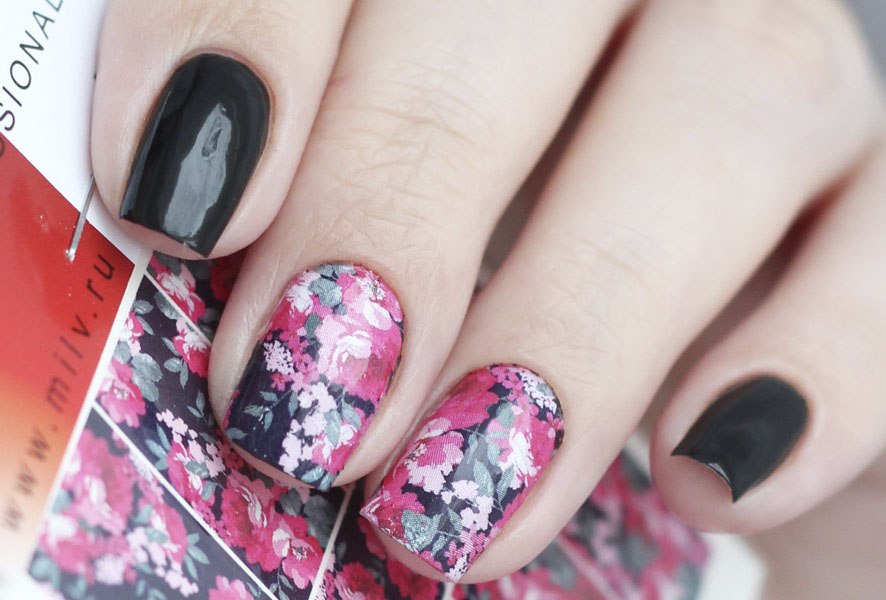
Nail sliders are one of the most popular manicure techniques. This term is translated from English meaning "slide." These are special stickers that are thin films with a pattern of various subjects. Due to the special composition of such films are securely fixed on the surface of the nail plate.

The slider design successfully replaces the art painting, it looks flawless. Applied to the gel varnish and top coat with a fixative, it prolongs the life of the manicure, while not losing color saturation and glossy shine.
The advantages of such a nail product include simplicity in work: it is possible to carry out the design of nails with stickers not only from a professional master in a beauty salon. Such pictures can be a decoration for all fingers or flaunt only a few, which looks no less beautiful and spectacular. They can be of different sizes, completely cover the surface of the nail plate or just the part selected for the design. Such pictures are also appropriate on the jacket, if you stick them closer to the base of the nail.
Observing certain rules of application, you can decorate your nails with manicure with sliders yourself at home. This saves time on painting the nail plates, allows you to create a full-fledged manicure, and the emphasis on any one finger.
Decorative stickers are safe for nails. They do not harm their structure, are easy to apply and rarely capricious when removed. In addition, the sliders are sold in free access in many specialized stores, so buy them based on their preferences is not difficult.
Such nail decorations have a wide price range, which allows you to choose luxury and expensive (from 500 to 1000 rubles), and more acceptable drawings (20 - 100 rubles), not inferior in beauty to expensive analogues.
Depending on the type of labels, they have different ways of gluing. Each technology has its own nuances, the violation of which will lead to the loss of a perfect type of manicure.
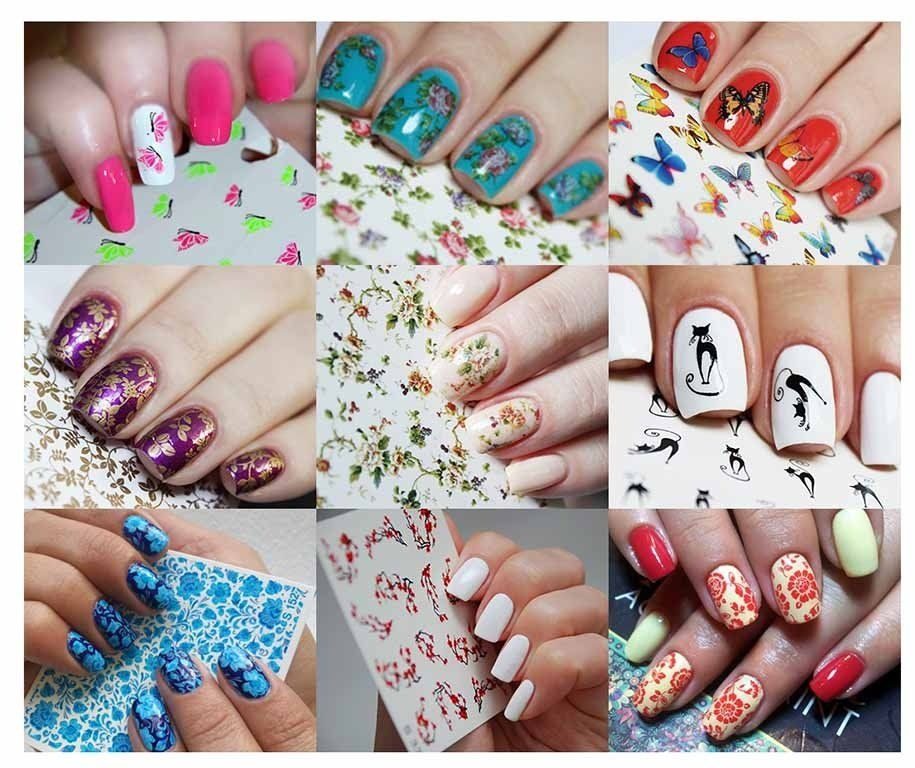
Themes of drawings
Colorful pictures can be bought in any cosmetic boutique. At the same time, their subject matter often amazes and baffles: I want to buy everything, it is so beautiful. The most popular image motifs on such design elements are:
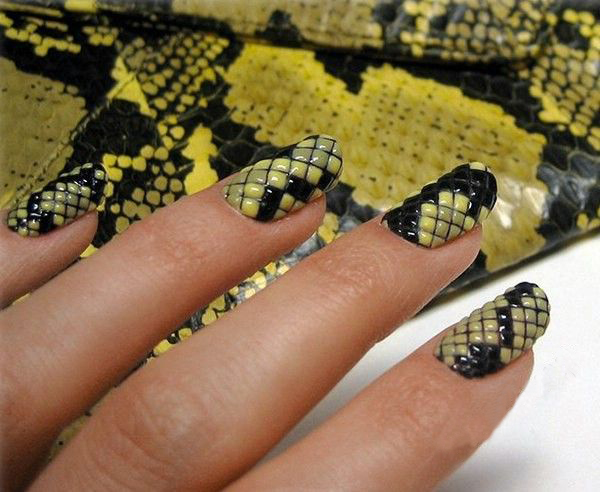
- animalistic drawings (all kinds of kittens, dogs, snakes, tigers, panthers, leopards, bears);
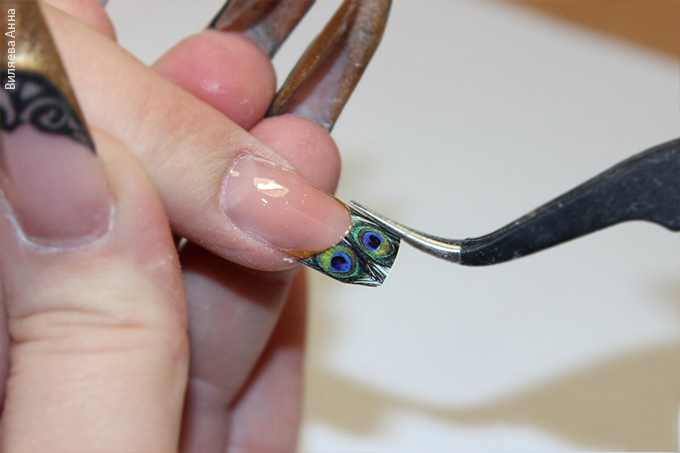
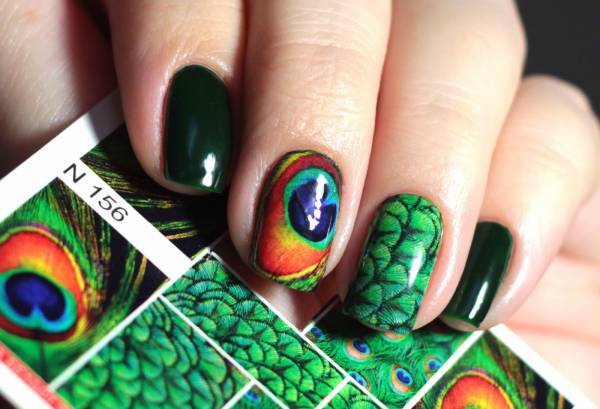
- birds (peacocks, gulls, birds of paradise);

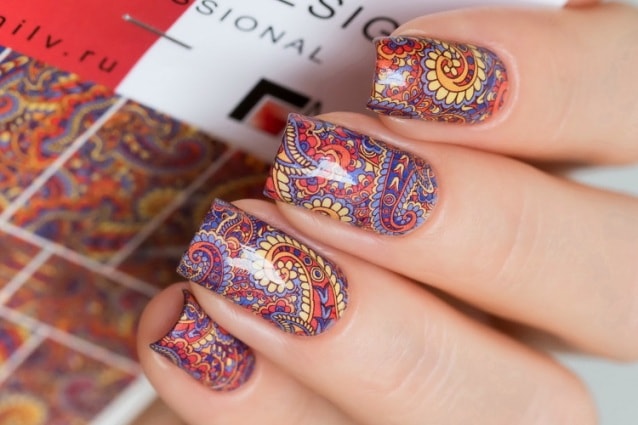
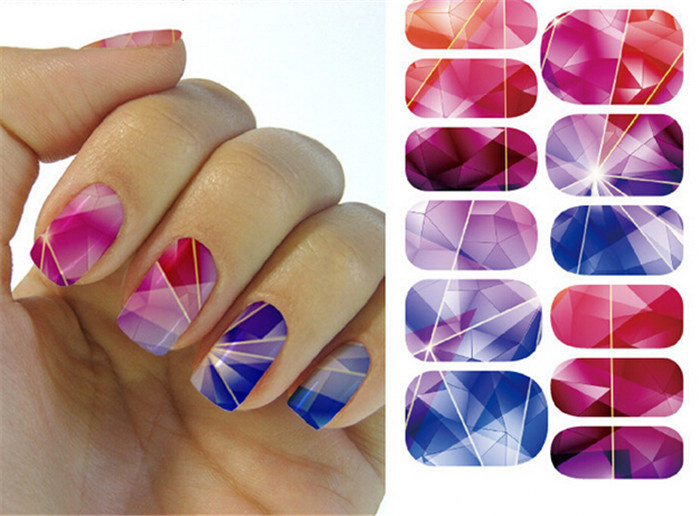
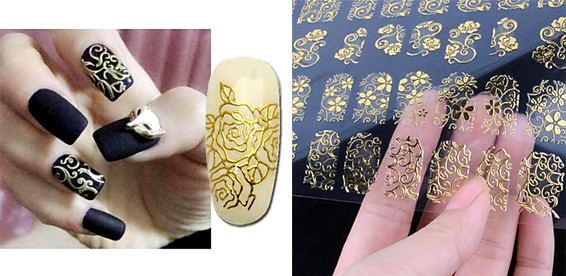
- ornaments (geometry, lace with scallops, stripes);
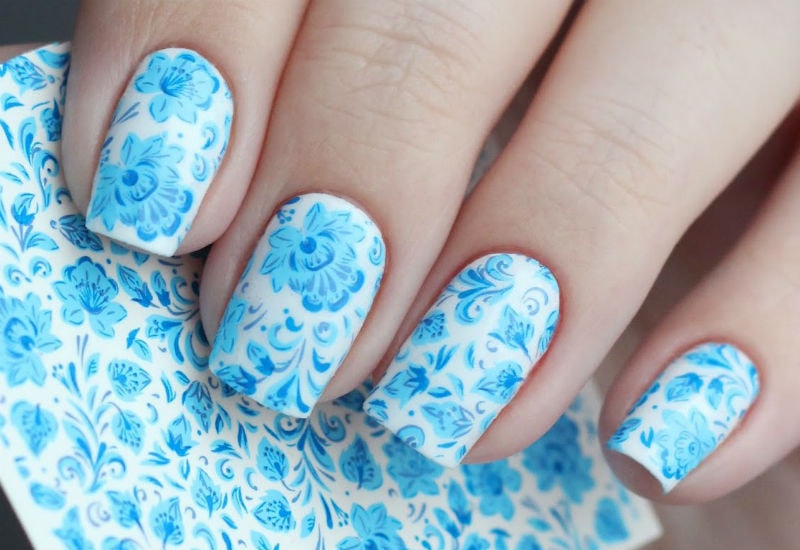
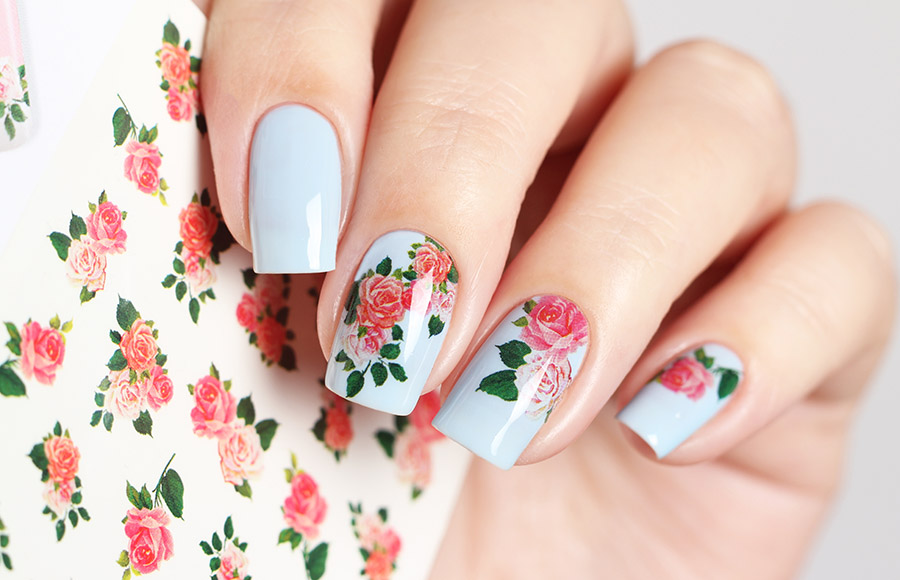
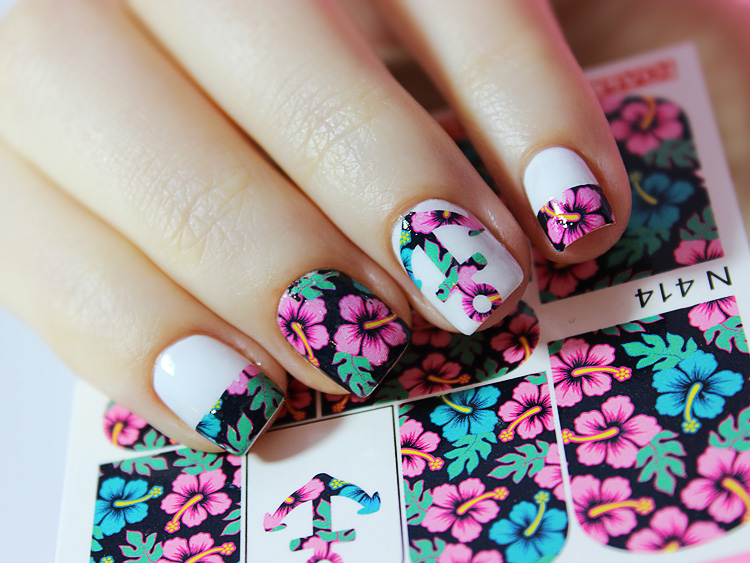
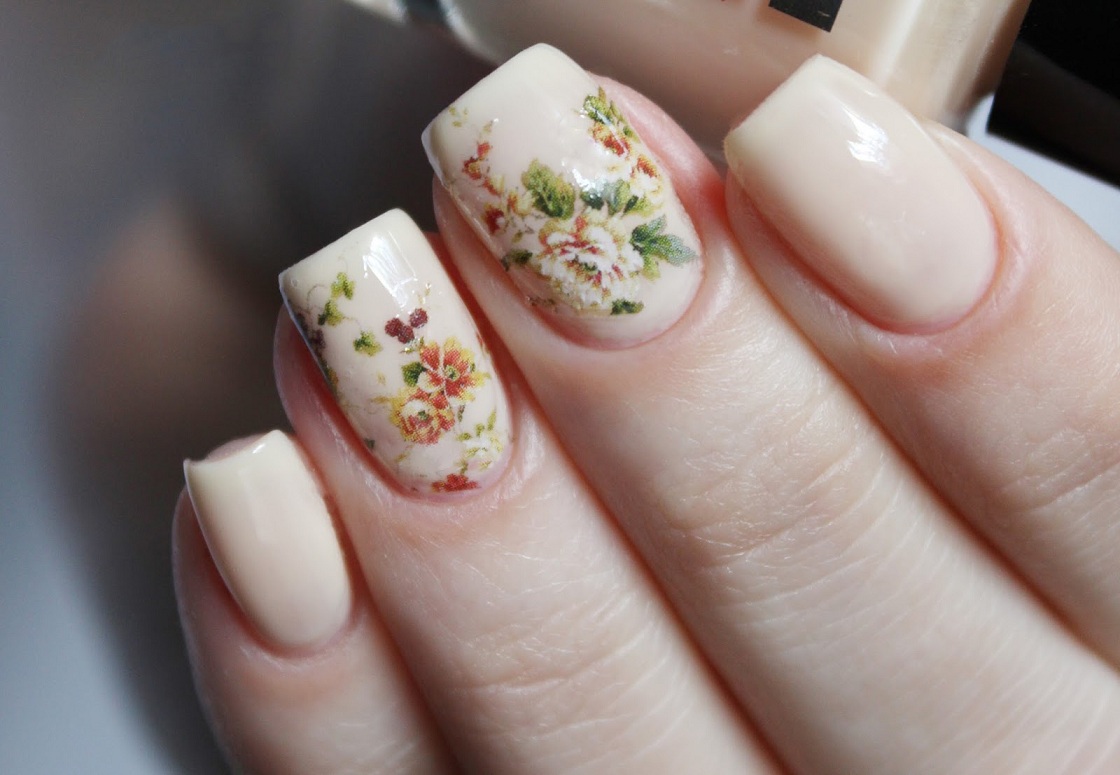
- prints (floral, abstract patterns, compositions with butterflies, designs under the skin of reptiles and color animal skins);
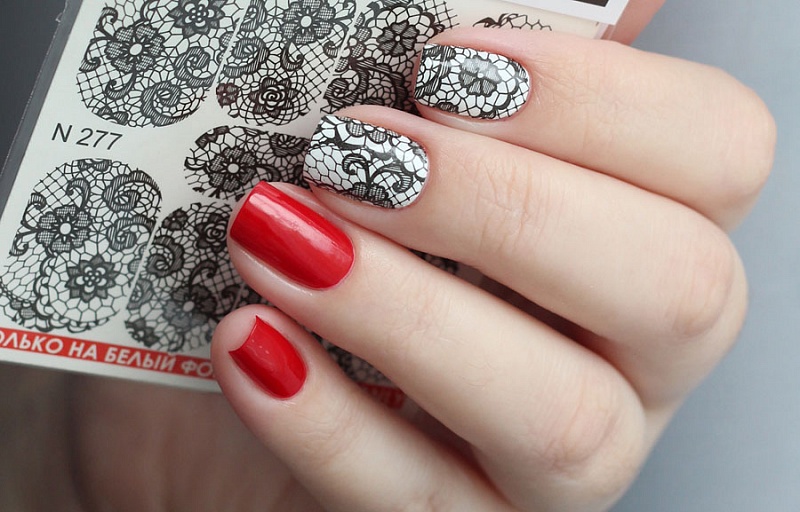
- lace (web, all sorts of lace patterns, made in one or several shades, imitation of textile textures);

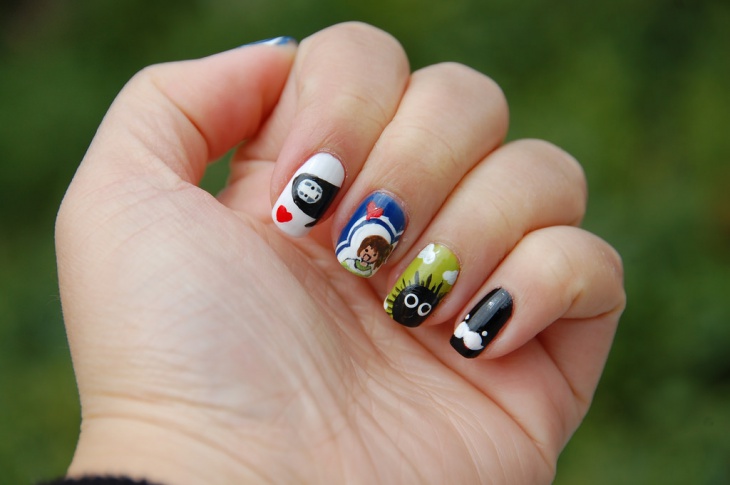
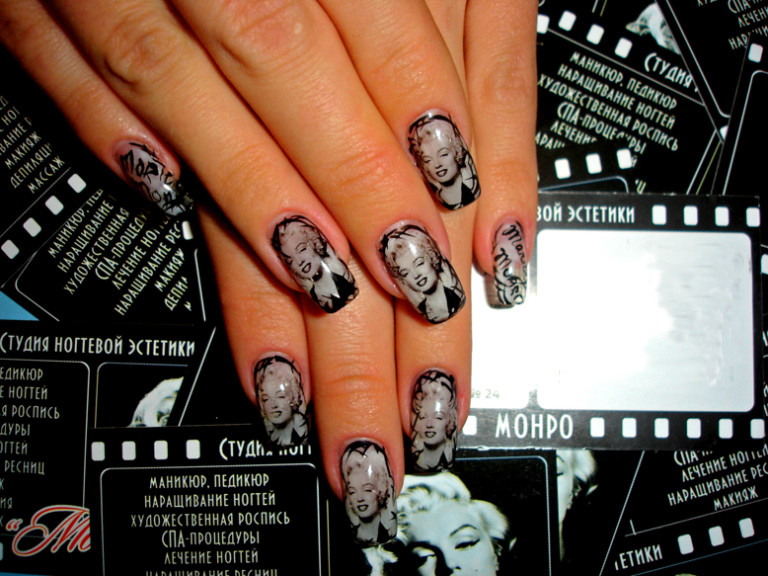
- portraits (famous people, female faces, silhouettes);
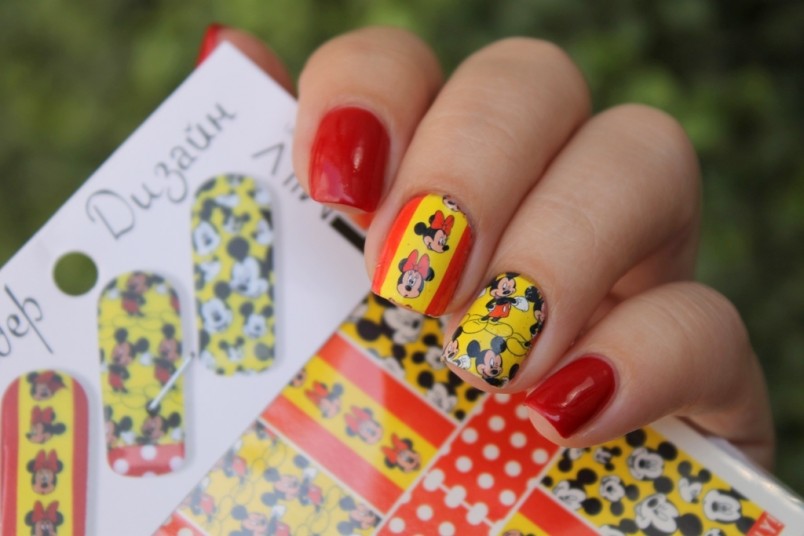
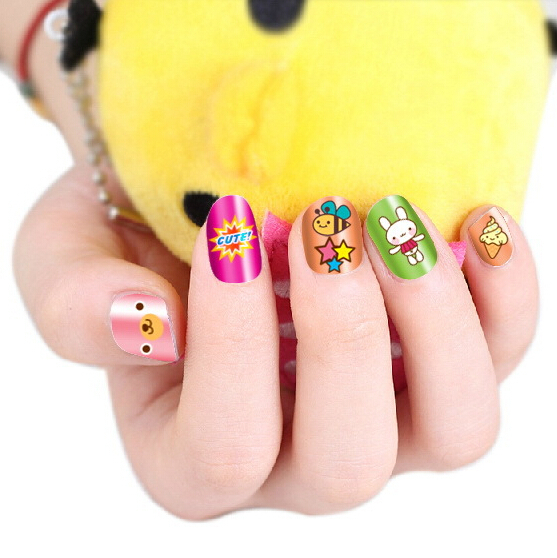
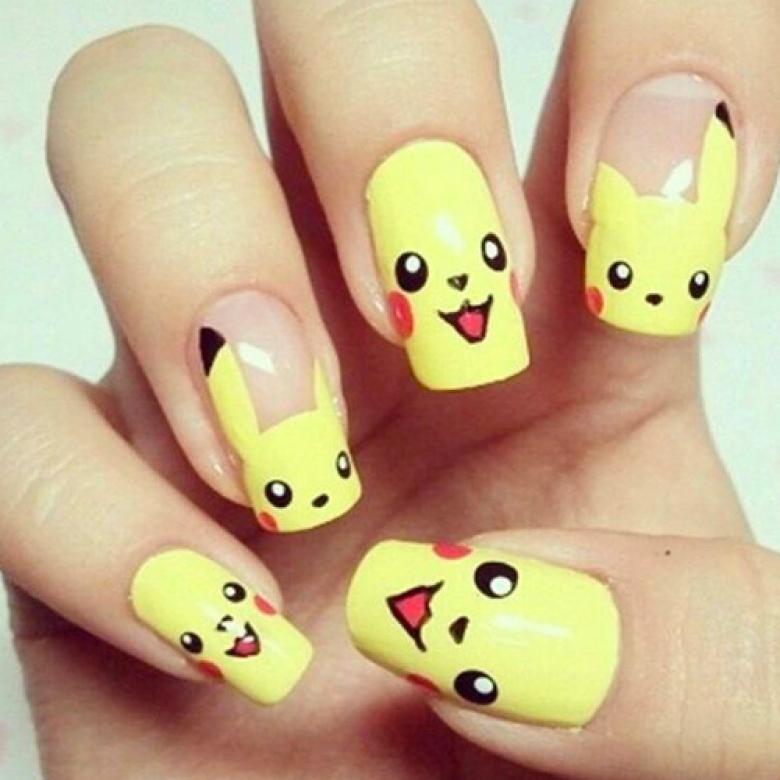
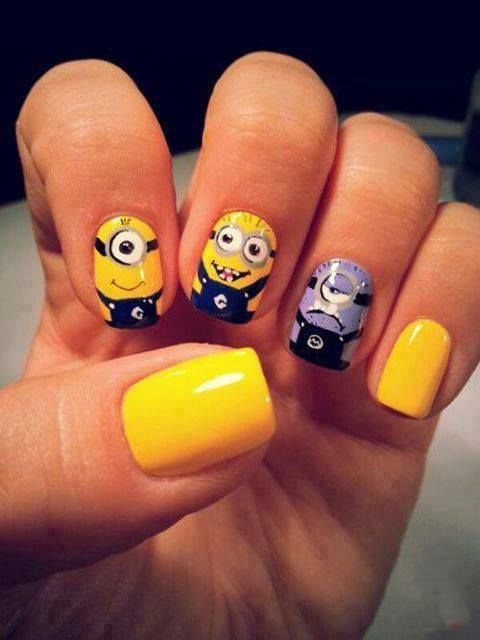
- cartoon characters (relevant for young people);
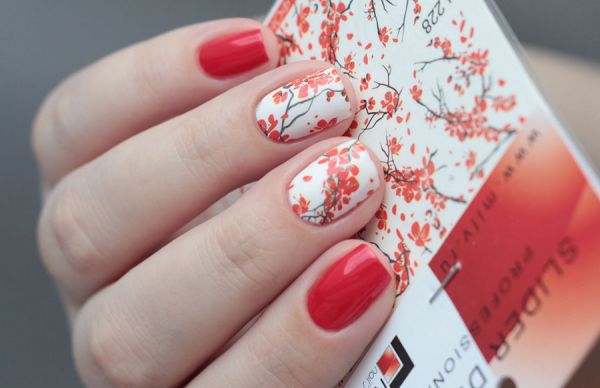
- Japanese patterns (sakura, geisha, anime sketches, etc.);
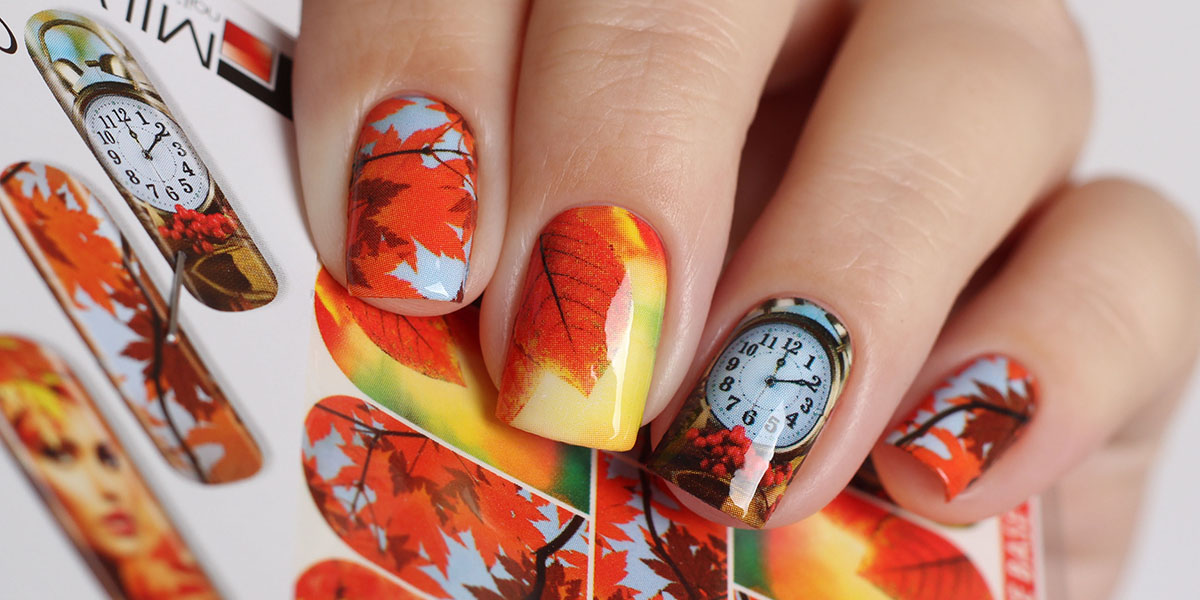
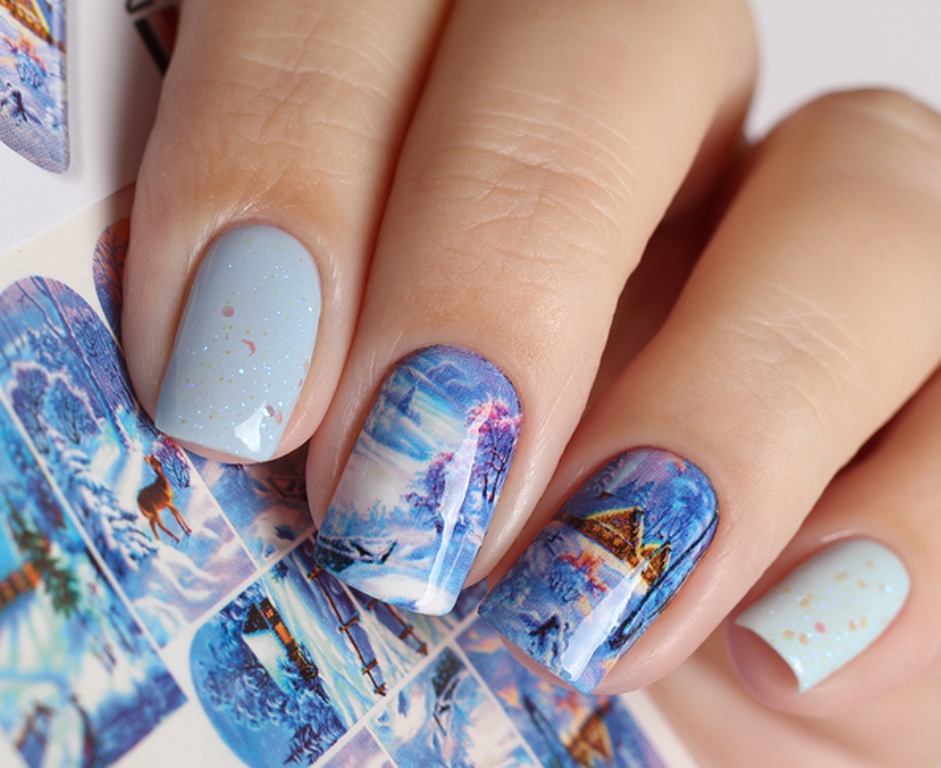
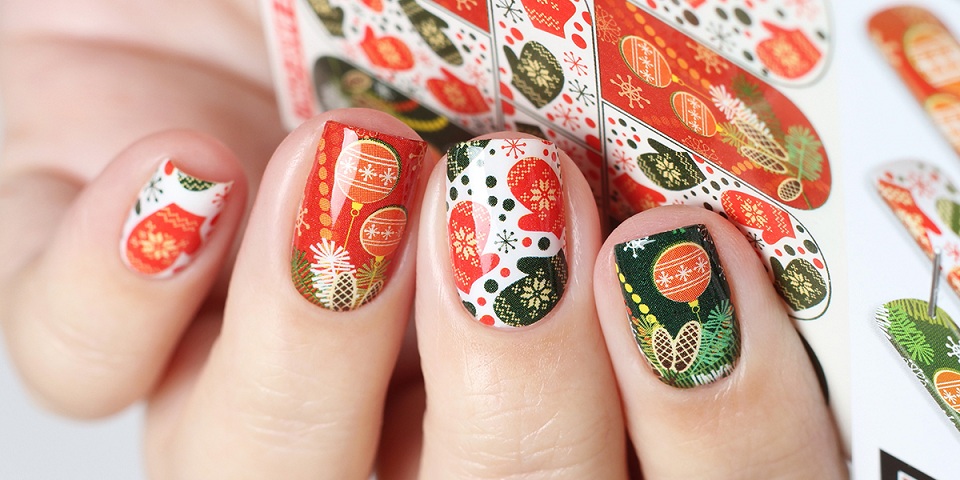
- Christmas theme (snowmen, snowflakes, bullfinch, deer, Christmas compositions);
- fruits and berries (various patterns with one or more objects);
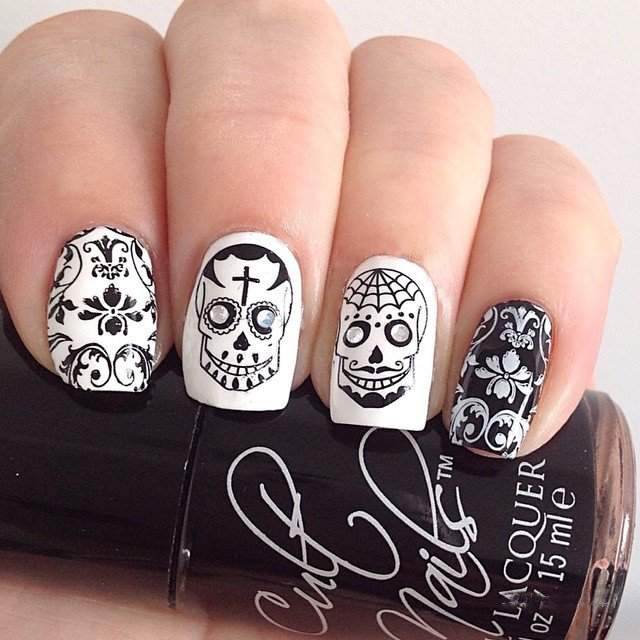
- rock style (skulls, crosses and similar attributes);
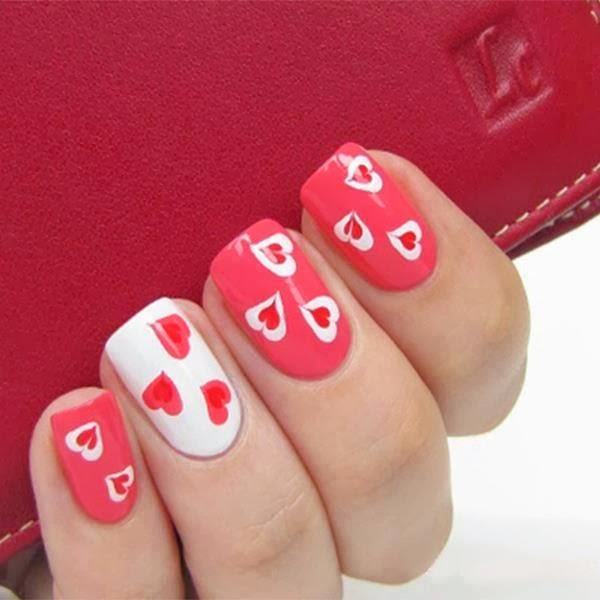
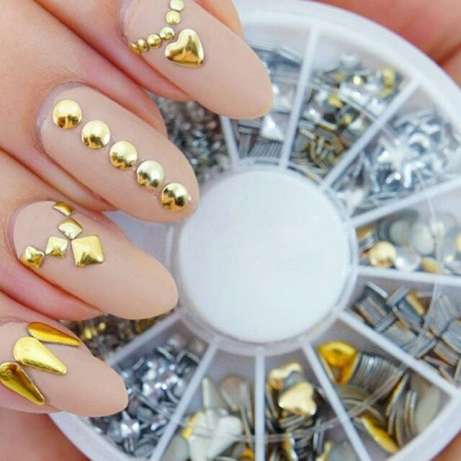
- glamor (hearts, bows, stars, gold or silver letters).
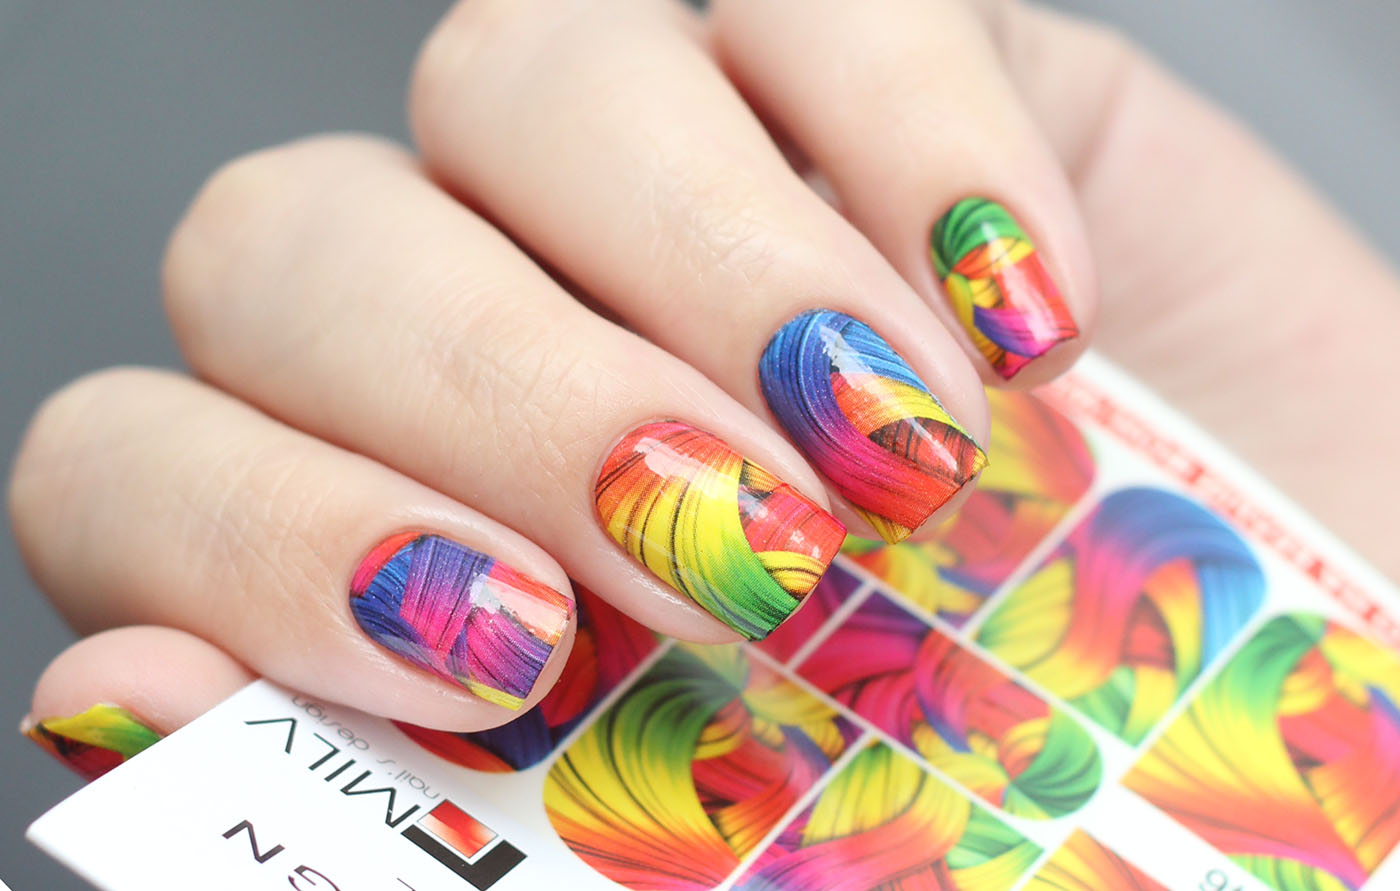
Patterns can be colored, monochrome, flat, with a small relief. Some drawings imply the maintenance of symmetry, others do not need it. Today, a free theme is used more often, in which accents are glued to just a few nails.
Kinds
Today the choice of such products is quite wide. There are many varieties of stickers for nail design.
Water
Water stickers are a thin film located on a white paper base. Feature of decal is the need to base on a translucent basis, so they need a careful selection of the shade of varnish. The background should be in harmony with the color palette of the pattern and not merge with it into a single incomprehensible spot.
The disadvantages of this type of labels include the likelihood of damage to the workpiece in the process of fitting it in size and shape.
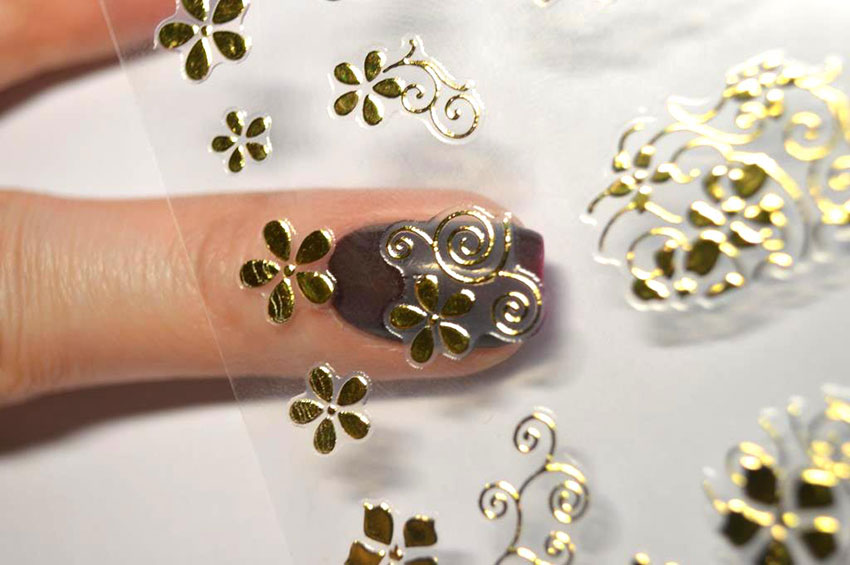
Self adhesive
Such drawings are photodesigns (fragments with a sticky surface located on a special substrate). Their feature is autonomy. In order to glue them, it is enough to separate the sticky layer and paste the fragment on the surface of the nail.

Stickers themselves can represent individual objects of a particular pattern or be a full-fledged object. They come in the form of a variety of sets of 10 plates, designed specifically to cover the entire area of the nail. The sets created for the jacket are made in the form of strips.
3D
Stickers of this type differ in volume. They are slightly convex, unlike ordinary flat pictures. This kind of sliders can be a full-fledged decorative element or a nail accent.
Such stickers are water based and glue based. In general, they are not difficult to work, although sometimes there may be difficulties (when designing a manicure on the entire area of the nail). The presence of a small relief (bump) does not interfere in everyday life, it does not scratch and does not cling to clothes and other objects.
The advantages of 3D stickers include the possibility of combining them with other decorative design elements (for example, with ordinary stickers). They are convenient in work and often look more beautiful than their counterparts. The disadvantages include the difficulty of removing the sticker when removing the coating. Special liquids for removing gel polish are not intended for such procedures, so this sticker will have to be scraped off.
Application Methods
There are several methods of gluing nail stickers. Each technique is unique in its own way, so you can choose the best option. Performing a slider design step by step is actually much easier than it might seem at first glance, it will not take long.
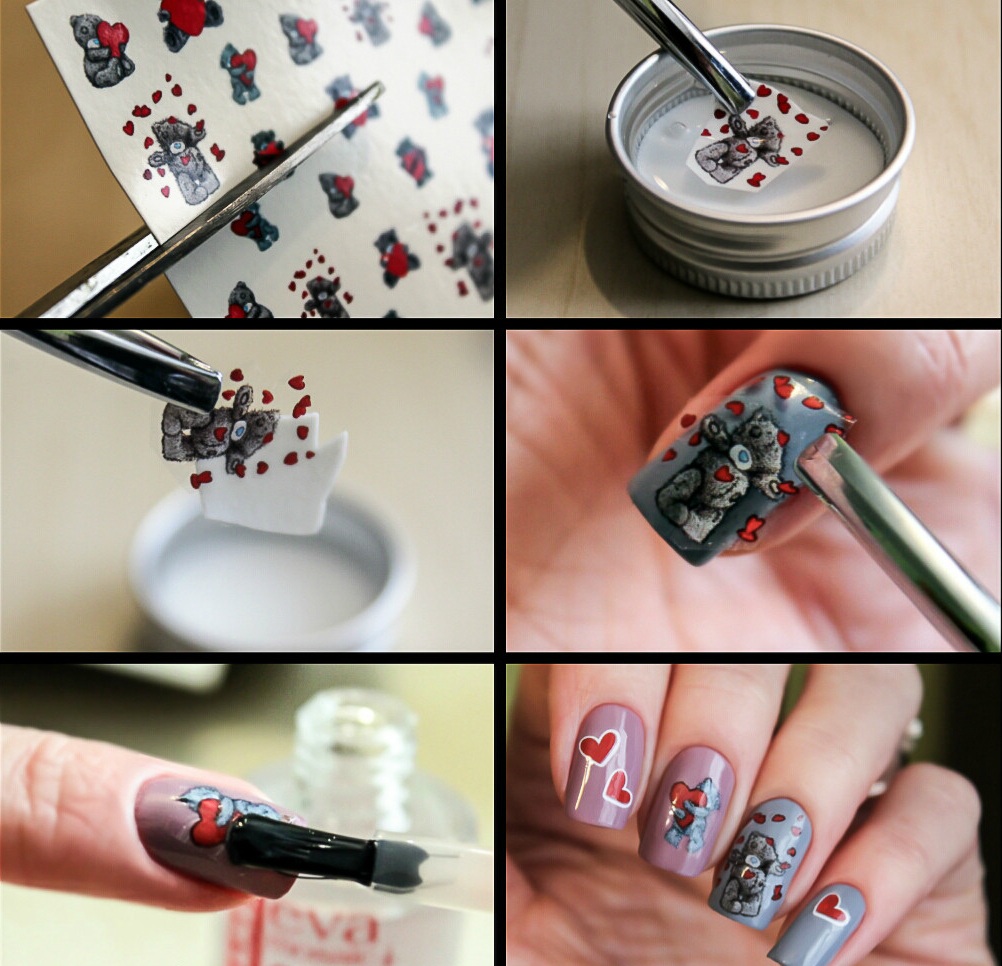
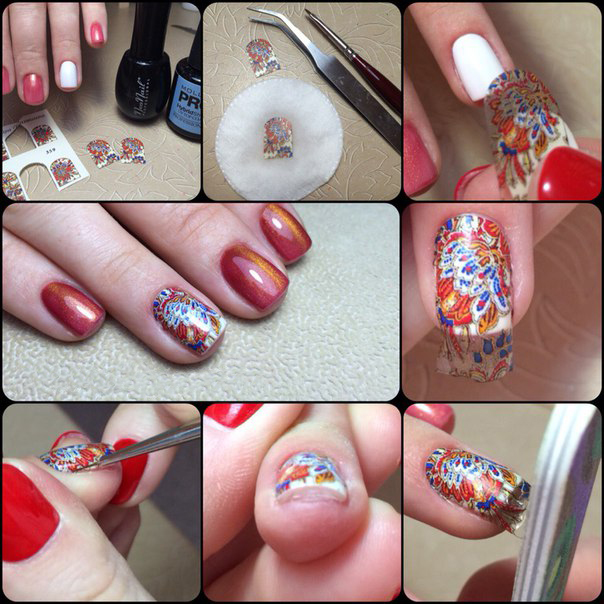
Water based
Sliders cut to the size of the nails, then immersed in water. You can use a cloth moistened with water by attaching a cut out to it on one nail. The film with the picture will peel off in both cases easily.
On not dried gel polish
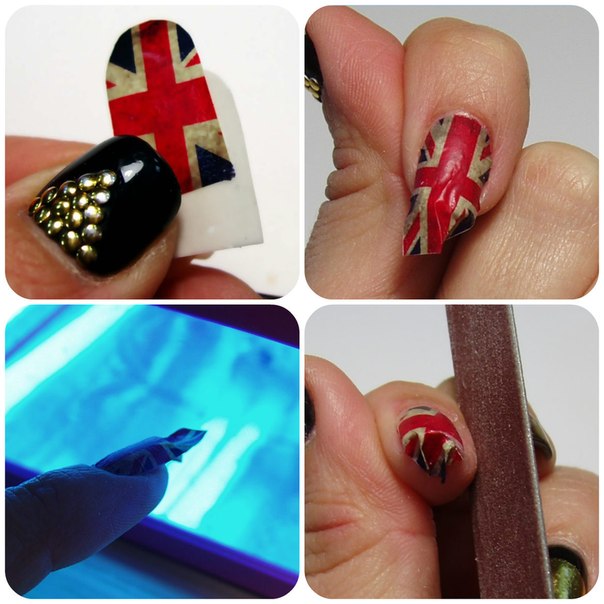
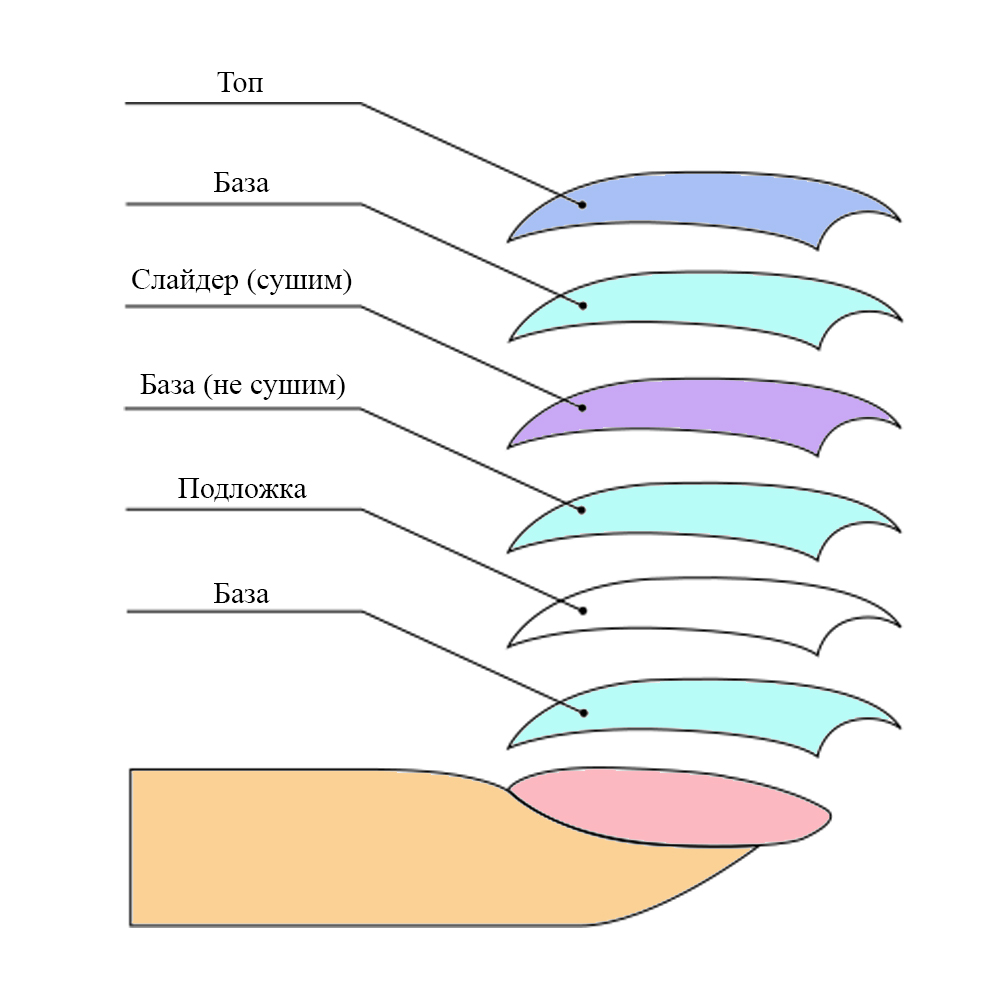
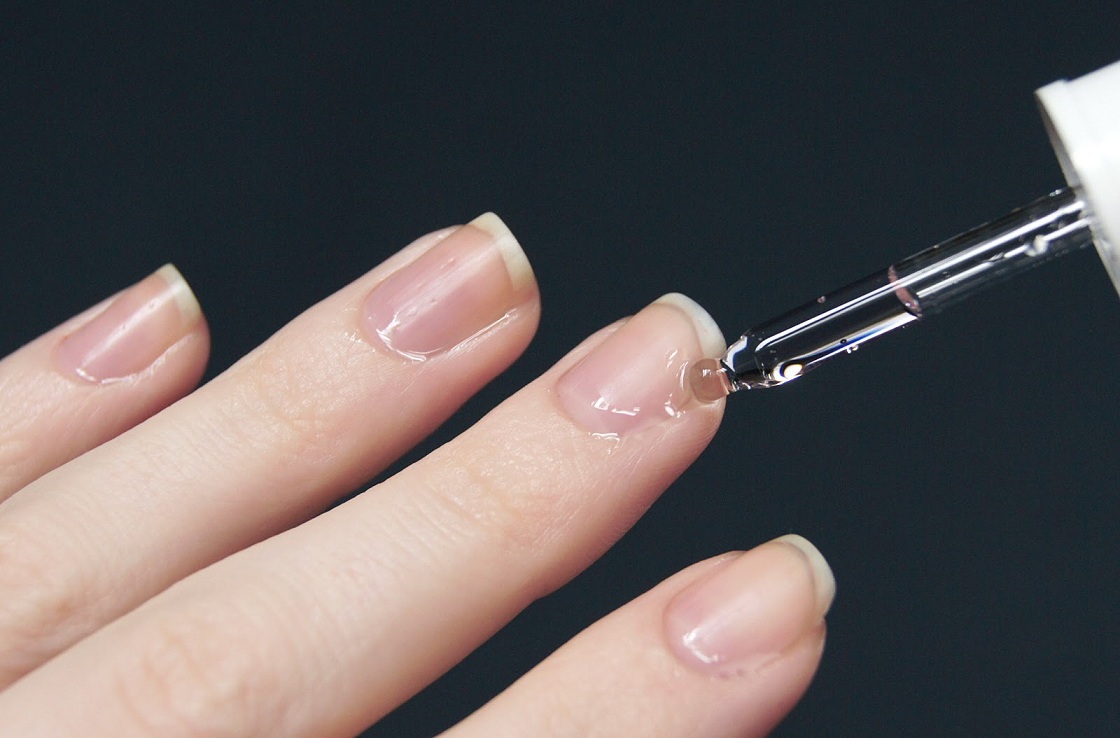
One of the most reliable ways to slider design is when images are applied to an un-dried pigment layer. Skilled masters advise to use a brush when smoothing a sticker. So the drawing will not break and will lie flat on the surface of the nail plate. The brush allows you to firmly secure the sticker to the base without air bubbles and waves.
The advantage of this method is excellent durability, since the coating layer dries with the slider. The adhesion of the slider with a coating with this variant of gluing will be as strong as possible. Therefore, in this case, one layer of fixer (finish) is enough.
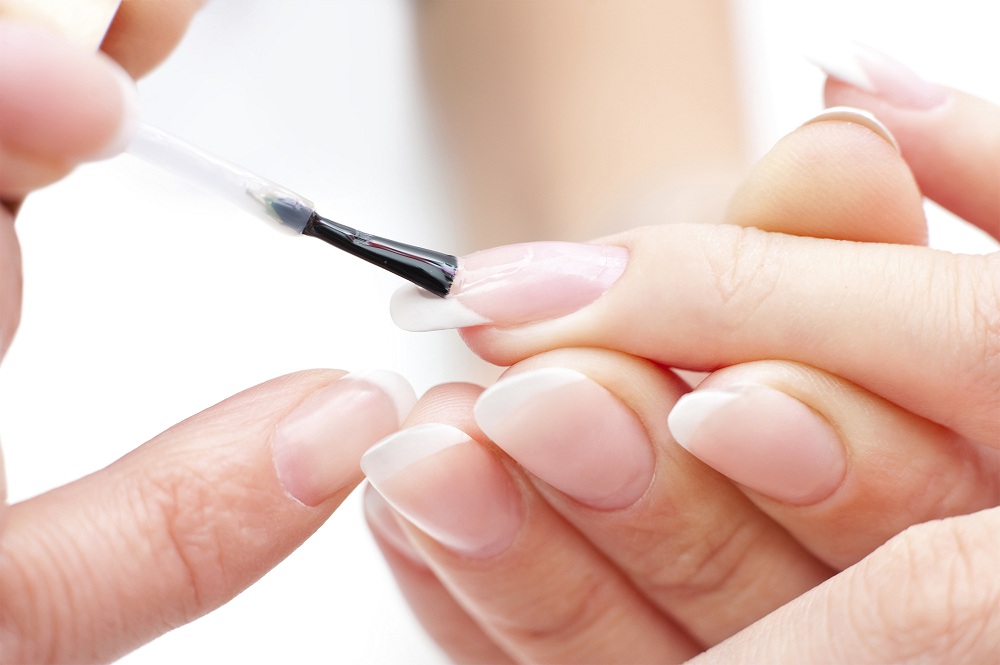
On top with a sticky layer
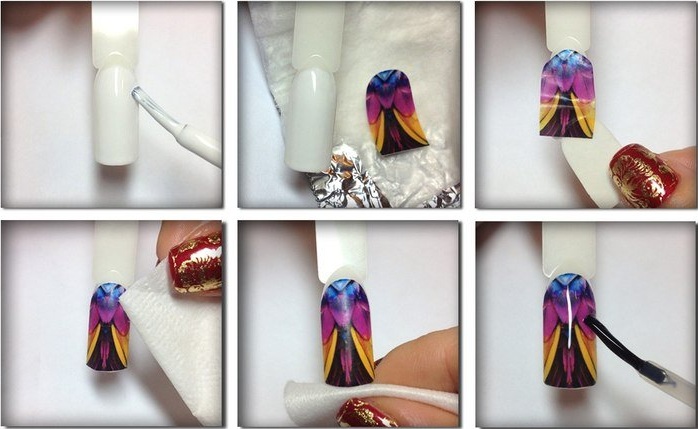
This method is very convenient and easiest. Sliders are applied to the finish coat after the pigment.Unlike the base coat, the top is distinguished by a thicker and thick consistency, which simplifies the process of applying pictures on the surface of the nail plates.
The label is spread with a brush and then fixed with a finishing coat. It is necessary to try so that the size of the sticker, if possible, does not go beyond the lateral borders of the nail plate.
On ready manicure
This method allows you to update a ready-made manicure. If the nails are painted with gel polish, but after a few days you want a change, this is the perfect solution. At the same time, it is not at all necessary to remove the old coating in order to change the design of the nails.
In this case, in order not to create an extra coating thickness and unnatural appearance, it is better to stick a slider design on the ultrabond (acid-free primer). He perfectly copes with fixing labels and will not create obstacles in the work. After completing the design, you need to fix the manicure using a top coat without a sticky layer.
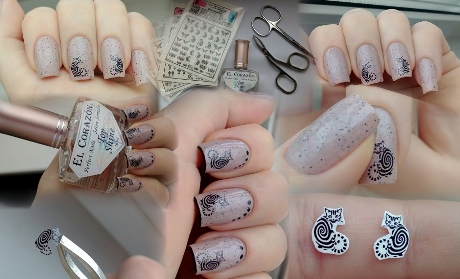
Photo design for long nails
In the process of work, you need to trim the stickers in shape and size, the most suitable for each specific nail. However, it is not scary if the film protrudes over the edge of the nail butt: then it can be cut with scissors and after drying, cut with a file.
Straightening the slider design with an elastic brush, you need to remove all voids. If the sticker does not fit well on the surface of the nail, you can make small incisions. Some experts use orange sticks to straighten a film with a design.
Having pasted a film, it is fixed with a layer of a finishing coating without a sticky layer. It is better if the top is glossy: the look of the pattern will be more attractive. In addition, you should not stick such pictures on a dark base, if the drawing is faded and made in semi-transparent muted tones.

Working with the slider design will appeal to every woman, no matter how you choose the way of sticking pictures. The duration of the procedure will not take more than 10-15 minutes with the condition that the work will be carried out calmly and carefully.
To draw such patterns can not every experienced master, and for much more time. The main rule of all stages of design is accuracy at each step. The technique of gluing water-based sliders is a bit like decoupage.
How much should you hold?
With proper design, the stickers stick on the nails for at least two or three weeks or more. The durability of such a manicure is affected by the careful handling of the coating. This is especially true of domestic work, in the performance of which the hands are in contact with water and aggressive detergents and chemicals.

In order not to wonder why the stickers do not stick on the nails for a long time and the beautiful coating quickly exfoliates, you need to follow all the rules of manicure with gel varnish at each stage. It is important to perform all actions carefully, without defects. Any slight imperfection of bonding will ruin the perfect appearance of the nails and ultimately lead to the fact that the coating will have to be removed.
In addition, the durability of the colorful design with stickers is affected by the use of high-quality components. It is better to buy gel varnishes reliable companies that are time tested and have positive feedback from experienced craftsmen working with this type of coating.
The coating can reduce the period of resistance in the case of hormonal changes in the body during pregnancy. In addition, the stickers can hold on the nails less if the nail plates themselves are unhealthy and very thin. To help thin nails can a special strengthening gel, which does not need to be subsequently removed by cutting.
How to translate at home?
Technology slider design for gel polish requires knowledge of the techniques of the masters working in the cabin. To extend the life of a colorful design, you need to correctly and gradually carry out all the items of the instructions, starting from the very beginning.
Before applying the base coat, it is necessary to treat the nails and make a light manicure without soaking. It is necessary to remove the cuticle, trim the shape of the nails, carefully handle the free edge of the nail. On how smooth it will be, depends not only the quality of the coating, but also its durability.
In addition, you need to consider that the perfect manicure implies the same length and shape of all nails. If an oil or cream was used in the treatment of the nails, they should be removed.
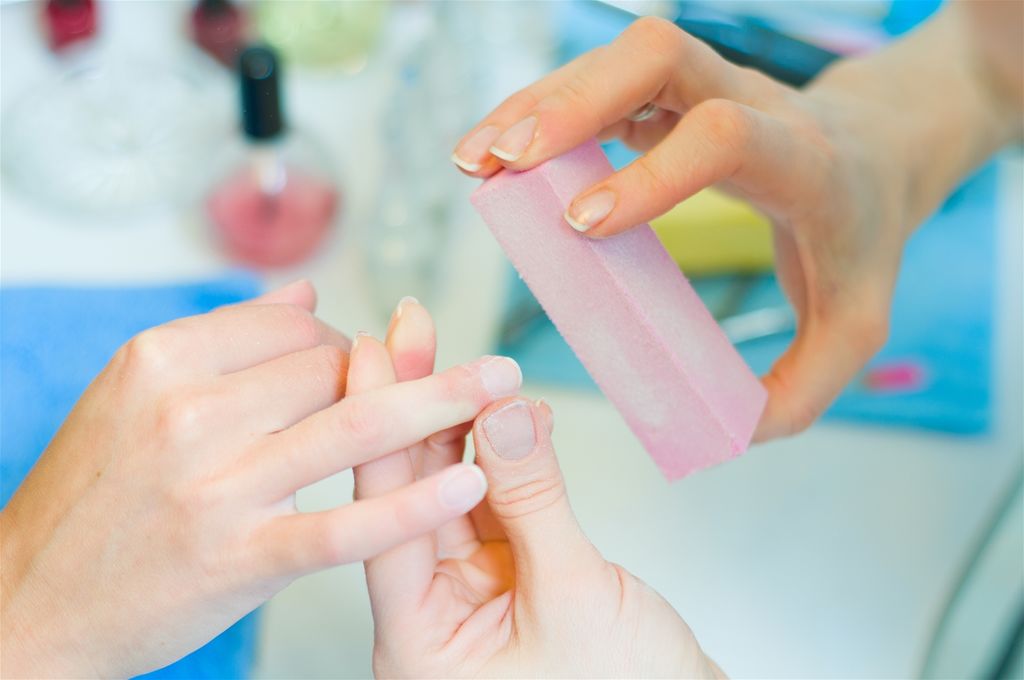
After that, the surface of the nail plate must be sanded using a soft nail file for natural nails (baf). You need to do this delicately, removing only the gloss. If you strongly press on the buff, you can harm the structure of the nail, removing not only its natural protective layer. Nails treated with a nail will look dull.
In the next step, a degreaser (dehydrator) is required. He will remove the residual sawdust after grinding and the remnants of cream or oil, if they were used at the very beginning. At this stage it is important to pay special attention to the end of the nail, the inside of the free edge and side rollers. If the untreated area remains, it can lead to a violation of the resistance of the coating.
Having completely removed the keratin layer, it is necessary to use an acid-free primer. It is especially necessary in cases where the nails are thin and soft. This component manicure helps to improve the adhesion of the coatings to the surface of the nails, strengthening their structure.
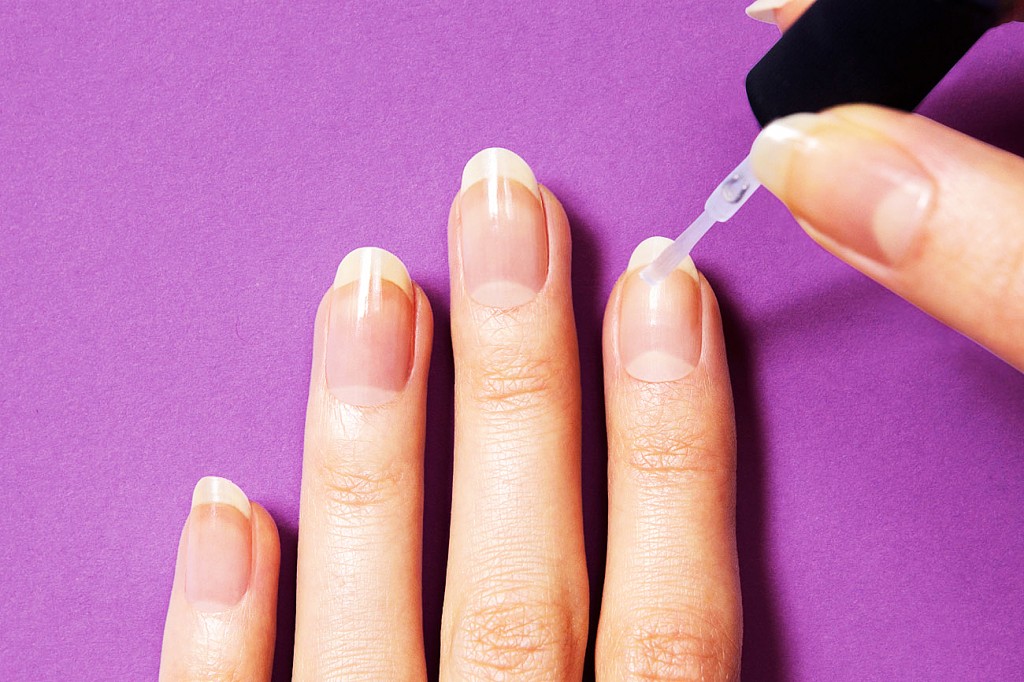
Preparing the nails for coating, put a base coat. It should be thin, evenly distributed over the entire surface of the nail plate. It is important not to forget about the end of the nail and the sides. The base coating has a sticky layer that cannot be touched: it makes the adhesion of the nail to the pigment maximum. When working, you should try to do everything carefully so as not to violate the integrity of the coating.
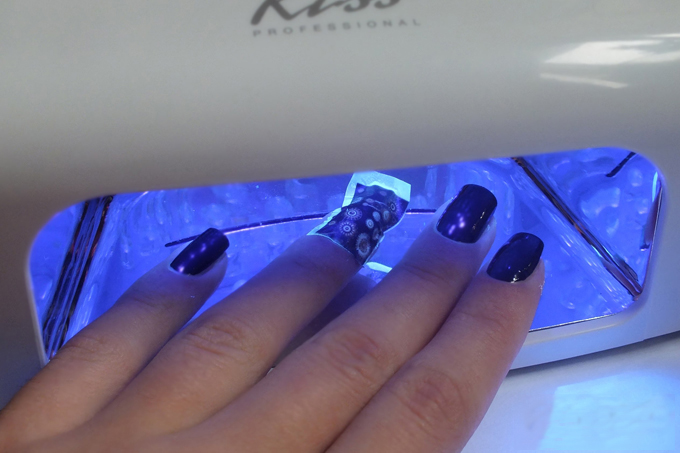
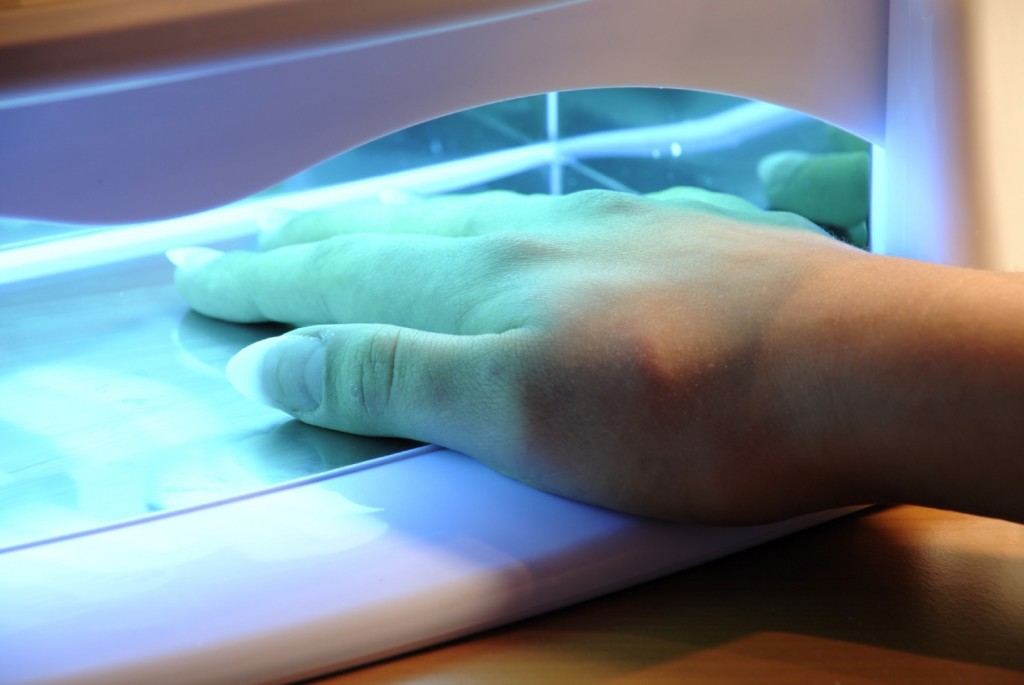
A distinctive feature of the entire manicure using gel polish is the need to dry each applied layer on a gel base. Remove the imperfections of the need to polymerization in a UV or LED lamp. A thick layer can quickly crack, which will affect the quality and durability of the subsequent steps.
Buying a special lamp can confound unenlightened shoppers. However, it is an important tool for manicure, because it is thanks to him that gel-varnish, base and top hardens.
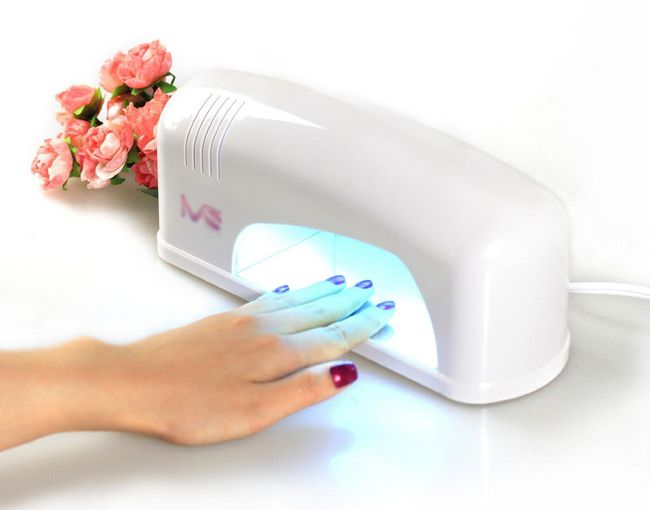
You can purchase a budget version of a compact lamp. It is not necessary to buy a powerful device for drying two hands at the same time: at home, a neat appliance, purchased at an affordable price, is quite enough.
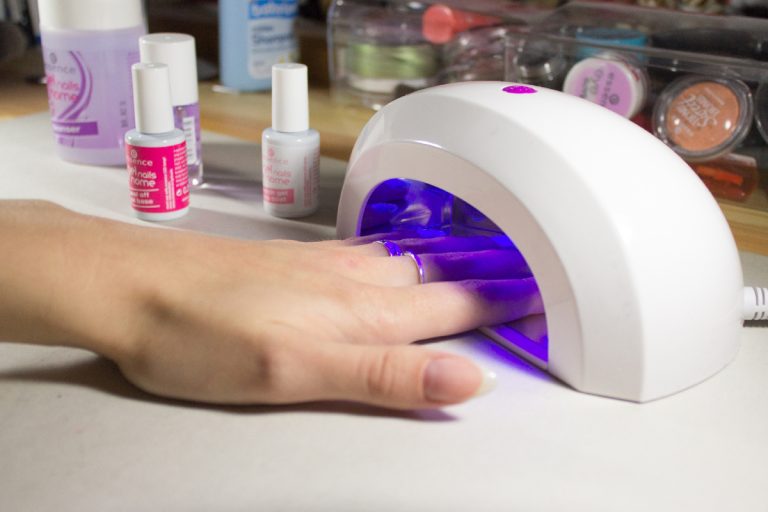
After the base coat, color gel polish is applied. Usually it has good dense pigmentation, so one or two thin layers will be enough for a smooth background without stripes and undyed areas. After applying each layer they will be polymerized in the lamp. Drying time depends on lamp type.
The LED device is more powerful and reduces the total time to create a manicure. Drying one thin layer in such a lamp is 10-30 seconds. However, manufacturers often produce nail products that are not intended to work with it. In this case, it is better to buy an ultraviolet lamp, it is a universal device for all types of coatings. Polymerization time in it of one thin layer makes 2 minutes.
Sliders are glued to the prepared surface. Their design can be very diverse, it depends on the imagination and style of the intended composition. The method of applying labels is different from their varieties. This process is very exciting and creative. Sticking pictures, you can decorate them with small rhinestones and microbies.
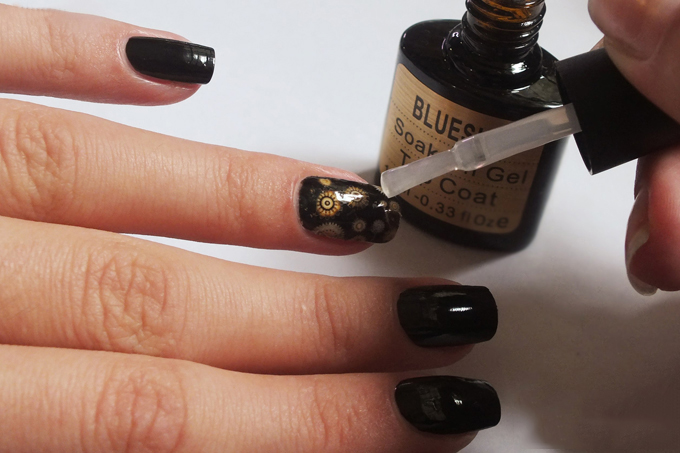
After the slider design can be applied to the finishing layer. The top is a fixative, it is applied in a more dense layer, so it dries a little longer. The polymerization time in the LED lamp of the top coating is 1 minute, in the ultraviolet - 3-4 minutes.
It is worth noting that UV lamps differ in power. Buying such a device for home use, it is better to choose a model with a power of 36 watts. This is the optimal value in order not to harm the manicure and not to disturb the water balance of the skin.
Professional Tips
In addition to observing all the named rules, experienced masters working in the nail sphere recommend choosing a basic color for stickers. thoroughly.
- If white color is chosen, it is desirable that it be clear, free of impurities. On such a background it is better to glue bright and attractive stickers. Such a framework is ideal for any slider design, as it is able to make the drawings richer.
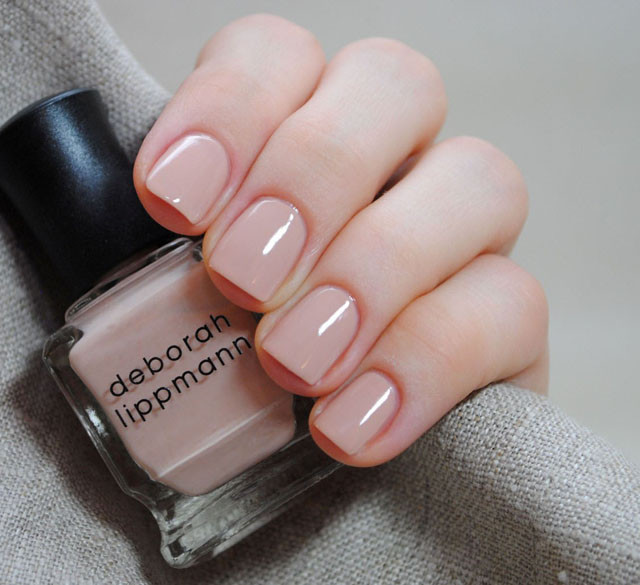
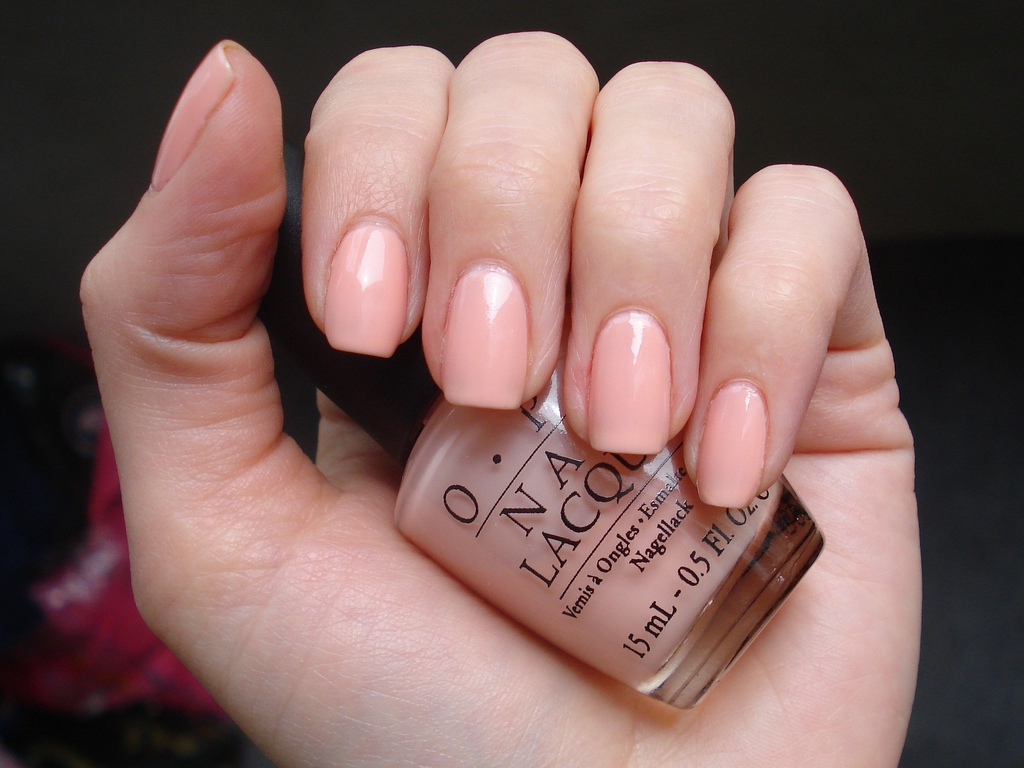
- One of the actual shades of gel polish under the pictures are flesh and beige-pink tones. Thanks to light shades, the drawing will not lose expressiveness and will be clear.
- When choosing a contrasting background for pictures, it is important to take into account the color combination. Gel polish should be a harmonious basis for the pattern.
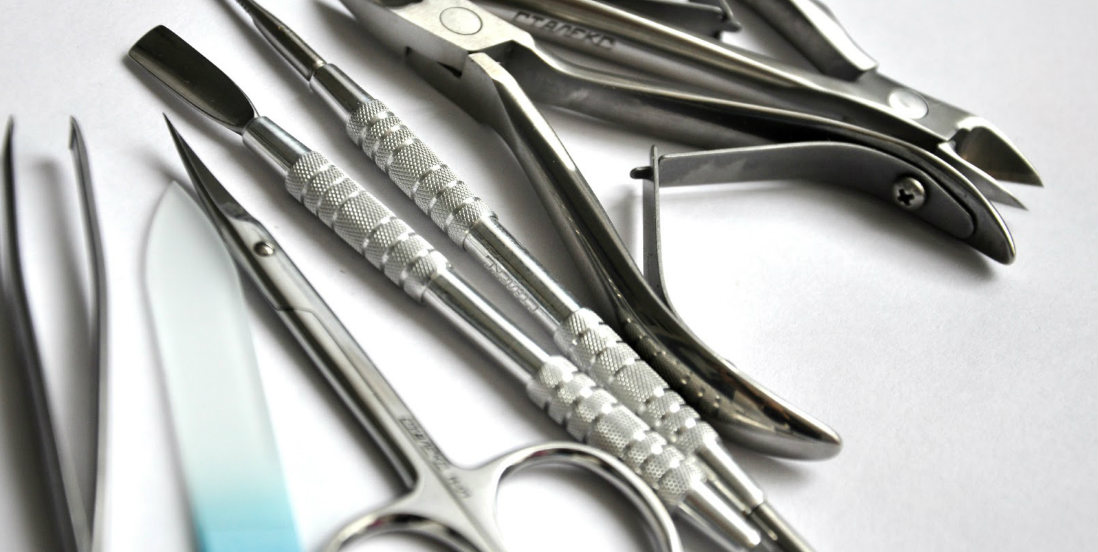
- Before you begin, you need to prepare the necessary tools so as not to be distracted by their search during manicure.
- When designing with water labels, it is better to use warm water: this is how the film leaves the substrate faster.
- If the picture is in the wrong place, as it was intended, you should not try to move it. In this case, there are two ways out: remake everything first or try to correct the defect with the help of other decorative elements (rhinestone, sparkles).
- Completely ready manicure should be protected from contact with water for at least half an hour after drying the finishing layer.
- In order for the slider to be a stable and high-quality nail decoration, special attention should be paid to sealing the free edge of the nail. We must not forget about it with each layer of coating, otherwise the stickers will begin to peel off after a few days.
Problems at work
Sometimes performing all stages step by step, fails to achieve an impeccable result. The reasons for this usually lie in the following:
- If the sticker falls off along with a layer of topcoat, then the reason is that the top layer or varnish is badly dried.
- The formation of wrinkles on the surface of the picture indicates that the quality of the sticker is low or its film is thicker. However, the reason may be that the slider is too wet.
- Chips of the top cover may indicate that he did not have enough minimum clearance on the side rollers.
- Peeling of the coating may be caused by insufficient sealing of the end of the nail. This is a mandatory step manicure, which is necessary for the formation of a kind of pocket holding the sticker.

Make your nails beautiful under the power of every woman. This requires the necessary fixtures, coatings, stickers and desire. The finished result will delight the hostess and attract the attention of others.
Learn more about how to apply labels on gel varnish - in the next video.