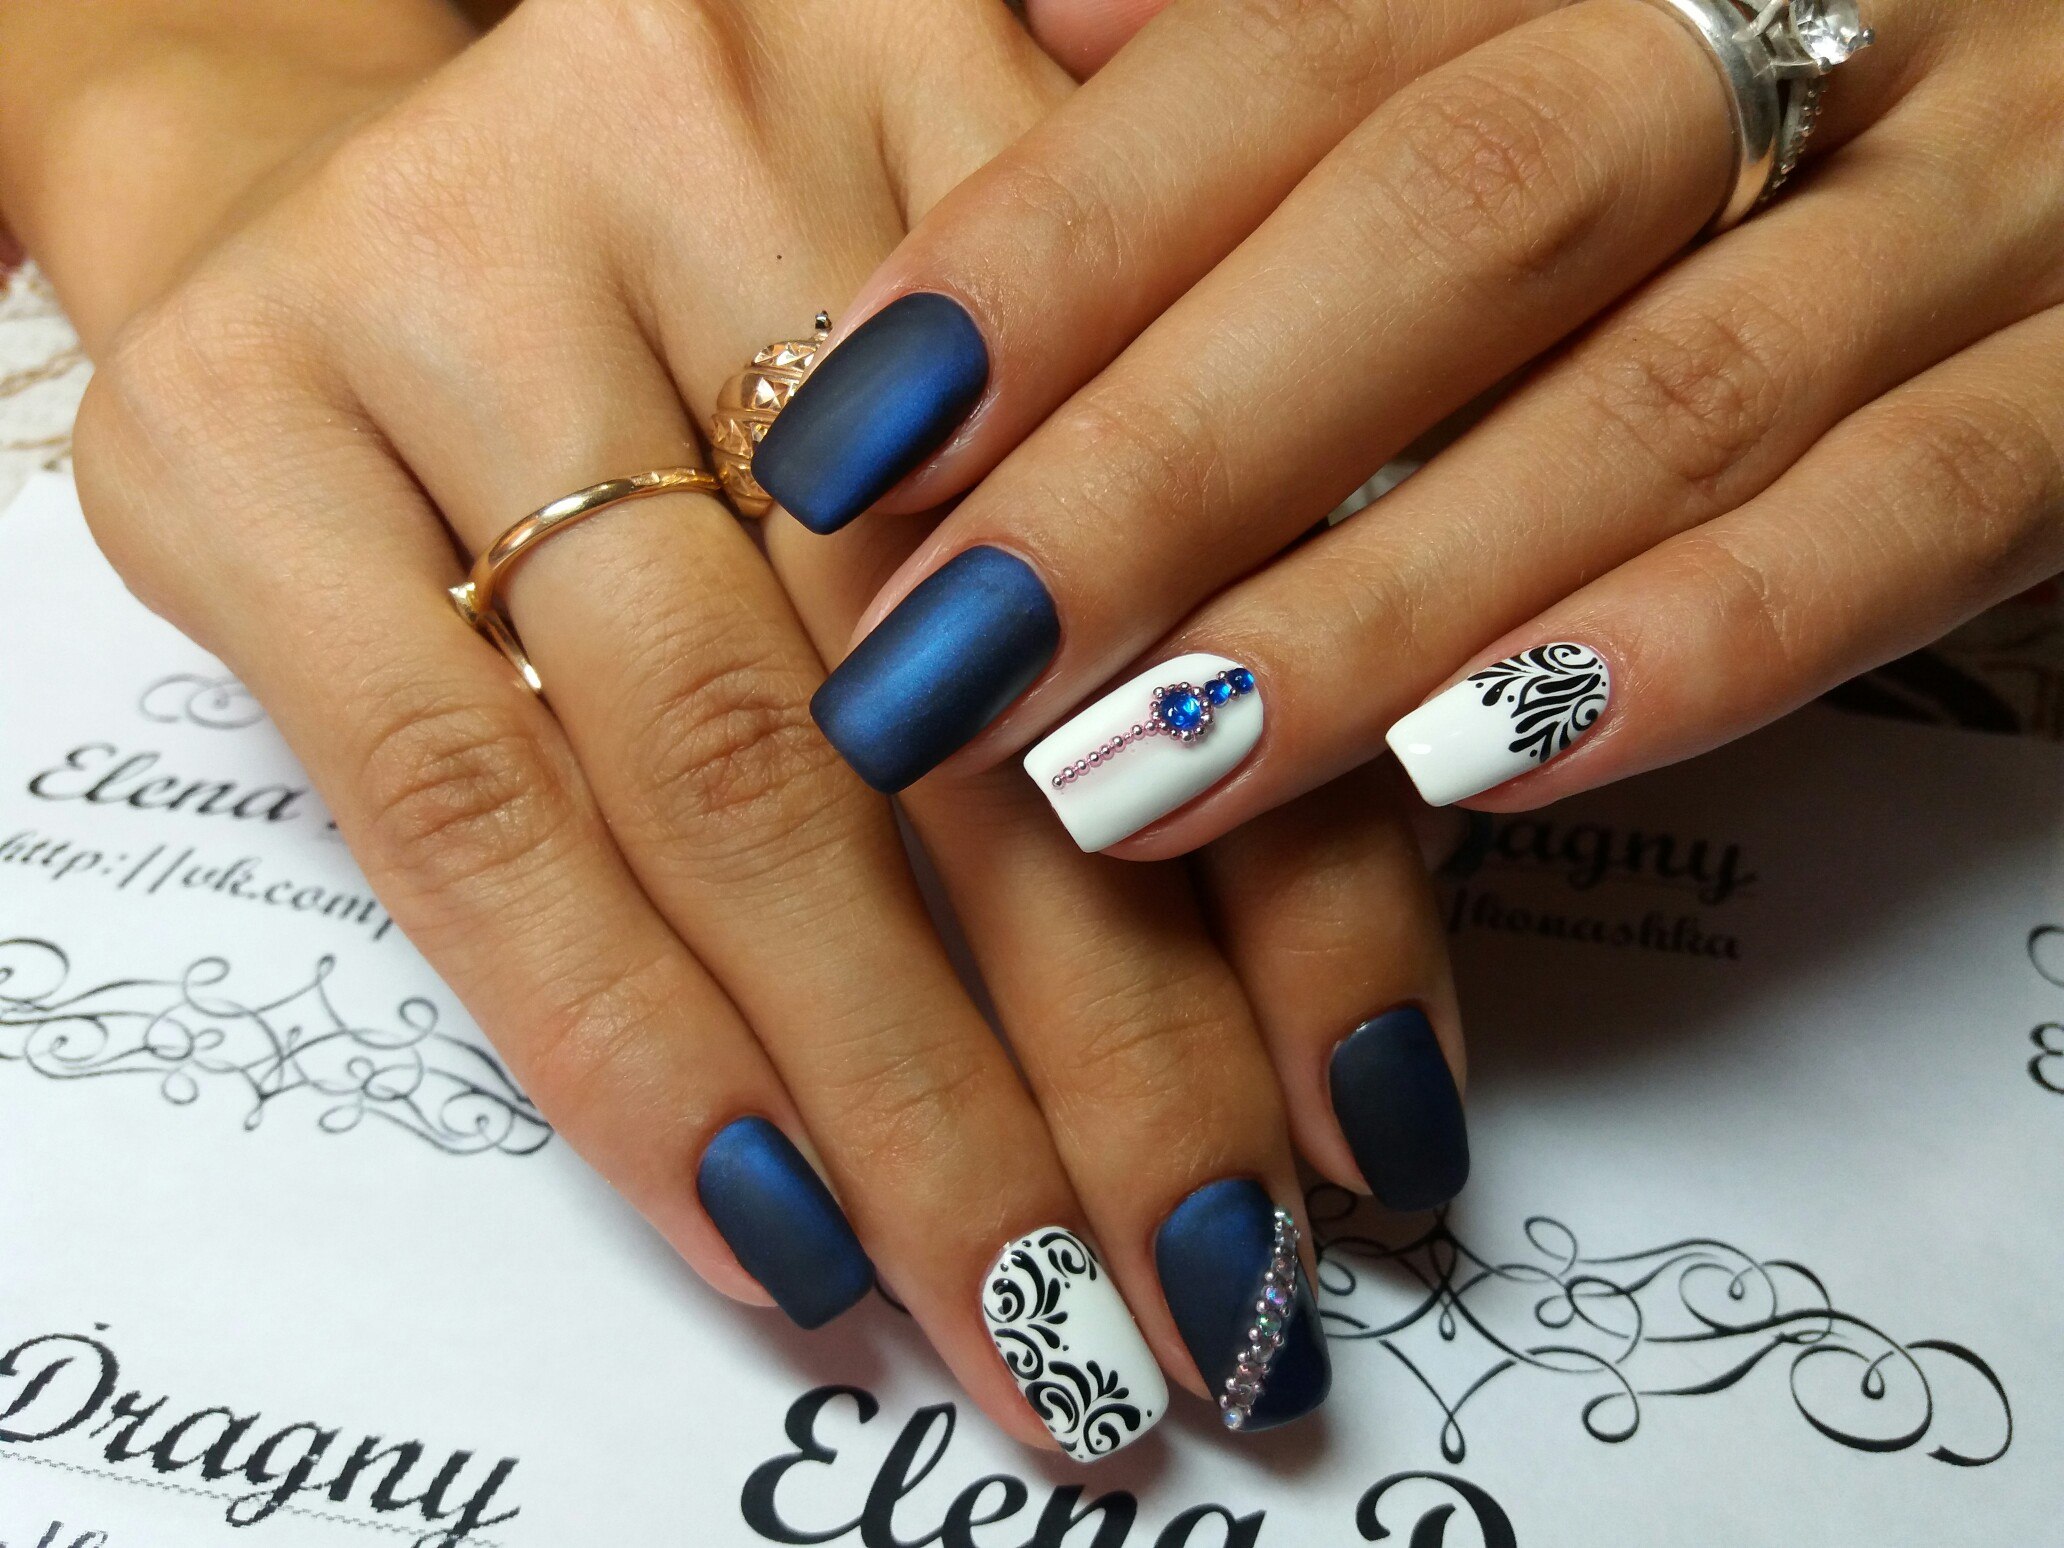
Drawings on nails gel varnish
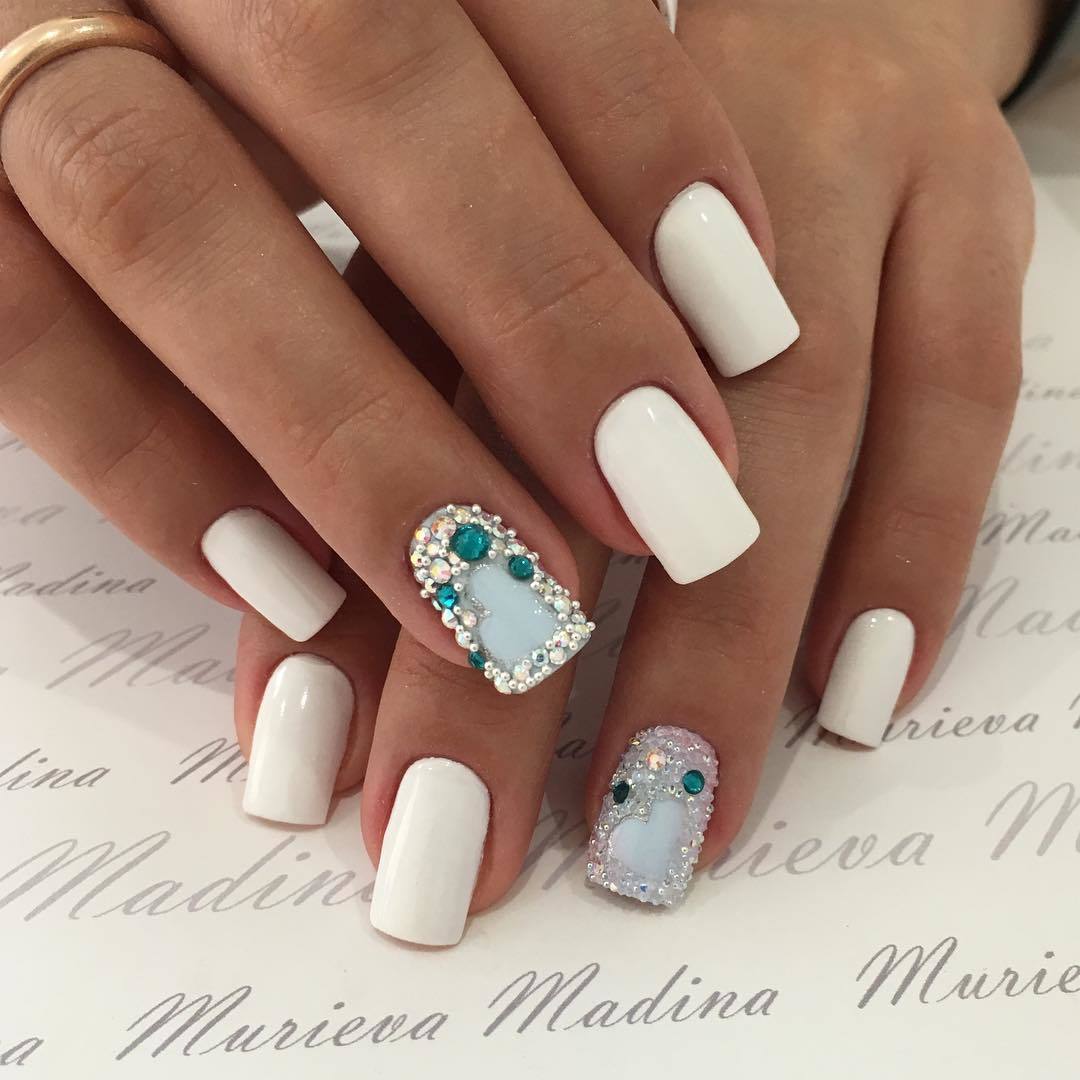
The volume drawings on the nails with gel varnish is a new trend of the spring-summer 2017 season. This is a very popular material that is considered an excellent substitute for ordinary varnish. Manicurists like to use it in salons due to its properties and ease of application. Varnish gives the nails a glossy shine, it looks beautiful and unusual. In addition, it lasts a long time, protects the nail plate, does not lose luster with time, provided that it is correctly applied.
New items
Today the beauty industry offers a huge amount of tools and tools for creating nail art. The desire to have a beautiful and neat manicure is often contrary to common sense, because a regular visit to the master is a cost. The paradox is that any pattern can be made independently, using numerous manicure tools. Properly chosen tools and patience are a guarantee of success.
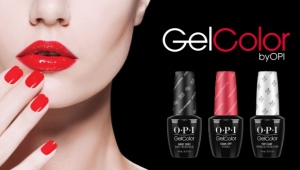
To date, gel polishes occupy a strong position in the world of nail design. Almost all masters provide today services to cover nails with such material. Without a doubt, gel polishes - one of the best achievements of the nail industry in recent years. This hybrid of gel and varnish is very popular among both craftsmen and clients. The main advantages of the technology: convenience and simplicity of the process of applying to the nail; high polymerization rate in the lamp; color fastness; intense shine of the coating is maintained until the removal procedure; safety of use for the nail plate, hypoallergenic materials.
Gel Polish is a tool that keeps on natural nails for two weeks.
A specially developed readily soluble plastic gel is applied as a regular varnish, but dried under a UV lamp.. It is great for girls and women who love beautiful and bright nails, but do not want to repaint them several times a week. The gloss of gel polish is incomparable with the gloss of a regular coating, because in the first case it is deeper.
To remove the coating or scratch it is difficult due to the special structure. This coating gives brittle nails elasticity, and thin - strength, thus avoiding the breakage of natural nails. Removed the gel with a special liquid and foil. The average wearing time is two weeks.
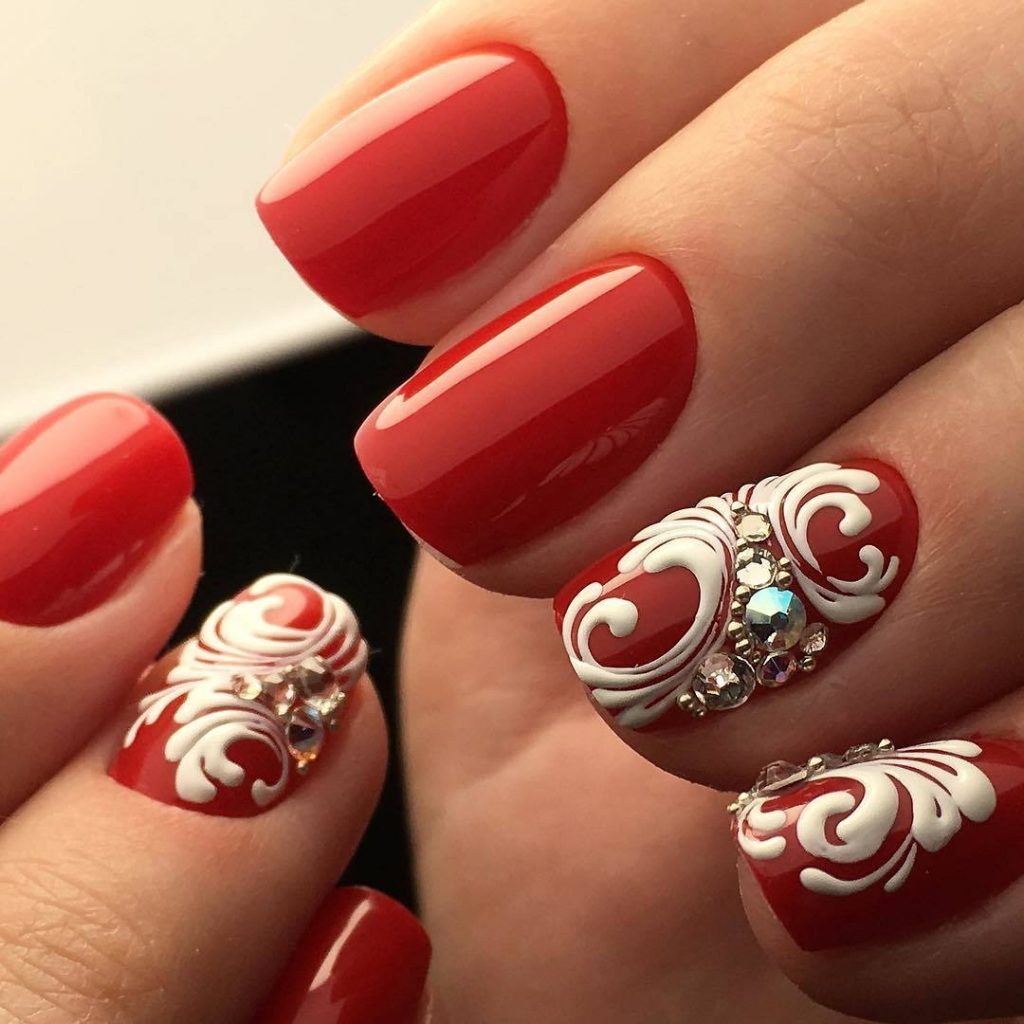
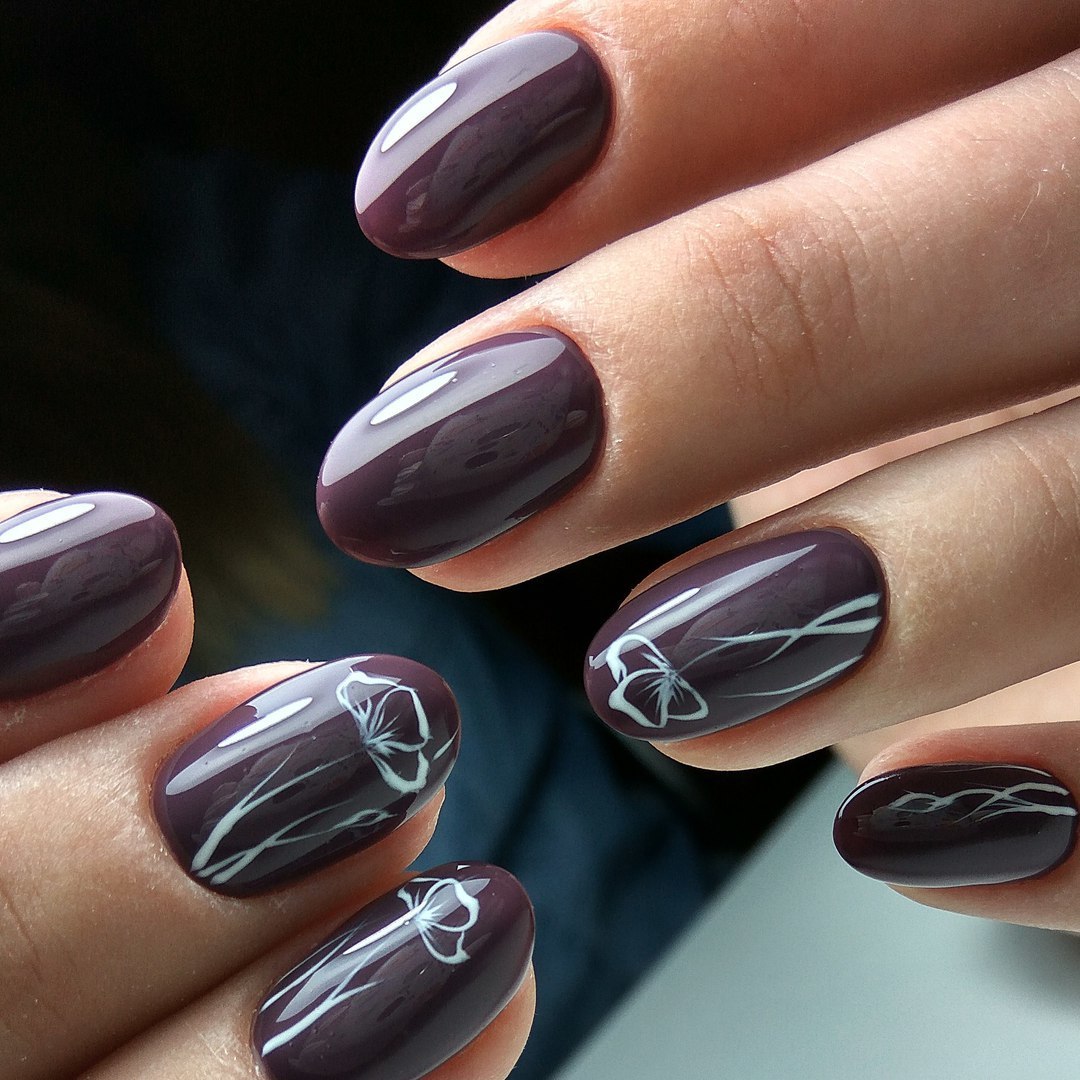
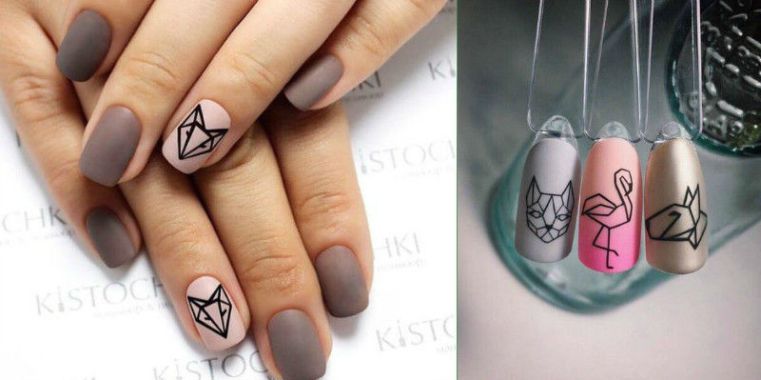
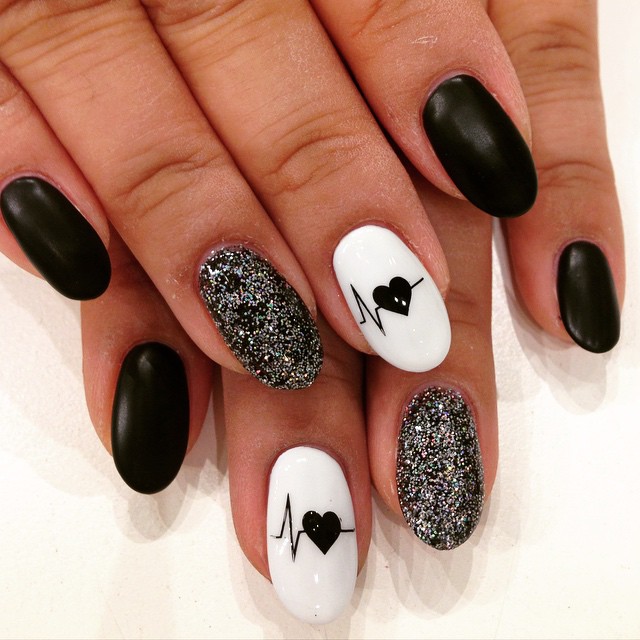
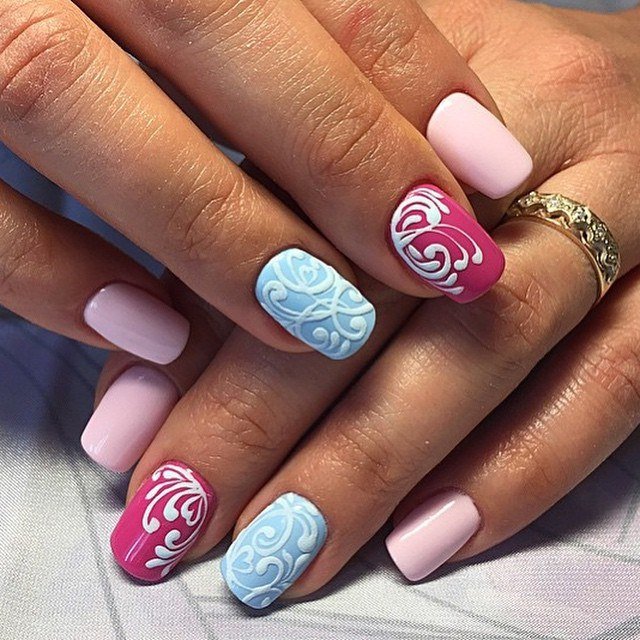
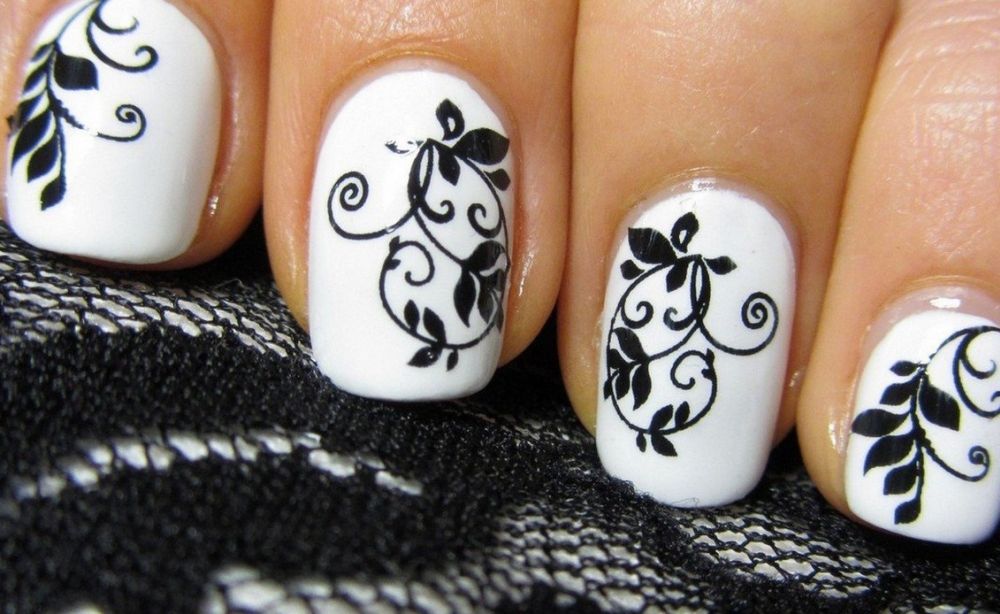
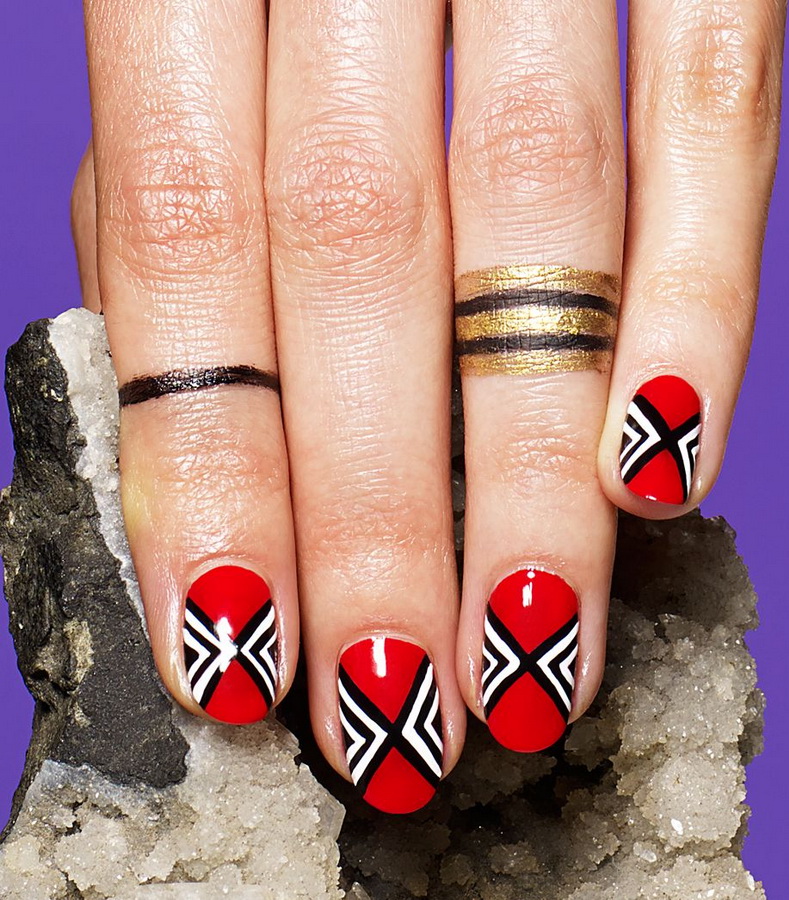
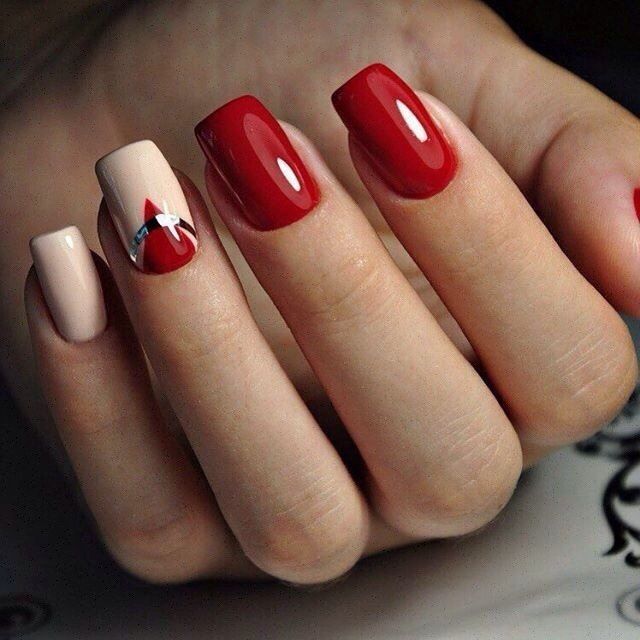
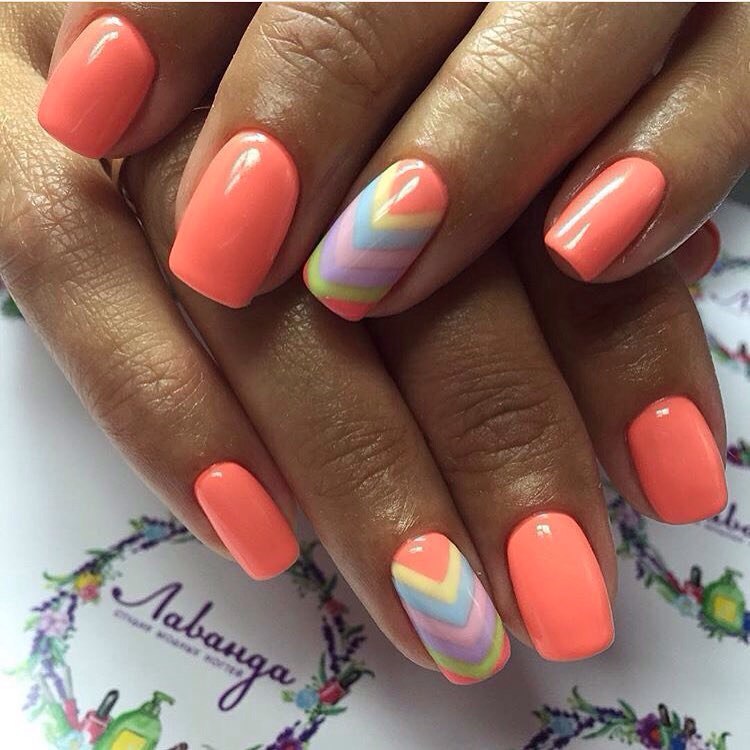
New 2017 manicure with its use is not limited to the master's imagination: it can be flowers, butterflies, zigzags, spirals, geometric shapes. It is only important to correctly combine colors that will harmonize not only with each other, but also with the image. The classics of the genre are black and white drawings on the nails, which will suit any image and for any occasion.
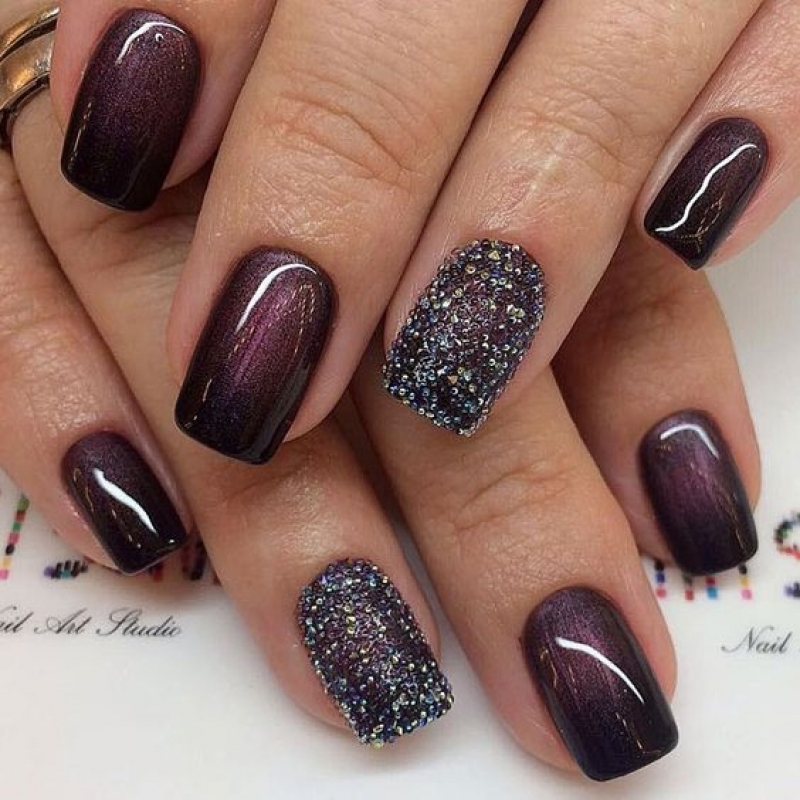
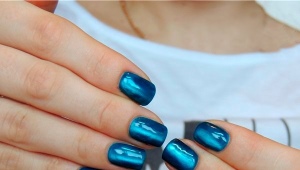
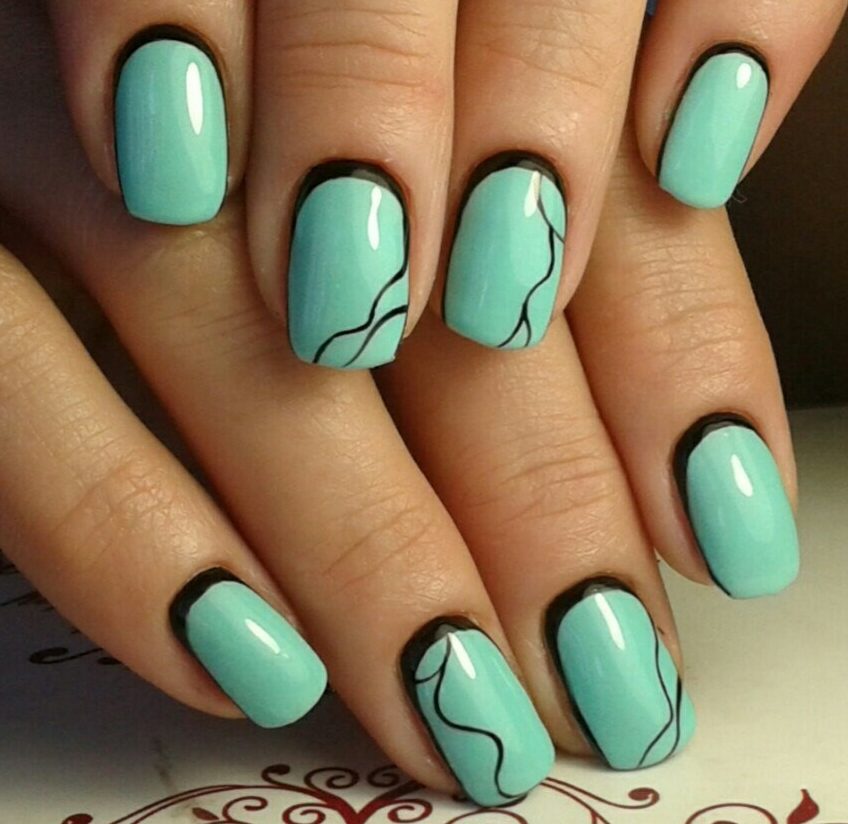
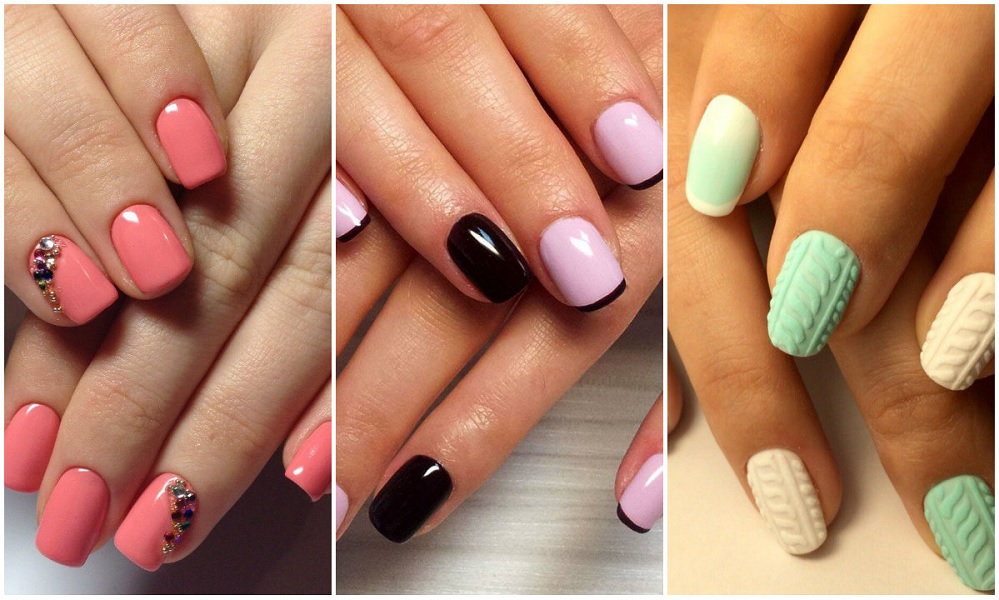
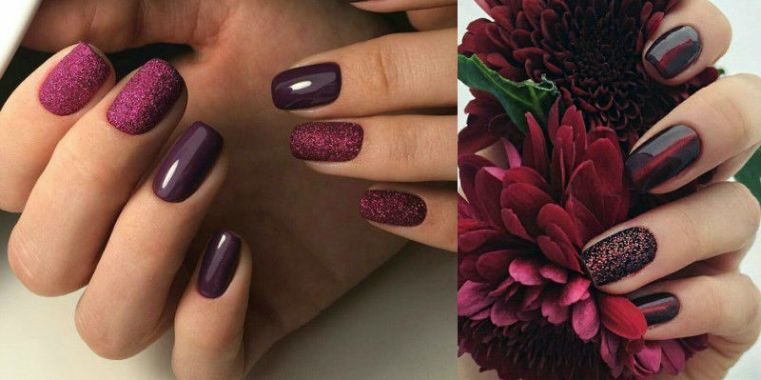
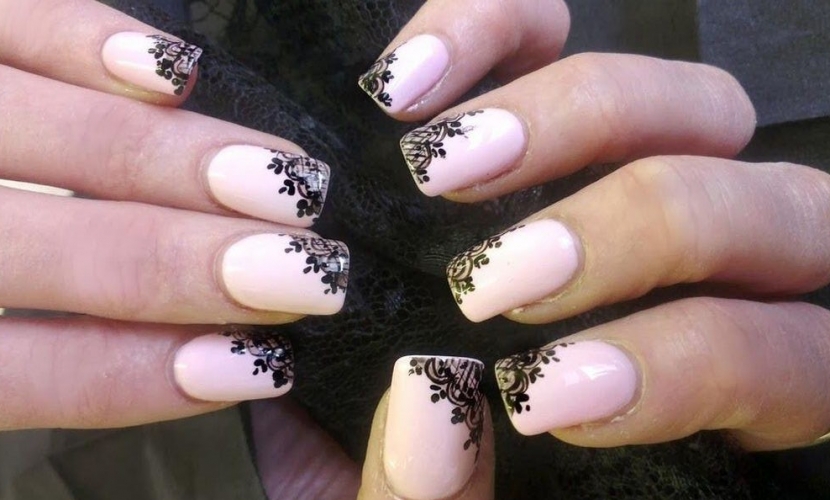
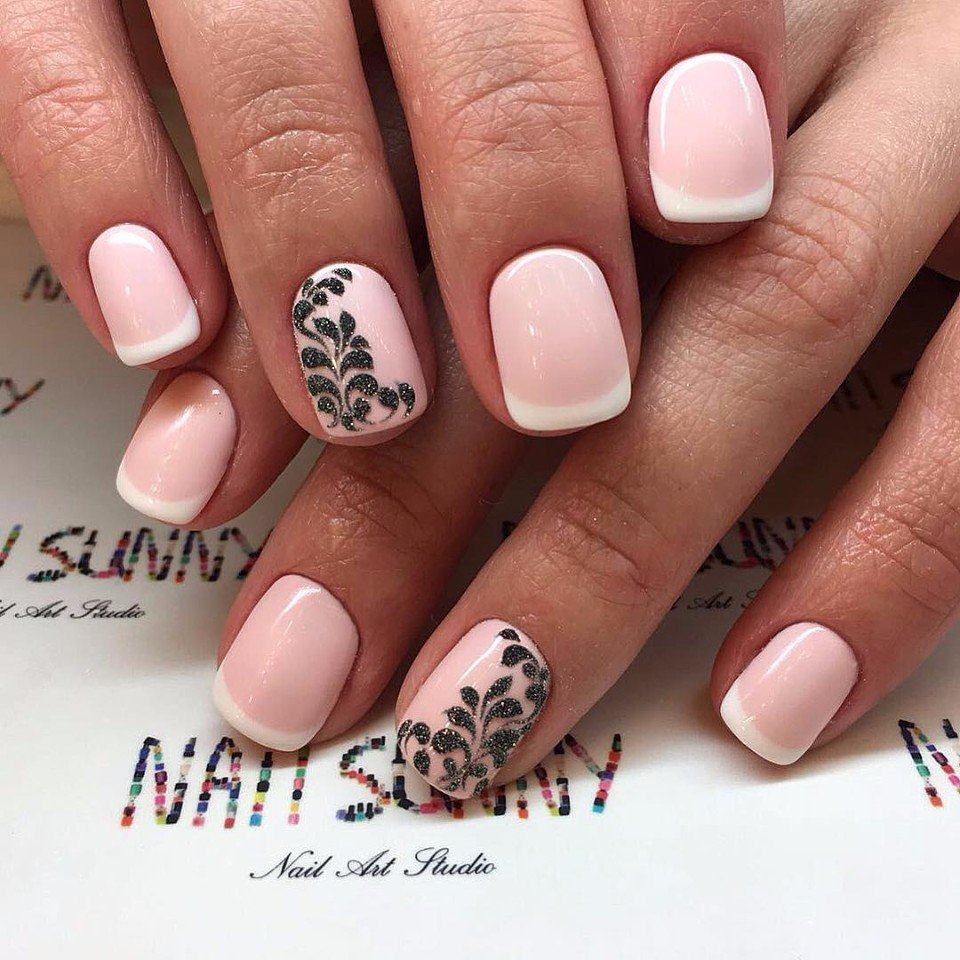
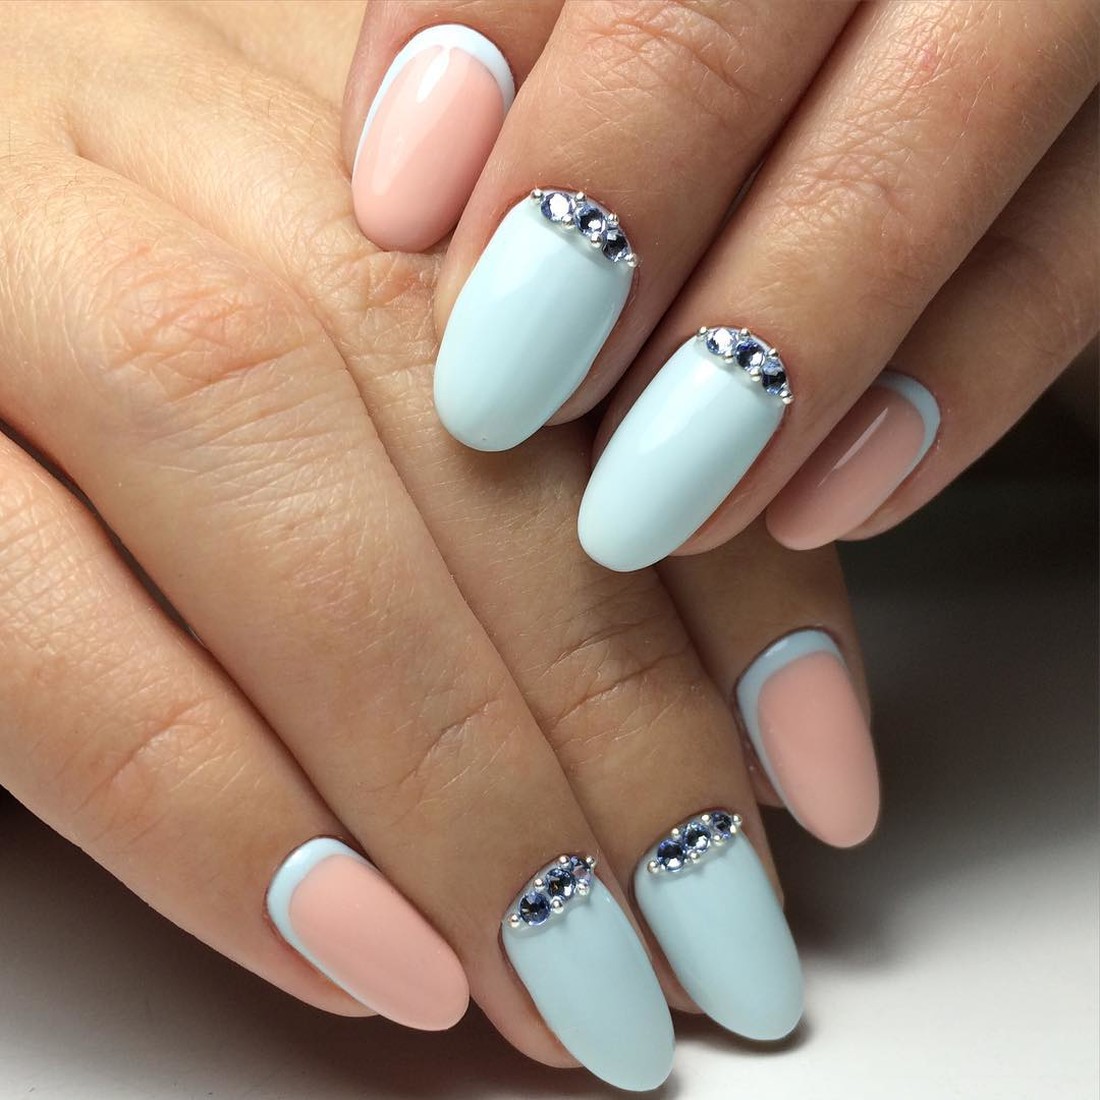
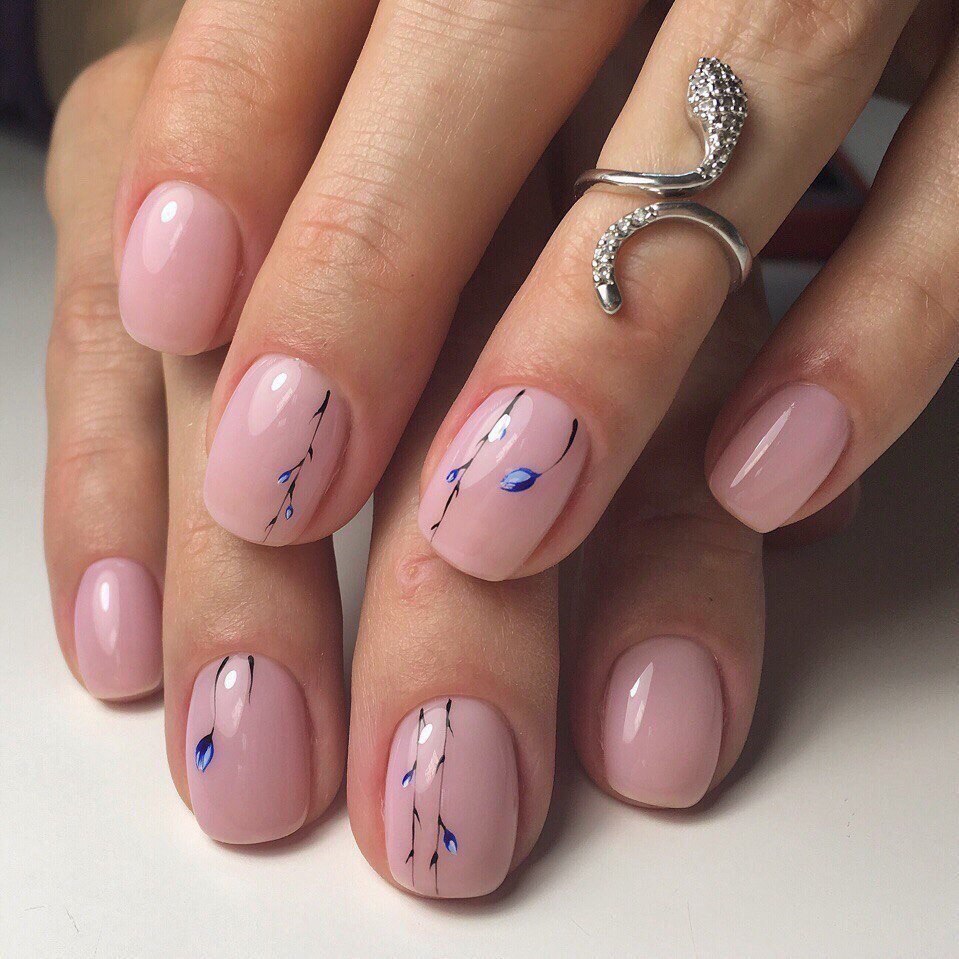
Naturalness in the new season is the main trend. In the palette of new products, gentle peach, creamy, pink, mint, heavenly and sandy shades of gel polishes are in the lead. In this style it is customary to use a monochrome coating. An interesting choice for manicure will be the “Cat's Eye” cover. Its bright and iridescent structure resembles feathers.
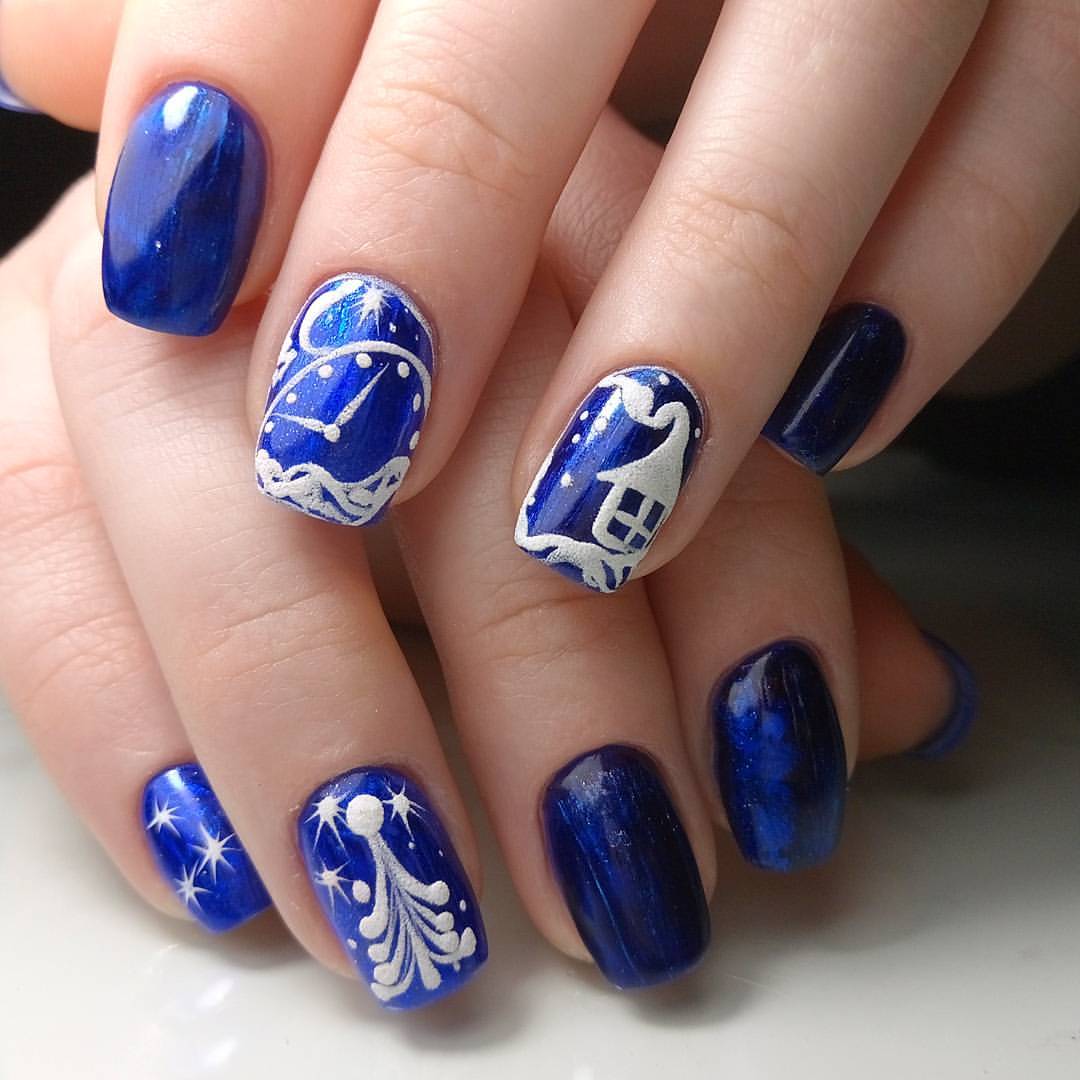
It is enough to cover your nails with orange, emerald green, lemon, blue, orange or coral varnish to embody the fashion trends of the season. Dark and berry tones are also in trend. A bichromic technique with a white or nude coating can add inks. This will give a contrast, create exquisite combinations. Interest in "metallized" coatings is growing. In the cold period, they are recommended to be combined with dull matte shades, and in summer and spring to be diluted with pastel colors.
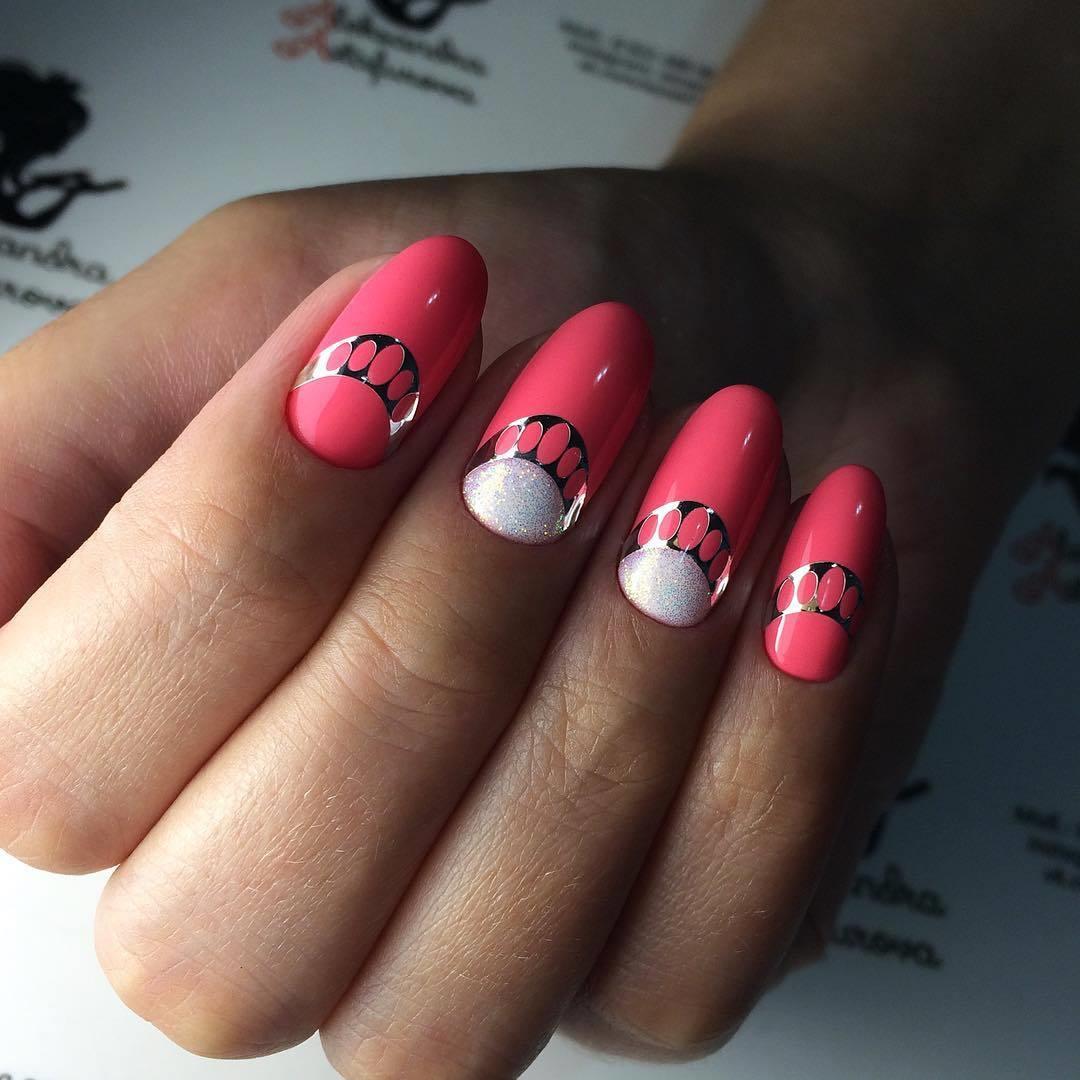
Metallic gloss visually lengthens and narrows the nail plate.
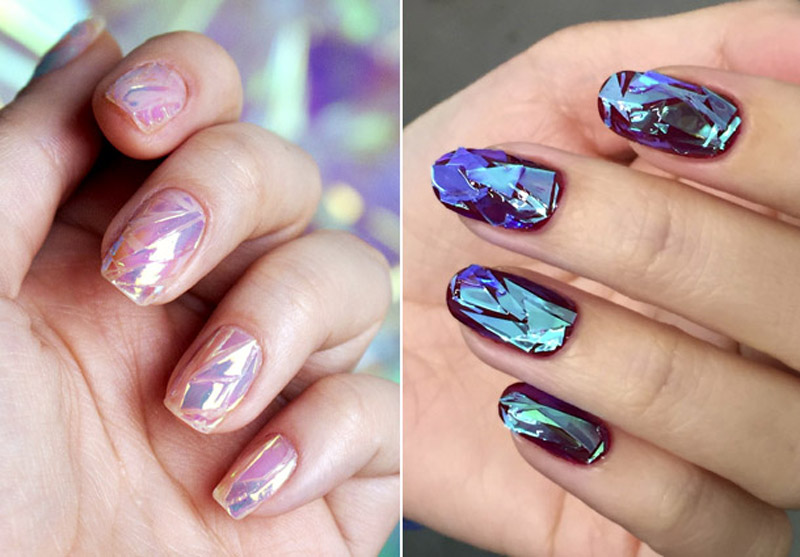
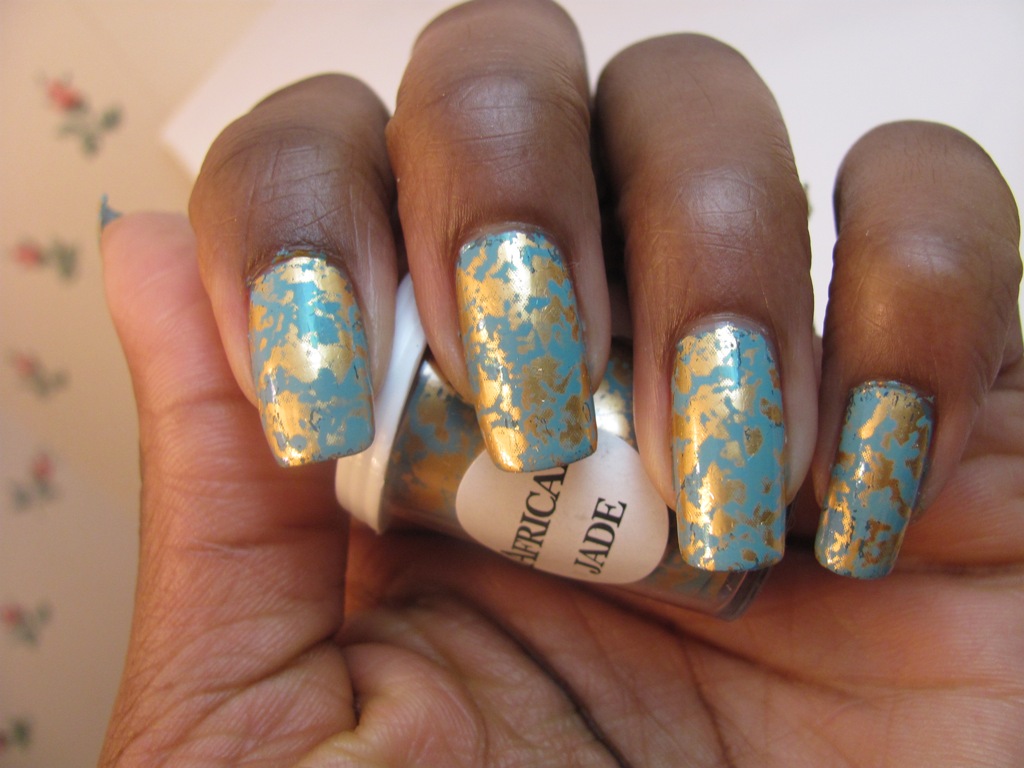
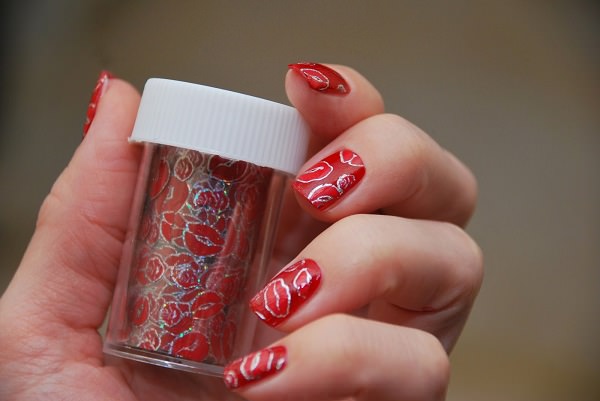
Of the new products for a similar effect in manicure is designer foil. It is sold in gold and silver. Original shapes and stripes are often used in decorating nails and look fantastic.
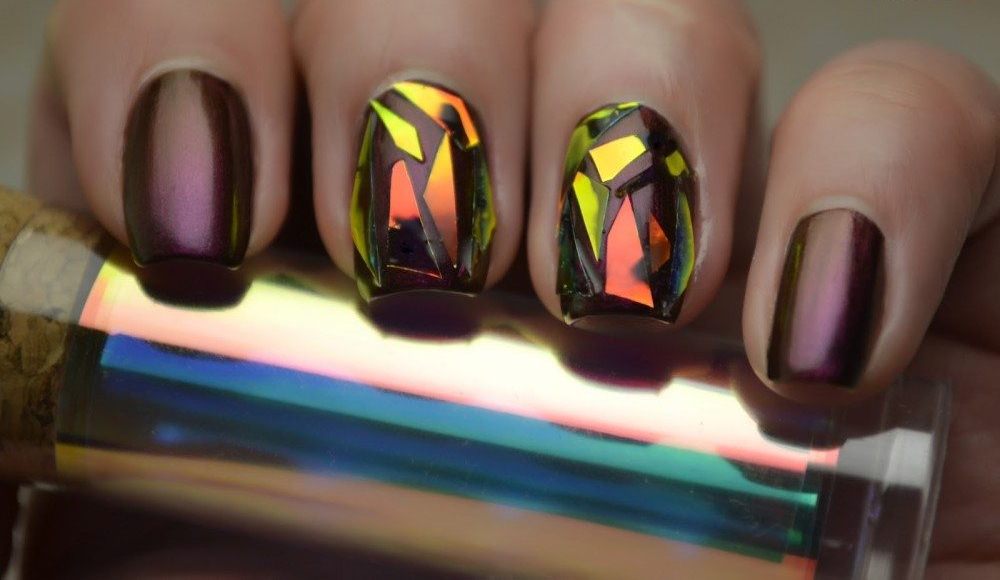
Color foil is also considered a novelty. The pieces resemble a broken stained glass window, walled in a gel polish. Among the fashion trends are dairy, holographic, steel and pastel "fragments". Glitters are capable to give shine to manicure. Powder perfectly copes with the "sparkling" task. Decorative elements will easily add playfulness, festivity, charm to boring images.
Simple manicure
Many women are aware of the diversity of texture lacquers, their immense colors and other features. Those who are interested in nail design know when new textures and beautiful shades appear. To date, to create nail art, two main types of lacquers are used: the traditional coating for manicure and the new product - gel polish. In two categories, it is customary to allocate a separate line of tools - paint for painting. They differ from traditional forms - the presence of a thin brush, which allows you to display neat lines without the use of available tools.
Most often, beautiful and contrasting patterns on the nails with ordinary varnish are created with the help of two or three shades of the chosen tool, as well as needles or toothpicks. Technician perform manicure there are two: liquid and dry. The essence of the first option is the execution of drawings on the base surface that has not yet dried out. If you want to make such a simple manicure, follow the technique of its creation:
- Apply a varnish coat of the chosen shade.
- Without waiting for the complete drying of the base, drip on the surface of the nail varnish of a different color.
- With the help of a needle, make drawings, stretching varnish drops in the right direction.
In the case of gel polish, the patterns are made on the dried base.
A good gel polish does not break and does not peel after the first washing of dishes, as it happens with ordinary varnishes and is harmless to nails, unlike a conventional gel. Gel polish coating is easily removed using a special solvent, which is not the case with the traditional gel buildup, in which the artificial material can only be cut. At home, women can create their own watercolor paintings, geometric shapes, draw a butterfly, heart, stripes, abstraction, as well as use the decor, which should be purchased in advance.

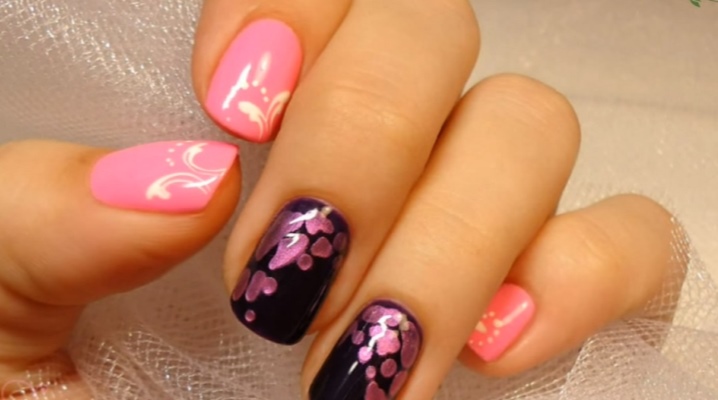
Patterns
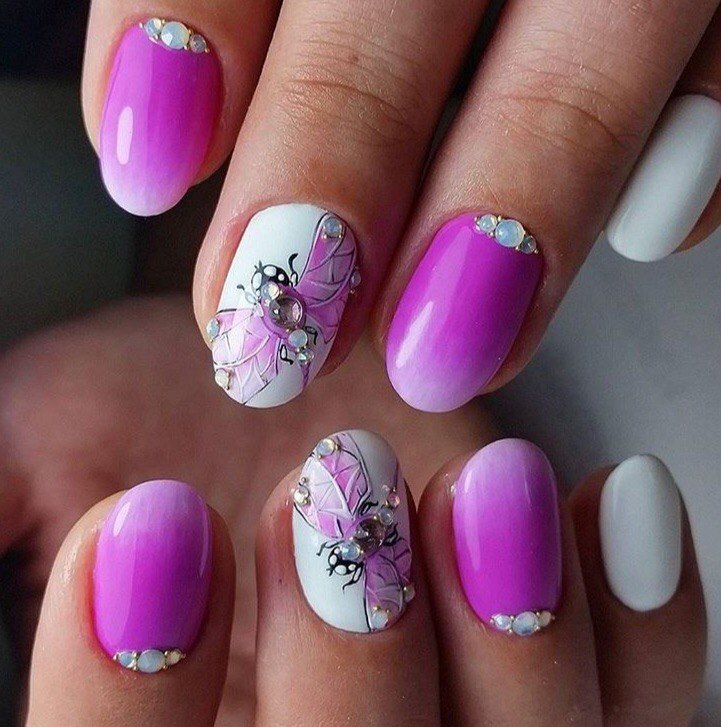
At home, you can create simple patterns on the nails using gel polish. These can be flowers (roses, tulips, poppies, orchids), butterflies, geometric patterns. It is best to start with simple patterns and only then proceed to the creation of complex ones. A neatly made drawing always delights others. Experiments are welcome this season. If you master the general technique of the drawings, then create a complex design is not difficult.
Read more about one of the most popular manicures of 2017 in the next video.
This technique (pictures on the nails) is called nail art.
Beginners for drawing recommend using the following tools: special brushes to create patterns on the nail plates; dots (tool for creating drawings), needles of different thickness; toothpicks, napless napkins. When creating nail art, proceed in stages:
- First cover the nail plates with a clear protective varnish. This will prevent damage and protect against scratches when creating drawings with sharp objects.
- Apply base - varnish, who chose as the basis for the pattern, wait until it dries.
- Start to create conceived patterns.
- Let the drawings dry.
- Fix the result fixer.


To create an interesting pattern on the nails with a brush, you will need experience in drawing. Remember that the lines should be smooth, without breaks, the desired thickness, otherwise the manicure will turn into inaccurate blots on the nails. Creating a manicure, try to do it in stages.
- Prepare the nails, align the ends, get rid of the cuticle, polish the surface.
- Apply a coating.
- When the transparent layer dries, paint the nails with a varnish base.
- Take a brush, start to remove patterns from the tip of the nail.
- When the drawing dries out, apply a lacquer fixer.
You can create a simple gel polish pattern, guided by the following plan:
- Apply to the nail plate base gel, dry in the lamp.
- Cover the gel polish with a shade that will become the basis of the manicure.
- Dry the layer for two minutes in the UV lamp.
- Using dots, apply dots using two different colors of gel polish. Apply them in random order. It is best to put dots close to each other, then the manicure will be interesting and beautiful.
- When the pattern is ready, send your nails to the UV lamp. At the end, apply a topcoat that will give the manicure a glossy shine and extra strength.

Observe the following steps to create a simple “eight” pattern:
- Apply the base on the nail plate and dry in the UV lamp.
- Apply the first layer of gel polish, dry in the lamp for two minutes.
- This is followed by a second layer of the same color. Do not dry it. Apply immediately small dots and gel polishes of a different color. Take a needle and in the form of "8" perform quick movements. This can be done both horizontally and vertically.
- Dry in the lamp, and then apply a special coating.
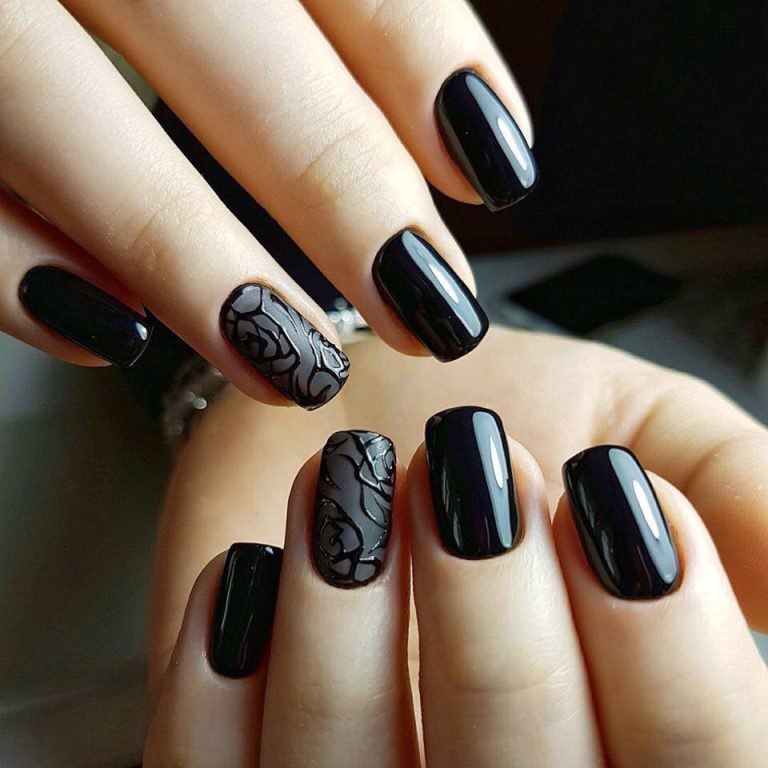
Complex patterns include flowers, monograms, animal faces and other art.
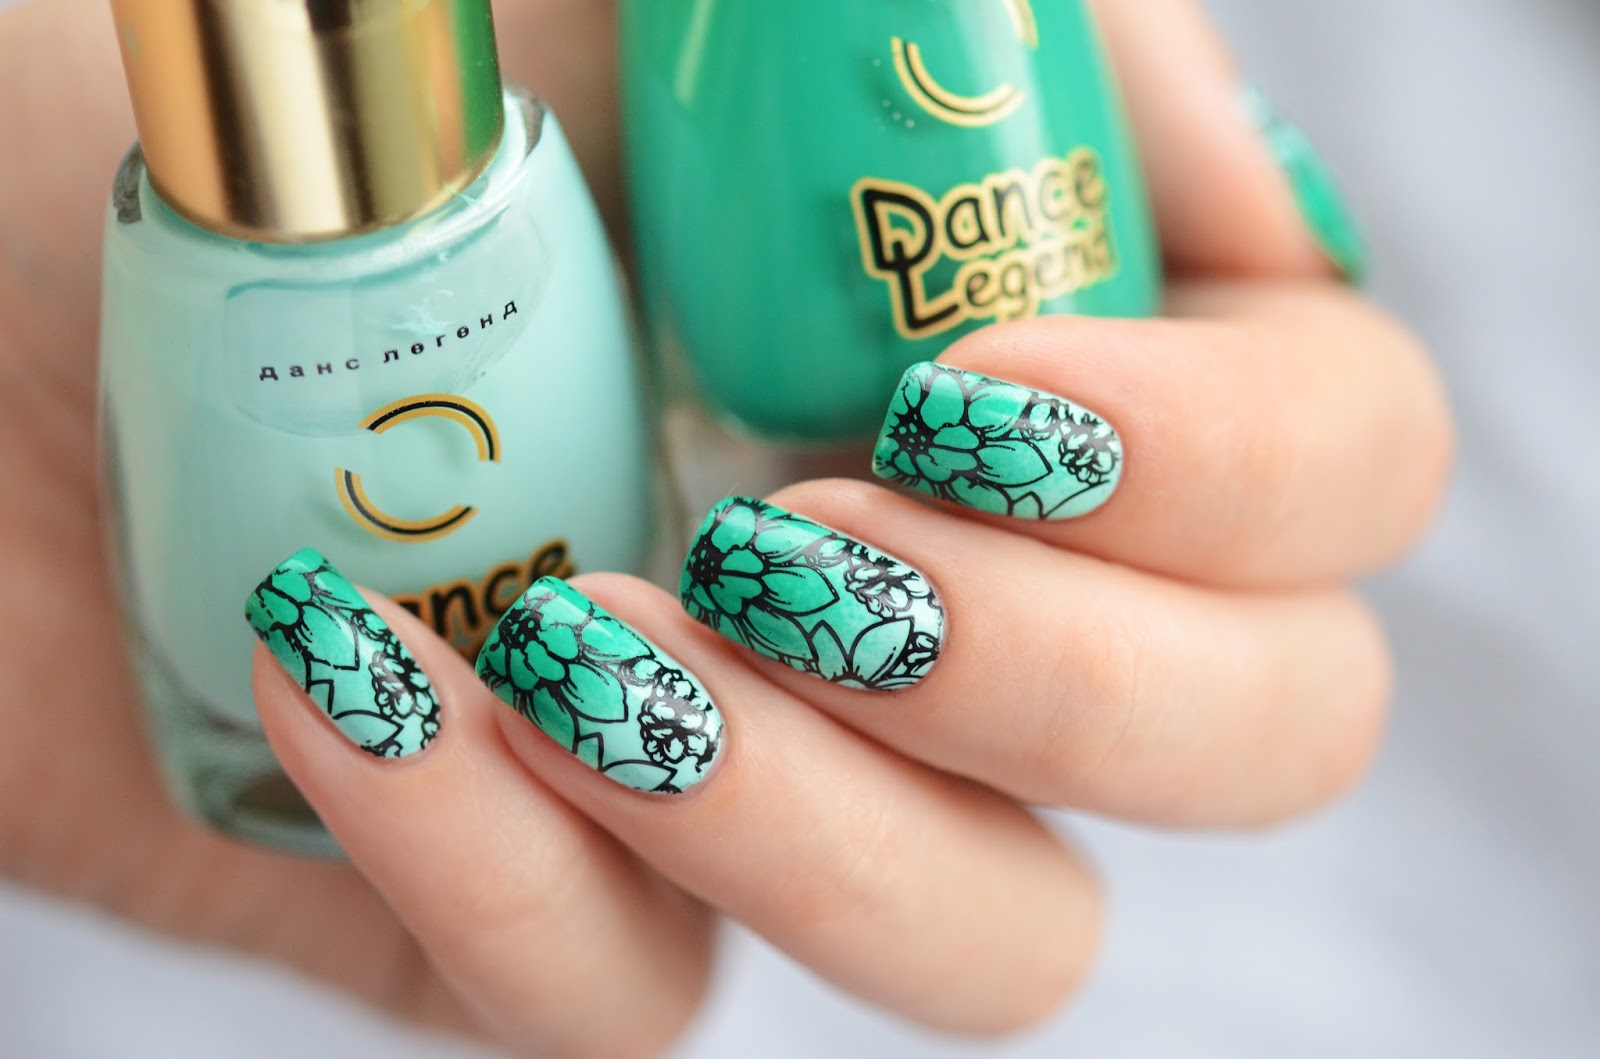
- Flowers If you want to get such a design, you need to prepare a gel polish of two colors: white and black. First apply the base gel and dry, then cover with black and send for drying. Color gel polish should be dried for three minutes.
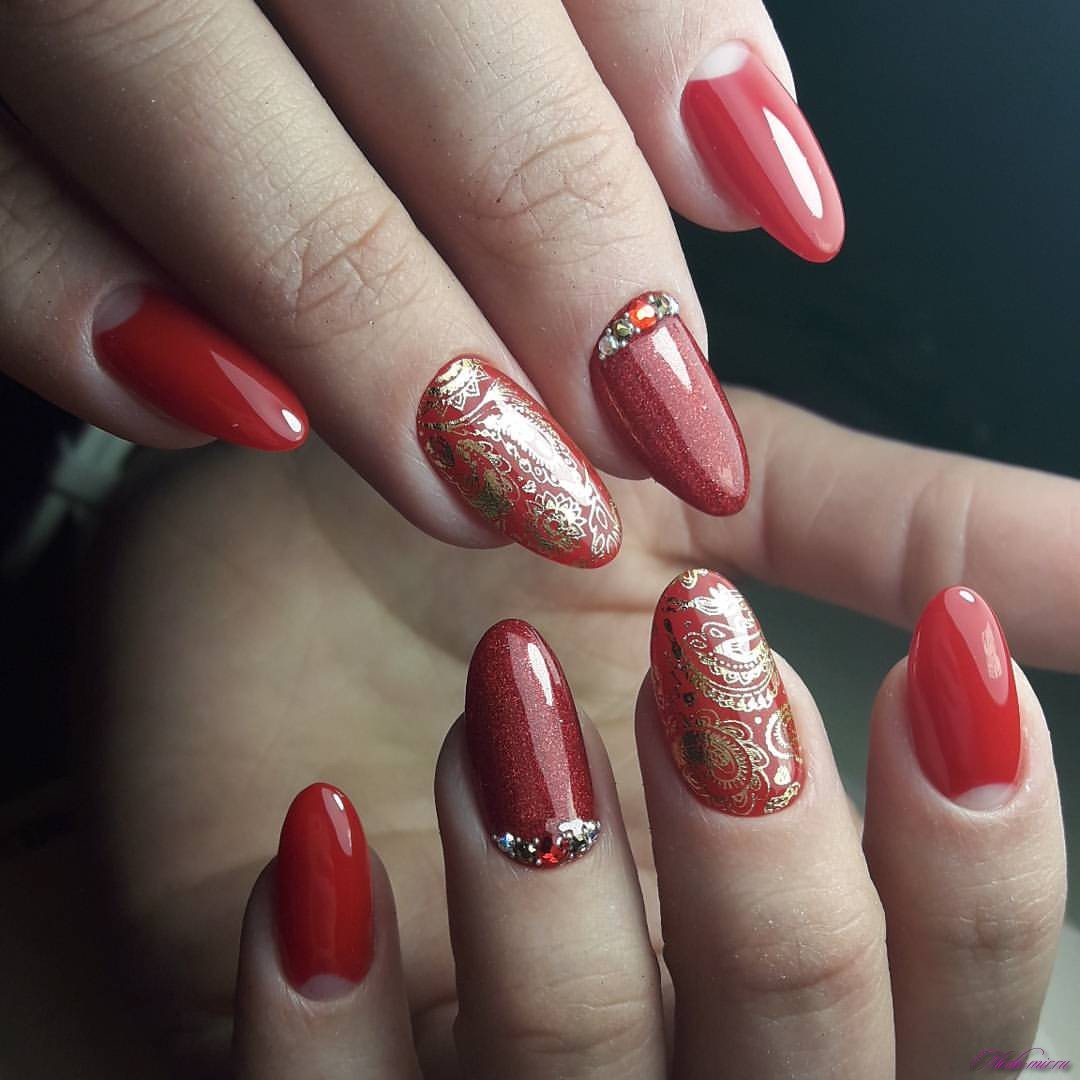
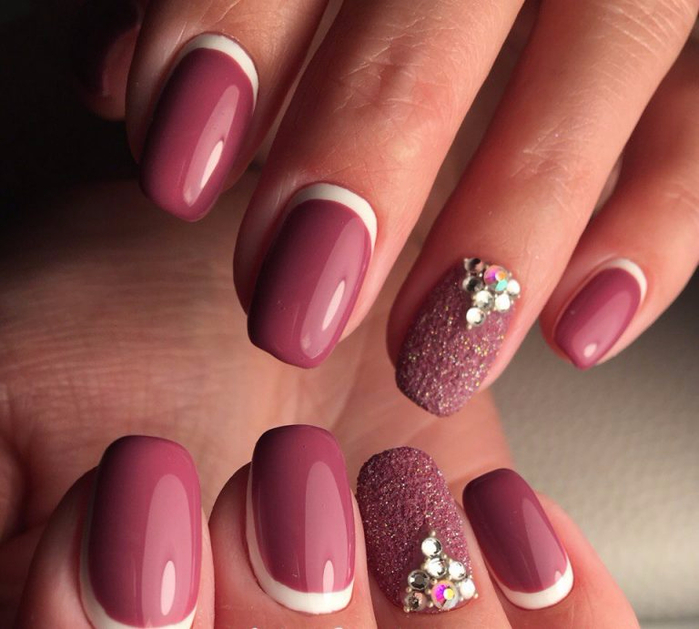
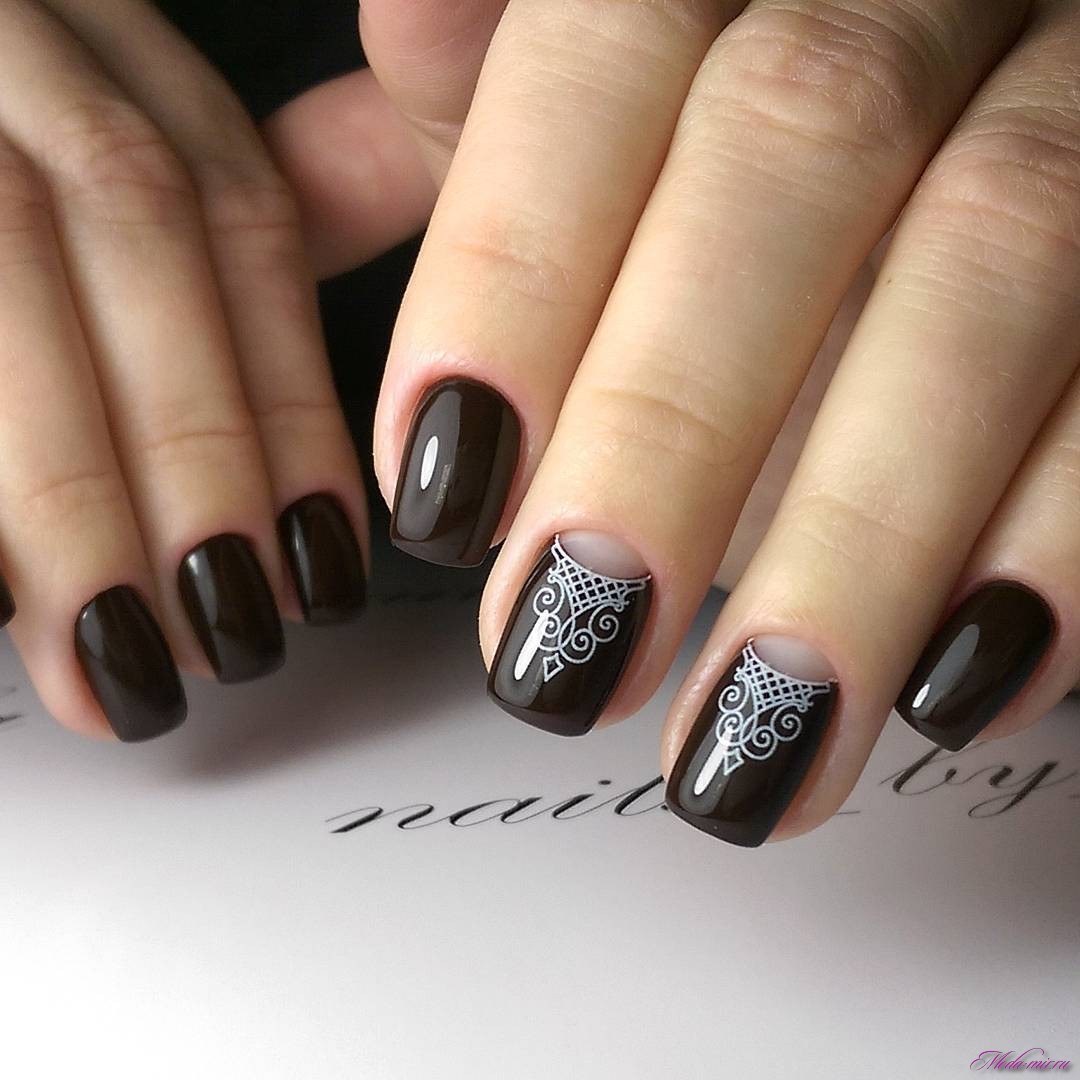
- Monograms. You can create this design with white gel polish and a thin brush. After applying the base, you need to type in a little white gel polish on the brush and draw a rounded monogram. Their direction and quantity depends only on fantasy. At first glance, this design may seem simple, but it will require experience and patience. To obtain an original and unique design, it is necessary to make monograms in different colors on each nail. For festive design, add sparkles, rhinestones.
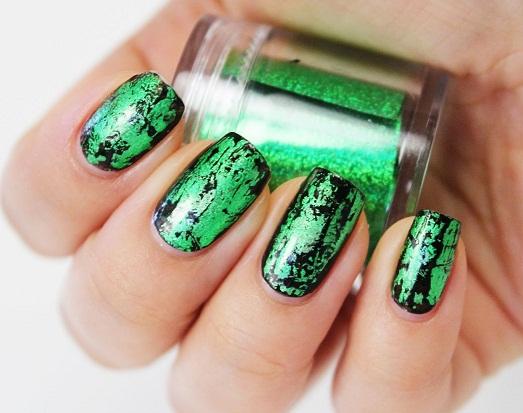
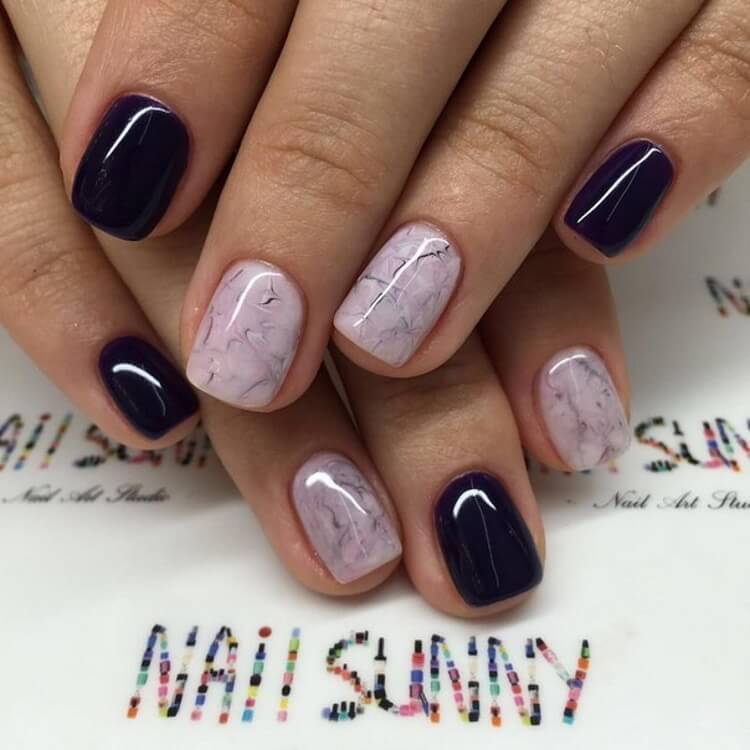
- Snake skin. The picture is suitable for those who want to get an original and unusual manicure. After the nail plate is prepared, apply a green gel polish on it. Dry in the lamp for two minutes, cover with a marsh color pearl lacquer. Do not send to the lamp, but take a brush and in a chaotic order apply a drop of varnish. Wait a while until the drawing appears. Cover all with the finish and dry.
- Roses. To create roses you need to prepare a dots, four gel polishes (blue, pink, white and green) and a thin brush. First, apply a base coat on your nails and dry in the lamp. Next, cover the nails with white gel polish and send again to dry. When the base color layer dries, you can draw roses.


Subtleties for beginners
Subject to the correct technology of applying gel polish keeps on nails up to 20 days. During this time, the coating does not lose luster, does not crack and does not split off, and also does not require additional correction. The nails look natural and are protected. Unfortunately, some gel polishes instead of two or three weeks of socks begin to crack or peel off a few days after the manicure. The reason for this may be improper application, poor quality of the product and further care. For beginners, before using gel polish, it is better to carefully examine its properties and familiarize yourself with the recommendations.
- Stage 1. Formation of the free edge of the nail. The free edge of the nail plate should be perfectly flat and completely clean (fat free).In the case of stratification of the nail plate gently trim it with a file for natural nails. If necessary, you can make a manicure. If during manicure used oils or creams, thoroughly clean the nails and dry them for 10 minutes. It is important to remove the cuticle in the first stage.
- Stage 2. Removal of the upper keratin layer of the nail plate. If this is not done, the gel polish will split off. It is not recommended to touch the treated nails. For the final removal of residual moisture and filing, use a special tool with a fat-free formula. It provides strong adhesion of gel polish to the nail plate.


- Stage 3. Application base. If the nail plate is very soft and weak after removing the enlarged nails, the gel polish may begin to peel off already in the first days after the application procedure. Therefore, before starting the manicure, apply a primer on the weakened plate. It will provide tight adhesion of the base gel with a natural nail.
The application of the base gel is one of the main components of the technology of working with gel polishes. The base gel is the basis for the product. He is responsible for creating a connection between the natural keratin of the natural nail and the artificial gel material. At the same time, the base gel protects the nail from the penetration of the gel-polish coloring pigments. In the technology of applying gel varnishes, it is important to ensure that the materials are applied to the nail plate in a very thin layer.
On a brush, type a small amount of the base gel and cover it in a rubbing motion, starting from the free edge.
Then go over the entire nail plate with smooth movements from top to bottom. Make sure that the gel does not fall on the skin, cuticle and side parts. Next, place the nail in the UV lamp for one minute to polymerize the base gel. After drying the base with a dry brush, level the layer. This is necessary in order to color gel varnish uniformly lay down, and not going and spread. Do not forget to cover the end of the nail, pay attention to the uniformity and smoothness of the coating.
- Stage 4. Finishing gel coating. The finish gel is applied with a slightly thicker layer than the color one. The finish gel should be well dried within two minutes. Insufficient polymerization will lead to the fact that when removing the sticky layer shine will be lost.
If you use color gel polish, keep in mind that all layers need to be applied very thinly. If you do not comply with the technology of application, then waves and nicks may appear on the free edge and air bubbles appear over the entire surface of the nail. Using bright, pastel colors, apply two layers of gel polish. Each layer must be passed through a UV lamp for two minutes. When working with dark colors, the first layer can be unevenly dyed, but you do not need to apply a large amount of gel polish. This problem will be fixed by the second layer. Working with dark tones, it is better to make three thin, but even layers.
When creating a painting with acrylics or gel polish, you can use Chinese technique.
When working with it, it is important to visually present the process of creating a pattern - petal by petal. For a beautiful result, the nail is covered with one layer, using a special tool, which has been previously painted with several layers and different colors. To perform this technique will need:
- Acrylic paints. The basis of such paints should be water and silicone. With the help of acrylic will be easy to draw beautiful pictures. Paints viscous and thick, evenly and easily fall on the nail.
- Brush. It is best to have several and different sizes. There are different types of brushes - brushes, liners, fan brushes, flat and beveled. They are used for drawing various lines and drawings.
- Sticks or skewers for drawing small circles and points.
- Jar of water.
It is best to purchase artificial false nails and practice on them, and having filled your hand well, start drawing on your nails.Prepare all the necessary materials, you can try to draw the first drawings from pictures. You will need three colors of acrylic paints: white, black and red, as well as a wide brush. Dip the brush in red and then in white paint, and with a small amount of water, blend them to create a pinkish glare.
Make a smear in the form of a rounded drop, make a second smear next, but higher. Two more brush strokes of a similar form, but slightly larger, perpendicular to the previous two. To complete the flower shape, add a couple more petals in empty places, selecting the required size. Using a fine brush and black acrylic paint, circle the petals around the edge, adding small strokes.
If you want to learn how to apply gel polish, it is important in theory to study all the nuances and not be afraid to use them in practice.
The advantages of this coating is durability, protection of the nail plate, ease of application. Disadvantages of the procedure are the high cost of consumables, improper removal of the coating at home, a traumatic natural nail, the need for skills, the duration of the gel nail polish removal procedure. It is quite possible to learn how to do such a manicure step by step, having studied the easy lessons of applying simple drawings.