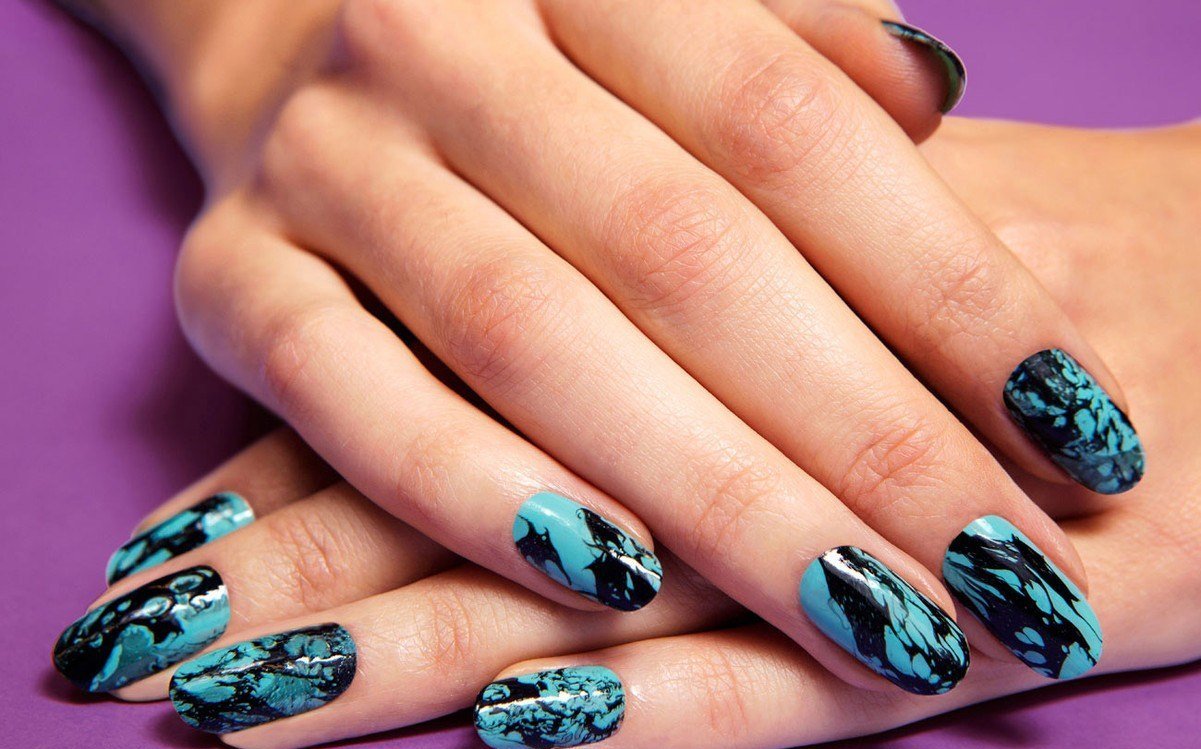
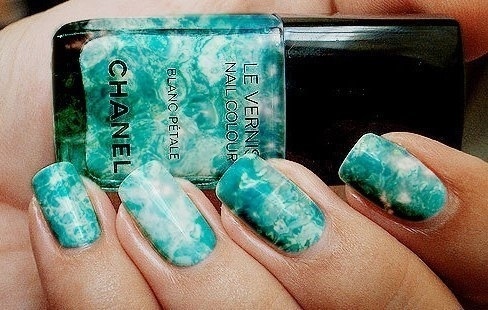
Marble manicure gel polish

There are millions of options for nail design from classic monochromatic coverage to intricate designs, from the usual french to unique stylish new products. In the new fashion season in the hands of fashionistas you can see the marble manicure - the original, stylish and admirable. He became a real hit, and young women of fashion literally “hunt” him.
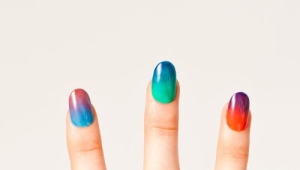
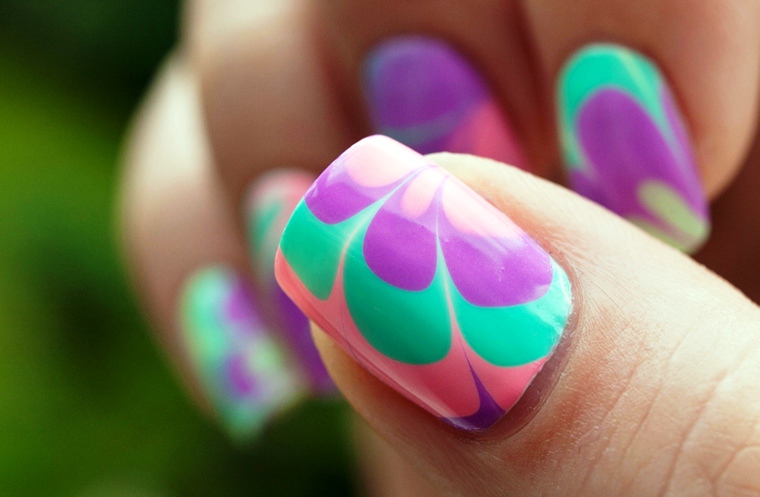
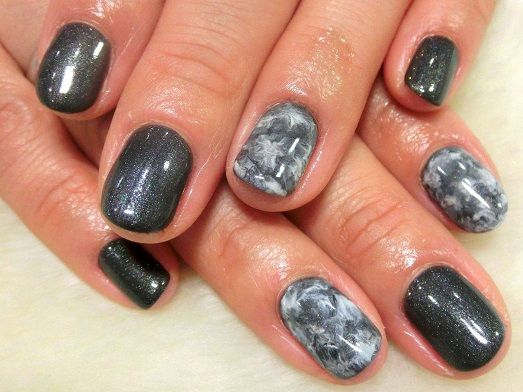
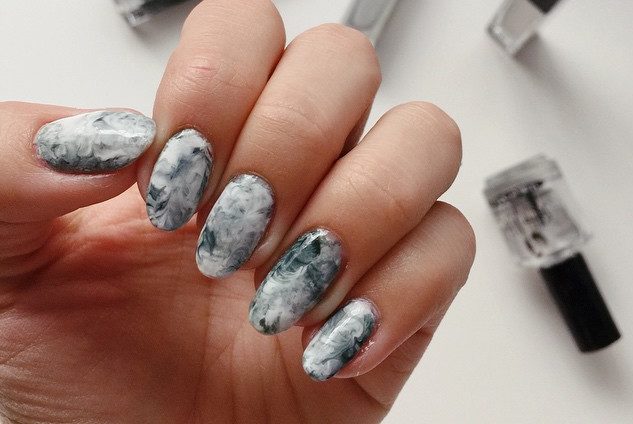
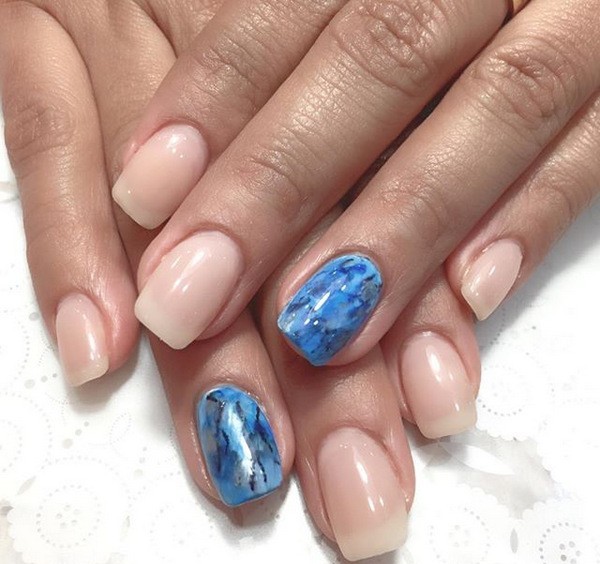
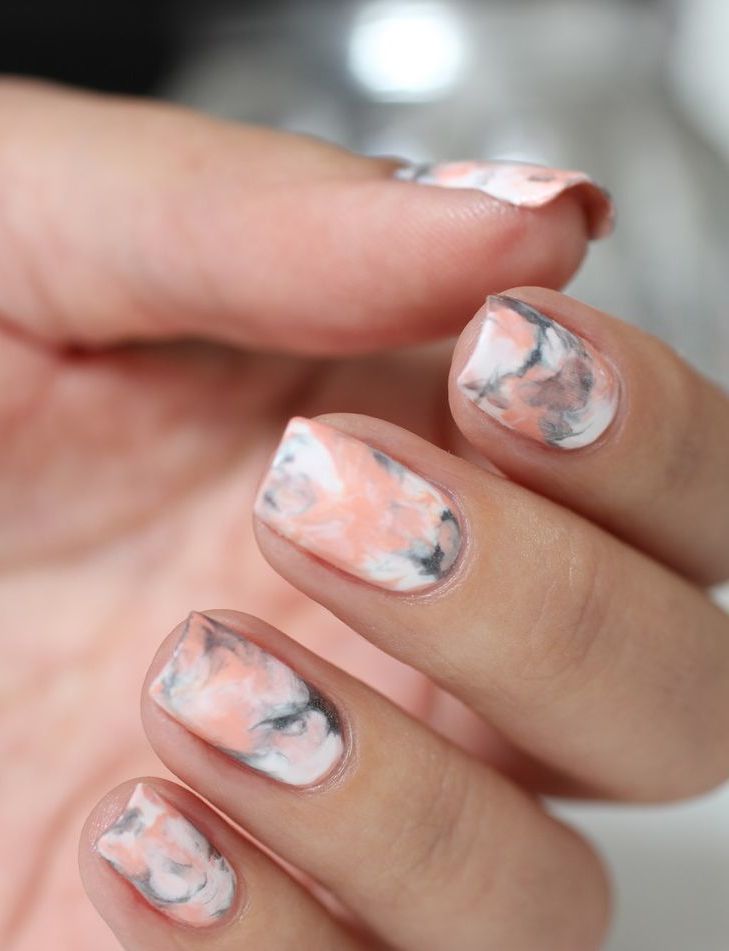
Marble effect on the nails is achieved with the help of special application technology and the use of two or more shades of gel polish. Recreate the natural beauty of the stone will help both calm shades - gray, black, white, silver, beige, and bright pigments - emerald, red, blue or blue.
What it is
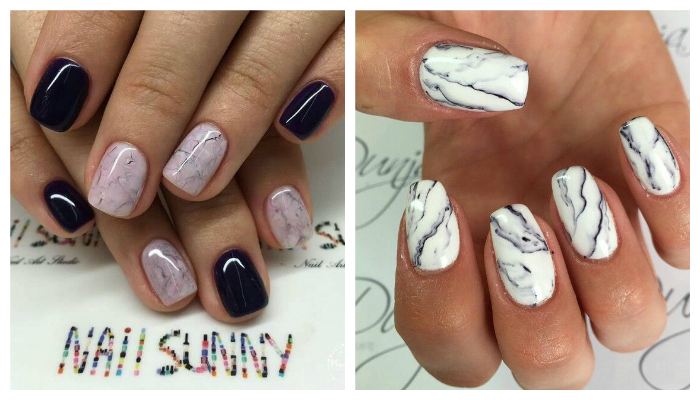
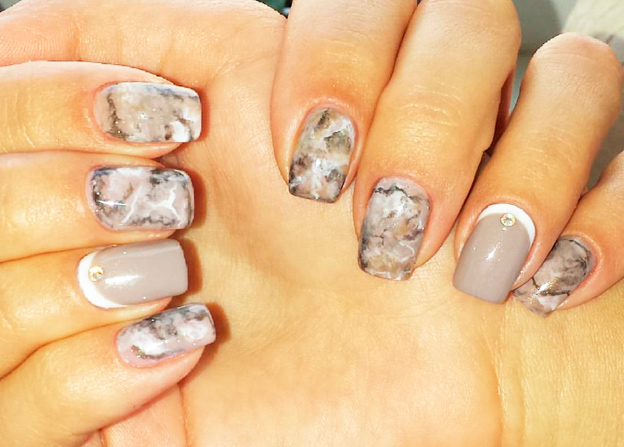
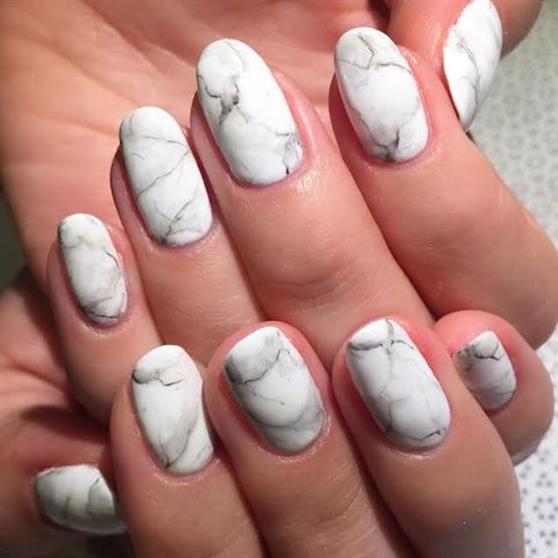
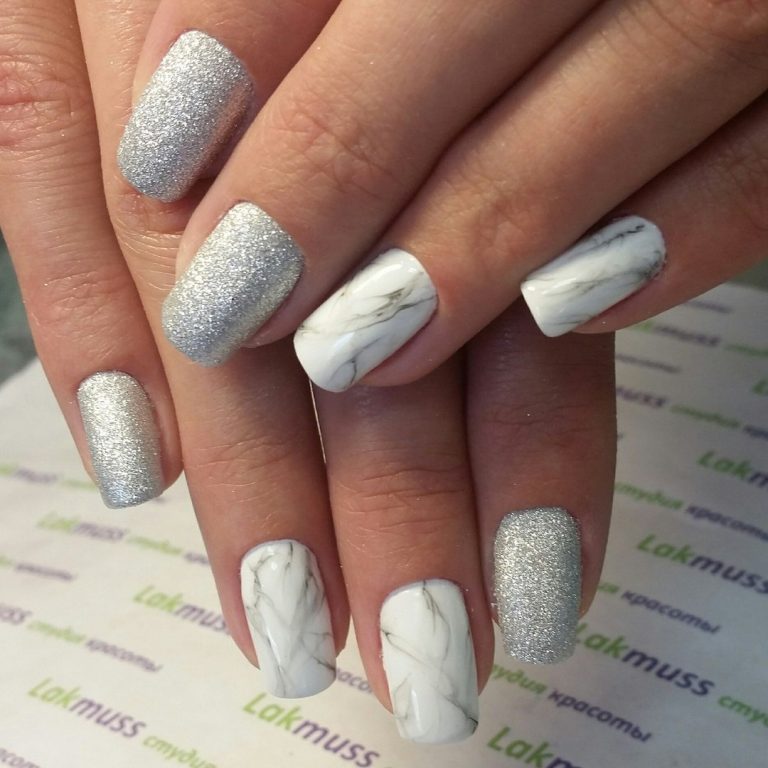
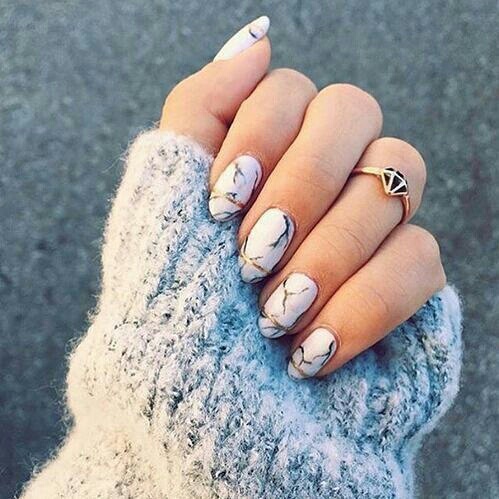
Marble manicure is an imitation of natural stone on the nail plate. Among the classic performance can be noted gray, white and black shades - they are perfectly combined with each other and are suitable for everyday wear. The original decision will be the choice of green or blue colors in order to “draw” malachite and any other gem on the nails.
At the end of last year, a marble manicure literally burst into the everyday life of modern fashionistas: an unusual design appealed to women of all ages and statuses. It looks great in everyday life and is suitable for a special occasion, if you play a little with shades of gel polish and the pattern itself.
Recreating a natural stone pattern on the nail is not difficult: There are several techniques for performing patterns using water or a regular toothpick. It is also possible to make a similar pattern on the nails at home, the main thing is to arm yourself with knowledge, patience and several jars of gel polish.

How to make a drawing
There are several ways to put a marble pattern on the nail plate. Consider them right now.
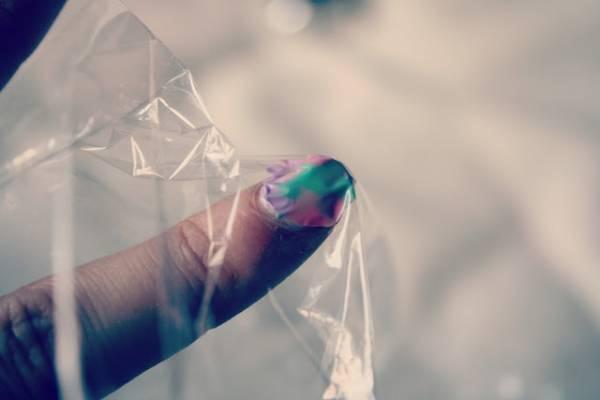
- Using polyethylene film.
Take a regular plastic bag, for convenience, you can cut it into one small rectangular piece and pre-crush in your hand.
- Repeat all stages of preparation and apply the main color on the nail, dry it in the lamp;
- Apply one or more colors of varnish on the nail and blot them lightly with plastic wrap, without holding it for a long time on the plate;
- Perform the procedure with each nail to create an interesting natural pattern.
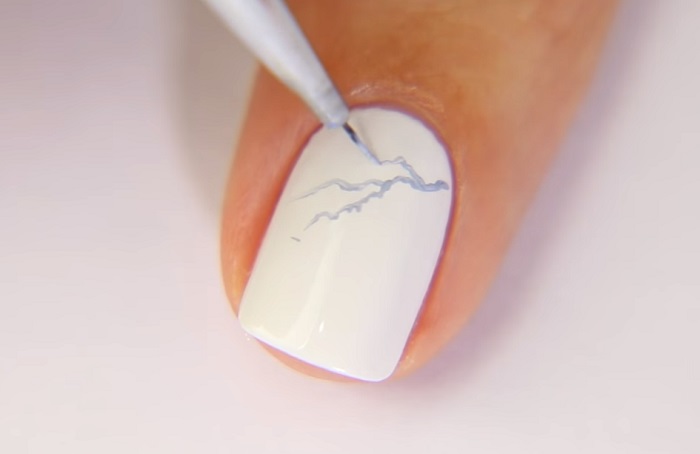
- Drawing a picture with a toothpick or a fine brush.
Put a little varnish on the main color or base and draw a smooth line with a toothpick. You can use one or more contrasting shades to get a calm or bright design.
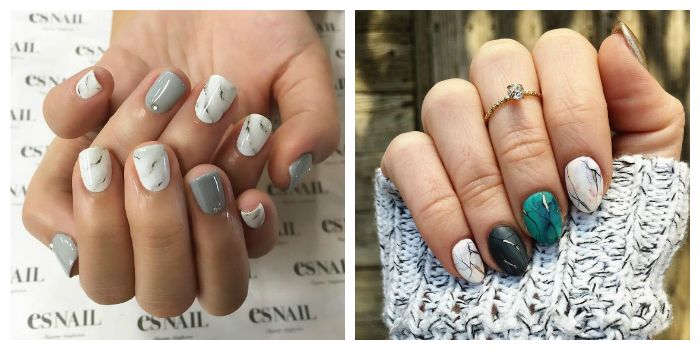
In order to obtain a natural effect, use shades of gel polish close to it. Among them, gray (from light to ultra dark), black, emerald, and turquoise are especially popular.
Toothpick can be replaced with a thin brush for drawing and literally transfer the pattern of natural stone on the nails, choosing the appropriate shades. You will have to work directly on the nail, and for this you do not have to have the skills of an artist, you can safely redraw the pattern from the photo.
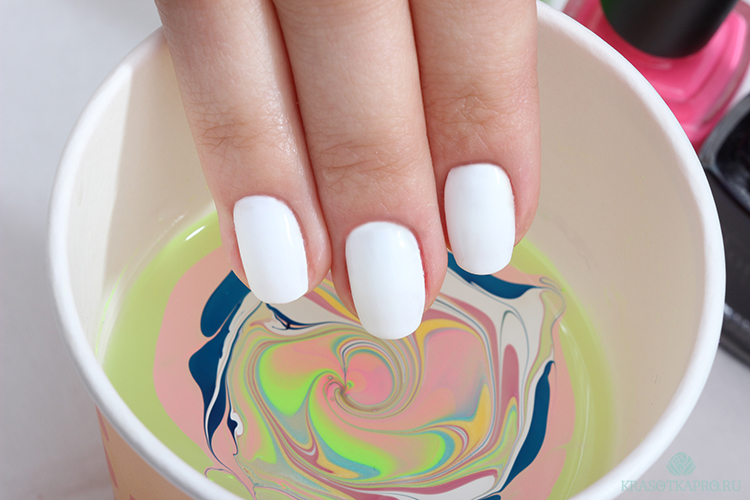
- Water equipment.
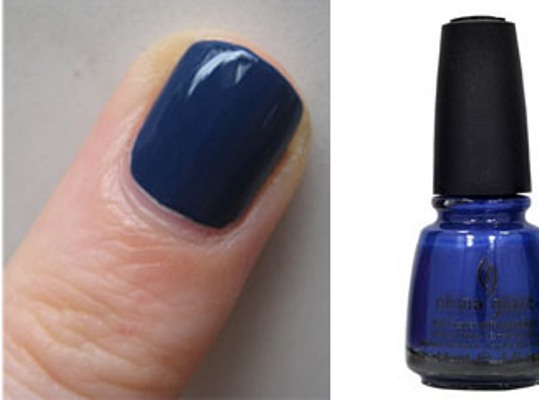
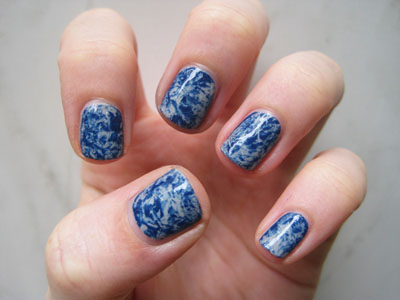
To do this, you will need a liquid with water at room temperature, a set to create a gel polish and the colors themselves. It is necessary to arm from 2 to 4 bottles with colored varnish with the condition that the shades are well combined with each other. For example, you can take black and gray or choose something brighter - pink, blue, green. Another rule - let at least two colors contrast with each other.
To create a marble effect, you will need a manicure kit - tools, fat cream, cotton swabs or discs.
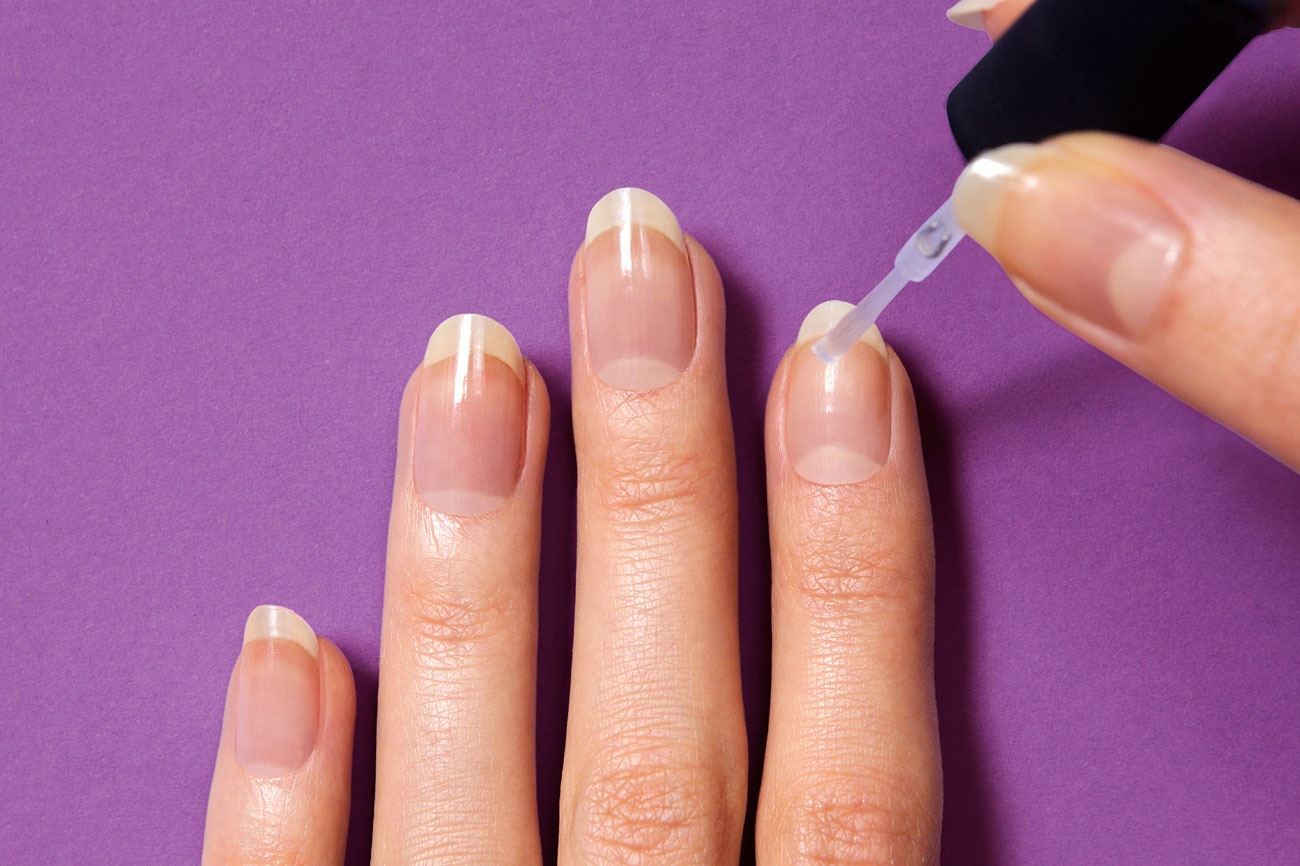
- First you need to prepare a nail for applying varnish: give it shape, remove the cuticle and level the surface with a special buff;
- Next you need to degrease the plate well. clinker, in a minute apply primer - it is used for better adhesion of the nail and base;
- Next stage - applying the base and drying it in the lamp;
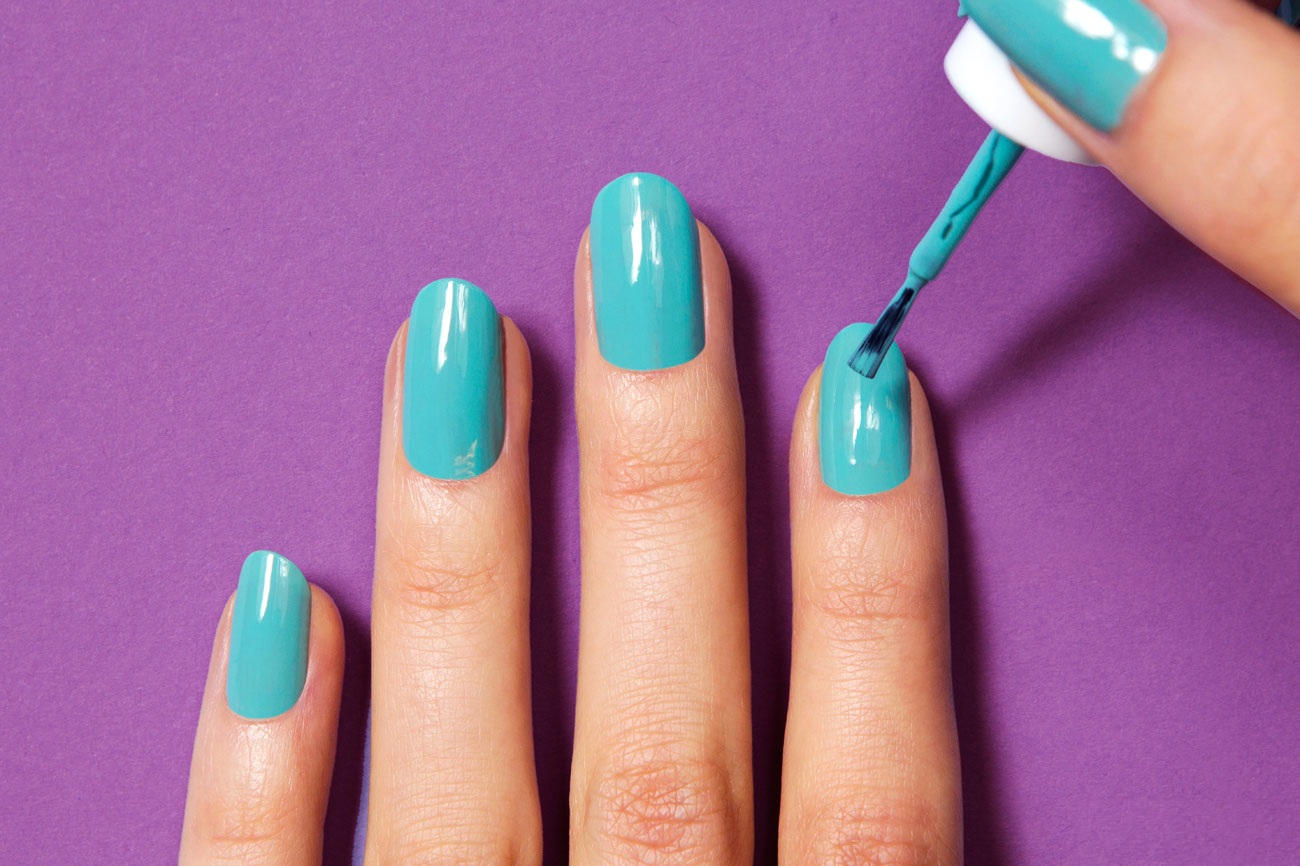
- Primary color can be appliedFor example, white, beige or any other. This stage is intermediate and optional. It is necessary if you plan to create a light stone texture on a light background;
- Now you need to prepare the fingers - treat the skin around the nail fat cream in order that gel varnish easily left from it after drawing drawing;
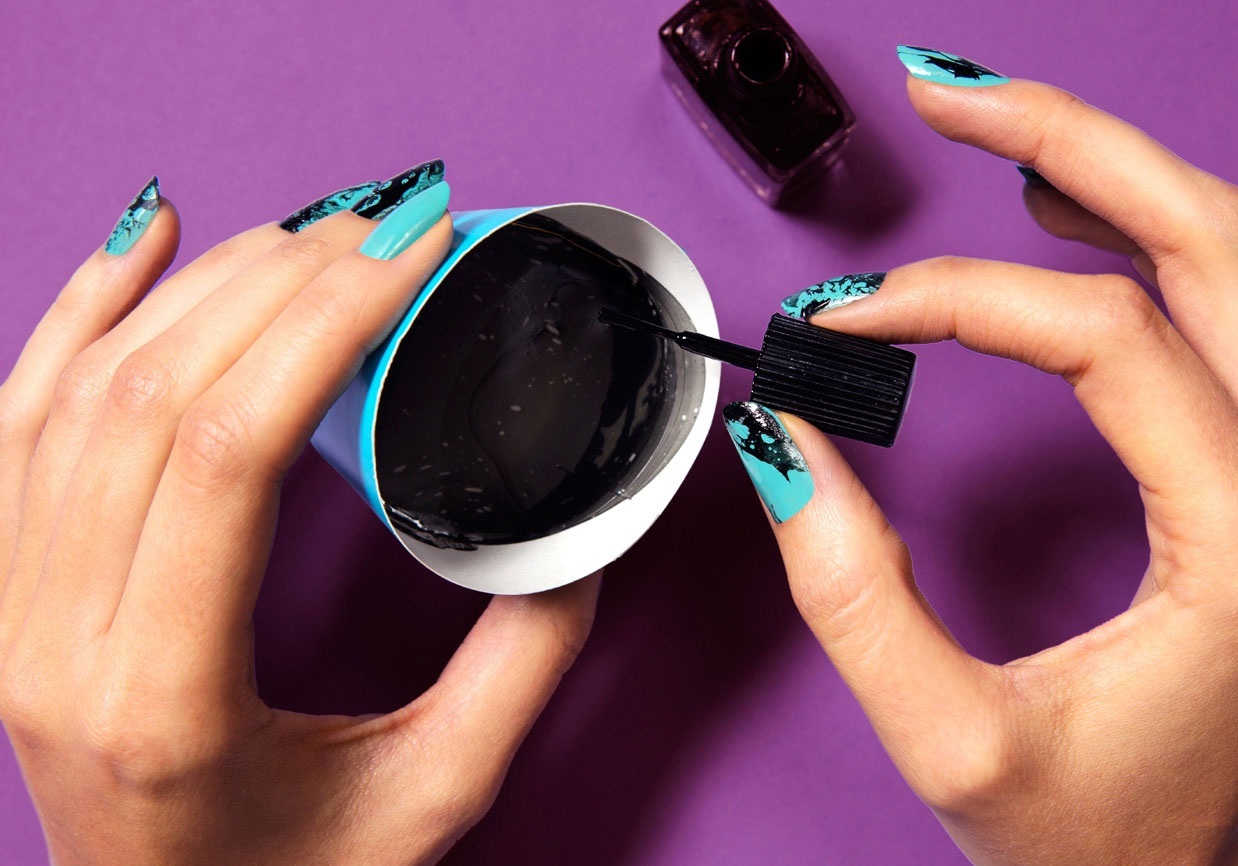
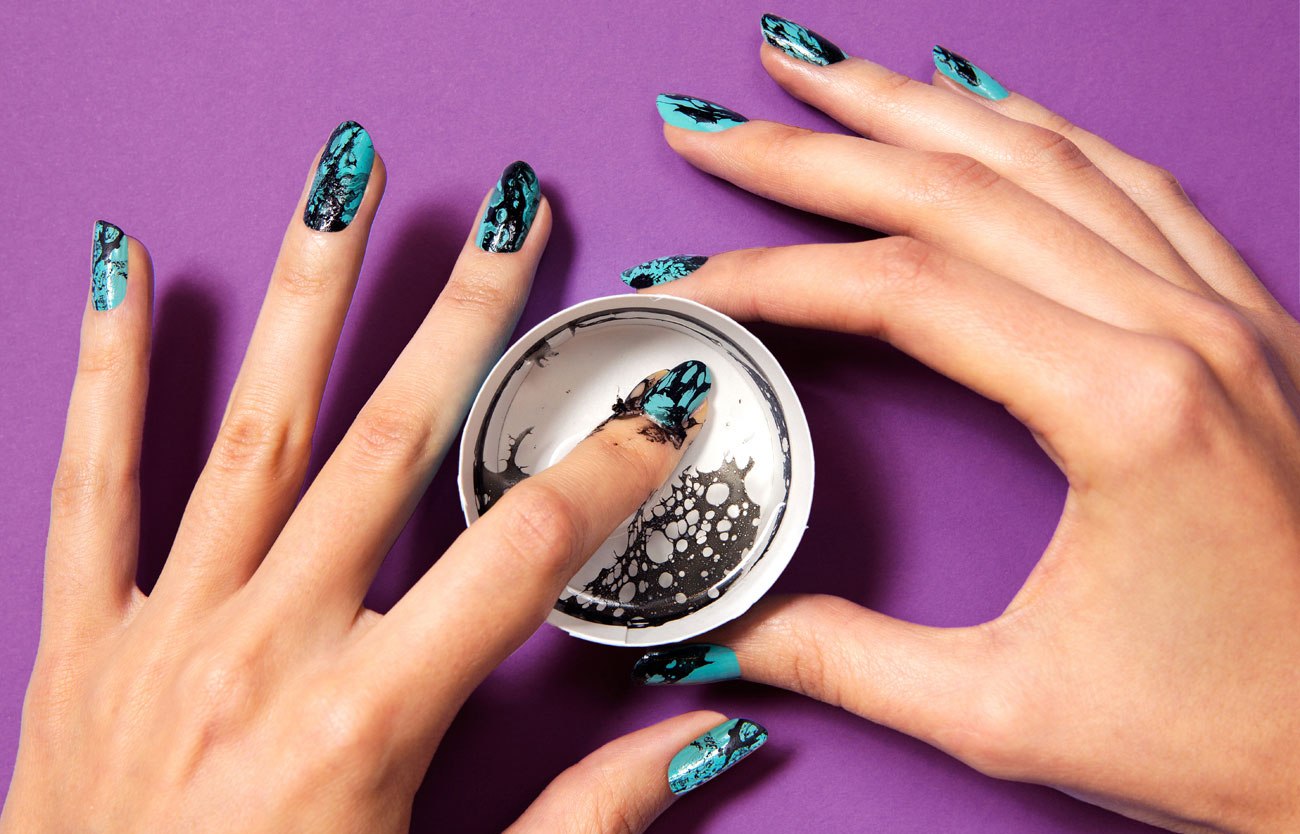
- Prepare a small container with room temperature water., put there one drop of thick varnish, then another, third, connect them with a toothpick and “paint” the texture of the stone on the water surface (you can use the finished picture to do this);
- Dip your nail gently. in this drawing on the water;
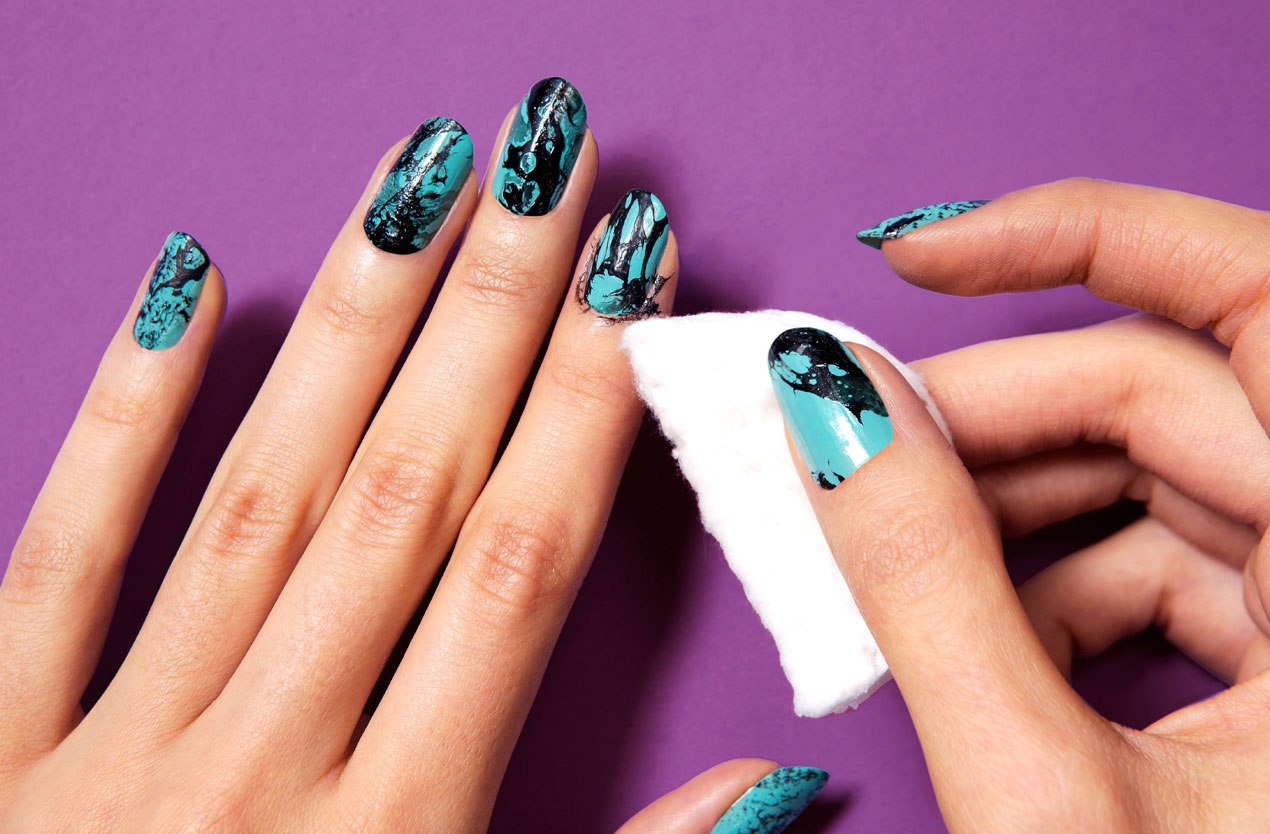
- Let the pattern dry on the nail and remove its excess from the skin with a cotton swab or disc;
- The procedure must be repeated for each nail. or those on which you plan to create a similar "engraving";
- It is necessary to fix the design of nails with top coat., dry it in the lamp and remove the formed sticky layer.
Not all masters choose the water application procedure, therefore there are alternative methods for creating a granite manicure.
- Marble lacquer.
To create a stone manicure, you can use the usual gel polish, which is called - marble. It differs from the already finished pattern, which is visible in the classical brush application. It usually has a basic shade and marble blotches to create an amazing natural pattern on the nail plate. Today, these products are easy to find on sale in specialized stores or manicure rooms. Their main advantage is the ability to get instant results - marble nail design without effort.
The only thing that will be needed from a woman in this case is the skills of staining the nail plate and a couple of hours of time.
Design
Today, you can find tens of hundreds of manicure designs with the effect of natural stone: from enchanting marble to brilliant emerald with gold splashes. Here are some tips on choosing a design:
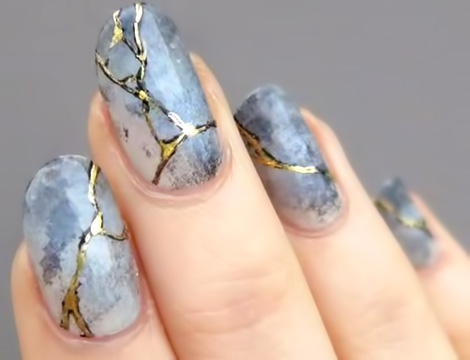
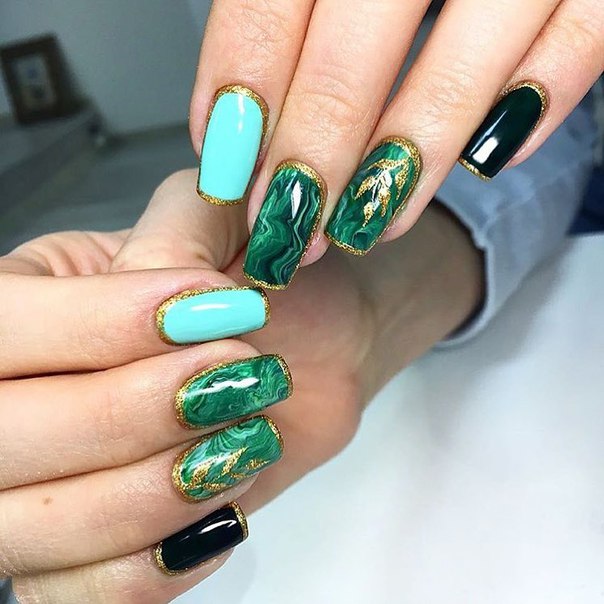
- New items in marble design are bright nails, usually green, emerald, dark blue and even black. It is important to add “cracks” of a contrasting shade: white, gray and yellow. Today it is fashionable to create not only a texture close to natural shades, but also a fantasy one.
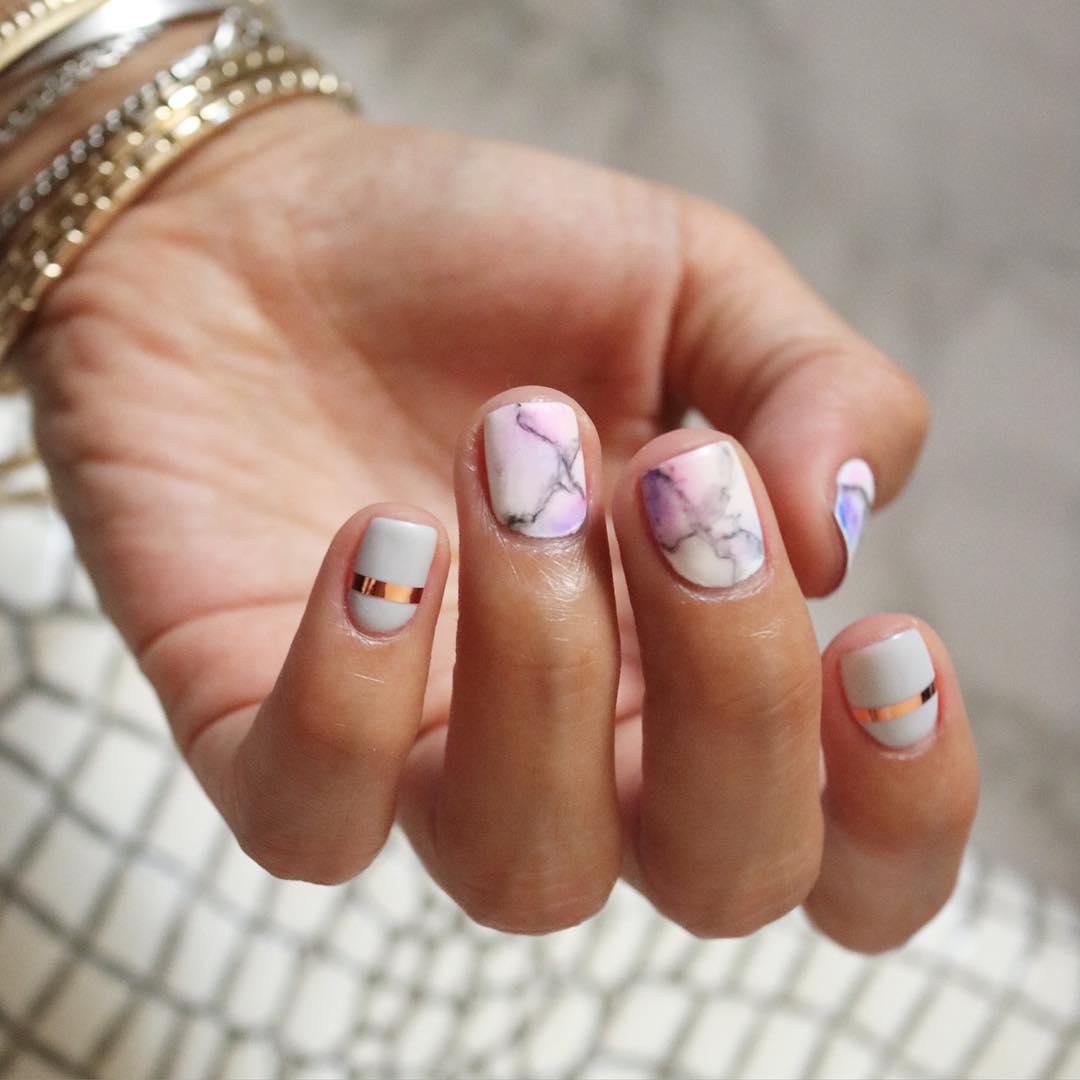
- The effect of the stone itself looks unusual, thin ribbons or gel polish of golden, silver color will help make it even more original. Geometrically correct ribbons will create a modern design, artificial cracks - a little retro, or bring chic.
- Classic marble on the nail plate is usually achieved by pre-coating it with a light-colored gel polish. (white or beige) and drawing with a brush, toothpick or needleSometimes, polyethylene film is used to create natural stains. Than to plant dark lines in the conditions of the house, girls are often interested. We answer: by any means at hand from a regular package to a thin sewing corner. The more natural the lines, the more natural the picture will look. Do not chase the geometry.
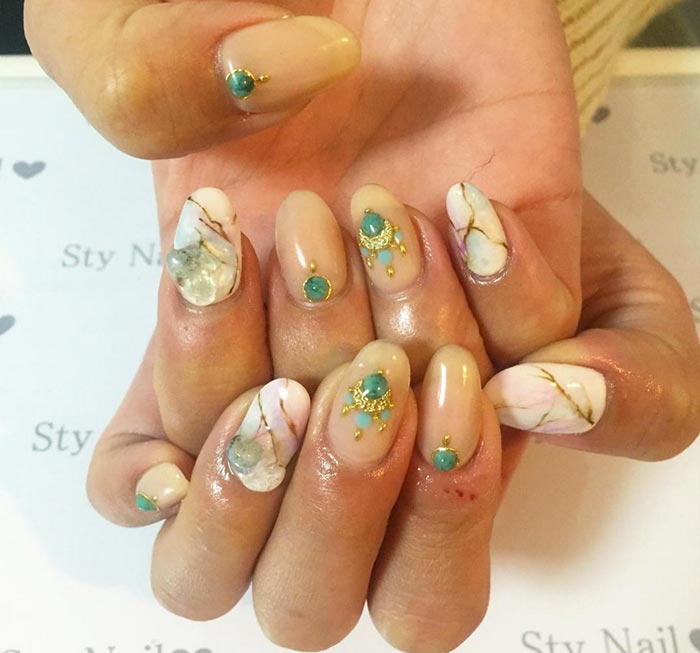
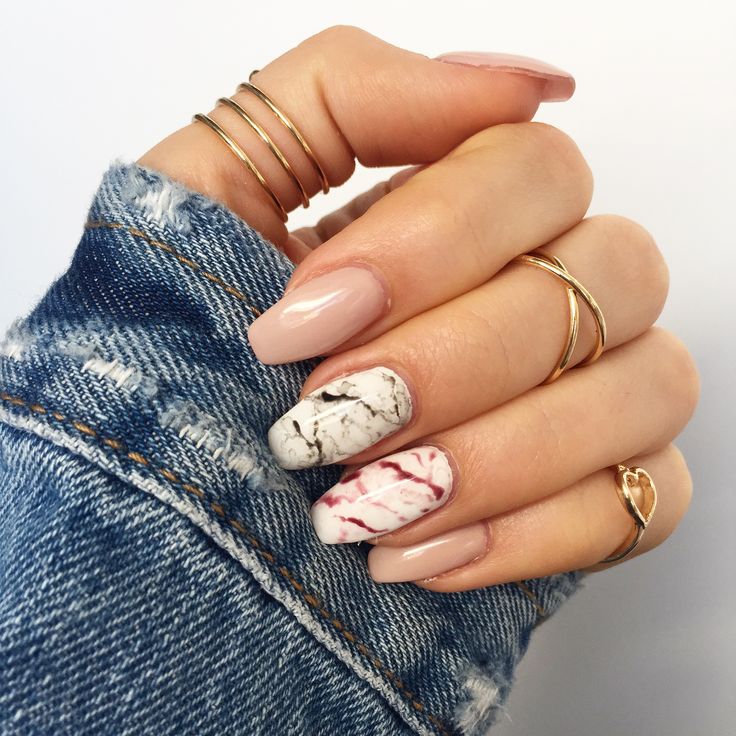
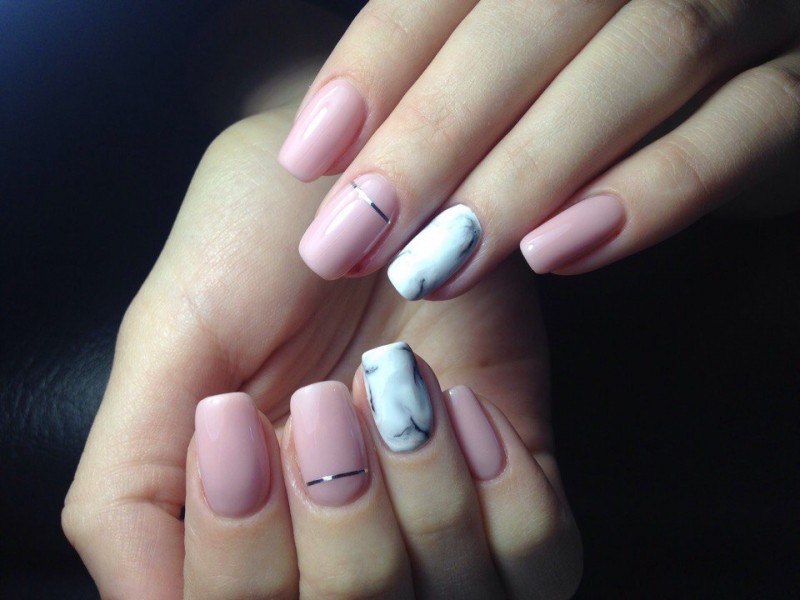
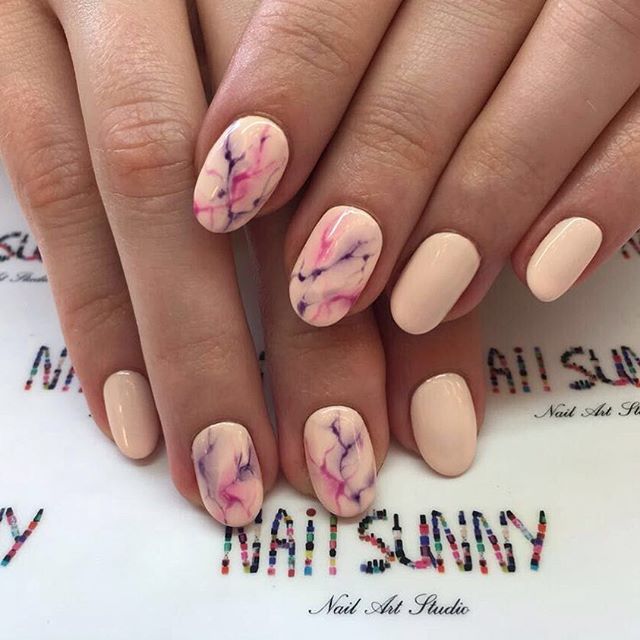
- The marbled finish does not look good on all fingers, but, for example, only on the nameless and middle ones. The remaining nails can be painted in some muted shade, blue, pink, white or beige. Asymmetry always looks good and remains relevant.
- To make the manicure original and memorable, choose the main color of the firmament, combine it with delicate pink, white and gold. The latter will add a bit of chic to the design of nails, especially if you designate the edges of the nail plate or create additional holes at its base.
- Looks stylishly green as the main shade, it is important to choose a deep and rich color, it is appropriate to combine it with white and gold.
Marble manicure can exist separately, and be used in combination with other techniques. Especially attractively the stone design looks with holes of a light, dark shade, brilliant or transparent. Unusually marble combined with a classic jacket - a rare combination, but always relevant and stylish.
A manicure in the “nude” style will no longer be boring if you diversify it with a marbled mood and apply contrasting stains on a couple of marigolds - index and middle or middle and nameless. For bright women, dark basic shades and light contrasting stains are suitable. Blue and white look unusually with splashes of gold, exactly like saturated green, purple, yellow, black, and blue.
Master Classes
Numerous workshops from masters and lovers of original design in manicure allow you to bring unique ideas to life, even at home. It is not necessary to be a top master in order to draw patterns "from natural stone" on your own nails.
Master classes allow step by step to make nail design in the technique of "marble manicure" at home. The first of these is aimed at creating a picture using a film:
- Create a solid base for further coverage. - apply one layer of transparent base and dry it under the lamp;
- Further - select the main or background color of the nails. Perfect light shades like white, beige or light pigmented - pale pink, blue, purple, lavender. Apply color in two layers for saturation;
- Before you start creating natural divorces It is necessary to take care of the skin around the nail and treat it with a fat creamBy the way, many girls use ordinary PVA glue - with it the gel polish is perfectly removed from the skin with one hand movement;
- To get the effect of natural stone, Apply a drop of the main color and contrast to it on the central part of the nail, blot with plastic wrap or regular package;
- Now carefully remove this film., allow the lacquer to "play" a little on the nail and take a natural form, remove its excess from the skin with a cotton swab or disc, dry the nail plate in the lamp;
- Now the same procedure must be carried out with the rest of the fingers and already after fixing the stone manicure with a top coat.
Numerous workshops from masters and lovers of original design in manicure allow you to bring unique ideas to life, even at home. It is not necessary to be a top master in order to draw patterns "from natural stone" on your own nails.


Marble manicure just draw yourself using a special thin brush. To do this, prepare the nail plate and select the color scheme in which the future design will be executed:
- Put a little contrast color on the pre-painted base shade and add a clear varnish. for better shading (the same gel base will do);
- Take a brush and make smooth streaks yourselfby guiding them in opposite directions. It is important here not to focus on geometry;
- To make the design look complete, bring the lines to the end of the nail plate with a sharp movement so that this “cliff” is natural and soft;
- After drawing the picture dry the nail in the lamp and fix the result with a top coating.
To diversify the manicure, add shiny elements like slender ribbons or sparkles to it, even a blitter or regular polish with sparkles will do.Any of the elements can be applied with the same thin brush, repeating the contours of the stains. Decorative tape can be divided into half the nail plate, 1/3 or select the edge of the nail to create natural and simultaneous rigor.
It looks very feminine white marble coating on the nails, which is particularly appropriate for everyday wear and is equally well suited for celebration. It is not necessary to do this design on each leg, you can use it on 2-3 plates, and the rest to paint in one tone.
In the video below - a master class on creating a "marble" pattern.
Water manicure - an alternative to dry application. It is interesting in performance and gives an even more natural watery effect. We will tell you step by step how to make natural stains using ordinary water and a set of gel polishes:
- Prepare the nails for drawing: remove the cuticle, apply a primer and a base on the surface of the nail;
- Pour cold water into a small container and put gel polish into it: first one shade, then another, and so on several times. Now create a drawing of a stone on water with a toothpick;
- Dip the nail in this gel film, remove it and evaluate the result;
- It is recommended to clean the skin around the plate immediately with a cotton swab, after which the nail should be thoroughly dried in the lamp.