How to glue the tape on the gel Polish
When creating an original and stylish design, girls often ask how to glue the tape on gel polish. There are several subtleties of this process, which even beginners can handle.
Kinds
Decorative tape to create the perfect nail design is in demand among professional and home craftsmen. Different in shade and thickness, it allows to diversify the image and give originality to any gel-polish coating.
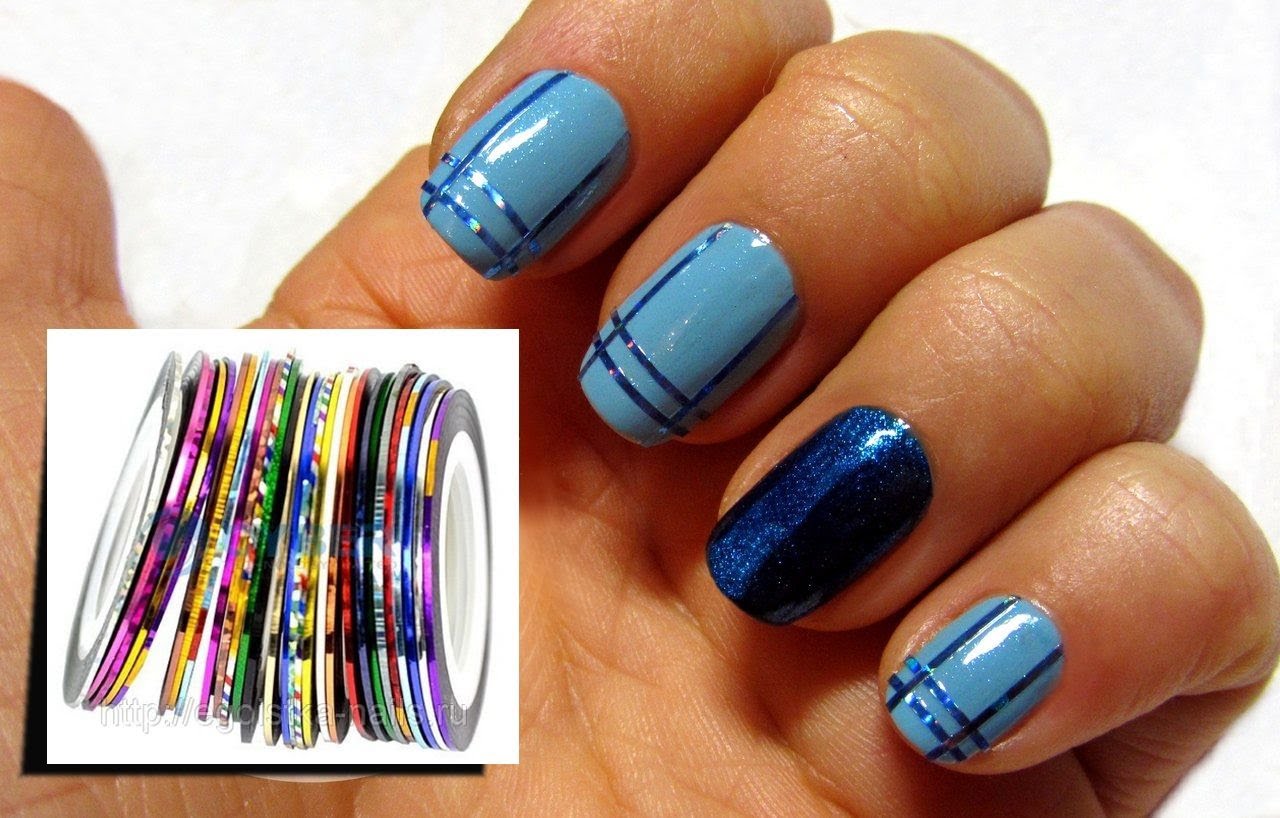
- Adhesive tape is sold in small coils and is a thin strip of various metallic colors. The cost of this accessory is low, and the range is simply huge.
With the help of adhesive tape it turns out to create a concise manicure or an intricate design with a geometric pattern. Strips are used to emphasize the geometry of the nail plate or cover, design color or shape of the nail.
- Liquid tape does not apply to accessories for creating neil design; a similar object acts as a protection for the okolonogtevoy area from the gel varnish, including the base and the top. The product is sold in a standard bottle with a brush, applied to the area around the marigold by means of the latter with soft movements, without entering the territory of the nail plate. The use of adhesive tape is useful at the beginning of the manicure: after processing the nail and the plate and before applying the base and pigments. The tape allows you to protect the delicate area from contact with her persistent gel textures and create a neat perfect manicure with a durable coating.
When coating gel varnish, work strictly on the nail plate or remove excess varnish before drying in the lamp.
It will be difficult to get rid of the coating on the skin, and it is easy to spoil the appearance of a manicure with such a manipulation. Liquid tape takes on the awkward shaking of the hand and the small errors of the master, which is especially characteristic when performing a complex design or ombre manicure. It is easy to remove the accessory after all stages of applying the gel coating, including the top. Simply pull the tape with tweezers — it can be easily removed without the risk of damaging the skin and skin.
Application technique
Adhesive decorative tape requires proper application in order for the design to be beautiful and practical at the same time. Consider the steps for using adhesive tape yourself:
- First you need to do a classic manicure and remove the cuticle, align the nail plate with the buff, take care of the uniform texture of the latter and “slick” the vulnerable spots of the finger rollers;
- Next, you need to apply a base coat and dry it in the lamp. Then apply the main color in 2-3 layers.
The design of the future manicure is better to think over in advance to determine the number of layers of the primary color of the varnish. UhThis can be a plain paint with a decorative ribbon or the use of several shades of gel polish on one plate.
- After the gel polish dries, you can apply the tape itself. You must first cut a small piece of the accessory along the length of the nail. It is important that the tape is not wider or longer than the nail itself, but a significantly short film will not look very good. Determine the "golden mean" or the desired length of the strip in advance, pre-prepare the material to create your design.
- Carefully apply a strip on the part of the nail that it will frame. This can be done with tweezers - it is convenient and practical. You can smooth the ribbon with your finger.
- Be sure to fasten the tape top and dry it well in the lamp, This will allow the accessory to stay on the nail plate for a long time.
If the length of the glued tape is slightly longer than necessary, you can shorten it directly on the finger with thin nail scissors.
Cut the excess piece with scissors before applying the top coat.
Decorative tape with a sticky surface allows you to create an original "striped" design on the nail plate, for which you will need to perform a number of simple steps:
- Make a manicure, cover the nails with a base, dry well under the lamp;
- Apply base color, dry again;
- Stick thin strips on the nail plate - they will protect the previous layer and keep the color;
- After the strips are pasted, the next lacquer of a contrasting shade can be applied. Dry the nails in the lamp and give your fingers some rest;
- Carefully remove unnecessary more strips and get the result - smooth contrast lines, relevant in this season;
- Be sure to apply a topcoat that will smooth out the unevenness of the nail plate and give the surface a nice gloss.
Auxiliary strips are used not only for the design in the style of "vest", they can draw a jacket or use to split the nail plate into two parts and use several colors on one nail.
Such techniques require the master of care and accuracy, the ability to correct the coating by hand with a toothpick and klinser.
Learn more about how to glue the tape, you will learn from the next video.
Design Ideas
The strips allow you to create an interesting manicure, without giving up the favorite color of the gel coating. Consider design ideas right now:
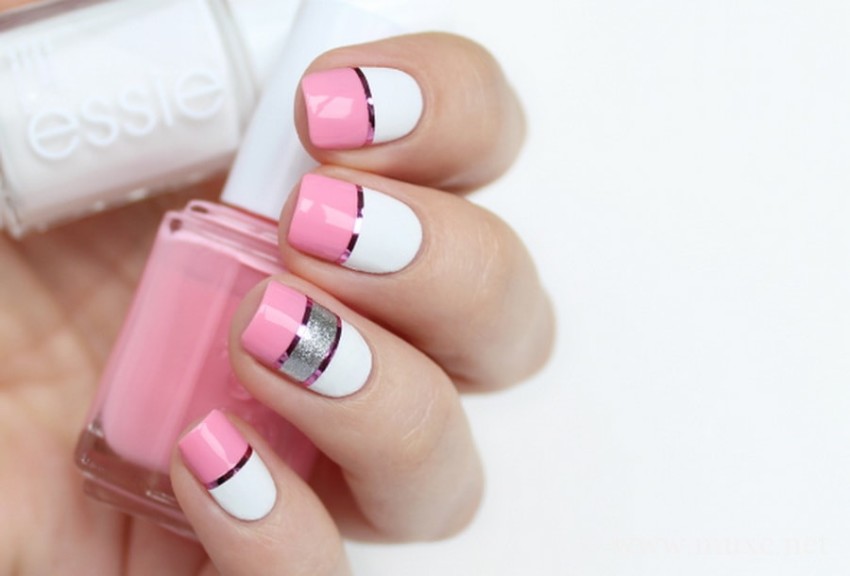
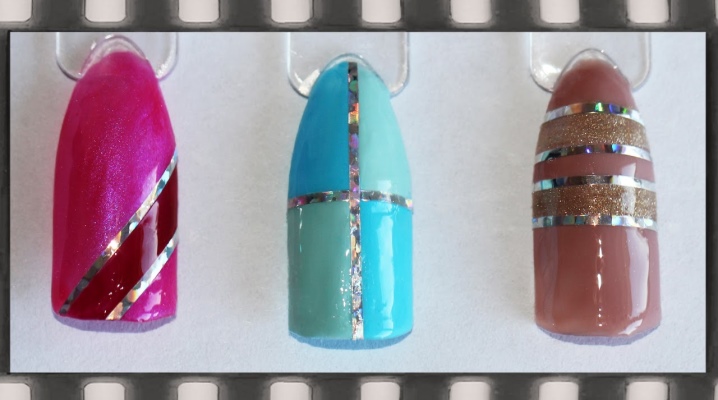
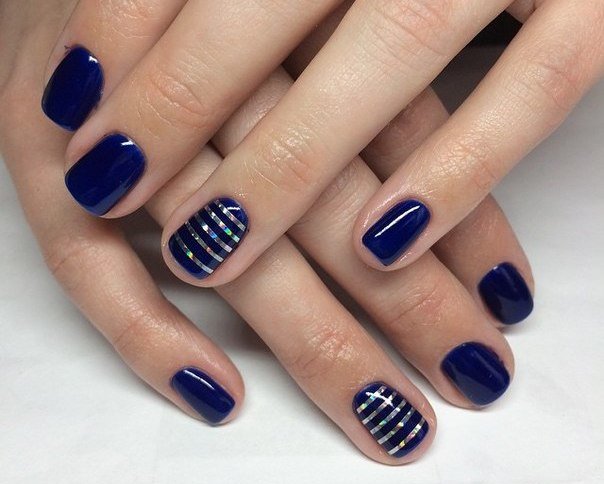
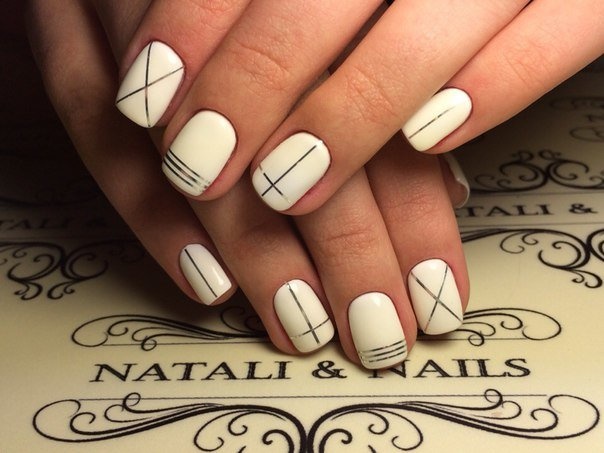
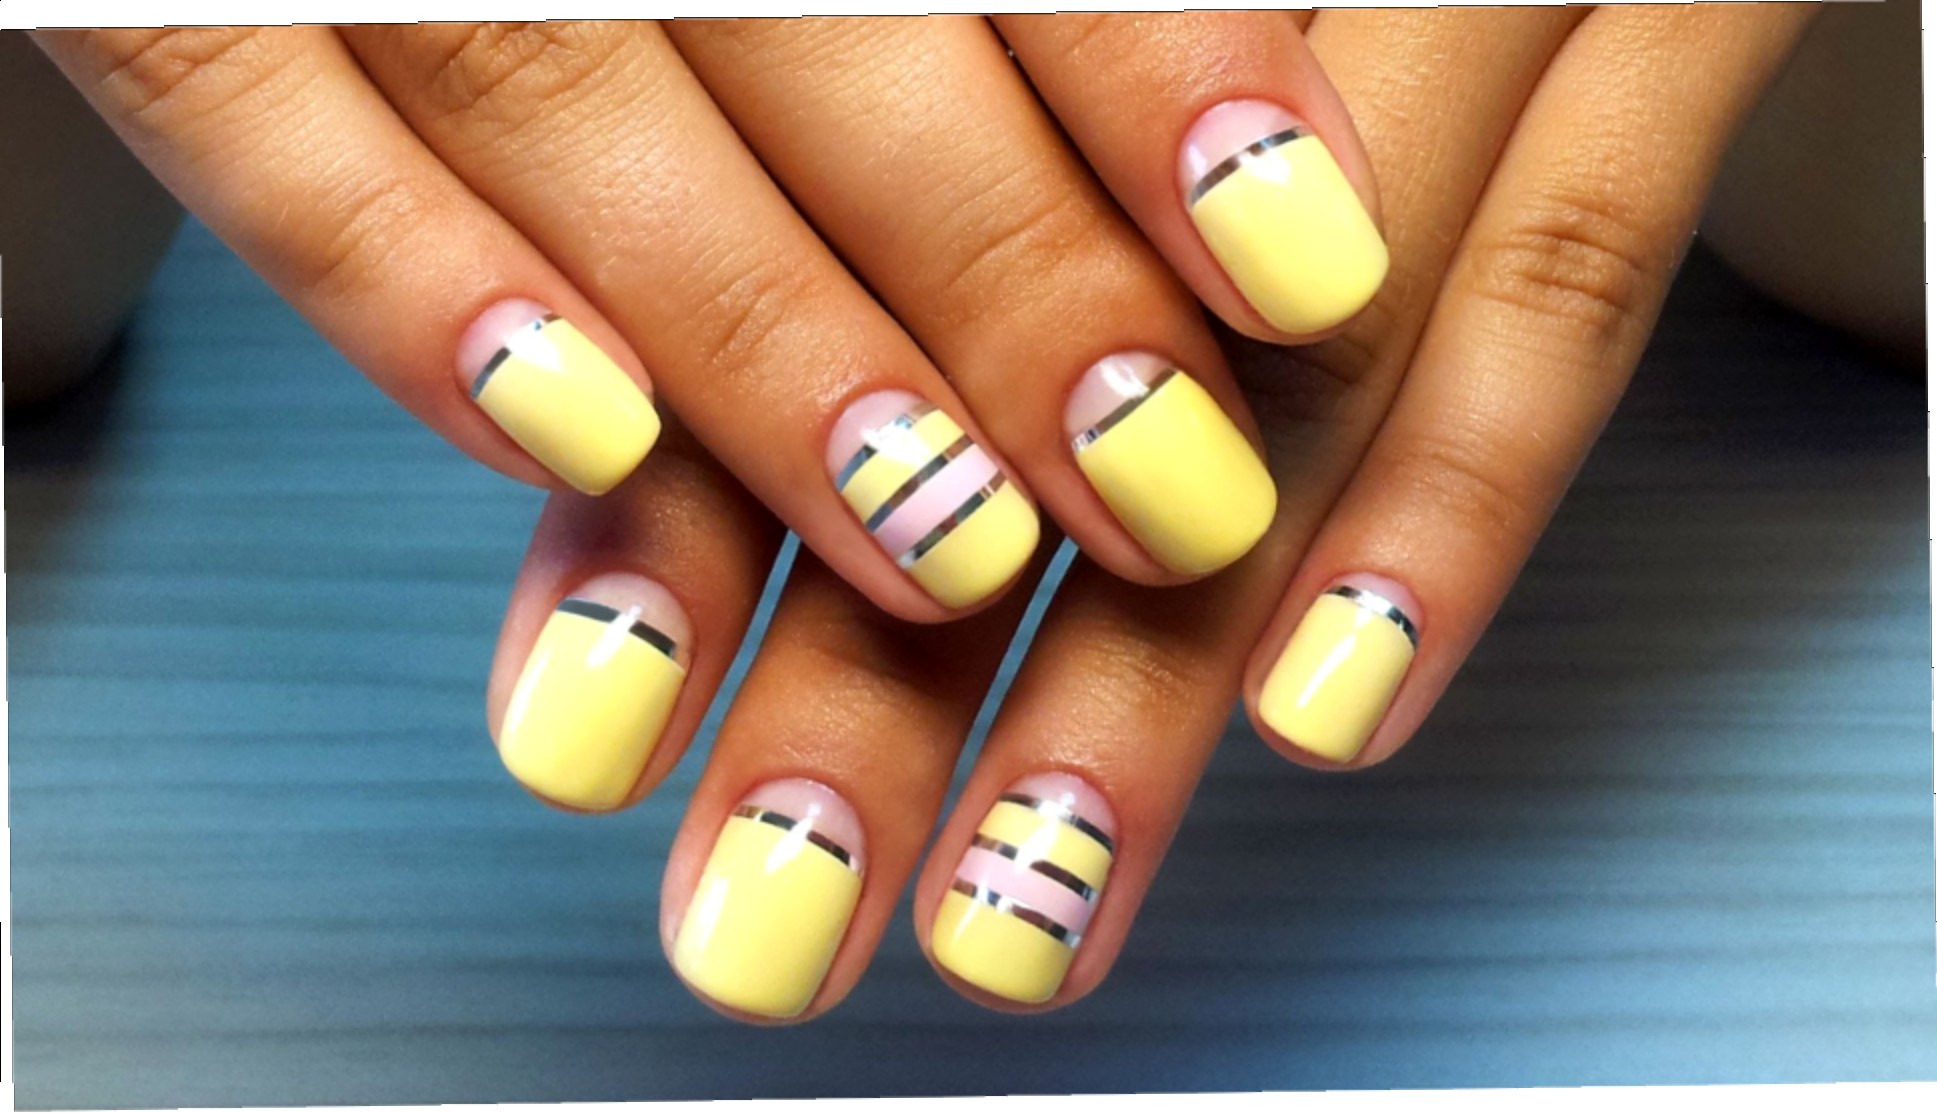
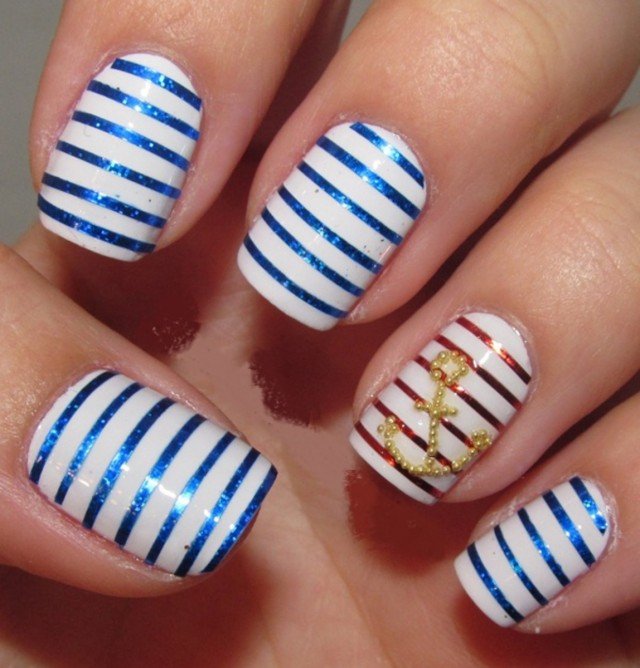
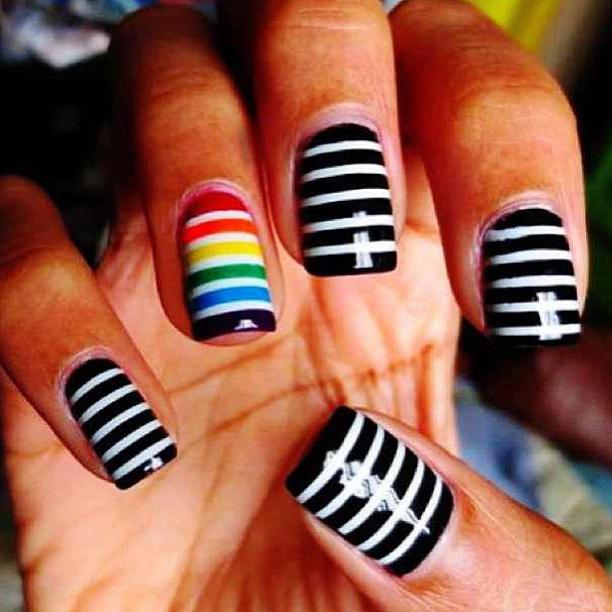
- Classic strips in the amount of 1, 2, 3 pieces can be positioned horizontally or vertically on the nail plate and get a concise design. It is better to use contrasting colors of ribbons.
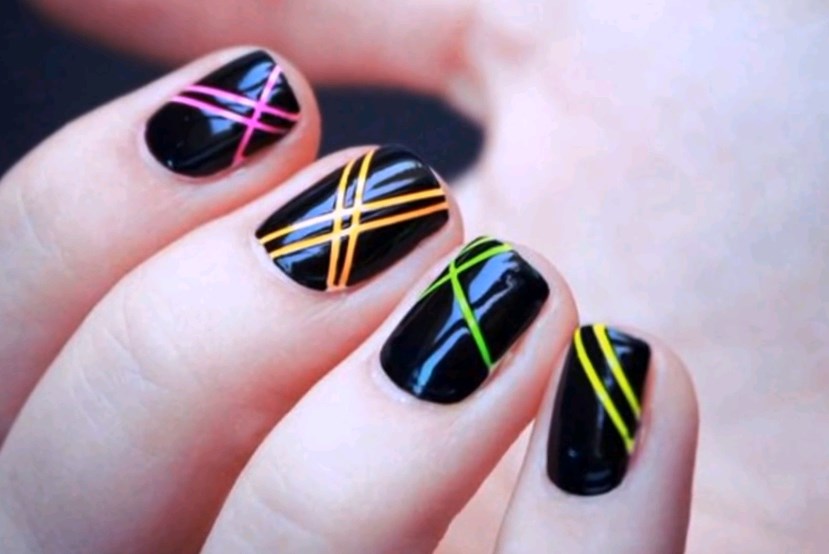
- "Cell" - alternative to simple strips. To create it, glue two horizontal thin strips in the upper part of the nail and two - perpendicularly, focusing on the right or left side of the plate.
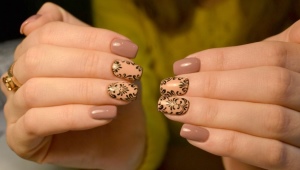
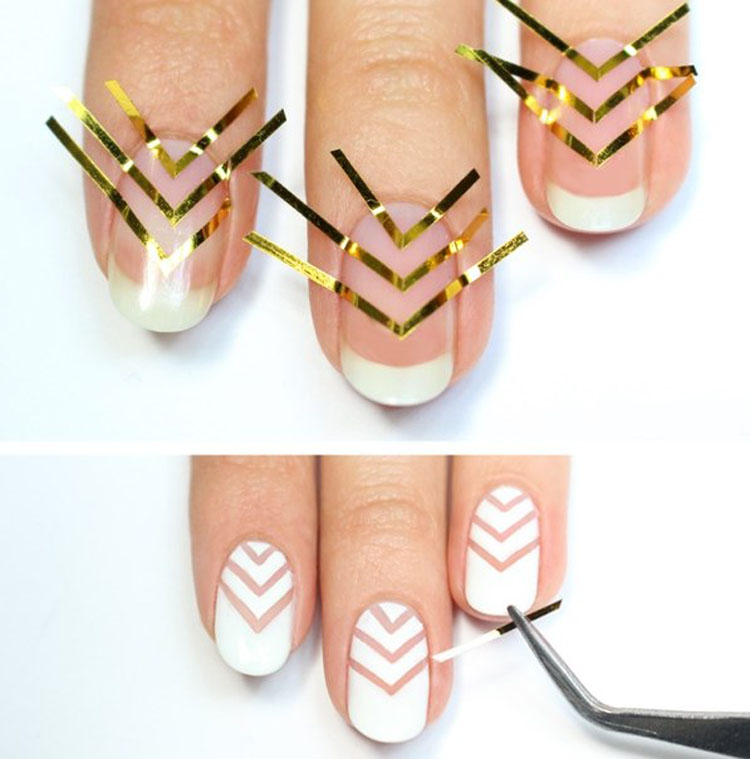
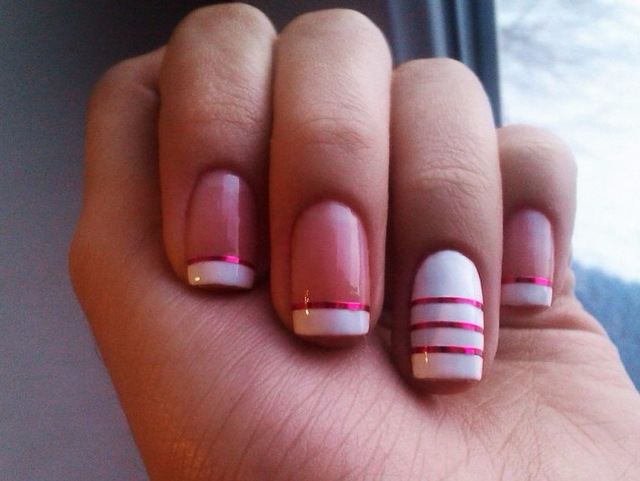
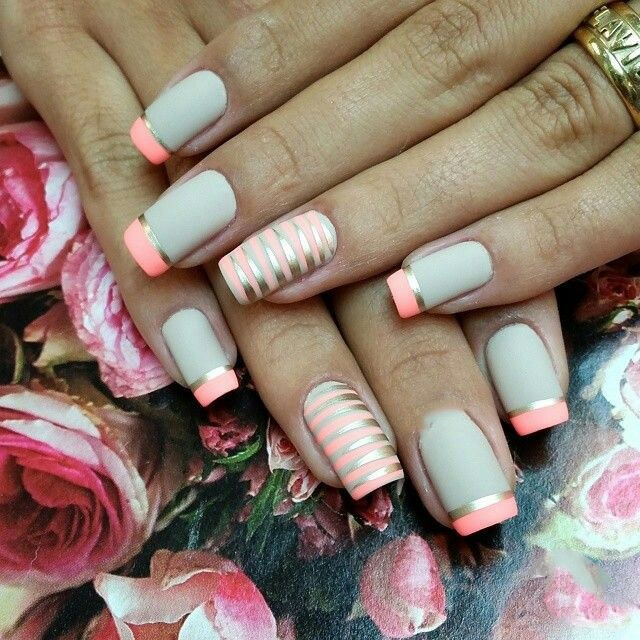
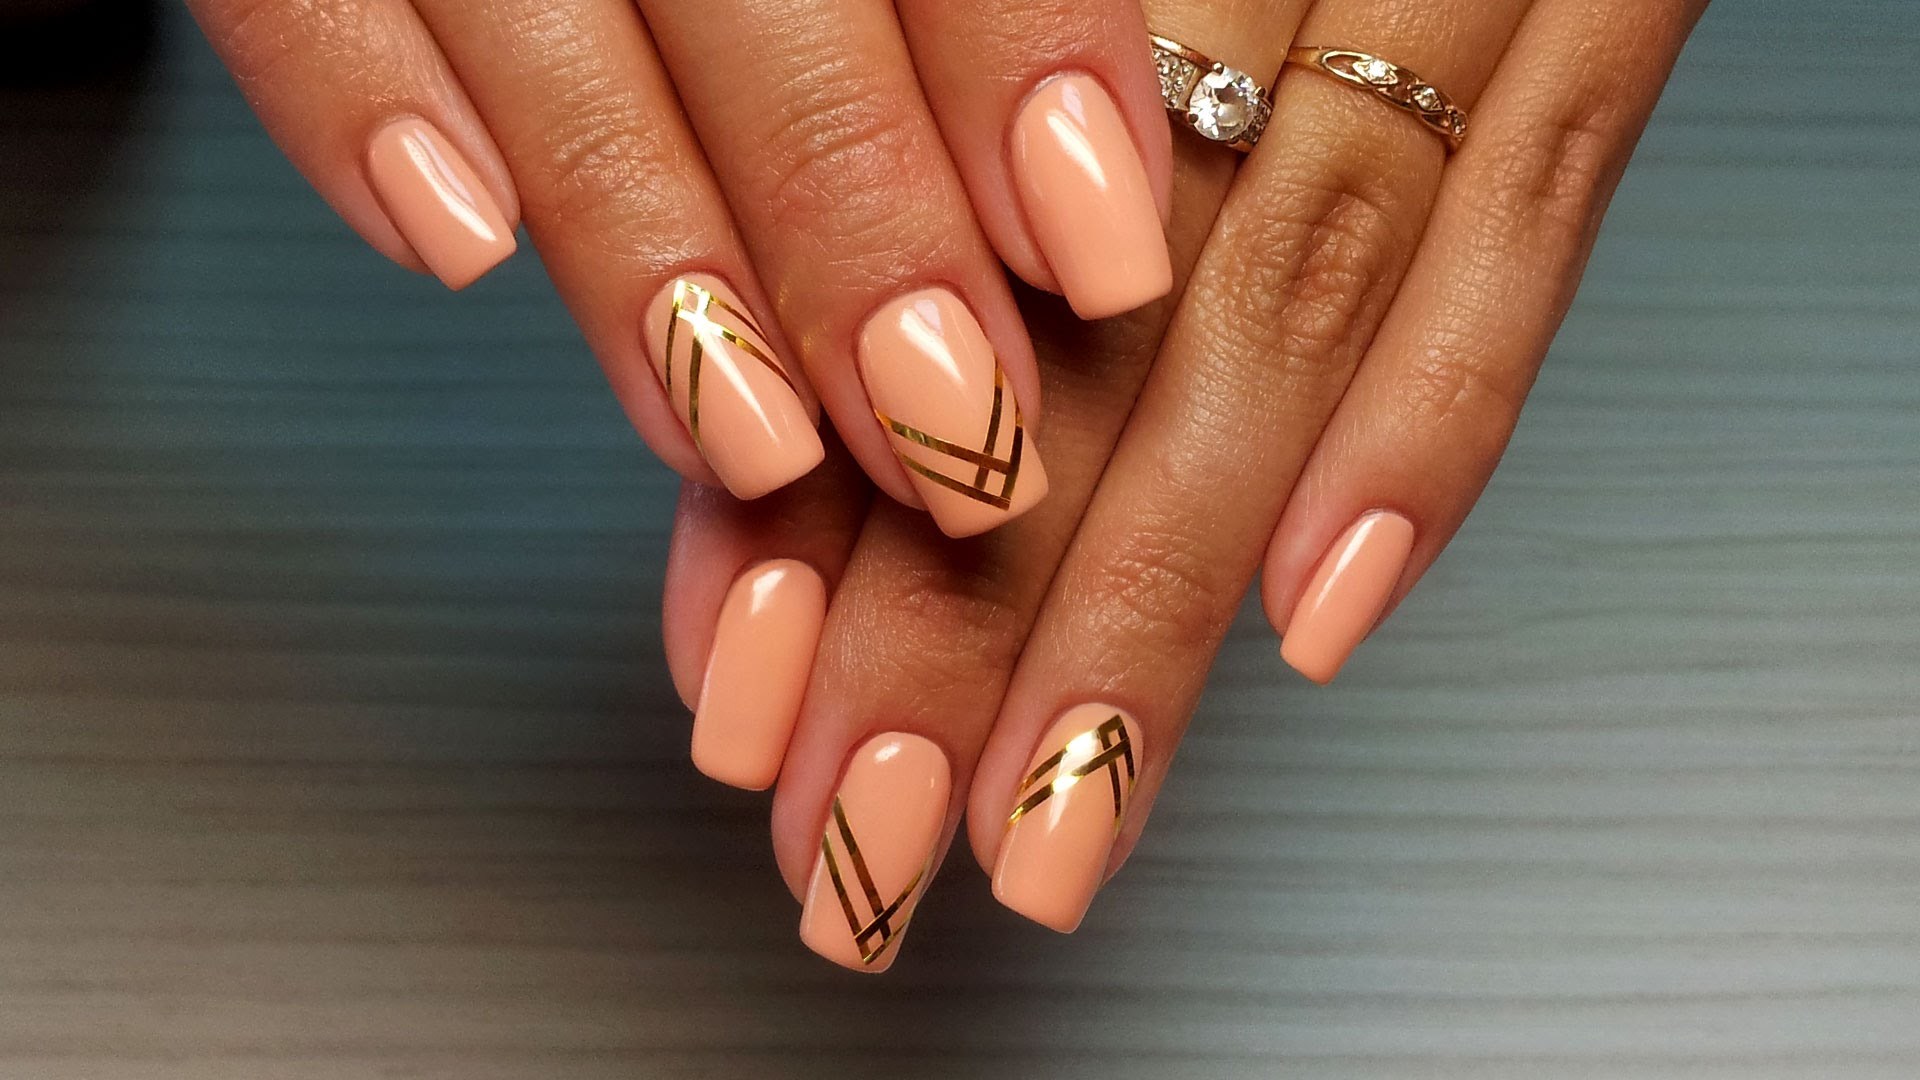
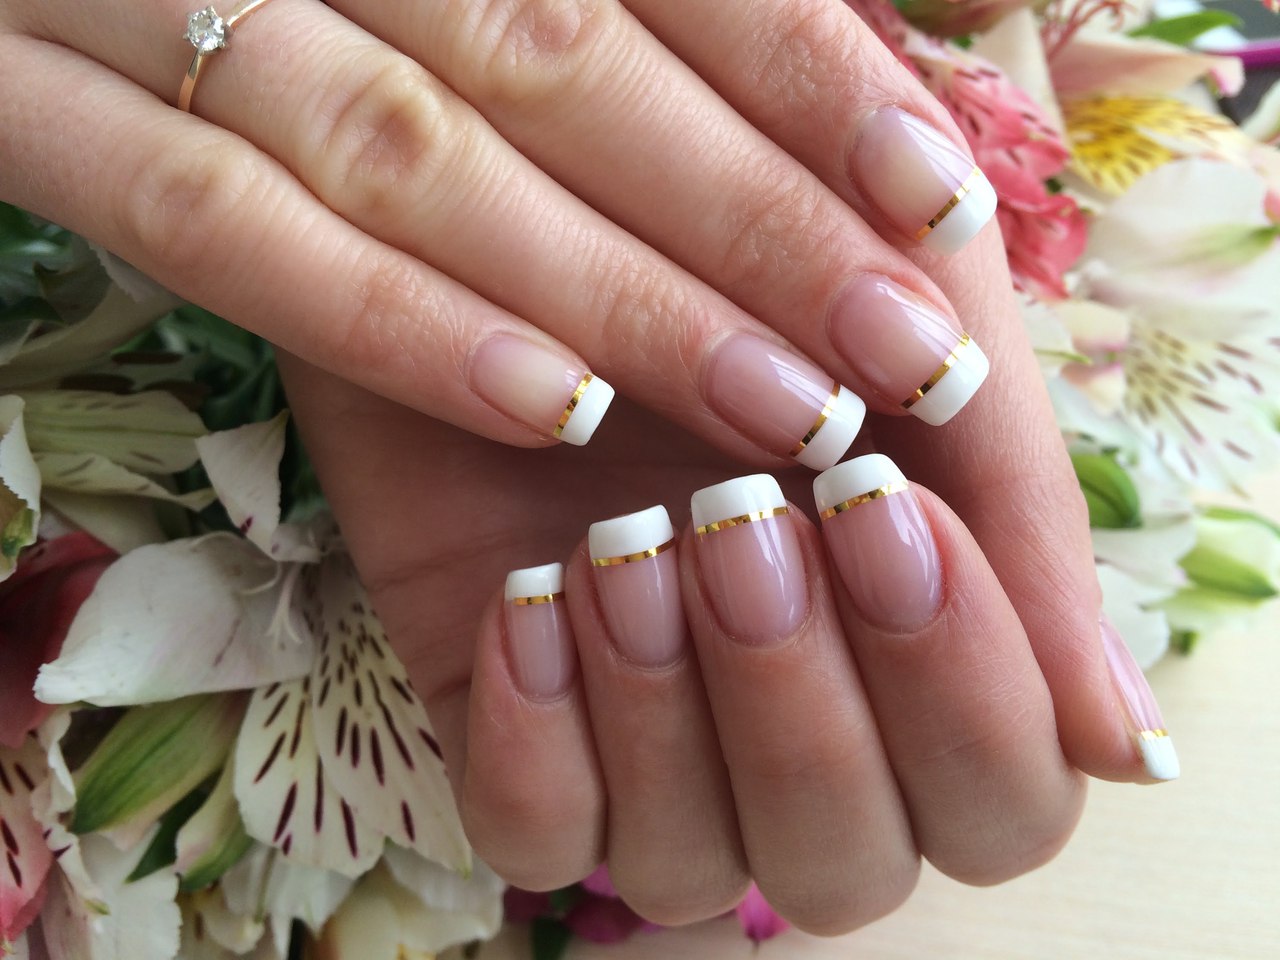
- Unusual jacket. This technique allows you to vary the rigorous design and bring into it the "flavor" not only with the geometric shape of the holes, but also with their design. Choose any nude shade of gel polish and apply it in 2 layers, dry in a lamp. Draw a rectangular hole with a simple or thin brush on the tip of the nail in two layers - for rich color. After the coating has dried in the lamp, cut the strips according to the desired length and glue them on the border between the main color and the holes.
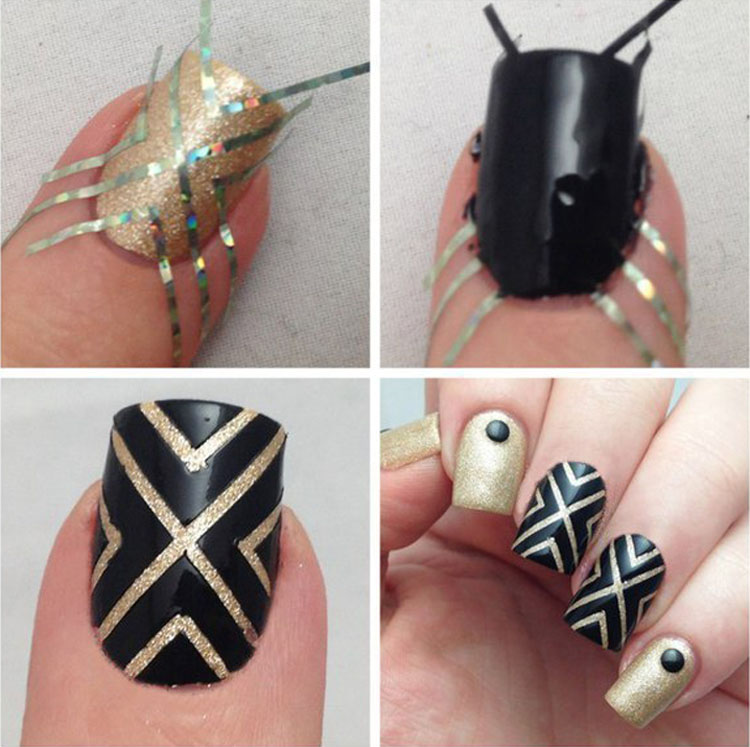
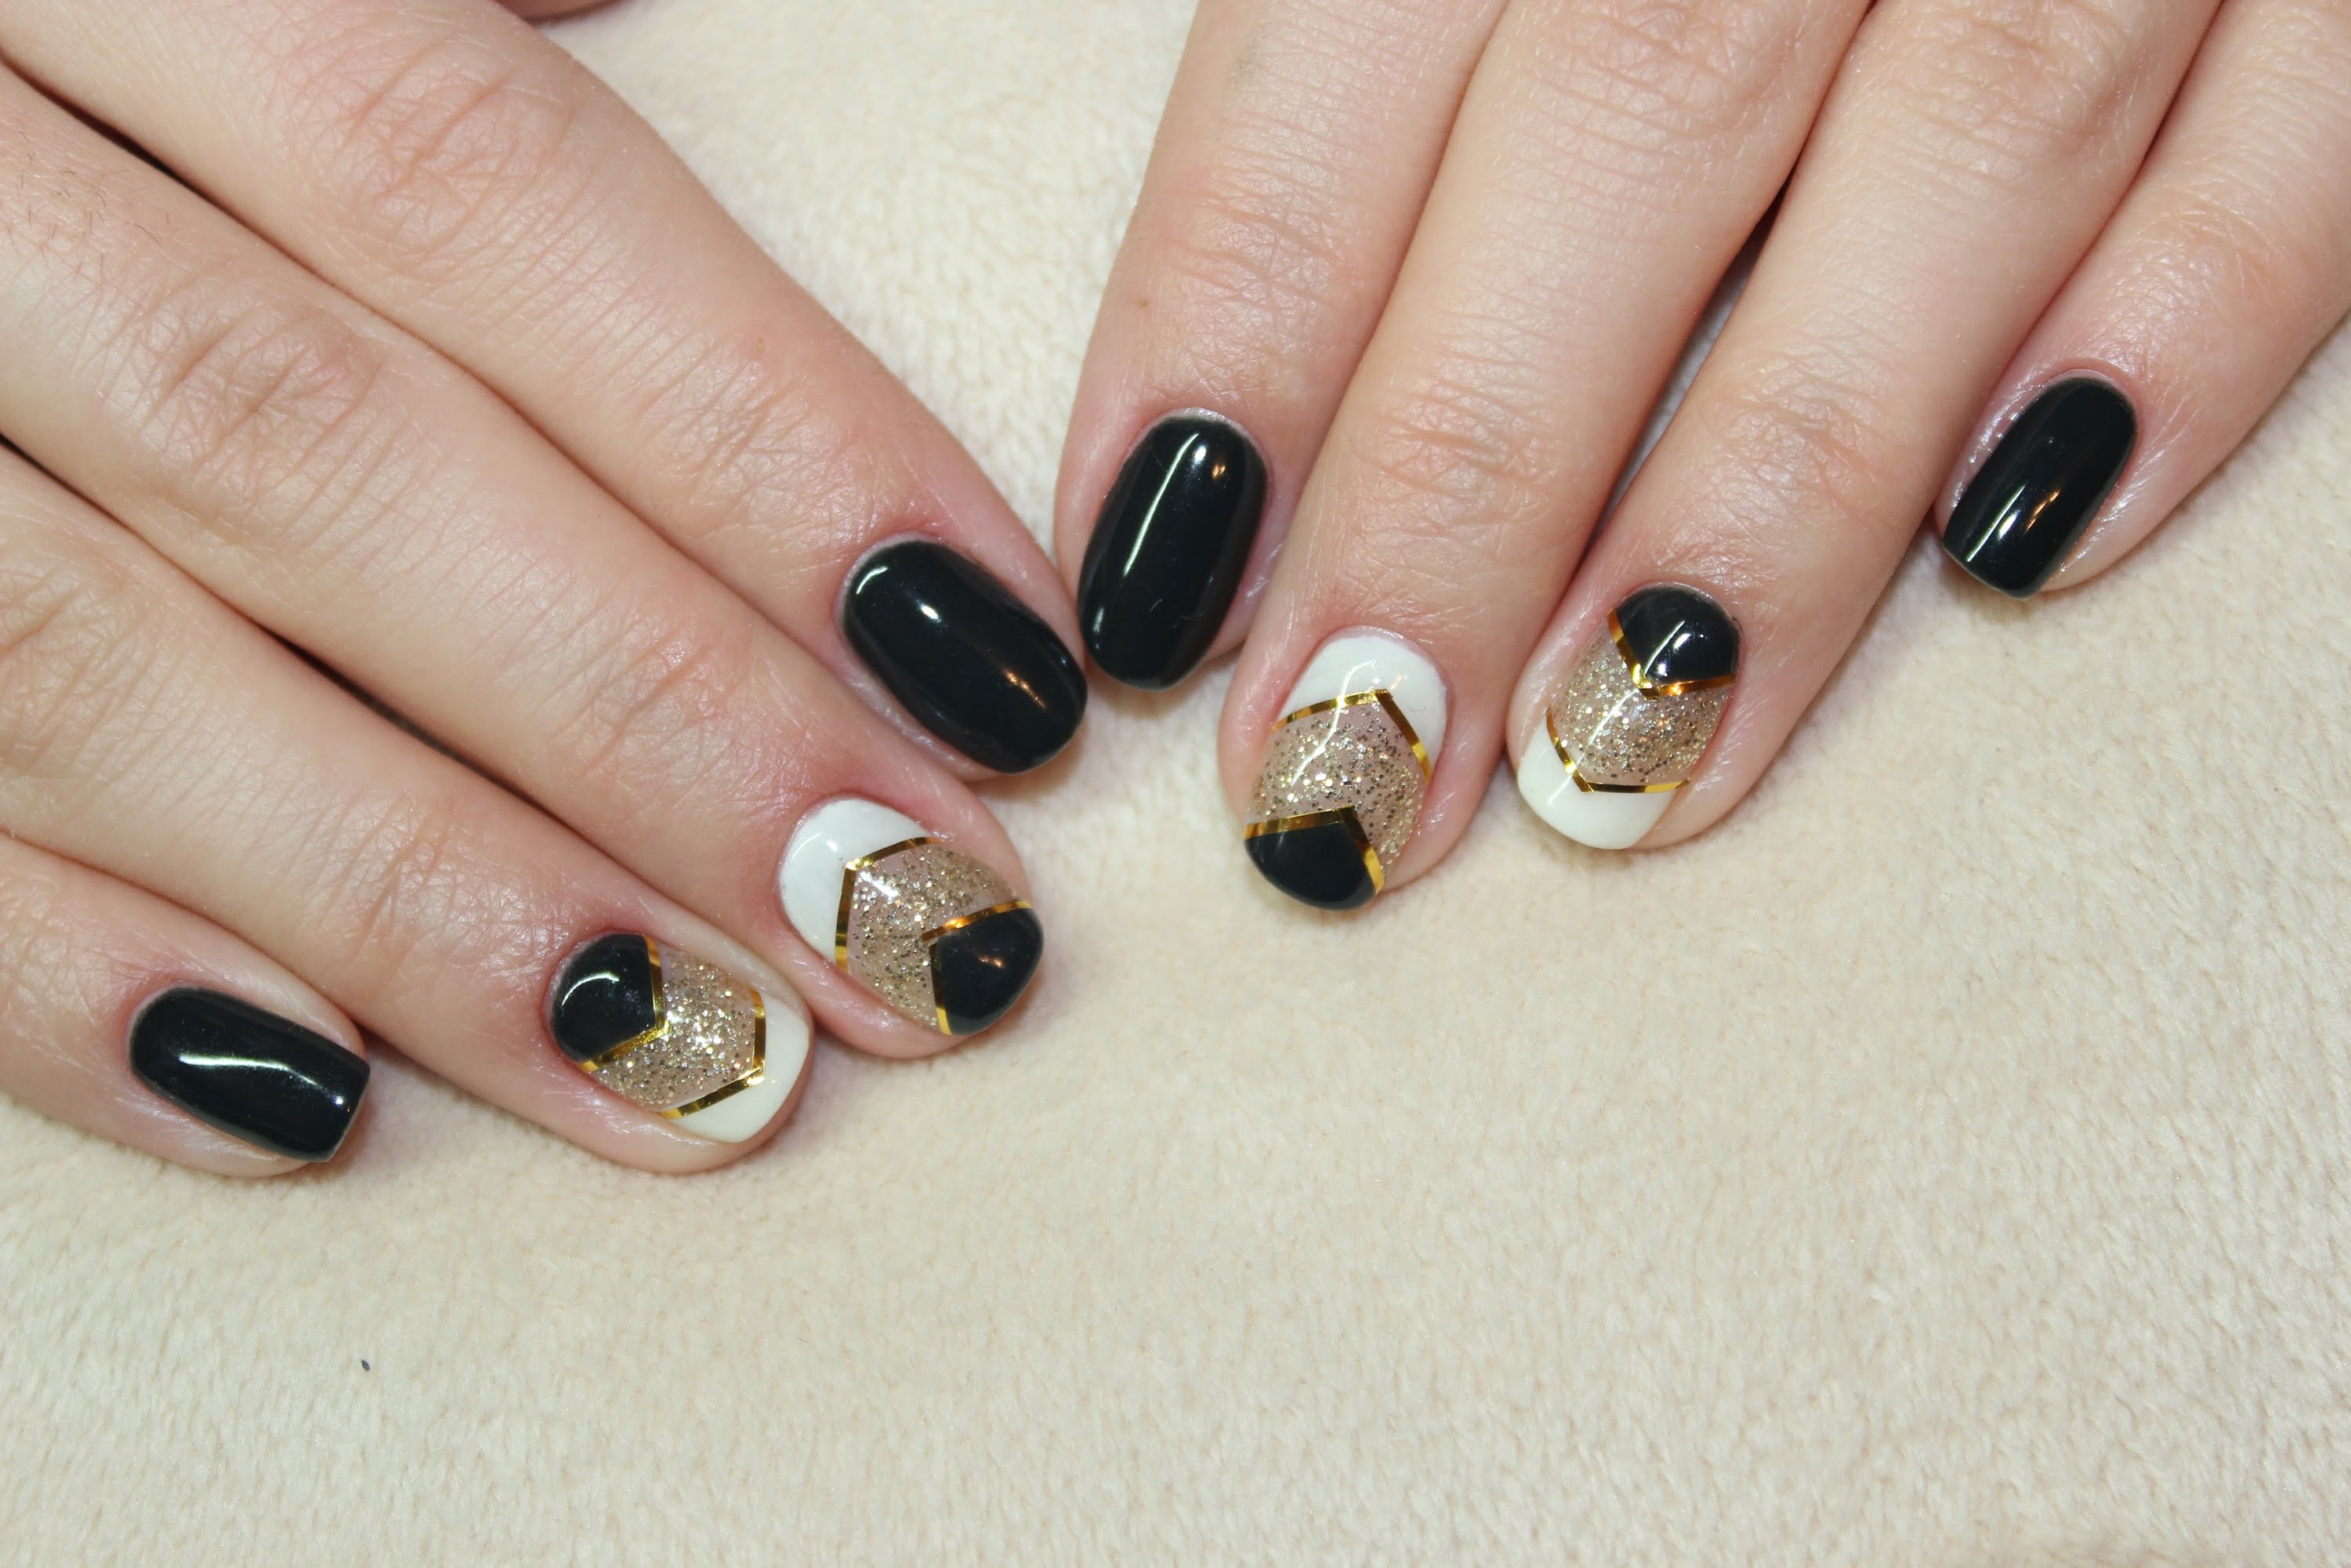
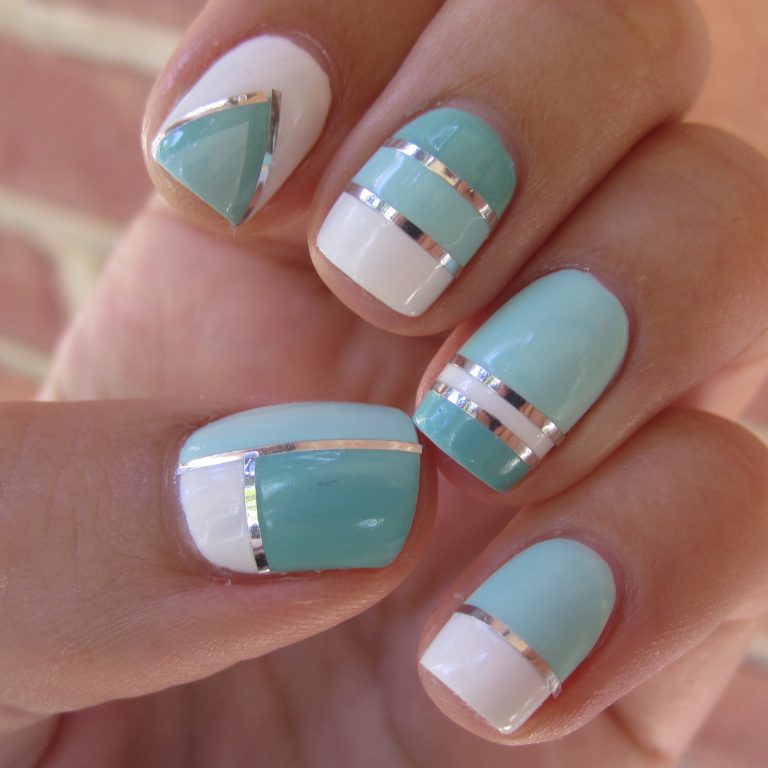
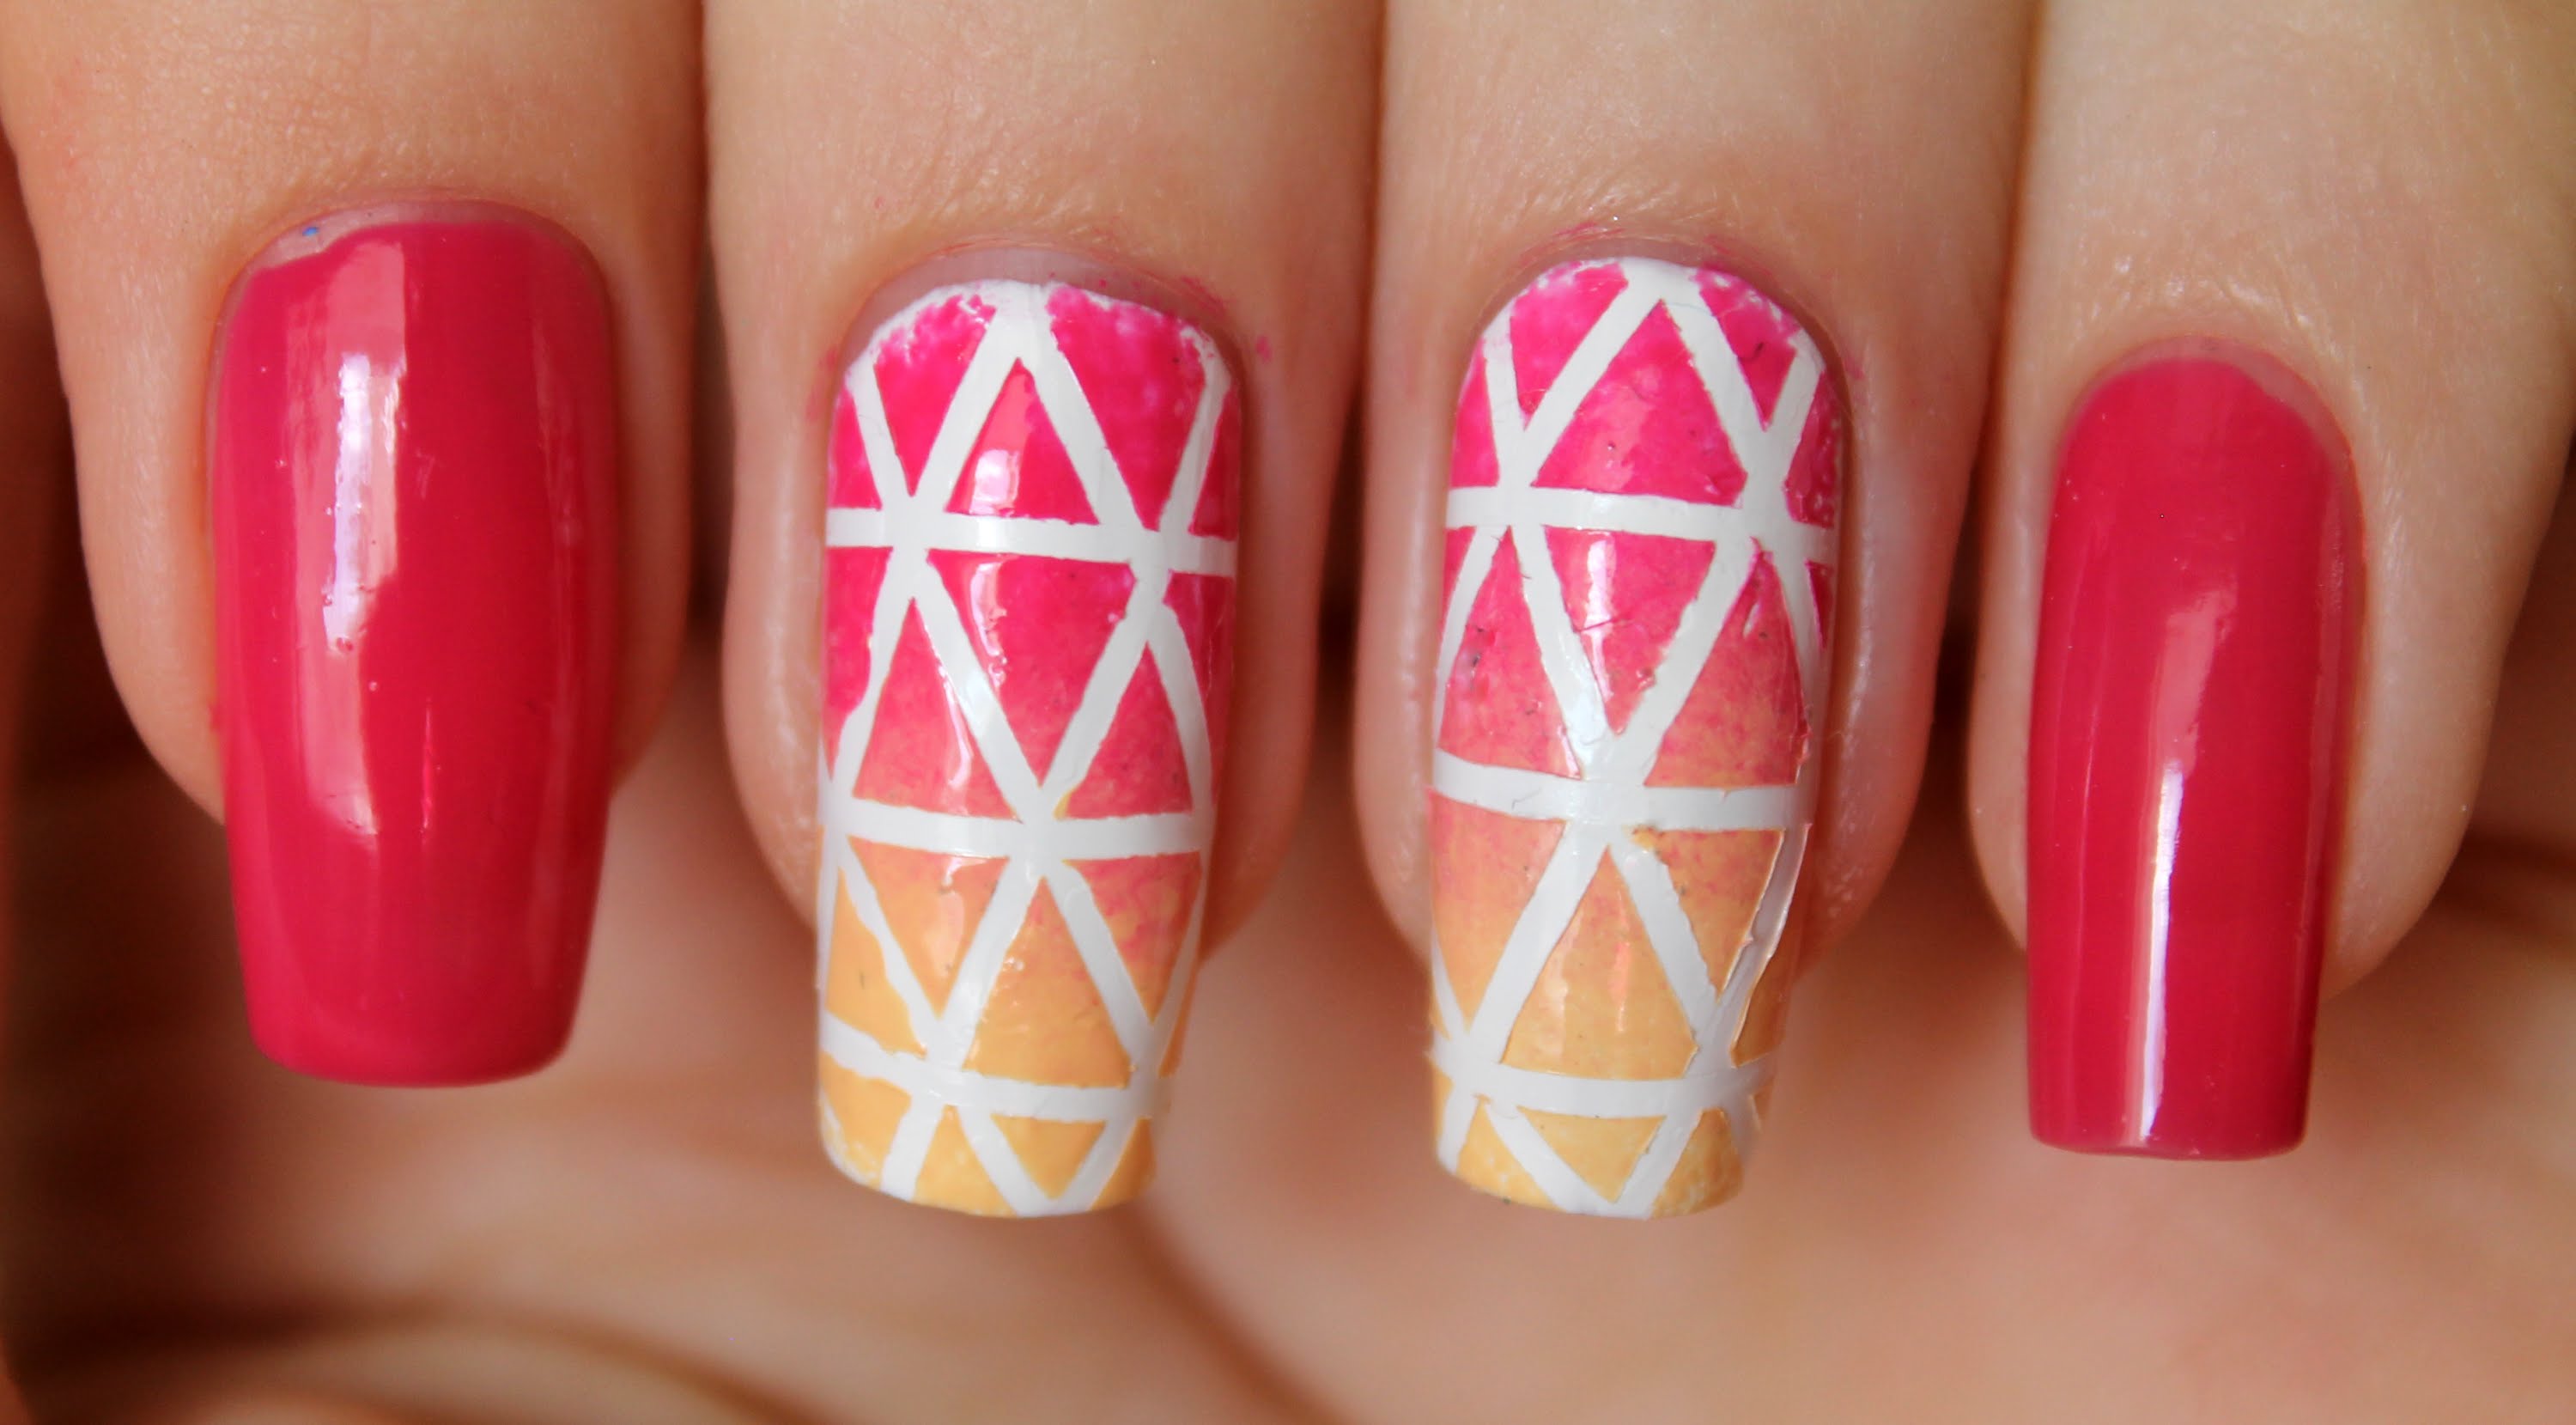
- The original design with geometric shapes will appeal to each: select the main shade of gel polish and cover their nails. On the index and nameless, for example, you can put 3 different shades and separate them with ribbons. You can draw rectangles, squares or triangles, select them with a ribbon in order to hide the imperfections.
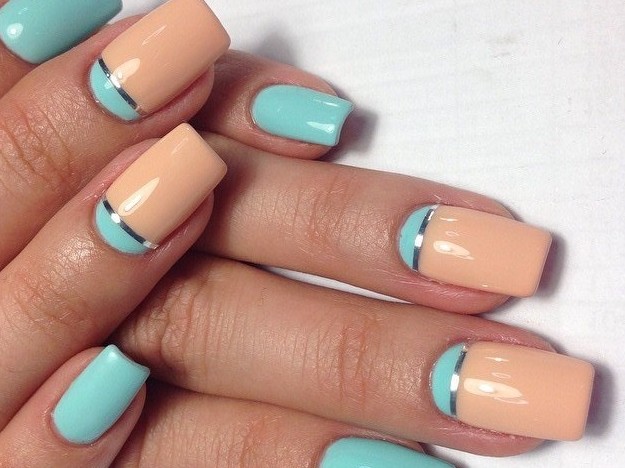
- Strips in the design of manicure - the current trend, which is just to create at home. In this case, decorative ribbons will become auxiliary and help to separate one color from another. They can make those very strips with a pleasant sheen.
Master Class
You can make a striped manicure yourself. We will tell you step by step about this interesting technique:
- Choose the main tone of gel polish and cover it with the nail plate in two layers, dry each of them alternately in a UV lamp.
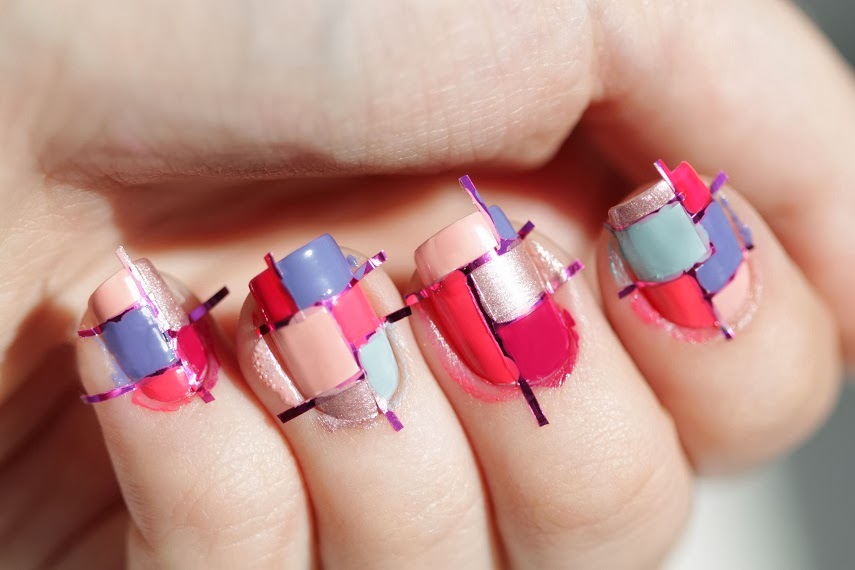
- After the layers are dry, take the prepared cut strips and stick them on the nail plate, keeping the same distance between them.
- Apply a second shade of gel polish on top, dry the layers under the lamp.
- After removing the tape with gentle movements (you can use tweezers).
- Do not forget to fasten the design with a top and carefully seal the tips of the nail plate.The top coating will allow to level the surface of the nail and strengthen the manicure, give it a glossy shine and protect it from chipping, cracks and scratches.
Striped manicure usually combines light and dark shades.
The main color is traditionally taken as a white or nude shade with a rich texture. It is light colors that are best applied first, and bright stripes - secondarily.
Useful tips
Decorative ribbons are quite capricious in nature, and even with strict observance of instructions, it is sometimes impossible to cope with them.
- If you are not sure that you can determine the necessary tape length by eye, cut it a little more, stick it on the nail and remove excess accessory with nail scissors. Corners can be smoothed with an orange stick.
- To create a "striped" manicure, take long pieces of tape: This will allow you to evenly stick them, maintain the required distance and easily remove them from the nail plate.
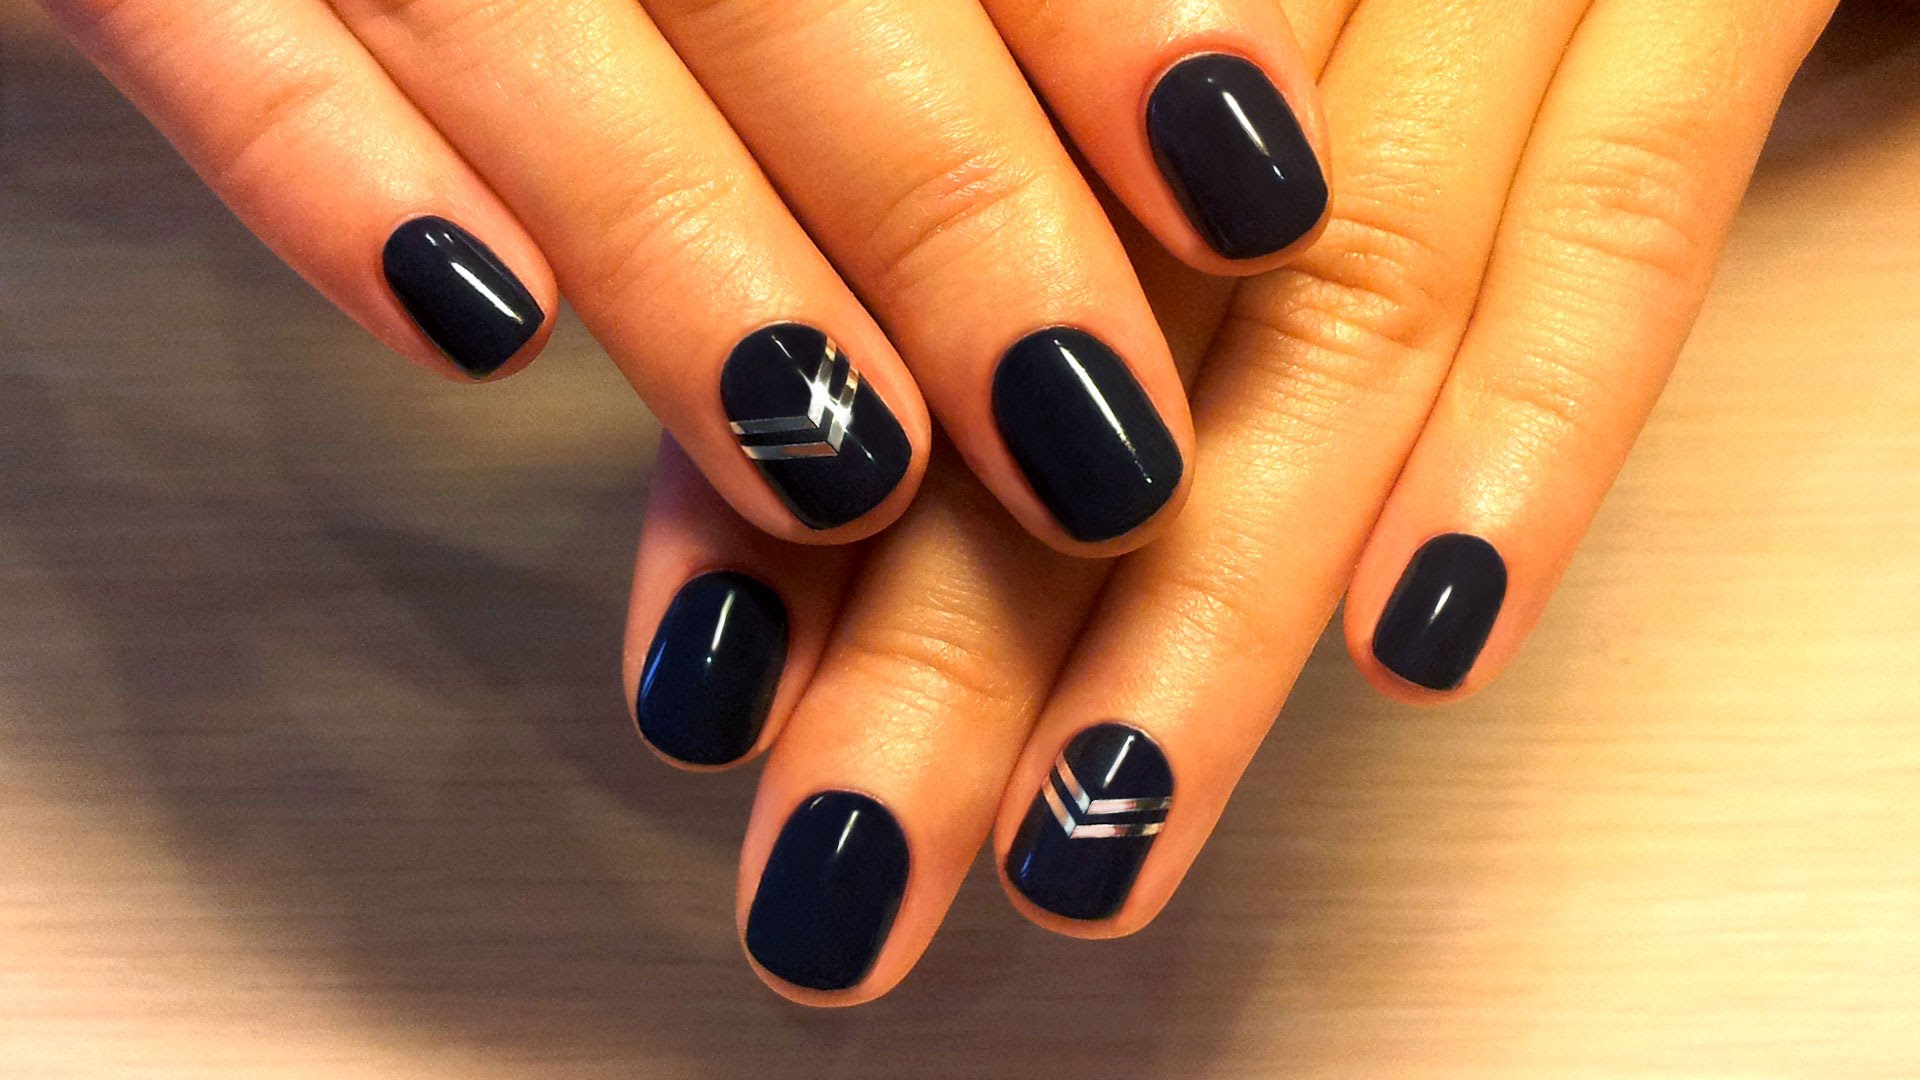
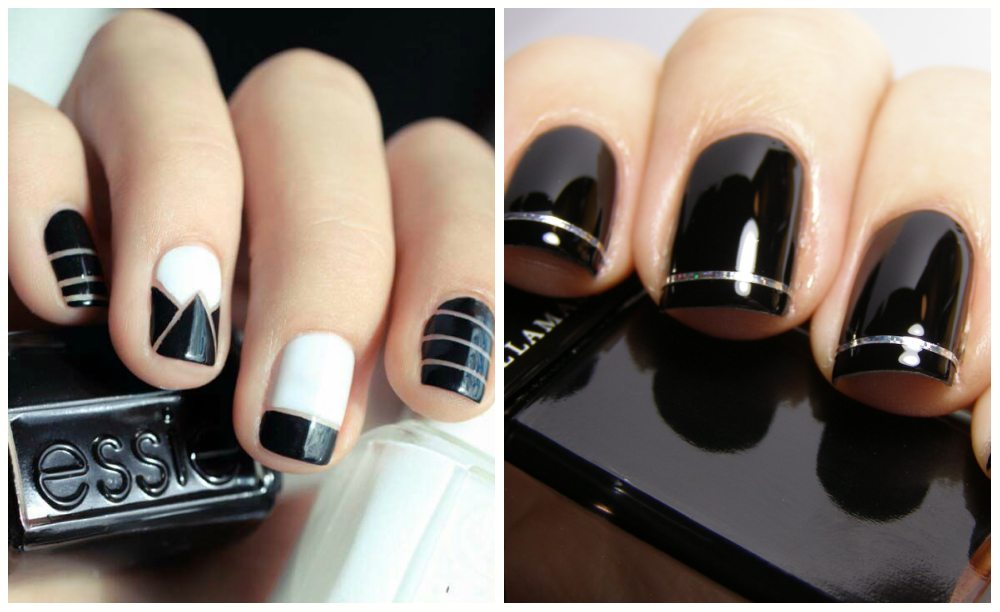
- To diversify black gel polish, apply light metallic or golden accessories to the coating. They will not allow the dark color to be rough and will add an interesting accent to the design of the manicure.
- An orange stick will help to stick the tape gently: smooth out the surface of the accessory with it.
- The tone is applied only after gluing the tape.
Coating options decorative tape
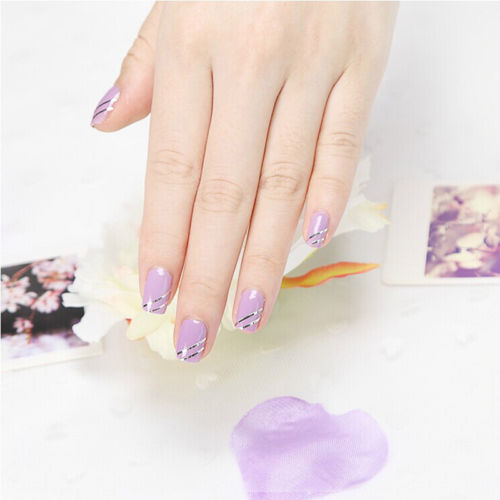
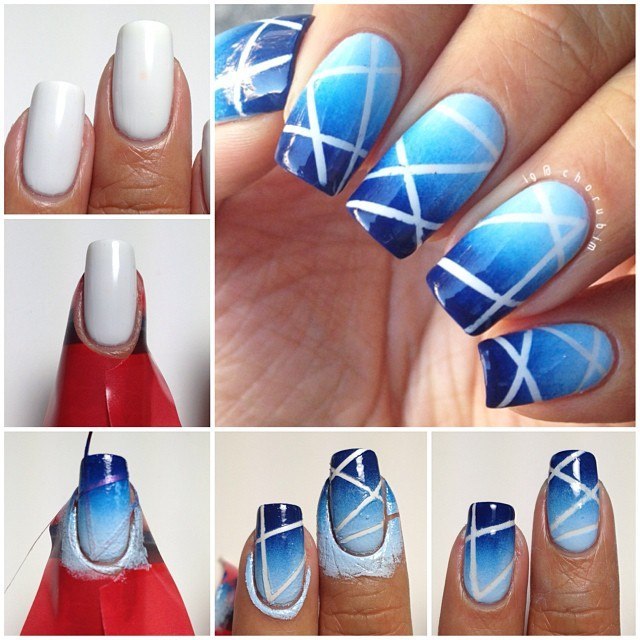
The "new" moon manicure with a decorative ribbon will sparkle with other colors. Cover the nail plate with a transparent base and dry it in the lamp. Arrange the pieces of tape to form a triangular hole (you can choose a simple rectangular design). Then apply a base color, for example, blue or lavender. After drying and applying the second layer (it must also be dried in the lamp), remove the tape from the nail plate - in this case, it served as an auxiliary element. You can stick a fresh strip to design the nail plate and create a contrasting transition from the hole to the color.
Overlapping tapes with parallel horizontal or vertical stripes is one of the easiest ways to use an accessory.
An alternative would be the location of its cell, that is, horizontally and vertically at the same time.
You can create geometric shapes on the nail plate due to small pieces of decorative strips.
What to do if the varnish falls in strips
If pigmented varnish strips, it means that it simply thickens. To soften it, it is recommended to dilute it with a special liquid (it can be purchased in specialized stores). Do not replace this mixture with ordinary nail polish remover - this will further aggravate the situation.
If the varnish is applied with strips, we recommend applying additional coating to even out the color. Overlaying one layer over another will provide a dense coating without streaks.
Do not forget to use the top - it will not only fix the result, but also align the visual surface of the nail.