Wet gel polish design
There is a huge variety of manicure jewelry. One of the most popular methods is a wet gel polish design. It looks very advantageous, attracts attention, but at the same time it is a simple and best option for beginners. The method is very popular, and its main difference from other methods of decoration is simplicity, which means that any girl can cope with it.
Features
The basis of the technique is the execution of the pattern on the nails on a wet lacquer. The special print is applied with a special tool - flowers, patterns, anagrams. With a slight free movement of the hands on the nails, beautiful monograms are obtained, and the colors are partially mixed and form bright and unusual combinations.
The design can also be performed with a simple lacquer, however, the special gel lacquer formula has its own characteristics and advantages:
- working hours. The tool freezes just under the UV lamp, so you can calmly and slowly model the design, the pattern is clear and even;
- the base has a liquid consistency, thanks to which the lines “float” along the marigold, forming delicate patterns. Too watery products are not suitable for manicure;
- bright shades of gel polish have good durability and keep on the nails longer than a simple varnish.
Due to the simplicity of its application, the wet gel polish design is particularly popular.. For example, you can use simple tools without buying professional add-ons. However, the tools at hand should be chosen with special care - they should not complicate the work, but only simplify it.
It is necessary to pay attention to the viscosity of varnish. The pigment should be slightly spread over the nail, so the coating should have an average density. The fixation of the picture in this case will be of high quality.
For creative action you will need a needle, a toothpick or a brush. The latter may be natural or synthetic. Natural pile allows you to make softer forms, and artificial - will make the edges of the pattern clearer and brighter.
Ideas
Drawing schemes do not require special efforts and talents. You can master them very easily. Main types:
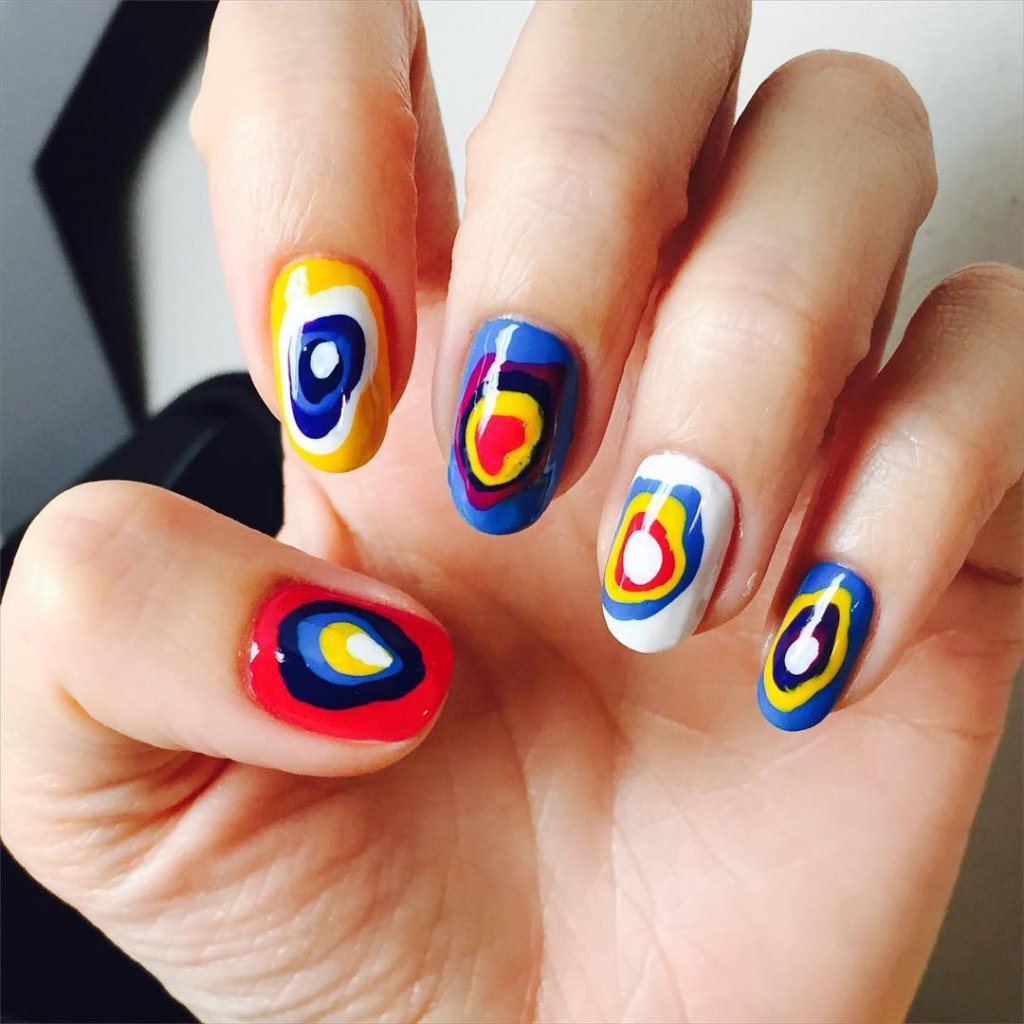
- stains. On the wet surface of the lacquer coating are drawn dots spots. Different colors are applied in a certain sequence. The entire nail plate is filled with drops, a certain pattern is built on the sides or in the center. Colored monograms gently flow, creating unusual transitions;
- reptile coloring imitation. Drawing takes place according to the technology of dot coating in a staggered manner, leaving small gaps between the points;
- curls. Dot paint is applied along the nail. Then curls and patterns of the required shape emerge from the drops. Unusual method: using a needle between points for drawing eights and loops;
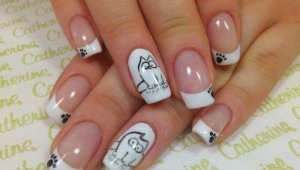
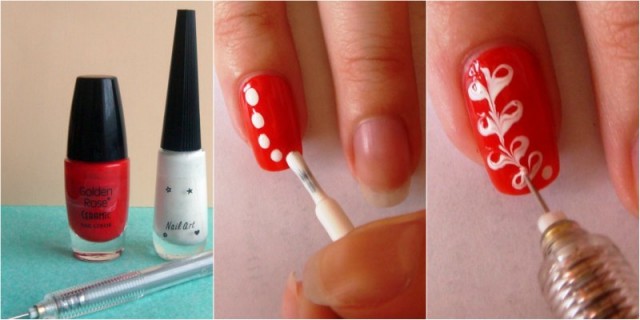
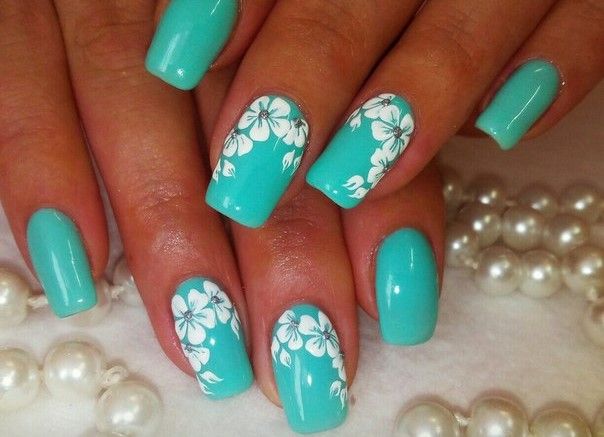
- flower. For the formation of a beautiful floral print, you must put a few dots in a circle with varnish, then draw lines to the center or in different directions, forming petals. In order to draw roses, it is necessary to use a brush - leave a few lines bent in a circle and draw a core;
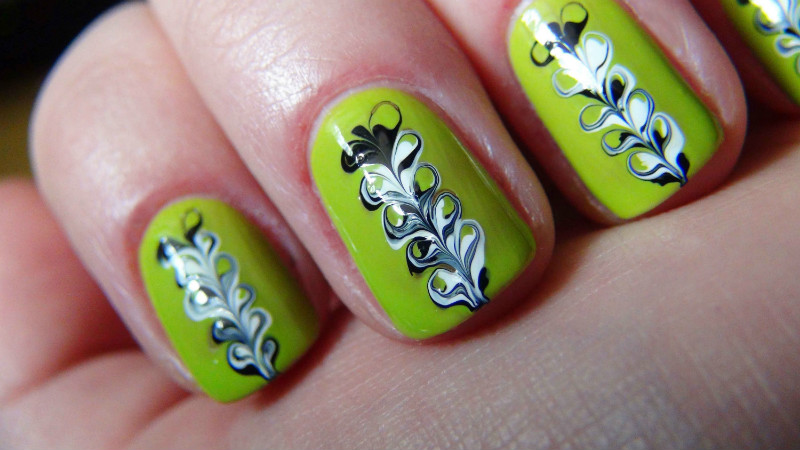
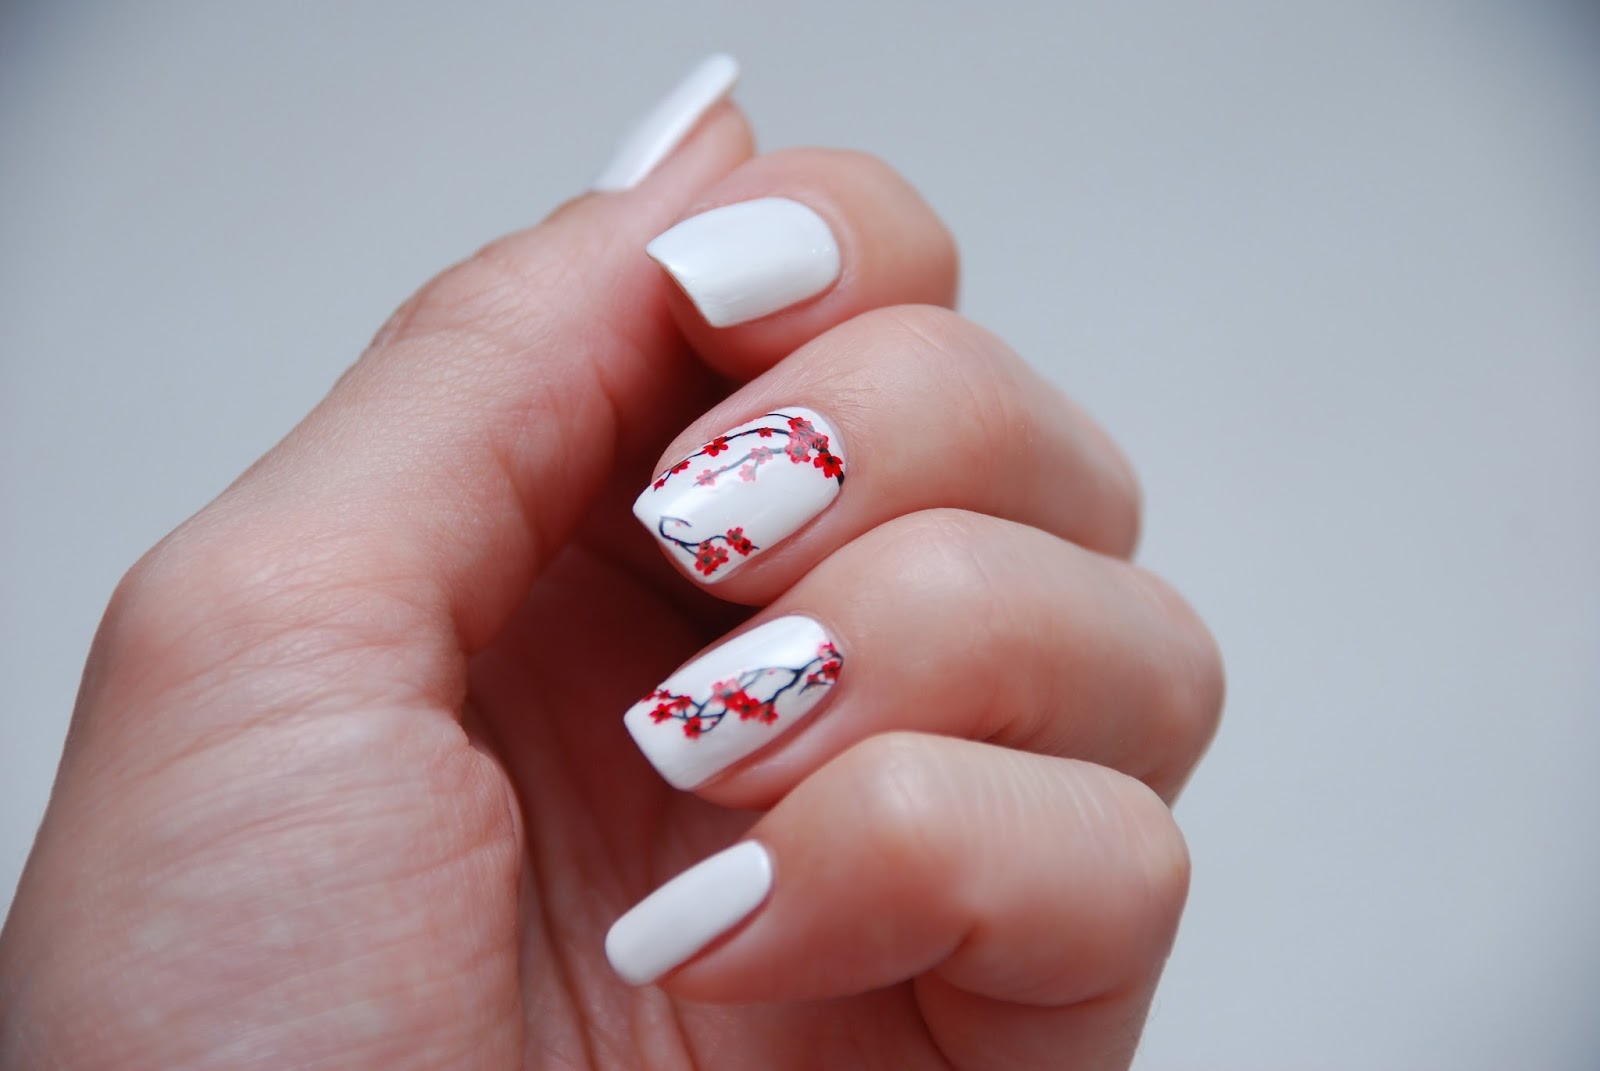
- branches. Point you need to draw a white line. In the middle of each point drop emerald lacquer. After that, you need to gently stretch the toothpick through the points, pulling them to get the twigs. Another method involves applying dots in two rows, with alternating varnish. From each drop you can draw a piece, stretching it to the middle, gradually forming a twig;

- spring. A few drops must be placed in a row with alternating colors, and then walk through them with dots, making movements in a spiral;
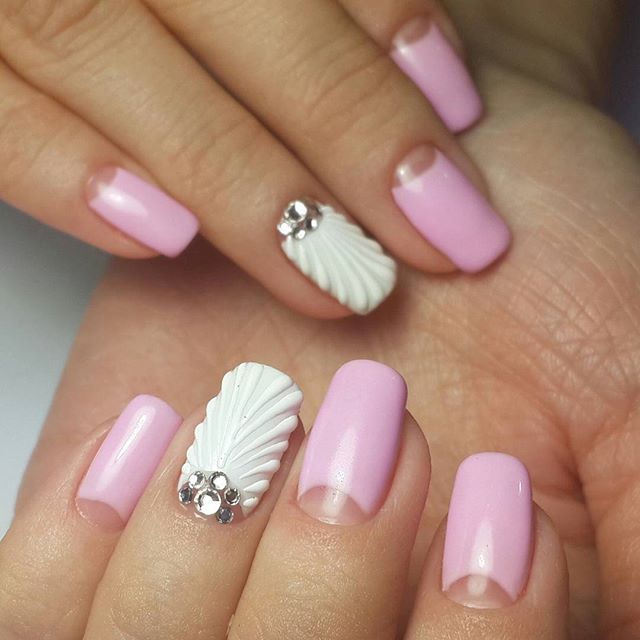
- seashells. For the correct drawing of the picture should draw a circle of dots, then draw another smaller circle. It is necessary to connect the pattern by moving in a spiral, gently pressing on the curvature of the shapes;
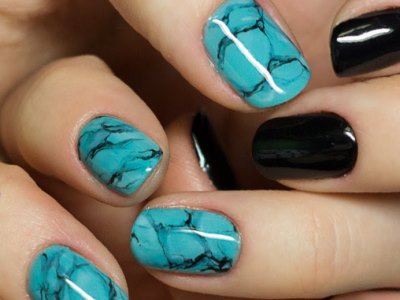
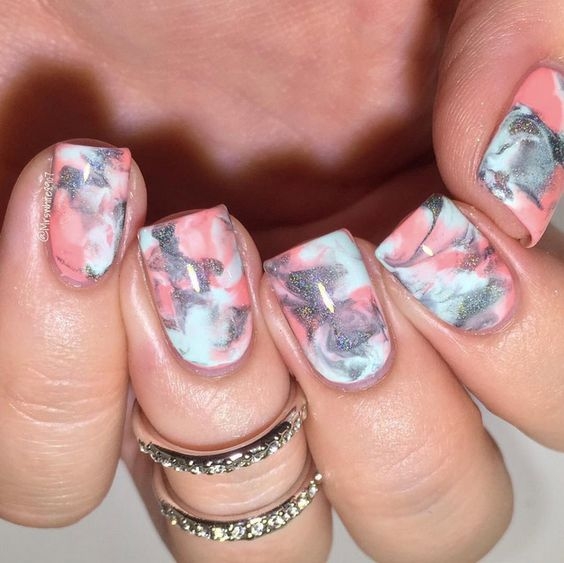
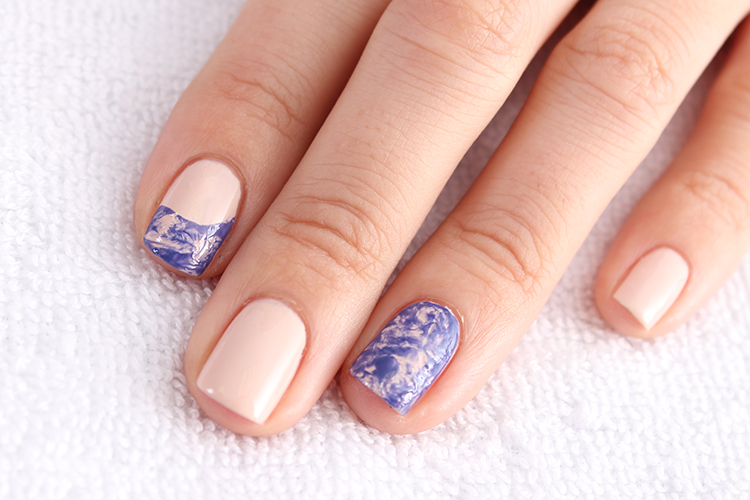
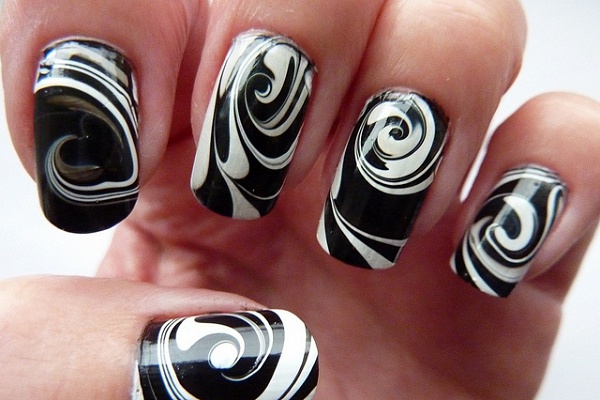
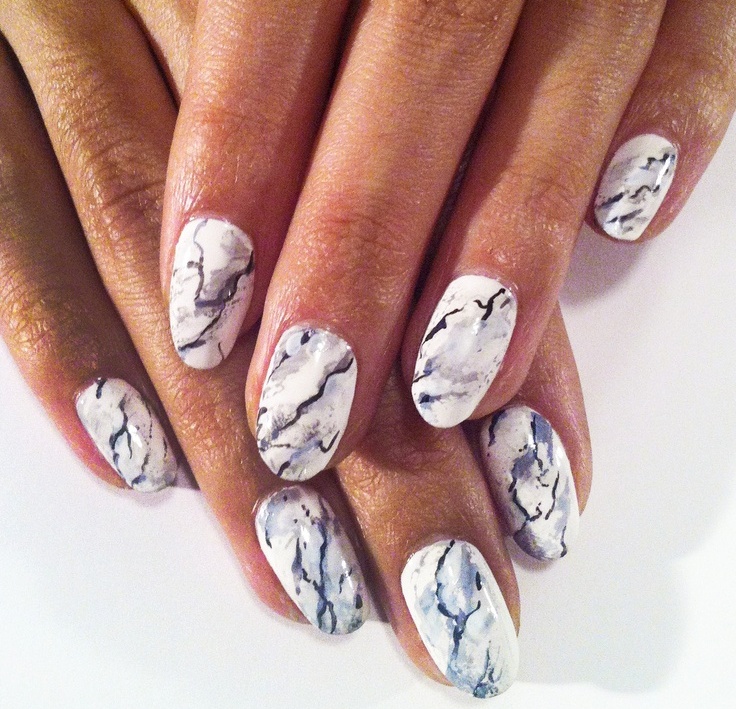
- marble imitation. The basis of this figure is a combination of two shades, usually black and white. On a light tone, certain areas are darkened - on the sides and in the middle. Next you need to spend the so-called "veins" from one blackout to another. Sometimes the lines can be smoothly shaded;
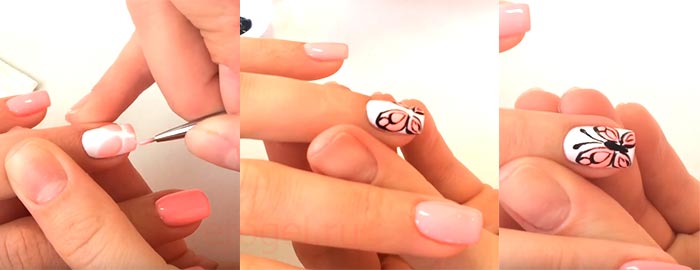
- butterfly. On a one-color basis, you should draw several color parallel lines, and in the middle put a transverse line. After that, you can connect the tips at one point, thus forming butterfly wings;
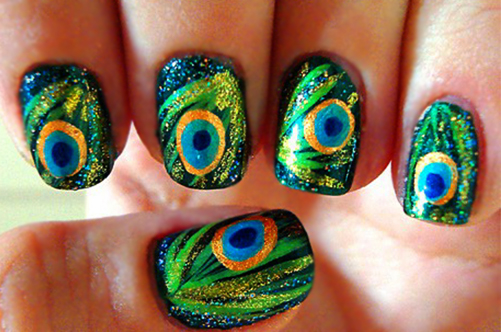
- peacock feather In the middle of the nail should drip varnish, then circle it with different colors, gently pulling the picture on the sides. It is recommended to use varnishes with glitter for this design;

- abstraction. This design is like a water manicure. For him, it is better to use several shades. Close to each other draw stripes, then draw transverse lines, but varying the speed and force of pressure;
- spider web Ordinary brush from the bottle should be on the surface of the nail two or three stripes vertically. Then draw a transverse line with a thin brush or toothpick, as if crossing out the composition. If you wish to arrange the design in cobwebs, you must do the same, only transverse lines should be applied unevenly and to the sides;
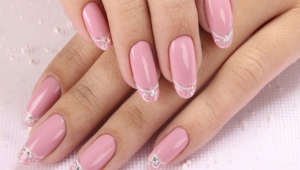
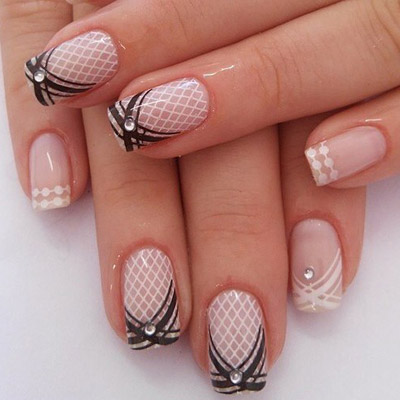
- french classic manicure. It is created in the standard way, only with a blurred border. On a damp base, draw a curved line along the edge of the marigold, and then shade its edges with a needle or soft brush.

Tips for beginners:
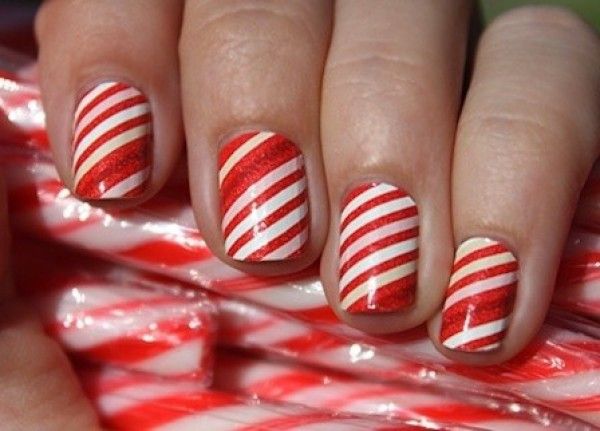
- it is better to give preference to contrasting shades. The most original ideas are obtained with a combination of bright colors. But it should be remembered that they are not suitable for everyday manicure;
- if necessary, change or correct the drawing brush must be wiped dry after any action. If you do not do this, the shades will easily intersect and blend beautifully, which is also very beautiful. Therefore, it is only necessary to determine the design;
- movements should be performed clearly and confidently - this is how the most unusual and beautiful combinations are formed.


Master Classes
For a manicure in this technique you will need a set of tools:
- main and top coating;
- primer;
- gel varnish of several colors or shades depending on the selected pattern;
- accessories in the form of a brush or needle;
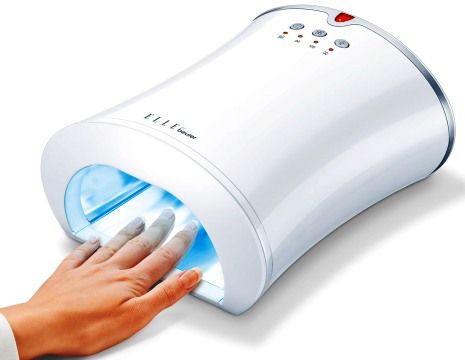
- lamp to dry.

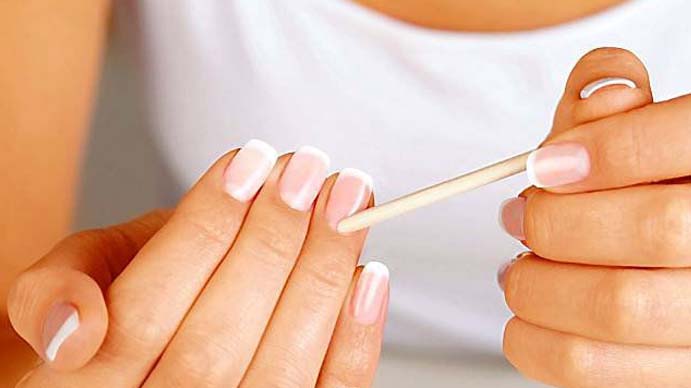
Before you start to draw, the pens need to be put in order: move the cuticle at the base of the nails, trim the edges of the plates and sand the surface of each nail.
- Apply degreasing coating and primer.
- After drying cover the nails with a base layer of gel polish.
- Apply two or three alternately layers of gel polish, each of which is dried in a UV lamp.
- Cover with an extra layer of varnish nails (use adjacent shade) and start drawing.
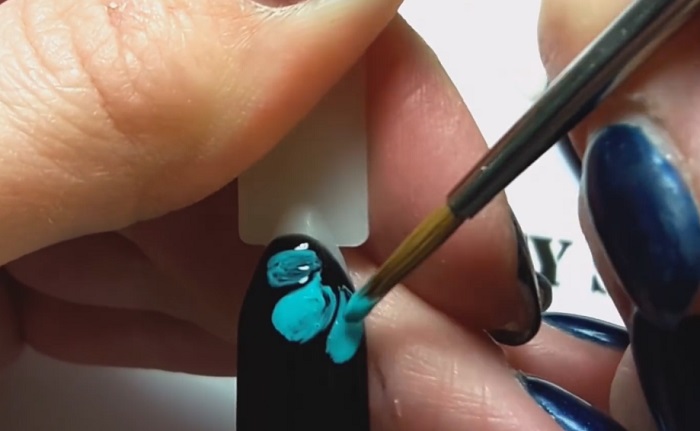
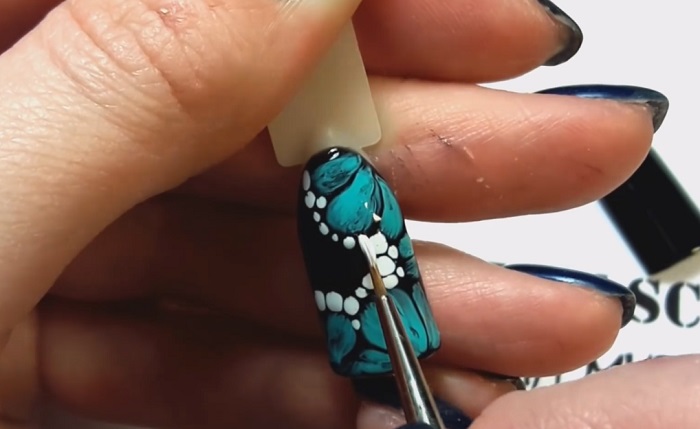
The best solution is painting with colors on each nail. The wet texture of the lacquer is ideal for transferring all complex color transitions. Walkthrough:
- On a thin brush you need to dial the color and put on a drop on the nail plate. This will be the basis for each flower. Gradually you need to draw layer by layer.
- Nail polish can spread on the nail and mixed with the base, which will create a harmonious combination and effect of volume.
- After pulling lines is recommended to wait 10-20 seconds and dry the nails under a UV lamp.
- Figure should always be fixed top and then remove the sticky layer.
The result is a very attractive and unusual design.You can use a large number of techniques. If experience is not enough, then the basics can be used in the first stages.
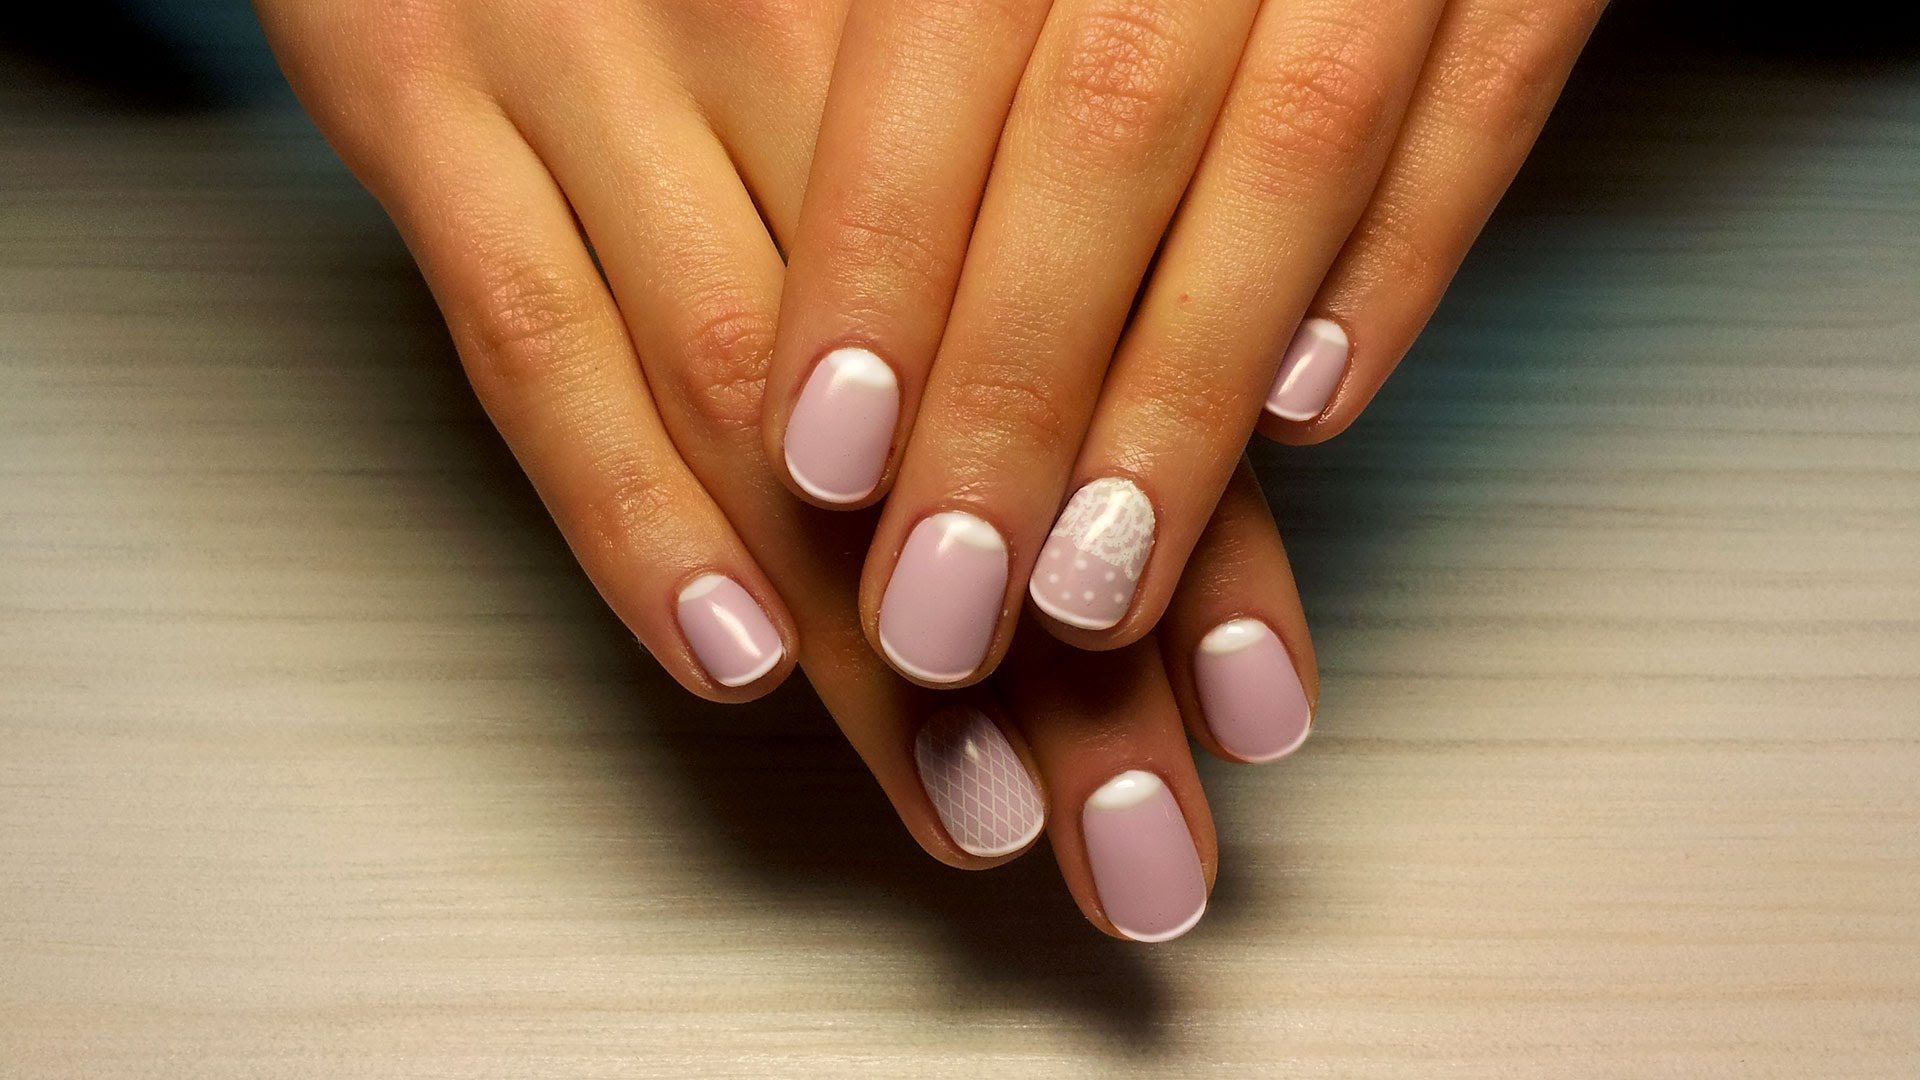
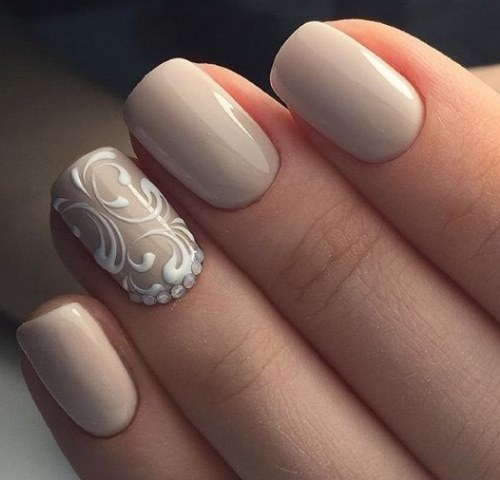
Design in beige tones
In simplicity hides elegance. This design is suitable for everyday wear and a strict business style. You will need very little to complete: gel pastel colors, such as beige and brown. Actions:
- after careful treatment of the nails, cover them with a transparent base and dry under a UV lamp;
- then - the little finger and thumb should be decorated with beige lacquer, and the rest of the fingers apply a brown tint;
- but on the ring finger will be a light, unobtrusive pattern.
- on a wet brown tone should be distributed dotted from above and below the white gel polish. Stretch it from one side and the other to the middle;
- painting must be covered with a finish and dried.
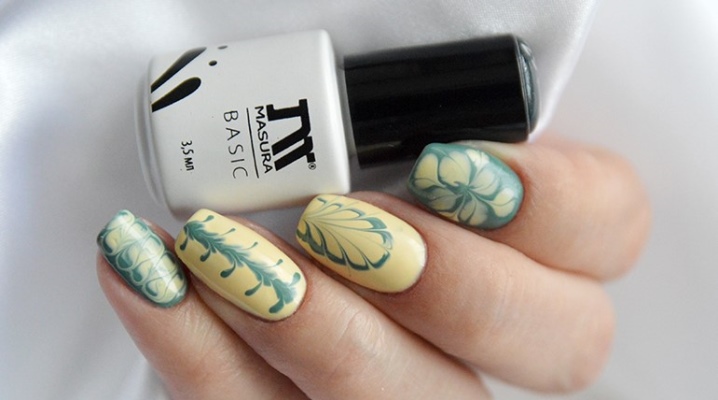
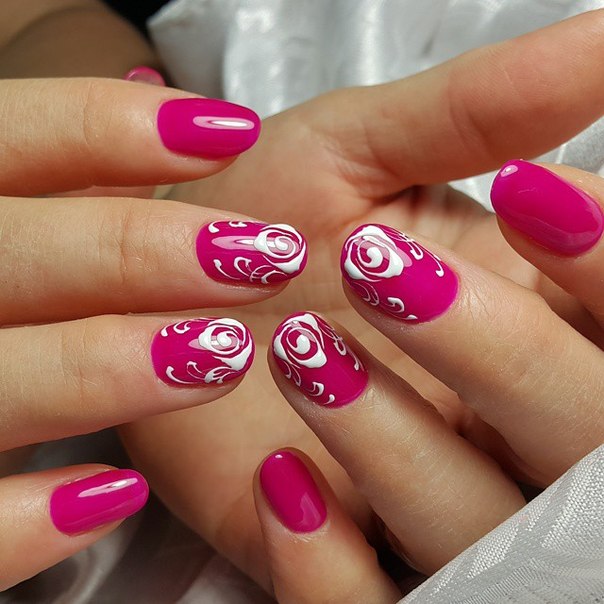
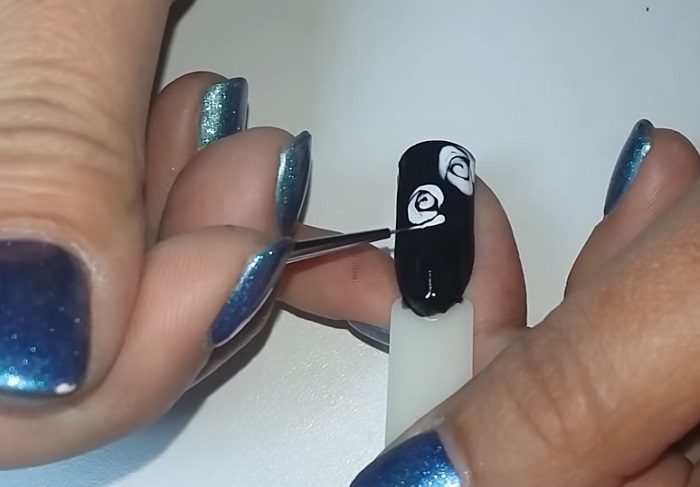
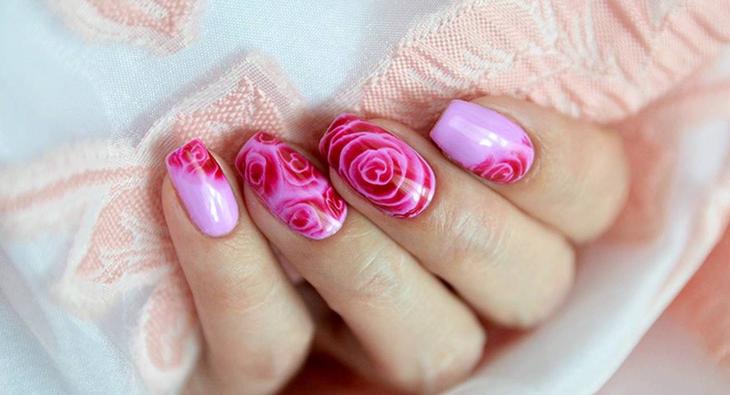
We draw delicate roses
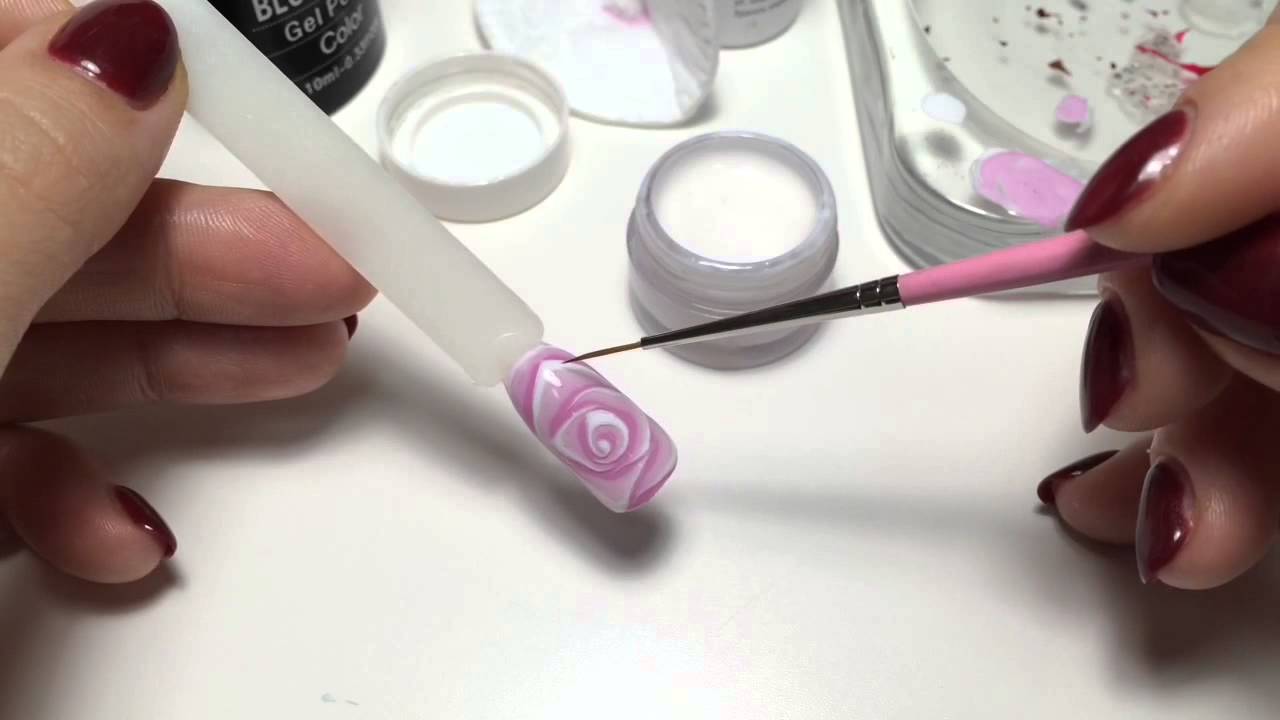
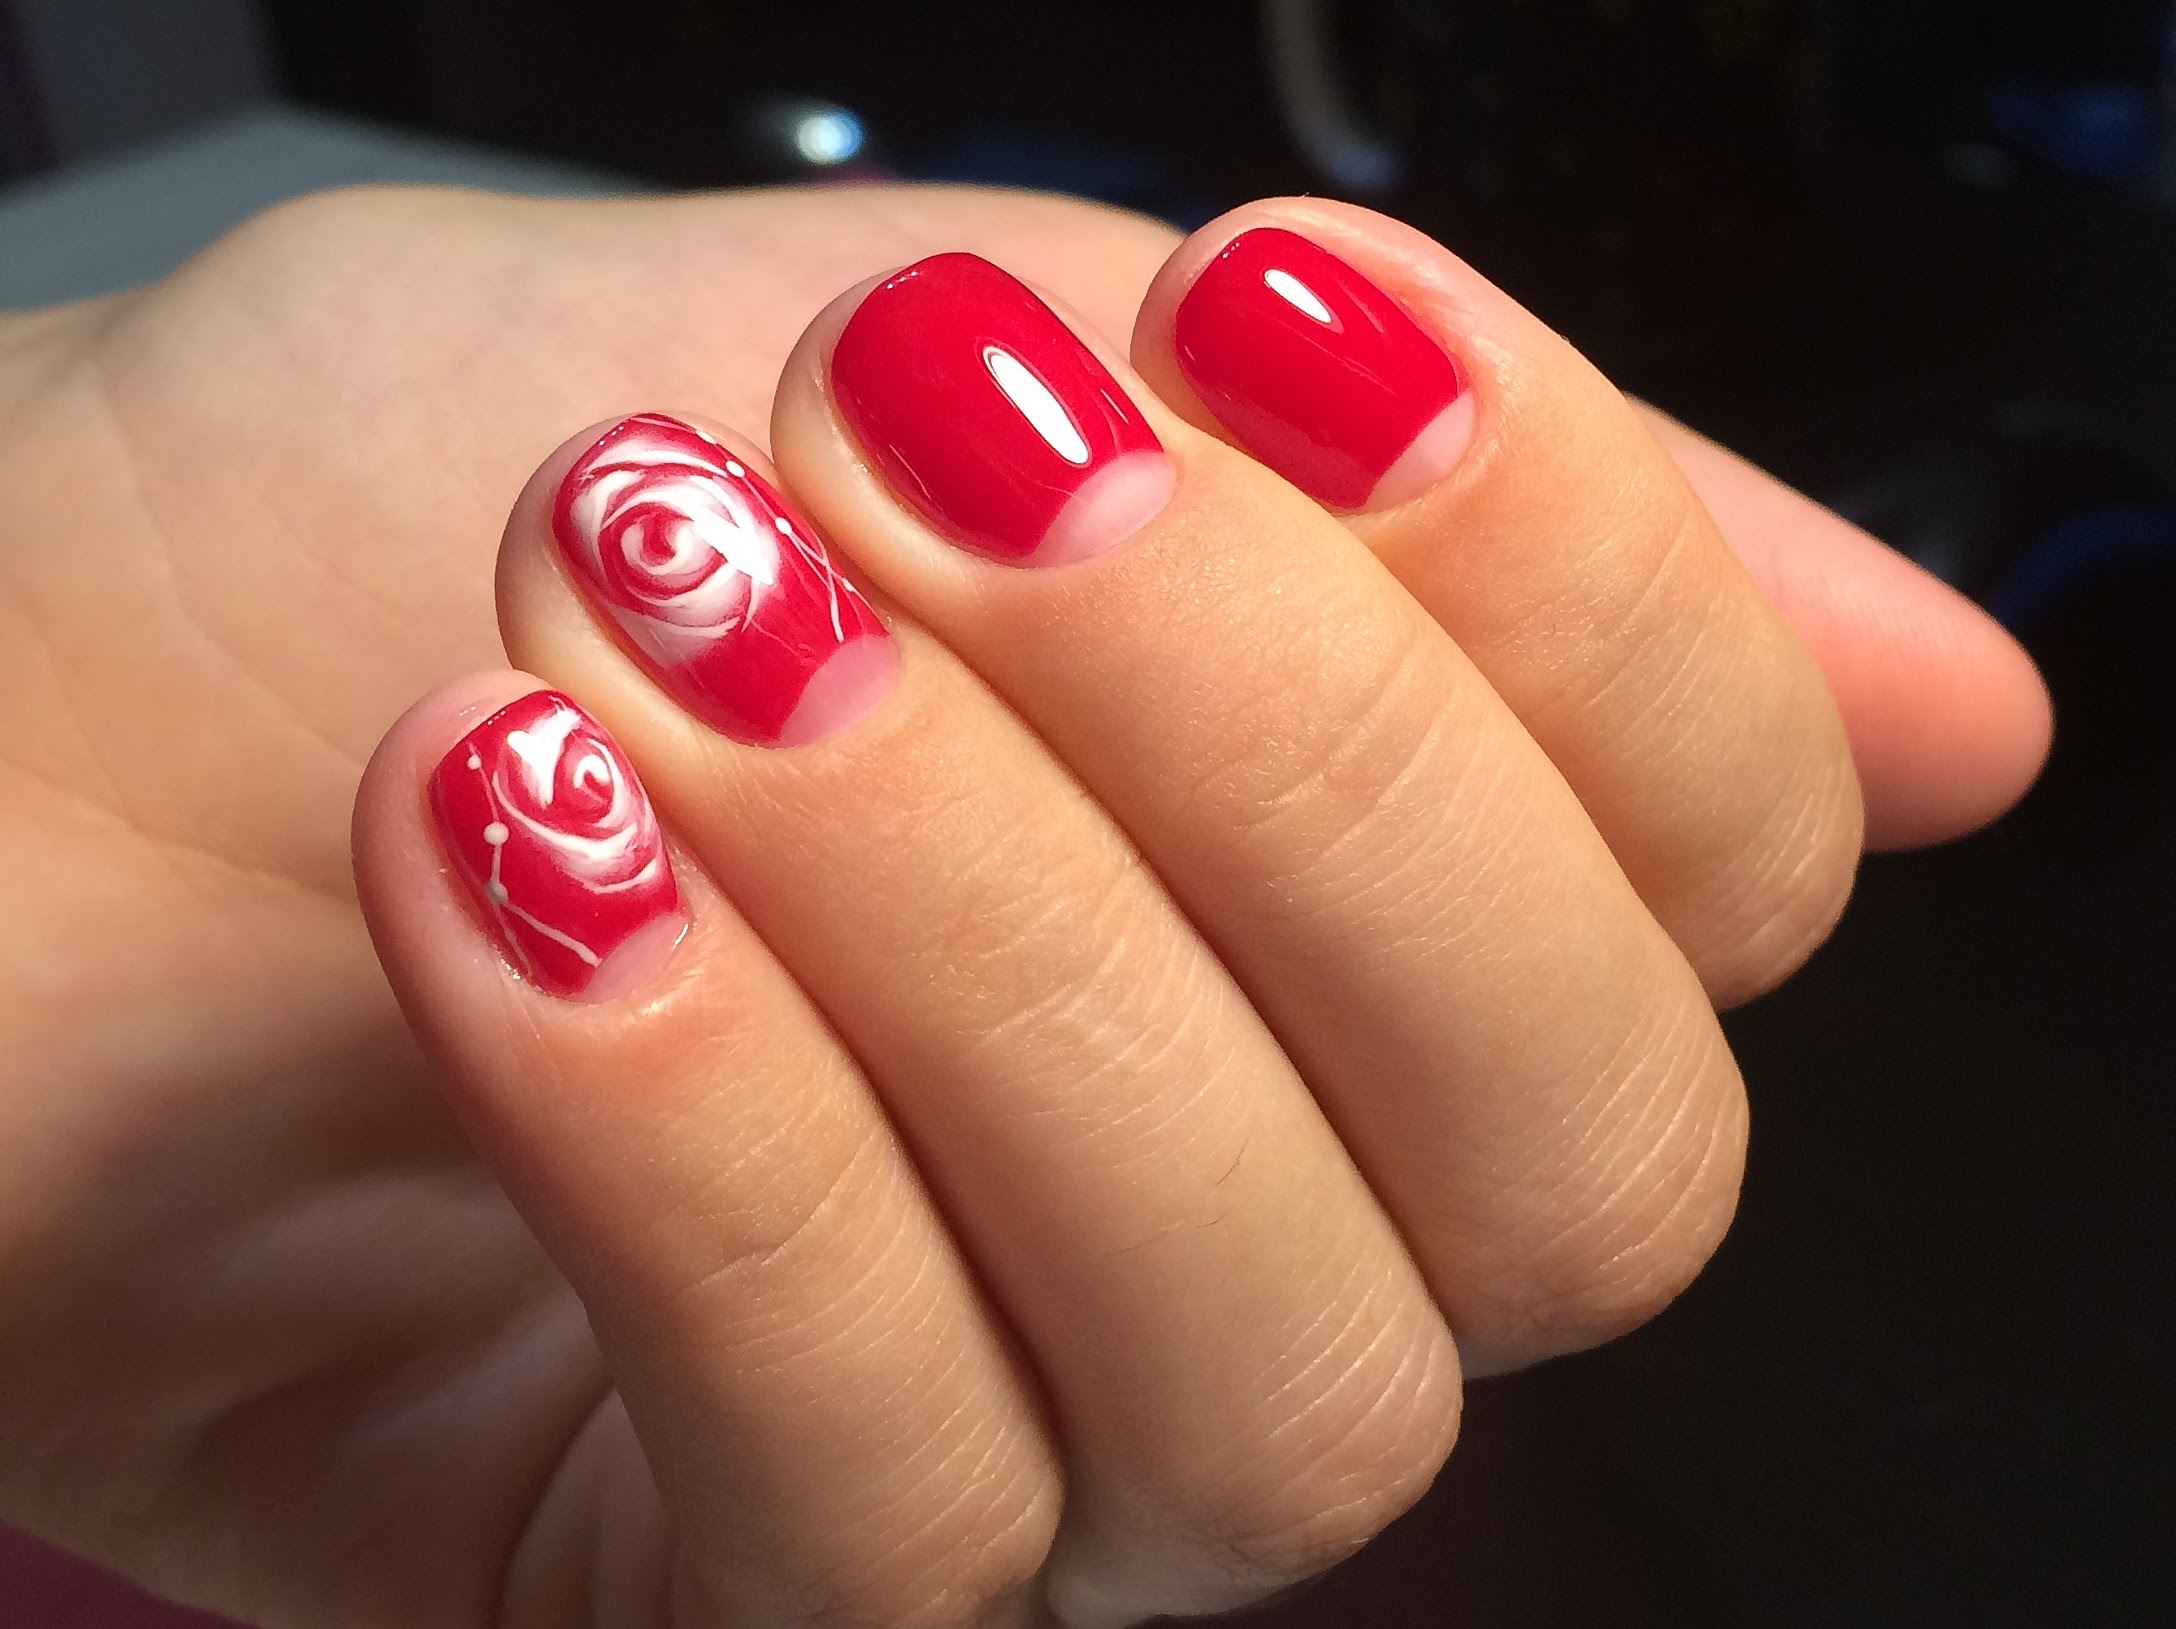
One of the most popular types of design is drawing roses on a wet gel polish. Spreading lines, which are formed at the same time, can be a harmonious whole. There may be several variants of the pattern - with the use of buds on each nail, where a small rosette is located just below, complemented by petals and thorns. Or drawing nail art on the whole nail. The technique used at the base is very simple:
- after nail treatment apply the first layer of color and dry it in the lamp;
- apply a second coat but this time not to use UV drying - it is on this layer that you need to paint and stretch the patterns;
- further on each nail plate you should draw a rose: put a few dots in a circle, and then drag the drawing along the axis with a thin brush. A few turns around - and it turned out the basis. After that you need to draw the petals - the lines should be from the center, and the edges should be made as thin as possible. Framing done at the hem, as if wrapping a flower;
- remaining space need to fill the same method;
- make an adjustment pattern in color, complementing it with an adjacent shade. In this case, it is necessary to take into account the basic tone and select the shade to him;
- one of the last stages - it is drying of fingers in the UF-lamp;
- completing the process You need to remember to apply the top coating and also dry it.
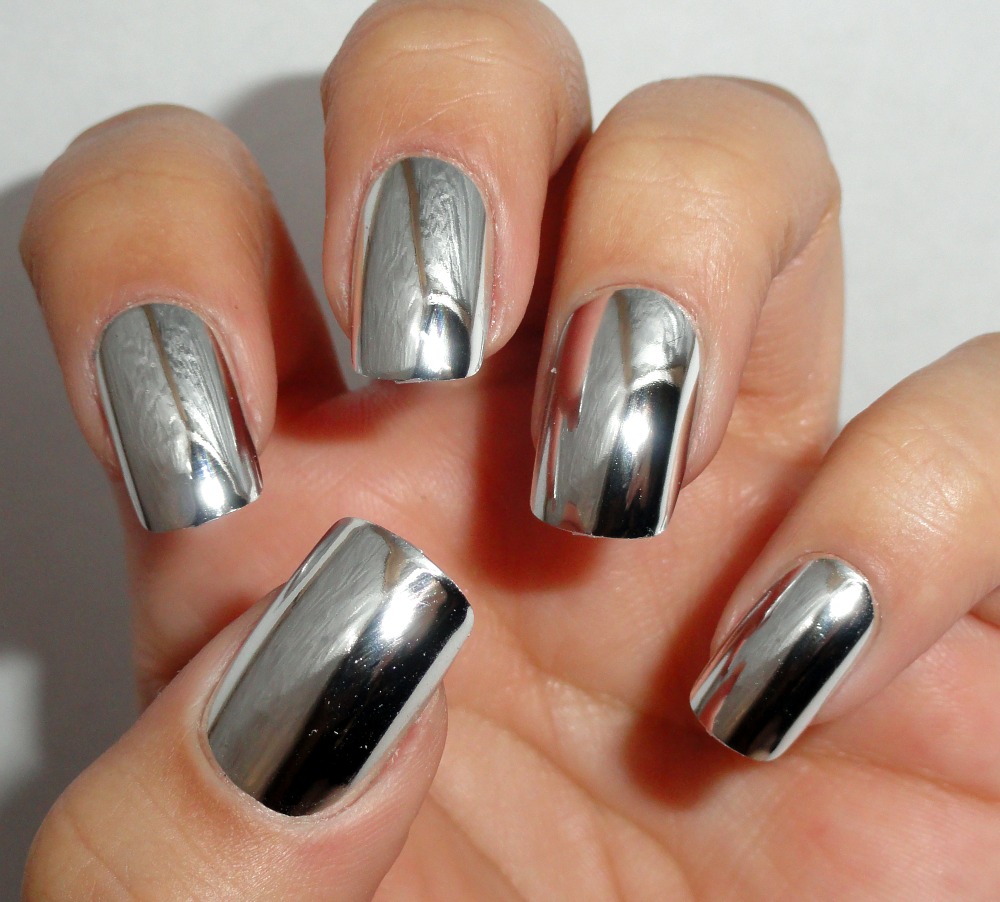
Chrome finish
For such a pattern you need to prepare the nail plate - remove the cuticle, trim the edge to the required length, give a smooth and neat shape to each nail. The surface should be treated with buff - adjust the top layer and wipe with a degreasing agent. It is better to apply a transparent primer at the very end - you do not need to dry it.
- Put the base and dry it in a UV lamp.
- Process nails a layer of white gel polish with sealing ends, then dry again.
- Use another white coat, but without drying - there will be a drawing on it.
- Draw a floral pattern - for this you need to use a thin brush and a dark gel polish. The brush should not be wet. It is necessary to apply the drawing in smooth patterns, and then dry it for about 14 seconds under the lamp. This is necessary for fixing the coating, but not completely hardening it. In this case, it is easy to glue to it and fix the imitation of chromium. He mates only with those areas where the drying was about 12-14 seconds.
- Process drawing fixing coating and dry under the lamp.
- Remove adhesive layer and apply over the care agent.
If the floral design on the nails is not pleasing, then you can use bold experiments, for example, for an office style, a calm design in gray shades with a spider web or marble imitation will do.
Technology design "reptile"
The drawing is currently very popular. Imitation of the skin of reptiles allows you to achieve an unusual effect on the nails and attract attention. You can use the usual tools:
- from varnishes: dark and somewhat light (pearly, golden, greenish, etc.);
- reticulum. It should be extremely thin and preferably from an artificial base - so the picture will be smooth and neat.
Sequencing:
- after nail treatment, apply a light base and dry the nails under the lamp;
- then applied to the nails mesh over the entire surface, after which it should be painted over with a dark layer of varnish and dried;
- after 10-12 seconds drying remove the mesh.
If you want to keep the unusual topography coverage from the finish, it is better to refuse. You can also use unusual solutions - change the location of the grid, apply several shades of shellac or two grids with different cell sizes.
Feature of this design: it is necessary to put a basis not a brush, but we sponge.

Smoke pattern
In this unusual design - a combination of several colors that smoothly flow from one to another. The drawing has the effect of haze. Actions:
- It is necessary to apply two or three layers of black gel polish as a base. (each of them dry). The adhesive layer must be removed;
- leave the last layer to dry. On the brush you need to dial the desired color and put on the edges of the marigold - so it will spread out with fancy beautiful forms;
- mix two colors of stained glass paints with top coat for gel polishes and apply on the free areas of the wet layer. After that, you need to dry the nails;
- add another varnish over the top and gently shade it with a brush. At the intersection of two colors will have an unusual effect - a third shade will appear.
It remains only to fix the finish and dry the nails.

Useful recommendations
- Coating is necessary to apply only liquid texture. - this is how you get beautiful pictures and divorces;
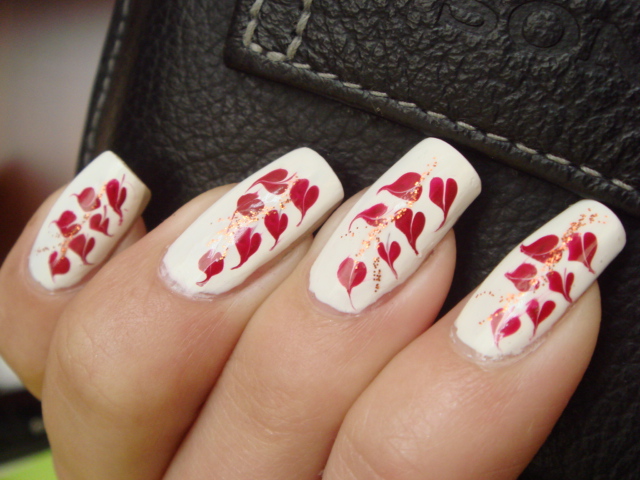
- with a specific design, for example, drawing a rose, should pay particular attention to color combinations. The best is the design of red roses on a black background. Also popular are pink, purple, purple hues on a light base;
- before using gel polish, it is necessary to check its consistency on cardboard or tips: whether it spreads well over the surface;
- if shellac got too thick, it can be mixed with a liquid base. In order that means does not flow on the parties, it needs to be applied with a thin layer;
- drawings and patterns will be better and more accurate, if you use a dog brush. Such a model has a thick pen, but a thin tip - it paints very high quality and carefully picks up the coloring pigment;
- well, if on the table, besides the brush, there will be other improvised fixtures - tips, toothpicks, needles, pencils and dots of different diameters. This will help create a variety of effects on the nails.
Wet-based manicure is a favorite option for those who don’t like to spend too much time on design.
The main condition for a beautiful manicure is the correct sequence of actions and a good consistency of gel polish.
This video presents 6 design options for a wet gel polish: